
1. Introduction
Thank you for purchasing the Parrot Uncle 61cm Ceiling Fan Light. This product combines a ceiling fan with an integrated LED light, offering adjustable fan speeds, dimmable lighting with multiple color temperatures, and a convenient remote control. This manual provides essential information for safe installation, operation, and maintenance of your new ceiling fan light.

Figure 1: Parrot Uncle 61cm Ceiling Fan Light
2. Safety Instructions
- Read all instructions carefully before installation and use. Keep this manual for future reference.
- Electrical Safety: Installation must be performed by a qualified electrician in accordance with all local and national electrical codes. Ensure the power supply is disconnected at the circuit breaker before installation or maintenance.
- Mounting: The mounting structure must be capable of supporting the weight of the fan (refer to specifications for weight). Ensure all connections are secure to prevent the fan from falling.
- Blade Clearance: Ensure there is adequate clearance between the fan blades and any obstacles (walls, furniture) to prevent injury or damage.
- Cleaning: Always disconnect power before cleaning. Use a soft, damp cloth. Do not use abrasive cleaners or solvents.
- Children and Pets: Keep children and pets away from the fan during operation and installation.
3. Package Contents
Please check that all components are present and undamaged before beginning installation. If any parts are missing or damaged, contact customer support.
- Ceiling Fan Motor Unit with Integrated LED Light
- Fan Blades (3x ABS Wood Grain)
- Mounting Bracket
- Remote Control with Wall Mount
- Hardware Pack (screws, wire nuts, etc.)
- User Manual
4. Setup and Installation
Important: Installation should only be performed by a qualified electrician. Ensure the main power supply is turned off at the circuit breaker before starting installation.
- Prepare for Installation: Turn off power at the main circuit breaker. Clear the installation area.
- Mount the Bracket: Secure the mounting bracket to the ceiling junction box. Ensure the bracket is firmly attached and can support the fan's weight.
- Assemble Fan Blades: Attach the three ABS fan blades to the motor unit according to the instructions provided in the separate assembly guide (if applicable).
- Wiring: Connect the fan's electrical wires to the household wiring. Follow the wiring diagram provided in the separate assembly guide. Ensure all connections are secure and properly insulated.
- Attach Fan to Bracket: Carefully lift the fan unit and attach it to the mounting bracket. Secure it with the provided screws.
- Final Checks: Ensure all screws are tightened and the fan is securely mounted. Restore power at the circuit breaker.

Figure 2: Product Dimensions for Installation Planning
5. Operating Instructions
The Parrot Uncle Ceiling Fan Light is operated using the included remote control.
5.1 Remote Control Functions
- Power ON/OFF: Turns the fan and light on or off.
- Fan Speed Control: Adjusts the fan speed through 6 levels.
- Light ON/OFF: Turns the light on or off independently.
- Color Temperature Adjustment: Cycles through 3 color temperatures (3000K Warm White, 4000K Neutral White, 5000K Cool White).
- Brightness Adjustment: Dims the light from 10% to 100%.
- Timer Function: Sets the fan to turn off automatically after 1, 2, 4, or 8 hours.
- Summer/Winter Function (Reverse): Changes the direction of fan rotation.
5.2 Fan Speed Settings
The fan offers 6 speed settings to suit your comfort needs:
- Speeds 1-2: Gentle breeze, ideal for sleeping or light air circulation.
- Speeds 3-4: Natural breeze, suitable for daily activities.
- Speeds 5-6: Cool breeze, for stronger air movement.

Figure 3: 6-Speed Fan Settings
5.3 Light Settings
The integrated LED light provides versatile illumination:
- 3 Color Temperatures: Switch between 3000K (Warm Light), 4000K (Neutral Light), and 5000K (White Light) to match your mood or activity.
- Dimmable: Adjust brightness from 10% to 100% using the remote control.

Figure 4: Dimmable Lighting with 3 Color Temperatures
5.4 Timer Function
Set the fan to automatically turn off after a specified period:
- Press the timer button on the remote to select 1, 2, 4, or 8 hours.
- The fan will operate for the selected duration and then switch off.

Figure 5: Quiet Operation and Timer Settings
5.5 Summer/Winter Function (Reverse Rotation)
The fan features a reversible motor for year-round comfort:
- Summer Mode: Blades rotate counter-clockwise, pushing air downwards to create a cooling effect.
- Winter Mode: Blades rotate clockwise, drawing air upwards to circulate warm air trapped near the ceiling.
- To change direction, turn off the fan, then turn it back on and press the reverse button on the remote control.
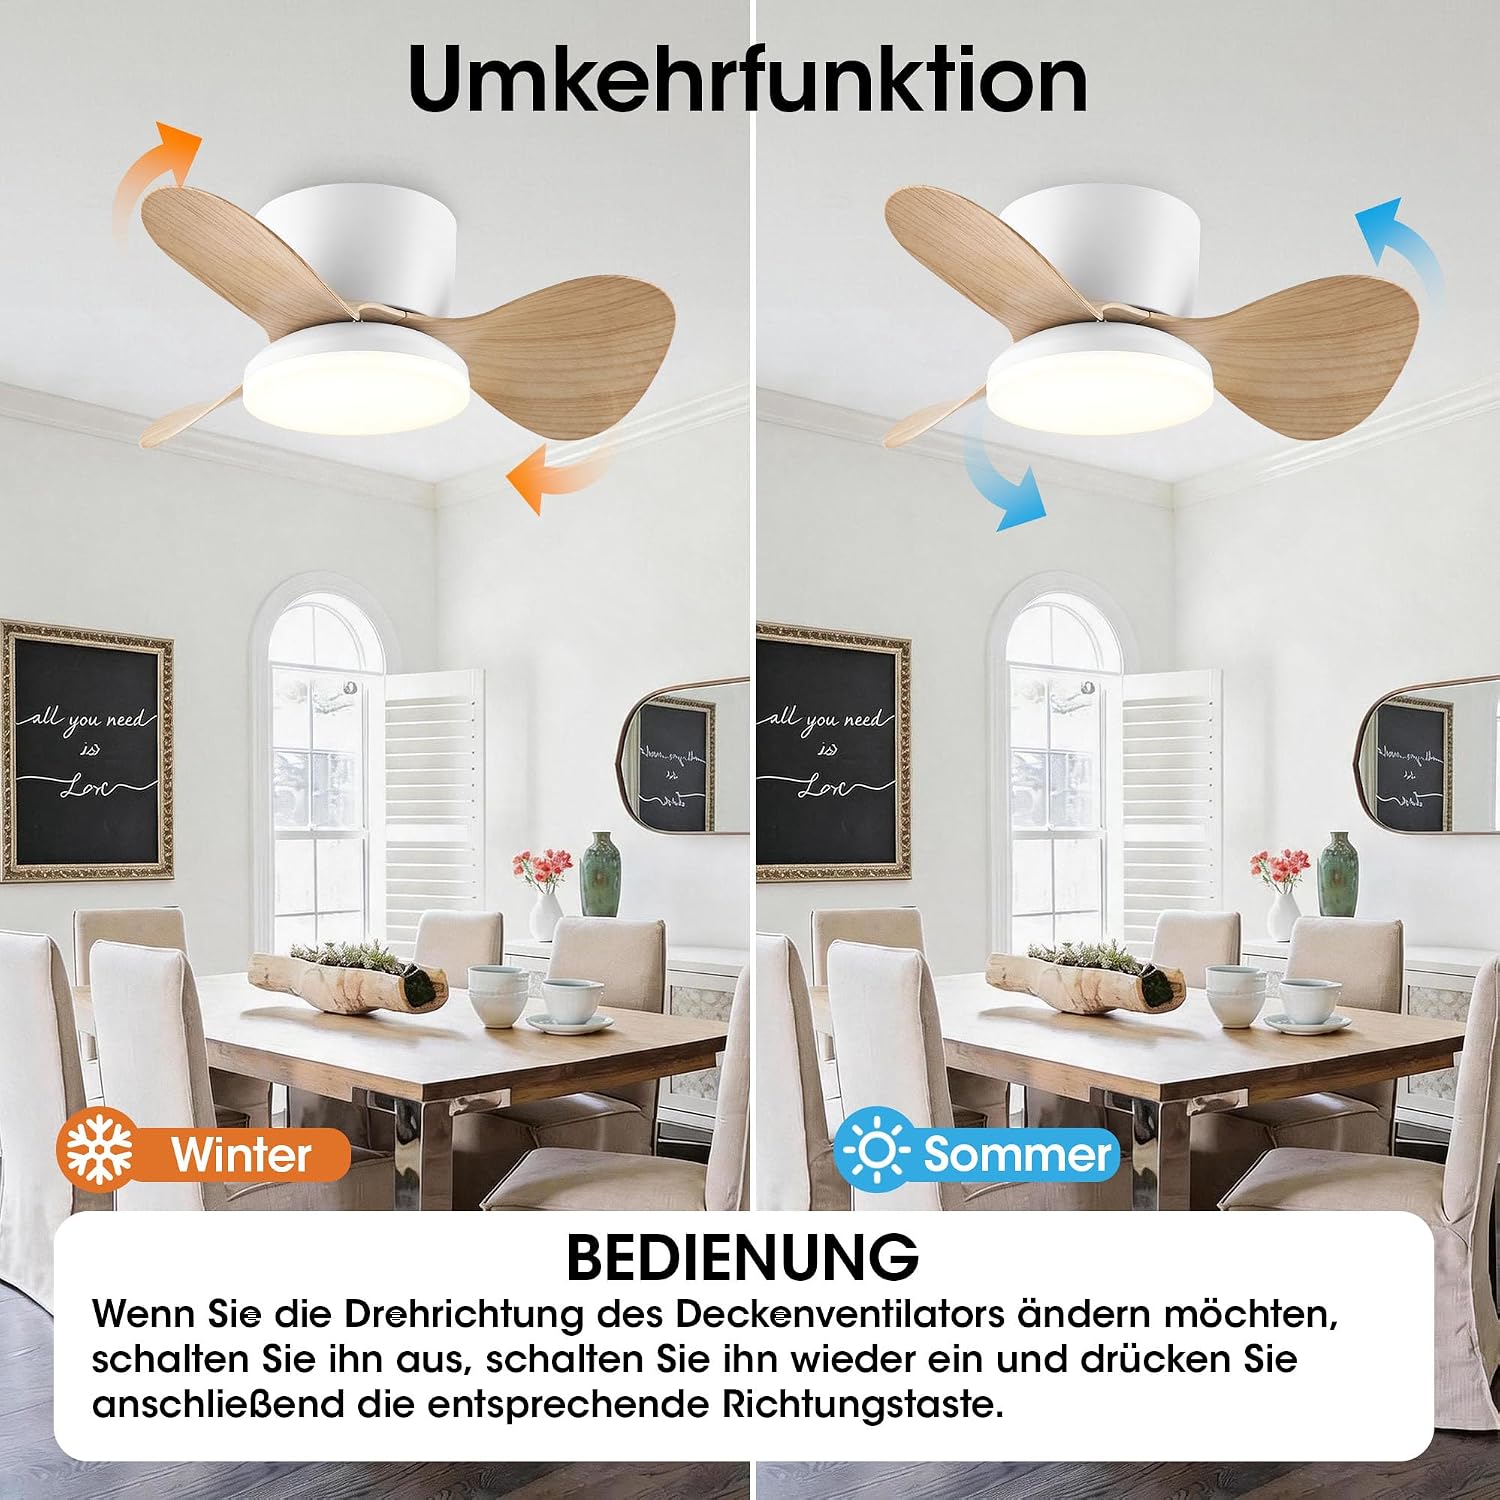
Figure 6: Summer and Winter Function
6. Maintenance
Regular maintenance ensures optimal performance and longevity of your ceiling fan light.
- Cleaning: Always turn off the power at the circuit breaker before cleaning. Use a soft, lint-free cloth to wipe down the fan blades and motor housing. For the light cover, use a slightly damp cloth. Do not use harsh chemicals or abrasive cleaners.
- Check Connections: Periodically check all screws and connections to ensure they are secure. Loose connections can cause noise or malfunction.
- Blade Balance: If the fan wobbles, check that all blades are securely attached and that their weights are evenly distributed.
7. Troubleshooting
If you encounter issues with your ceiling fan light, refer to the following common problems and solutions:
| Problem | Possible Cause | Solution |
|---|---|---|
| Fan does not start | No power supply; Loose wiring; Remote control battery low. | Check circuit breaker; Verify wiring connections; Replace remote control battery. |
| Light does not turn on | No power supply; Loose wiring; LED driver issue. | Check circuit breaker; Verify wiring connections; Contact customer support if LED driver is suspected. |
| Fan wobbles | Loose mounting screws; Unbalanced blades. | Tighten all mounting screws; Ensure blades are securely attached and balanced. |
| Remote control not working | Battery low or incorrectly inserted; Remote not paired. | Replace battery, ensure correct polarity; Refer to remote pairing instructions (if applicable). |
| Excessive noise | Loose screws; Motor issue; Blades hitting an obstruction. | Check and tighten all screws; Ensure no obstructions; Contact customer support if motor noise persists. |
8. Specifications
| Feature | Specification |
|---|---|
| Brand | Parrot Uncle |
| Model Number | F3019-EU |
| Product Dimensions (L x W x H) | 61L x 61B x 19.5H cm |
| Color | Wood Grain |
| Power Source | Corded Electric |
| Included Components | Remote Control |
| Light Energy Efficiency Class | A |
| Assembly Required | Yes |
| Country of Origin | China |
| GTIN | 810132416354 |
| UPC | 810132416354 |
9. Warranty and Support
This Parrot Uncle Ceiling Fan Light comes with a 1-year warranty from the date of purchase. This warranty covers manufacturing defects and material faults under normal use.
The warranty does not cover damage caused by improper installation, misuse, accidents, unauthorized repairs, or normal wear and tear.
For warranty claims or technical support, please contact your retailer or the manufacturer directly with your proof of purchase and model number (F3019-EU).