1. Introduction
Thank you for purchasing the Generic GN-715 Cordless Electric Blower. This powerful and versatile tool is designed for efficient cleaning and maintenance tasks, including clearing leaves, dust, snow, and drying surfaces. Featuring an 800W brushless motor and dual 21V 6.0Ah lithium batteries, it offers cordless convenience and high performance. Please read this manual carefully before operating the device to ensure safe and optimal use.
2. Important Safety Instructions
WARNING: Read all safety warnings, instructions, illustrations, and specifications provided with this power tool. Failure to follow all instructions listed below may result in electric shock, fire, and/or serious injury.
- Always wear eye protection and hearing protection when operating the blower.
- Do not operate the blower in wet conditions or rain.
- Keep children and bystanders away while operating the blower.
- Ensure the nozzle is clear of obstructions before starting.
- Do not point the blower nozzle at people or animals.
- Use only the specified battery packs and charger.
- Store the blower and batteries in a dry, secure place, out of reach of children.
- Disconnect the battery pack before making any adjustments, changing accessories, or storing the tool.
3. Package Contents
Verify that all items listed below are included in your package:
- 1 x Cordless Electric Blower Unit
- 2 x 21V 6.0Ah Lithium-Ion Batteries
- 1 x Battery Charger
- 1 x Long Nozzle
- 1 x User Manual

Image: The complete package contents including the blower, two batteries, charger, and nozzle.
4. Product Overview
Familiarize yourself with the components of your electric blower:
- Blower Body: Main unit housing the motor and controls.
- Battery Port: Where the lithium-ion battery is inserted.
- Power Switch/Trigger: Activates and deactivates the blower.
- Speed Control Dial/Button: Adjusts the airflow speed.
- Nozzle: Directs the airflow. The long nozzle is included for extended reach.
- Battery Pack: 21V 6.0Ah Lithium-Ion battery.
- Charger: For recharging the battery packs.

Image: Detailed view of the blower unit, battery, charger, and nozzle, highlighting key components.
5. Setup
5.1 Charging the Battery
- Connect the charger to a standard power outlet.
- Insert the battery pack into the charger. Ensure it clicks into place.
- The indicator light on the charger will show the charging status (e.g., red for charging, green for fully charged).
- Once fully charged, remove the battery from the charger and unplug the charger from the outlet.

Image: Illustration of the battery being charged by the included charger.
5.2 Attaching the Nozzle
- Align the long nozzle with the air outlet of the blower body.
- Push the nozzle firmly onto the outlet until it is securely seated.
- Ensure the nozzle is locked in place to prevent it from detaching during operation.

Image: The long nozzle being attached to the main blower unit.
5.3 Installing the Battery
- Slide a charged battery pack into the battery port on the blower until it clicks securely into place.
- To remove the battery, press the release button (if present) and slide the battery out.
6. Operating Instructions
6.1 Starting and Stopping the Blower
- To start: Press and hold the power trigger.
- To stop: Release the power trigger.
6.2 Adjusting Airflow Speed
The blower features variable speed control (5000-28000 RPM) to suit different tasks.
- Use the speed control dial or button (if present) to increase or decrease the airflow intensity.
- Start with a lower speed for delicate tasks and increase as needed for heavier debris.

Image: The blower being used to clear leaves, demonstrating its operational capability.
6.3 Recommended Applications
- Leaf Blowing: Clear leaves from lawns, driveways, and patios.
- Dust Removal: Clean workshops, garages, and construction sites.
- Snow Removal: Clear light, powdery snow from vehicles and small areas.
- Drying Surfaces: Quickly dry vehicles after washing or wet surfaces.
- Grill Lighting: Aid in igniting charcoal for barbecues.

Image: The blower assisting in lighting a barbecue grill, showcasing its versatility.

Image: The blower effectively removing snow from the surface of a vehicle.
7. Maintenance
7.1 Cleaning
- Always remove the battery pack before cleaning.
- Wipe the exterior of the blower with a damp cloth. Do not use harsh chemicals or abrasive cleaners.
- Ensure the air intake and outlet are free from debris. Use compressed air if necessary to clear vents.
7.2 Battery Care and Storage
- Store batteries in a cool, dry place, away from direct sunlight and extreme temperatures.
- Do not store batteries in a discharged state for extended periods. Recharge them periodically.
- Avoid dropping or damaging battery packs.
7.3 Storage of the Blower
- Remove the battery pack before storing the blower.
- Store the blower in a dry, secure location, out of reach of children.
- Protect the blower from moisture and dust.
8. Troubleshooting
| Problem | Possible Cause | Solution |
|---|---|---|
| Blower does not start. | Battery not charged or not properly installed. | Ensure battery is fully charged and securely inserted. |
| Reduced airflow. | Nozzle or air intake blocked. Low battery charge. | Clear any obstructions. Recharge or replace battery. |
| Blower stops during operation. | Battery overheated or discharged. | Allow battery to cool down. Recharge or replace battery. |
| Unusual noise or vibration. | Loose components or internal damage. | Stop operation immediately. Check for loose parts. If problem persists, contact customer support. |
9. Specifications
| Feature | Detail |
|---|---|
| Model | GN-715 |
| Brand | Generic |
| Motor Type | Brushless |
| Power | 800W |
| Battery Voltage | 21V |
| Battery Capacity | 6.0Ah Lithium-Ion (x2 included) |
| Max Wind Speed | 65 m/s |
| No-Load Speed | 5000-28000 RPM (Variable) |
| Noise Level | 95 Decibels |
| Item Weight | 1500 Grams |
| Dimensions (L x W x H) | 20cm x 10cm x 25cm (Blower body) |
| Material | Rubber, Metal, ABS Plastic, Lithium-Ion |
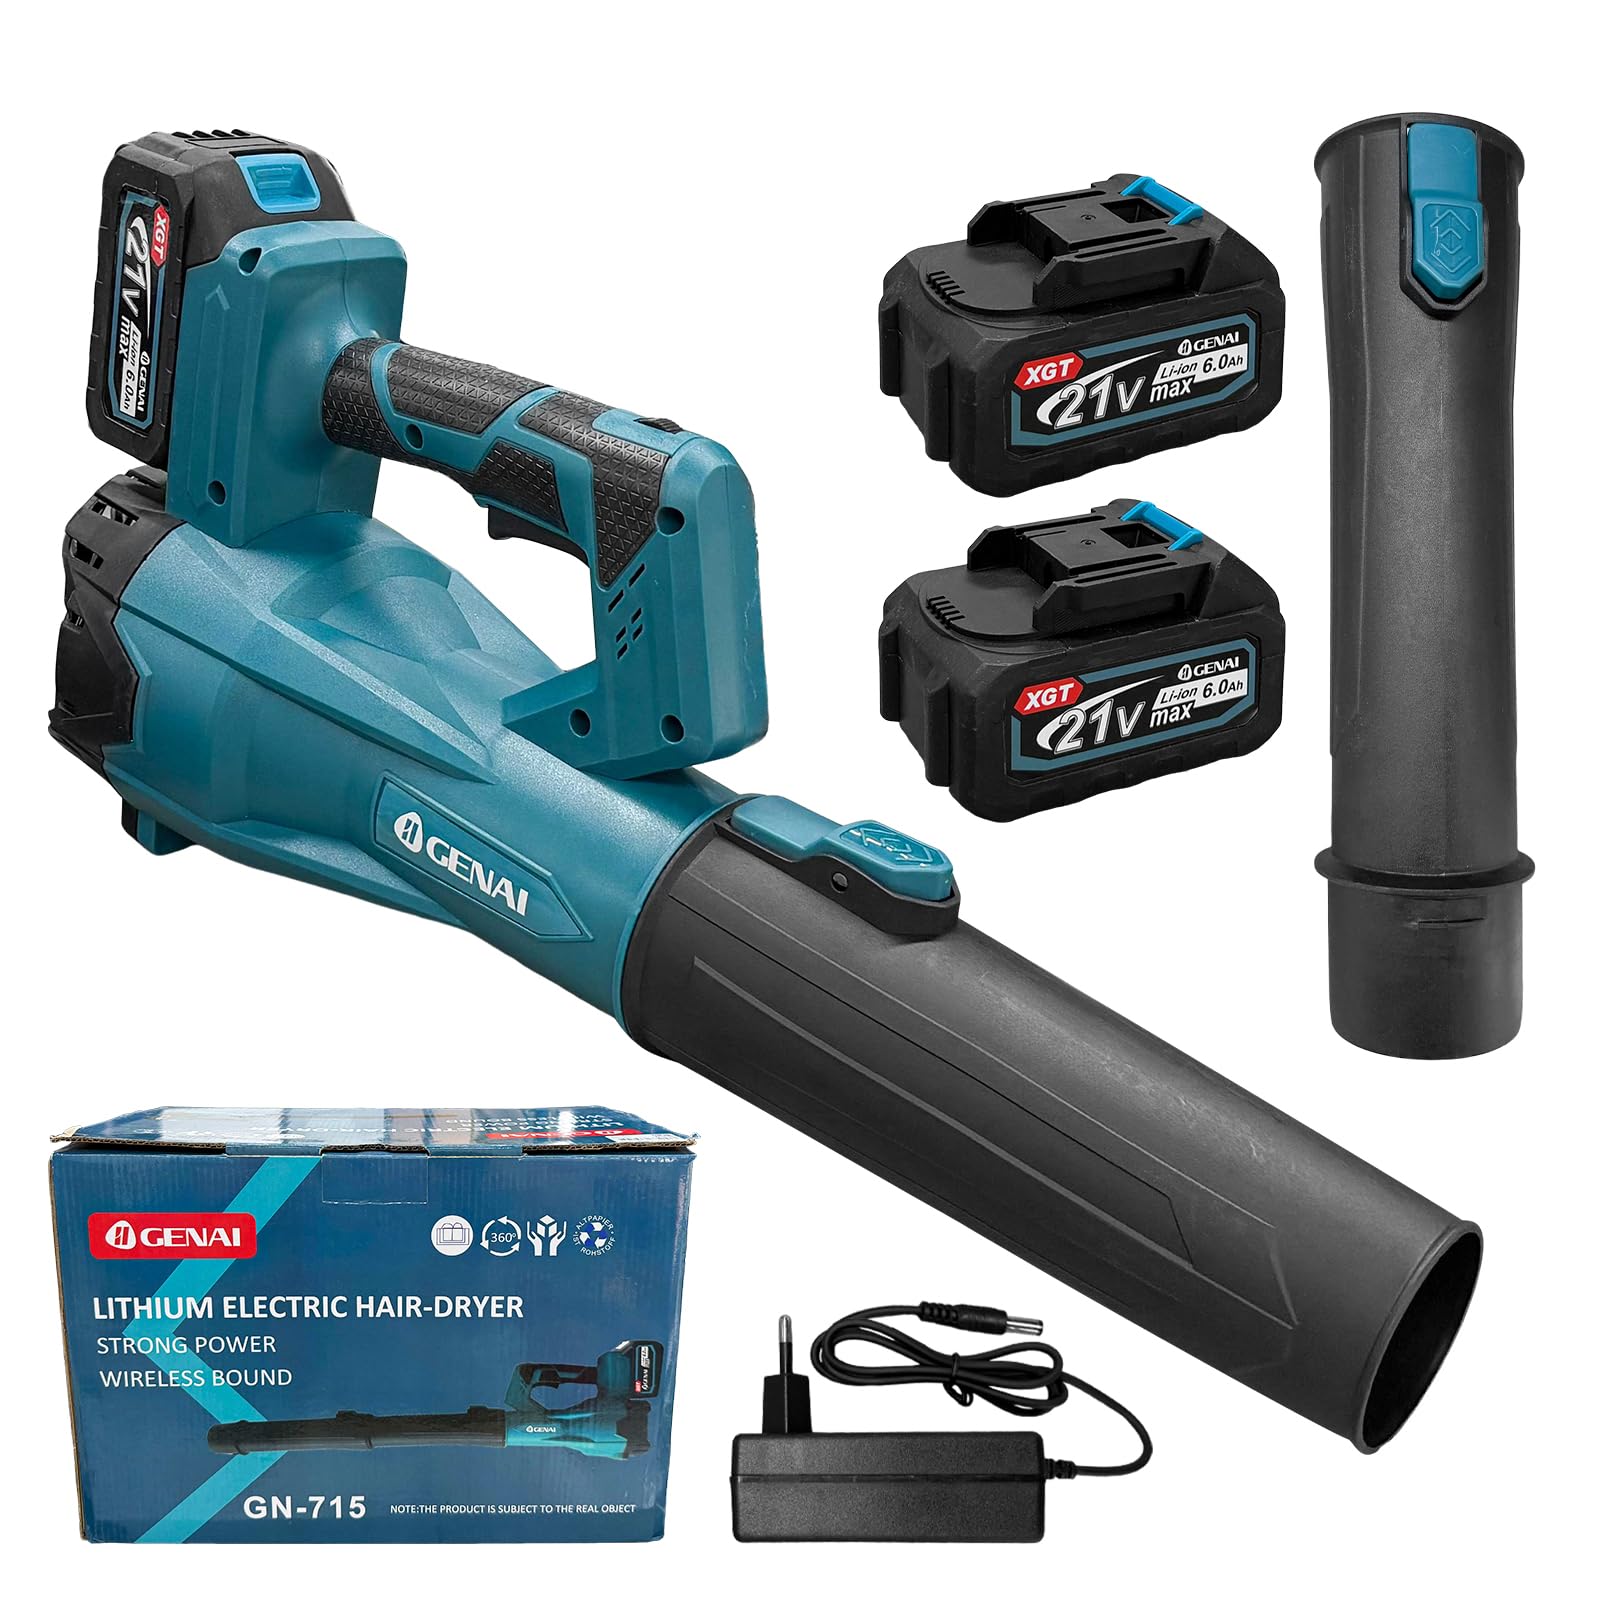
Image: Diagram showing the dimensions of the blower and its nozzle.
10. Warranty and Support
For warranty information or technical support, please refer to the documentation provided at the time of purchase or contact your retailer. Keep your proof of purchase for any warranty claims.
For further assistance, please contact the manufacturer or your local distributor.