
1. Product Overview
The TECHPICCO Hood Struts are designed to replace the factory hood prop rod on Toyota Tacoma (2024-2026) and Toyota 4Runner (2025-2026) vehicles. This system utilizes gas-charged cylinders and custom brackets to automatically lift and hold the hood open, providing improved access to the engine bay.

Figure 1: TECHPICCO Hood Struts installed on a vehicle.
2. Package Contents
Verify that all components are present before beginning installation:
- 2x Hood Struts (Gas Cylinders)
- Mounting Brackets
- Hardware Kit (bolts, washers, clips)
- Installation Instructions (this manual)

Video 1: Unboxing and overview of the TECHPICCO Hood Struts components.
3. Safety Information
Always prioritize safety when working on your vehicle. Failure to follow these guidelines may result in injury or damage to your vehicle.
- Ensure the vehicle is parked on a level surface with the engine off and the parking brake engaged.
- Use appropriate personal protective equipment, such as safety glasses and gloves.
- Keep the hood securely propped open with the factory prop rod or a suitable support during installation to prevent accidental closure.
- Do not attempt to compress the gas struts manually without them being installed, as they are under high pressure.
- If you are unsure about any step, consult a qualified mechanic.
4. Installation Guide
This hood strut kit is designed for a bolt-on installation, requiring no drilling. The estimated installation time is 30 minutes or less.
Tools Required:
- 12mm Socket Wrench
- Optional: 12mm Open-ended Wrench
Installation Steps:
- Prepare the Hood: Open the vehicle's hood and secure it using the factory prop rod.
- Install Upper Brackets: Locate the existing bolts on the hood hinge area. Remove the specified bolts and install the upper mounting brackets using the provided hardware. Ensure the brackets are oriented correctly.
- Install Lower Brackets: Identify the factory attachment points in the engine bay. Remove the existing bolts and install the lower mounting brackets. For some Tacoma models, an Intelligent Battery Sensor (IBS) wire may need slight repositioning to accommodate the bracket.
- Attach Hood Struts: With the brackets securely installed, attach one end of a hood strut to the upper ball stud on the hood bracket and the other end to the lower ball stud on the engine bay bracket. Repeat for the second strut. Ensure the struts click firmly into place.
- Test Operation: Carefully remove the factory prop rod. Slowly lower and raise the hood to confirm the struts operate smoothly and hold the hood securely in the open position.
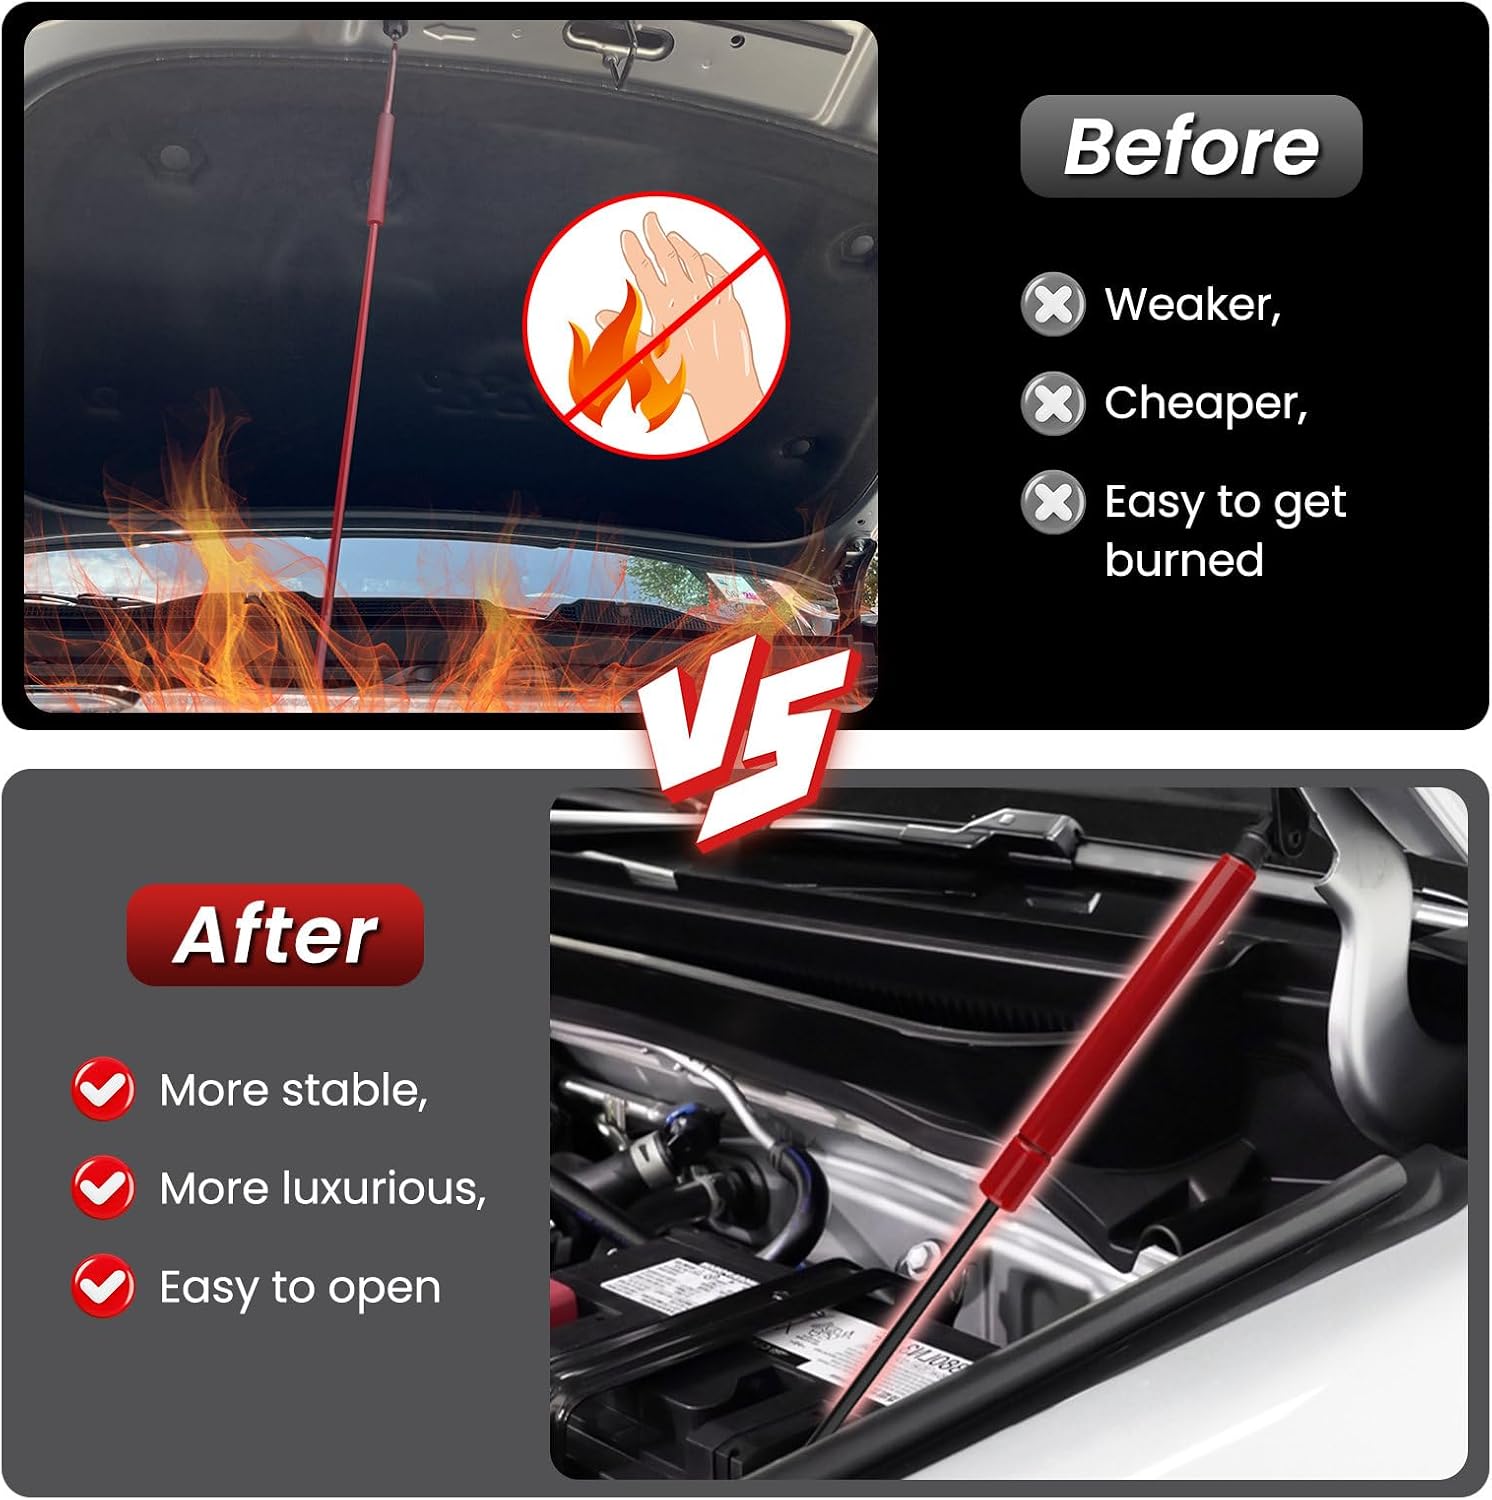
Figure 2: Attaching the upper mounting bracket to the hood.

Figure 3: Repositioning the IBS sensor wire if necessary.

Figure 4: Various views of the hood struts after installation.

Video 2: Step-by-step demonstration of the hood strut installation.
5. Operating Instructions
Once installed, operating your hood with the TECHPICCO Hood Struts is straightforward:
- Opening the Hood: Release the hood latch from inside the vehicle. Lift the hood slightly, and the gas struts will assist in raising it to its fully open position.
- Closing the Hood: Apply a firm, steady downward pressure on the hood until the struts begin to compress. Continue pressing down until the hood latch engages securely. Avoid slamming the hood.

Figure 5: Comparison of hood support methods.
6. Maintenance
The TECHPICCO Hood Struts are designed for durability and require minimal maintenance. Follow these guidelines to ensure long-lasting performance:
- Regular Inspection: Periodically check the struts and mounting points for any signs of wear, damage, or loose connections.
- Cleaning: Keep the strut rods clean from dirt and debris. Wipe with a clean, damp cloth if necessary. Avoid using harsh chemicals or abrasive materials.
- Lubrication: No lubrication is typically required for gas struts. Do not apply grease or oil to the piston rod, as this can attract dirt and damage the seals.
- Temperature Effects: Gas struts may perform slightly differently in extreme cold or heat. This is normal and does not indicate a defect.
7. Troubleshooting
If you encounter issues with your hood struts, consider the following common solutions:
- Hood Not Staying Up:
- Ensure both struts are properly attached to their ball studs.
- Check for any obstructions preventing the hood from fully opening.
- Inspect struts for signs of leakage or damage; replace if necessary.
- Hood Difficult to Close:
- Verify that the struts are correctly installed and not binding.
- Ensure the hood latch mechanism is functioning correctly.
- New struts may require a few cycles to break in and operate optimally.
- Unusual Noises:
- Check all mounting bolts for tightness.
- Ensure no components are rubbing against each other or other parts of the vehicle.
8. Specifications
Key specifications for the TECHPICCO Hood Struts:
| Brand | TECHPICCO |
| Model Number | YQCG-TACO24+-2-R |
| Compatibility | Toyota Tacoma 2024-2026, Toyota 4Runner 2025-2026 |
| Material | Durable 3mm carbon steel brackets, thickened steel pipe cylinder body, QPQ treated piston rod |
| Installation Type | No-drill, bolt-on |
| Item Weight | Approximately 1.28 pounds (total package) |
| Package Dimensions | 16.38 x 3.31 x 1.34 inches |

Figure 6: Components and construction details of the hood struts.

Figure 7: Internal structure of the upgraded cylinder.
9. Warranty and Support
For warranty information, product support, or assistance with installation and troubleshooting, please contact TECHPICCO Gear Store directly through your purchase platform or their official website. Refer to your purchase documentation for specific return and warranty policies.