Introduction
This manual provides detailed instructions for the assembly, operation, and maintenance of your ONBRILL 60" Buffet Cabinet with Storage, Model BSB-140-GR. Please read all instructions carefully before beginning assembly and retain this manual for future reference.
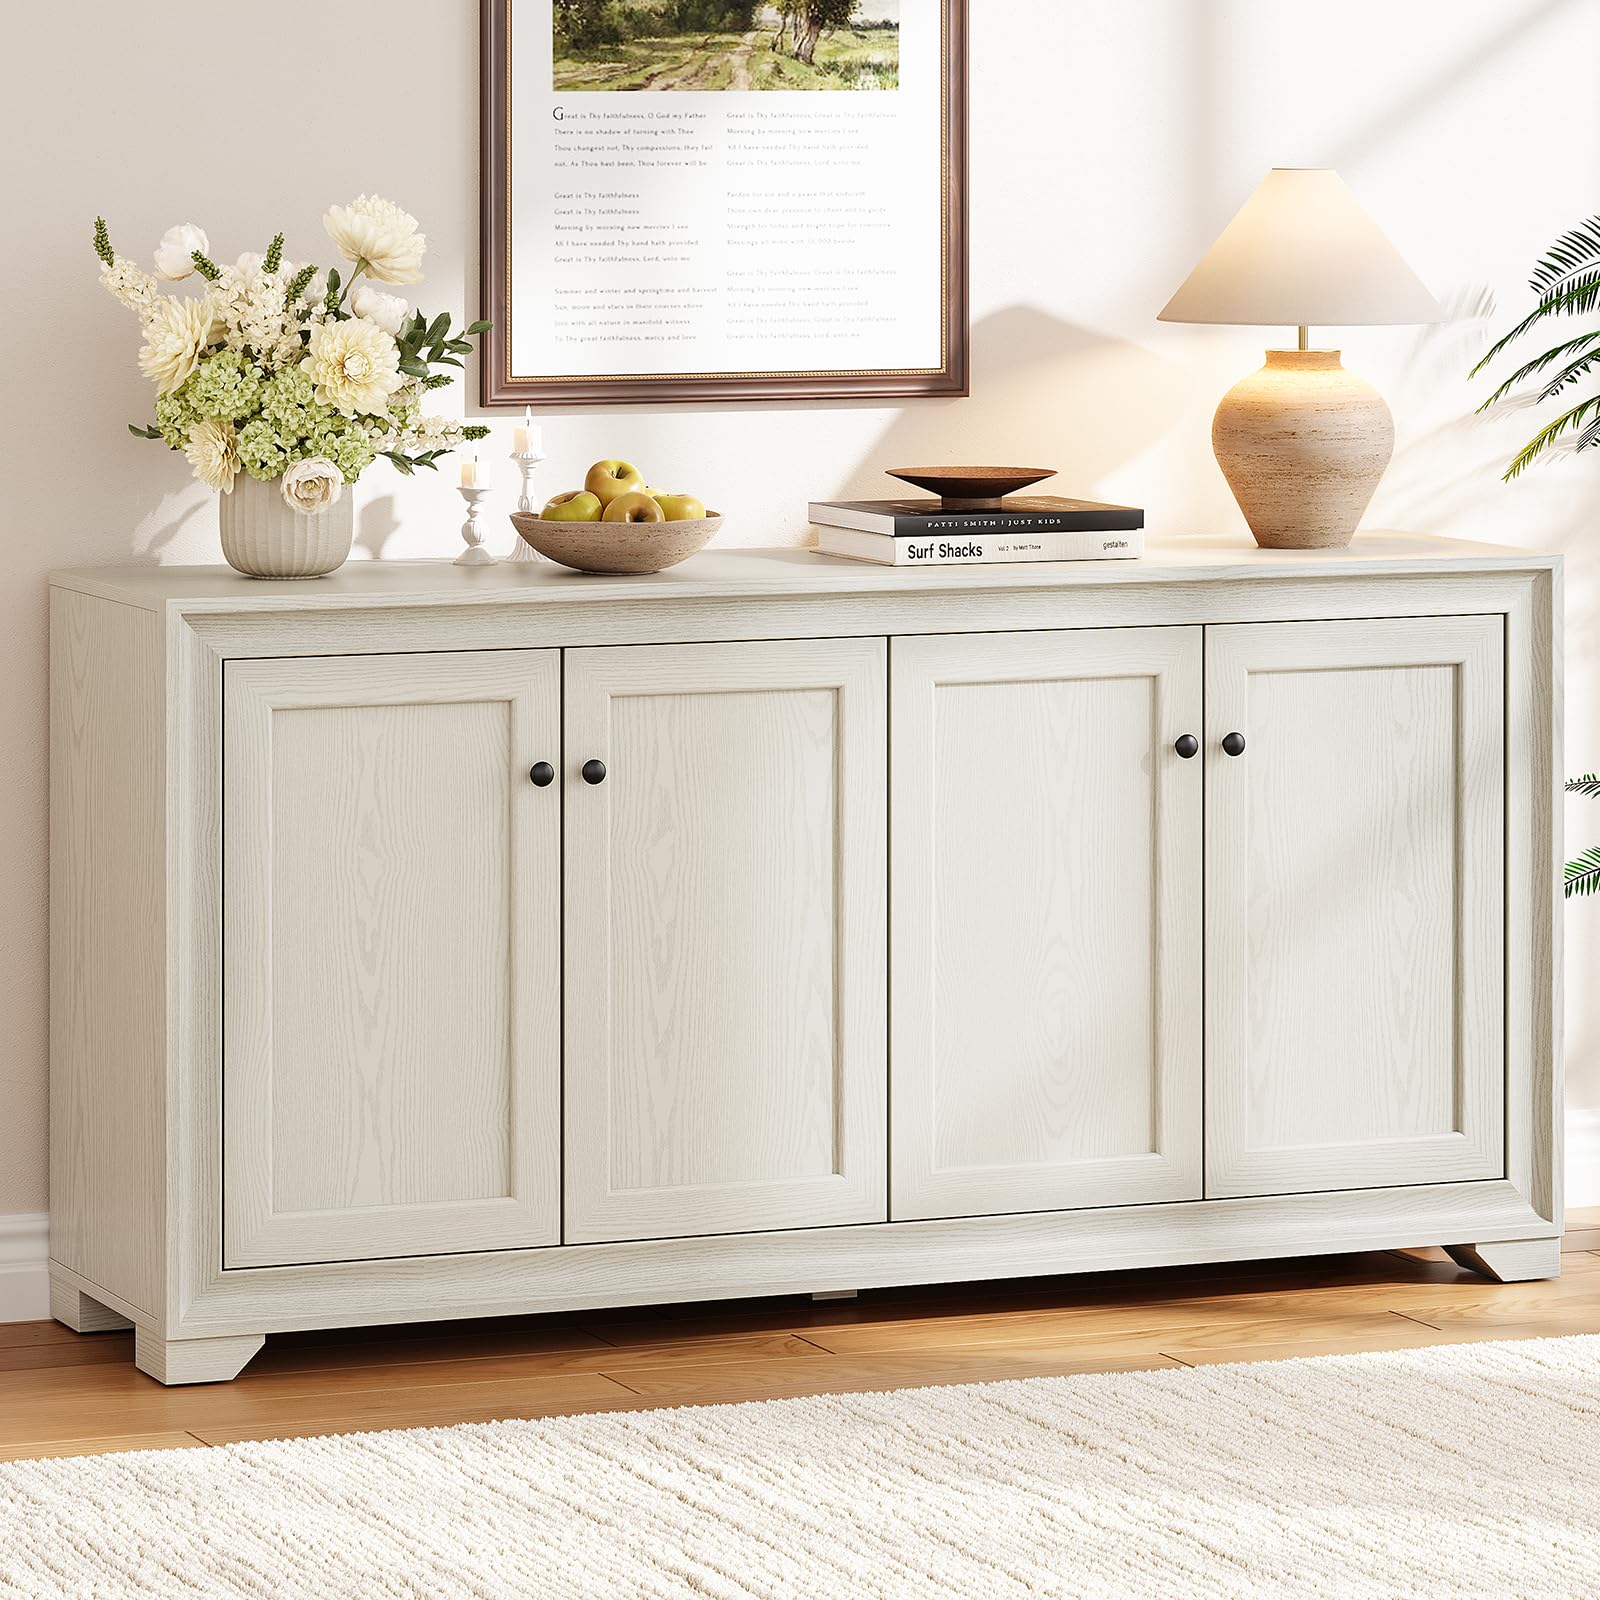
Image: The ONBRILL 60-inch Buffet Cabinet, Model BSB-140-GR, in a grey finish, showcasing its four doors and overall design.
Safety Information
For your safety and to prevent damage to the product, observe the following precautions:
- Always secure the cabinet to the wall using the provided wall connection fixer to prevent tipping.
- Do not overload the shelves to maintain stability.
- Keep the area around the cabinet clear to prevent accidents.
- Ensure all screws and fasteners are tightened securely during assembly. Periodically check and re-tighten if necessary.
- Do not allow children to climb on or play with the cabinet.

Image: Detail of the wall connection fixer, demonstrating how to secure the cabinet to the wall for enhanced stability and safety.
Package Contents
Before assembly, verify that all components are present and undamaged. If any parts are missing or damaged, please contact customer support.
- Cabinet Panels (Top, Bottom, Sides, Back)
- Doors (4 units)
- Adjustable Shelves (2 units)
- Hardware Kit (Screws, dowels, hinges, door handles, shelf pins)
- Wall Mount Anchor / Anti-Tipping Kit
- Assembly Instructions Manual
Assembly Instructions (Setup)
Assembly typically requires two adults. A power drill may be helpful for pre-drilling holes, as some users have noted that pilot holes may not be fully pre-drilled for all components, particularly for screws and door handles. Ensure you have adequate space for assembly.
Step-by-Step Assembly Guide:
- Unpack and Identify Parts: Lay out all panels and hardware. Refer to the parts list in the included manual to identify each component.
- Assemble the Base Frame: Connect the bottom panel to the side panels using the provided screws and dowels. Ensure connections are secure.
- Attach Back Panels: Secure the back panels to the assembled frame.
- Install Fixed Shelves (if applicable): If your model includes fixed shelves, install them according to the manual.
- Install Adjustable Shelf Pins: Insert the shelf pins into the desired holes for the adjustable shelves. Ensure pins are level.
- Attach Hinges to Doors: Secure the hinges to the four doors.
- Mount Doors to Cabinet: Carefully attach the doors to the cabinet frame using the installed hinges. Adjust door alignment as needed (refer to troubleshooting section for tips).
- Install Door Handles: Attach the door handles to the front of each door.
- Install Adjustable Shelves: Place the adjustable shelves onto the installed shelf pins.
- Secure to Wall: Using the wall connection fixer, secure the cabinet to a wall stud to prevent tipping. This is a critical safety step.
Video: Official ONBRILL 60" Buffet Cabinet Assembly Video. This video provides a visual guide for the step-by-step assembly process of the cabinet.

Image: Product dimensions diagram, illustrating the length (60"), width (15.7"), and height (29.5") of the assembled buffet cabinet.
Operating Instructions
Adjusting Shelves:
The ONBRILL Buffet Cabinet features two adjustable shelves in the middle sections, allowing for customized storage space. To adjust a shelf:
- Empty the shelf of all contents.
- Carefully lift the shelf and remove the four shelf pins from their current holes.
- Re-insert the shelf pins into the desired new set of holes, ensuring they are level and fully seated.
- Place the shelf back onto the pins.
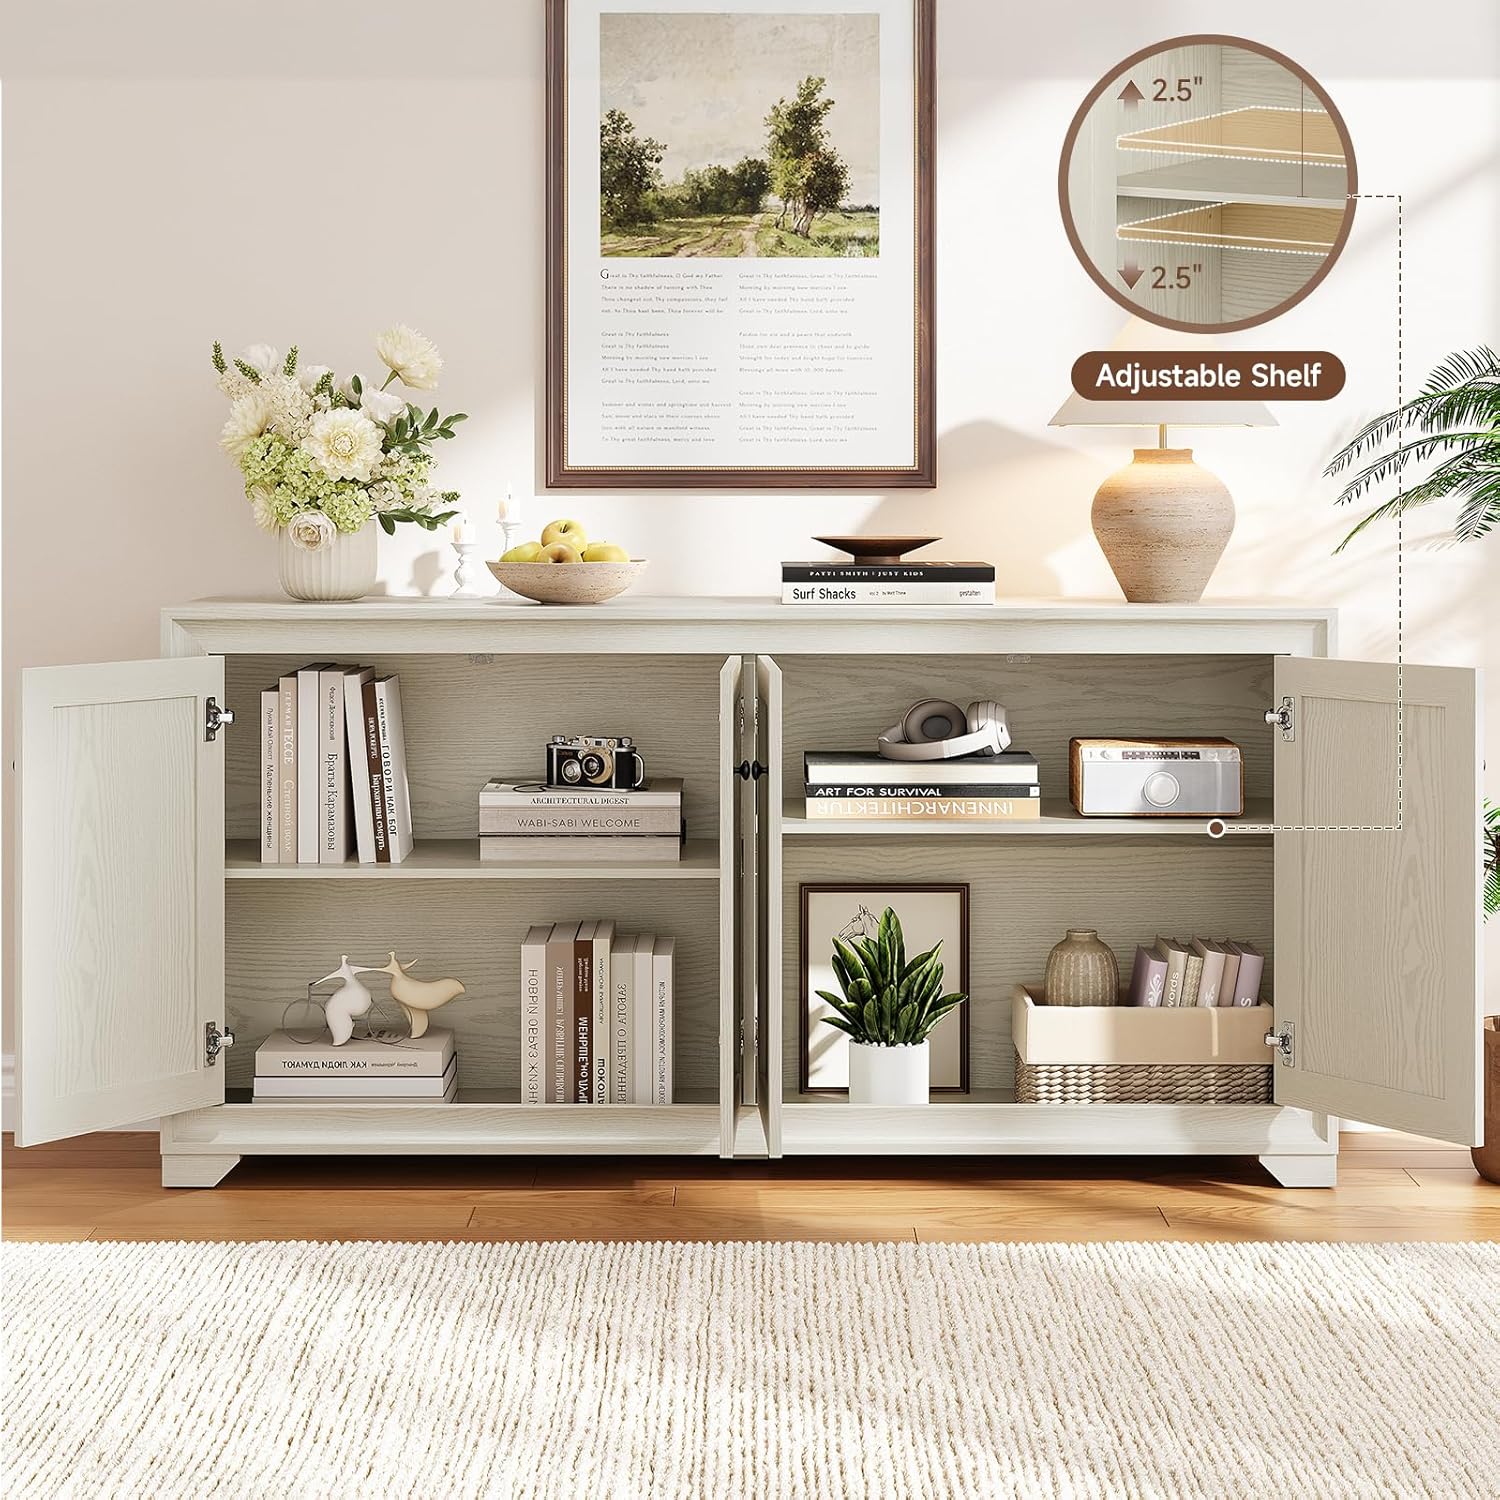
Image: The interior of the buffet cabinet with doors open, highlighting the adjustable shelves and their versatility for storing various items.

Image: Detailed view showing the soft-closing hinge mechanism, the adjustable shelf pin system, and the sturdy design of the cabinet legs.
Maintenance
Proper care will extend the life and appearance of your buffet cabinet.
- Cleaning: Wipe surfaces with a soft, damp cloth. Avoid abrasive cleaners or harsh chemicals, which can damage the finish.
- Spills: Clean spills immediately to prevent staining or damage to the engineered wood.
- Sunlight: Avoid prolonged exposure to direct sunlight to prevent fading.
- Humidity: Maintain a stable humidity level in the room to prevent warping or cracking of the wood.
- Hardware: Periodically check all screws and fasteners to ensure they remain tight. Re-tighten if necessary.
Troubleshooting
Common Issues and Solutions:
- Doors Not Aligning:
Adjust the hinges on the doors. Most cabinet hinges allow for minor adjustments (up/down, left/right, in/out) using a screwdriver. Refer to the hinge manufacturer's instructions or a general guide on cabinet door adjustment.
- Cabinet Wobbles/Unstable:
Ensure the cabinet is placed on a level surface. Verify that all assembly screws are fully tightened. Confirm the wall connection fixer is properly installed and secured to a wall stud.
- Difficulty with Screw Installation:
Some pilot holes may require additional drilling, especially for smaller screws or door handles. A power drill with an appropriate drill bit (smaller than the screw diameter) can be used to create or deepen pilot holes. Exercise caution to avoid over-drilling.
Specifications
| Feature | Detail |
|---|---|
| Brand | ONBRILL |
| Model Number | BSB-140-GR |
| Color | Grey |
| Material | Engineered Wood, Iron |
| Product Dimensions (D x W x H) | 15.7" x 60" x 29.5" |
| Item Weight | 84 Pounds |
| Number of Doors | 4 |
| Number of Shelves | 4 (2 adjustable) |
| Mounting Type | Freestanding (with Wall-Mounted Anti-Tipping) |
| Required Assembly | Yes |
Warranty and Support
For warranty information or customer support, please refer to the documentation included with your purchase or contact ONBRILL directly through their official website or the retailer where the product was purchased. Please have your model number (BSB-140-GR) and purchase date available when contacting support.