
1. Safety Information
Warning: Oxalic acid is a corrosive substance. Always prioritize safety when operating this device. Failure to follow safety guidelines can result in serious injury.
- Always wear appropriate personal protective equipment (PPE), including a NIOSH-approved respirator, chemical-resistant gloves, and eye protection, when handling oxalic acid and operating the vaporizer.
- Operate the vaporizer in a well-ventilated outdoor area, away from people, animals, and flammable materials.
- Keep the device and oxalic acid out of reach of children and pets.
- Butane fuel and oxalic acid are not included with this product and must be purchased separately. Ensure you use appropriate butane canisters designed for torches.
- Do not spray vapor directly onto bees or into the hive entrance. Direct the vapor into the hive through an appropriate opening.
- Allow the device to cool completely before storage or cleaning.
2. Product Overview
The Generic Butane Powered Oxalic Acid Vaporizer is a portable device designed for applying oxalic acid vapor to beehives for mite control. It utilizes a butane torch for heating, providing a cordless and efficient solution.
2.1. What's in the Box
- 1 x Oxalic Acid Vaporizer Unit
- 2 x Measuring Spoons (5g and 8g)
- 1 x Extending Elbow Pipe
- 1 x Lighter (for initial ignition, if needed)
- 1 x User Manual (this document)
2.2. Key Features
- Butane Powered: Operates with a standard butane canister (not included), offering portability.
- Stainless Steel Construction: Designed for durability and resistance to corrosion.
- Rapid Heating: Facilitates quick and consistent vapor production.
- Adjustable Flame: Allows for control over the heating process.
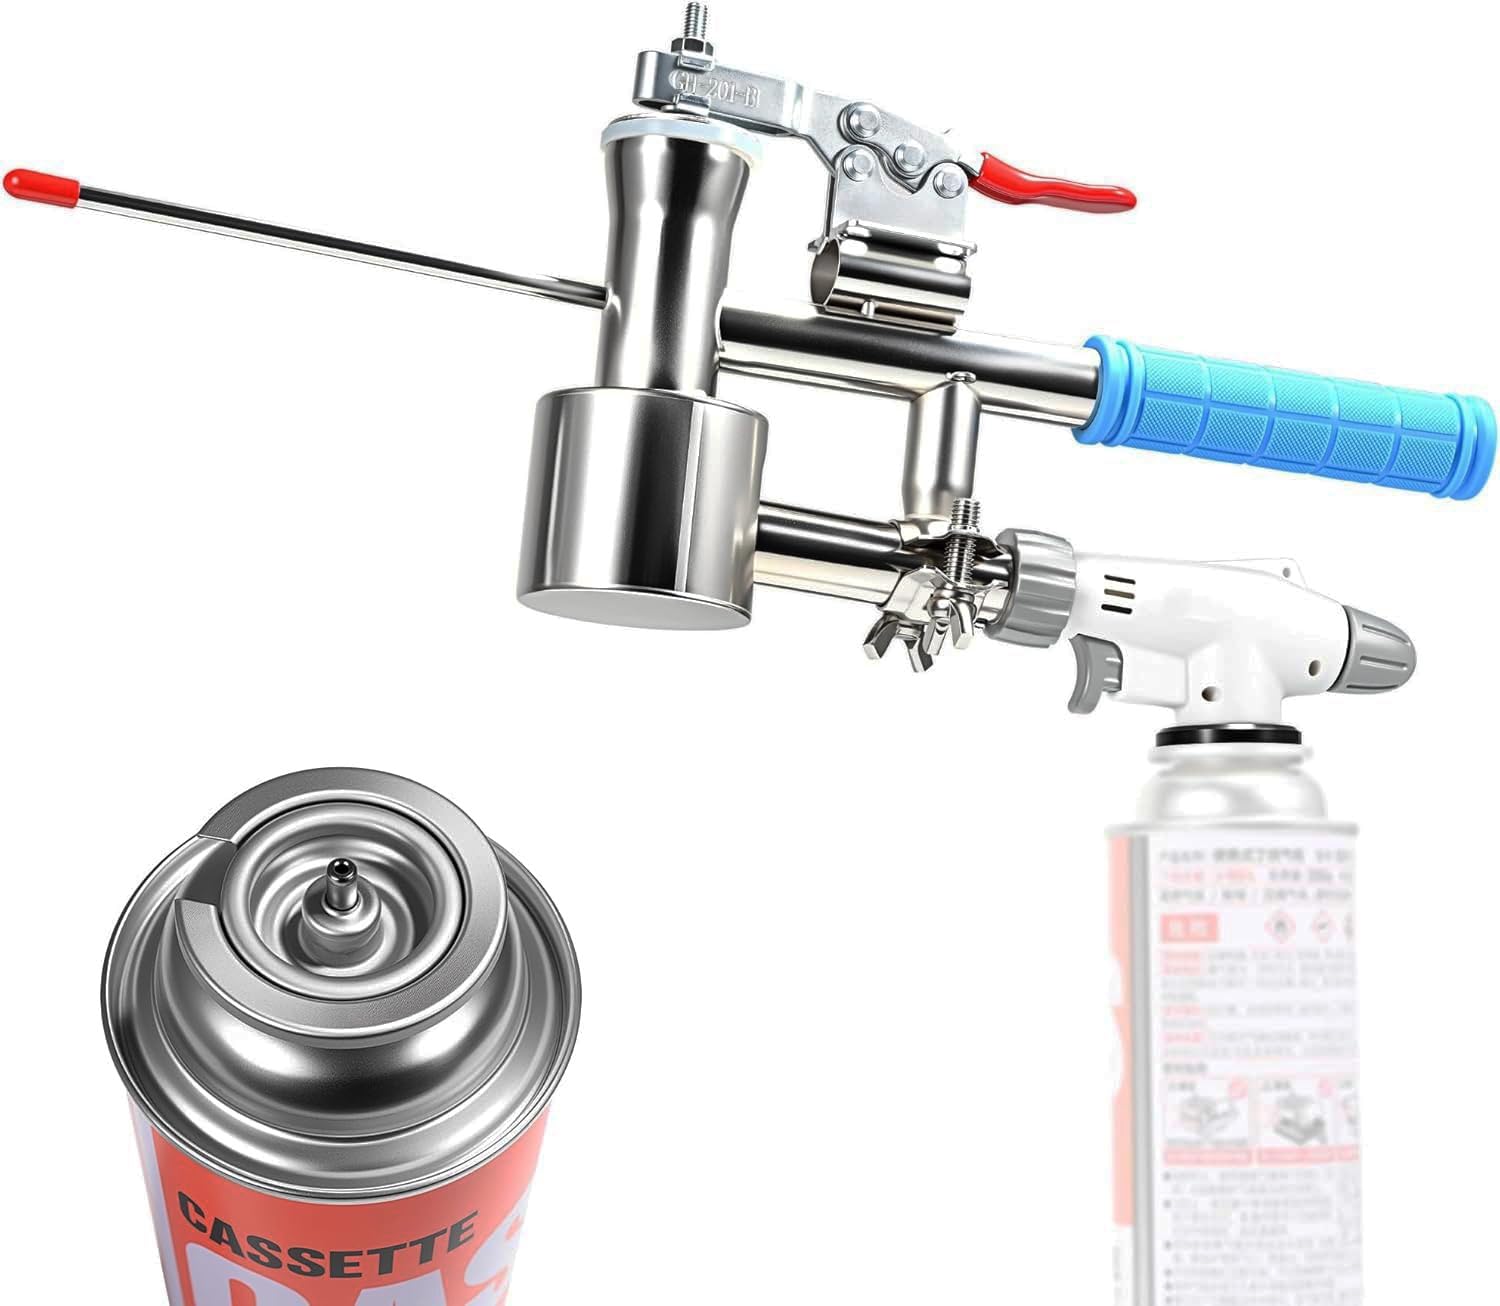
Figure 1: Assembled Oxalic Acid Vaporizer with butane canister.
3. Component Identification
Familiarize yourself with the main components of the vaporizer and torch unit.

Figure 2: Butane Torch Component Diagram. This image illustrates the various parts of the butane torch, including the preheating copper tube, soft and hard fire adjustment, oxygen inlet, fire control switch, switchgear, and gas tank connection clip.

Figure 3: Vaporizer Unit and Accessories with Dimensions. This image provides an overview of the vaporizer unit, extending elbow pipe, and measuring spoons, along with their respective dimensions.
4. Setup
Follow these steps to assemble and prepare your vaporizer for use.
- Attach the Vaporizer Unit to the Torch: Align the vaporizer unit with the butane torch. Secure it by engaging the rotating locking mechanism. Ensure it is firmly attached to prevent accidental detachment during operation.
- Connect Butane Canister: Attach a compatible butane gas canister to the torch's gas tank connection clip. Ensure a tight seal to prevent gas leaks.
- Attach Extending Elbow Pipe (Optional): If needed for reaching difficult areas of the hive, attach the extending elbow pipe to the vaporizer nozzle.
- Prepare Oxalic Acid: Using the provided measuring spoons, measure the appropriate amount of oxalic acid. Do not add oxalic acid to the vaporizer yet.

Figure 4: Attaching the Vaporizer Unit. This image demonstrates the 'pull up to open' and 'rotating locking' actions required to securely attach the vaporizer unit to the torch.

Figure 5: Locking Mechanism and Flame Adjustment. This image highlights the rotating locking mechanism for secure assembly and the flame adjustment control on the butane torch.
5. Operating Instructions
Follow these steps for safe and effective vaporization of oxalic acid.
- Ignite the Torch: Turn on the gas flow and ignite the torch using the integrated lighter or the provided separate lighter. Adjust the flame to a medium setting.
- Preheat the Device: Hold the vaporizer with the flame directed at the heating chamber for approximately 30 seconds to allow it to reach the optimal temperature.
- Adjust Flame: After preheating, reduce the flame to a low setting. The initial smoke output may be minimal. The temperature will stabilize for optimal smoke production after two or three cycles.
- Add Oxalic Acid: Carefully add the pre-measured oxalic acid into the heating chamber.
- Vaporization: Maintain a low flame. Normal operation typically produces white smoke. If blue smoke appears, the flame is too high and needs to be reduced. The duration of smoke release depends on the amount of oxalic acid used, typically lasting around 10 seconds per dose.
- Dosage:
- For a deep hive: Use approximately 5 grams of oxalic acid.
- For a honey super: Use approximately 8 grams of oxalic acid.
- Application: Direct the vapor into the hive through an appropriate opening. Avoid spraying directly onto bees.
- Cool Down: After use, turn off the butane torch and allow the entire unit to cool down completely before handling or storage.
6. Maintenance
Proper maintenance ensures the longevity and effective operation of your vaporizer.
- Clearing Pipe Blockages: If a pipe blockage occurs, stop use immediately. Clear any residue by tilting the pipe downward while gently heating the tube base with a low flame. Ensure the device is cool enough to handle safely before attempting to clear blockages manually.
- Cleaning: After each use, once the device has cooled, wipe down the exterior with a damp cloth. Ensure no oxalic acid residue remains on external surfaces.
- Storage: Store the vaporizer in a dry, cool place, away from direct sunlight and out of reach of children. Disconnect the butane canister before storage.
7. Troubleshooting
Refer to this section for solutions to common issues.
- Issue: Minimal smoke output during initial operation.
Solution: This is normal. The device requires preheating for approximately 30 seconds. Optimal smoke production will occur after two or three cycles as the temperature stabilizes. - Issue: Blue smoke is produced instead of white smoke.
Solution: Blue smoke indicates the flame is too high. Reduce the flame setting on the butane torch until white smoke is consistently produced. - Issue: Vaporizer pipe appears blocked.
Solution: Immediately stop operation. Allow the device to cool slightly, then clear residue by tilting the pipe downward while applying gentle heat to the tube base. Ensure the pipe is clear before resuming operation. - Issue: Butane torch does not ignite or maintain a flame.
Solution: Check if the butane canister is properly connected and contains sufficient fuel. Ensure the gas flow valve is open. If issues persist, the torch may require maintenance or replacement.
8. Specifications
- Model Number: HOG-037
- Product Dimensions: 17.5 x 5.9 x 2.2 inches (44.45 x 14.99 x 5.59 cm)
- Item Weight: 2.25 pounds (1.02 kg)
- Material: Stainless Steel
- Power Source: Butane Gas (canister not included)
9. Warranty and Support
Specific warranty information for this product is not provided in this manual. For warranty claims or technical support, please refer to the retailer or manufacturer's contact information provided at the point of purchase.
