1. Important Safety Instructions
Read all instructions carefully before using the appliance. Keep this manual for future reference.
- Always ensure the appliance is placed on a stable, heat-resistant surface.
- Do not touch hot surfaces. Use handles or knobs.
- To protect against electrical shock, do not immerse cord, plugs, or the appliance body in water or other liquid.
- Close supervision is necessary when any appliance is used by or near children.
- Unplug from outlet when not in use and before cleaning. Allow to cool before putting on or taking off parts, and before cleaning the appliance.
- Do not operate any appliance with a damaged cord or plug, or after the appliance malfunctions or has been damaged in any manner.
- The use of accessory attachments not recommended by the appliance manufacturer may cause injuries.
- Do not use outdoors.
- Do not let cord hang over edge of table or counter, or touch hot surfaces.
- Do not place on or near a hot gas or electric burner, or in a heated oven.
- Extreme caution must be used when moving an appliance containing hot oil or other hot liquids.
- Always attach plug to appliance first, then plug cord into the wall outlet. To disconnect, turn any control to "off", then remove plug from wall outlet.
- Do not use appliance for other than intended use.
- The appliance is not intended to be operated by means of an external timer or separate remote-control system.
- The cool-touch handle is designed to remain cool during operation.
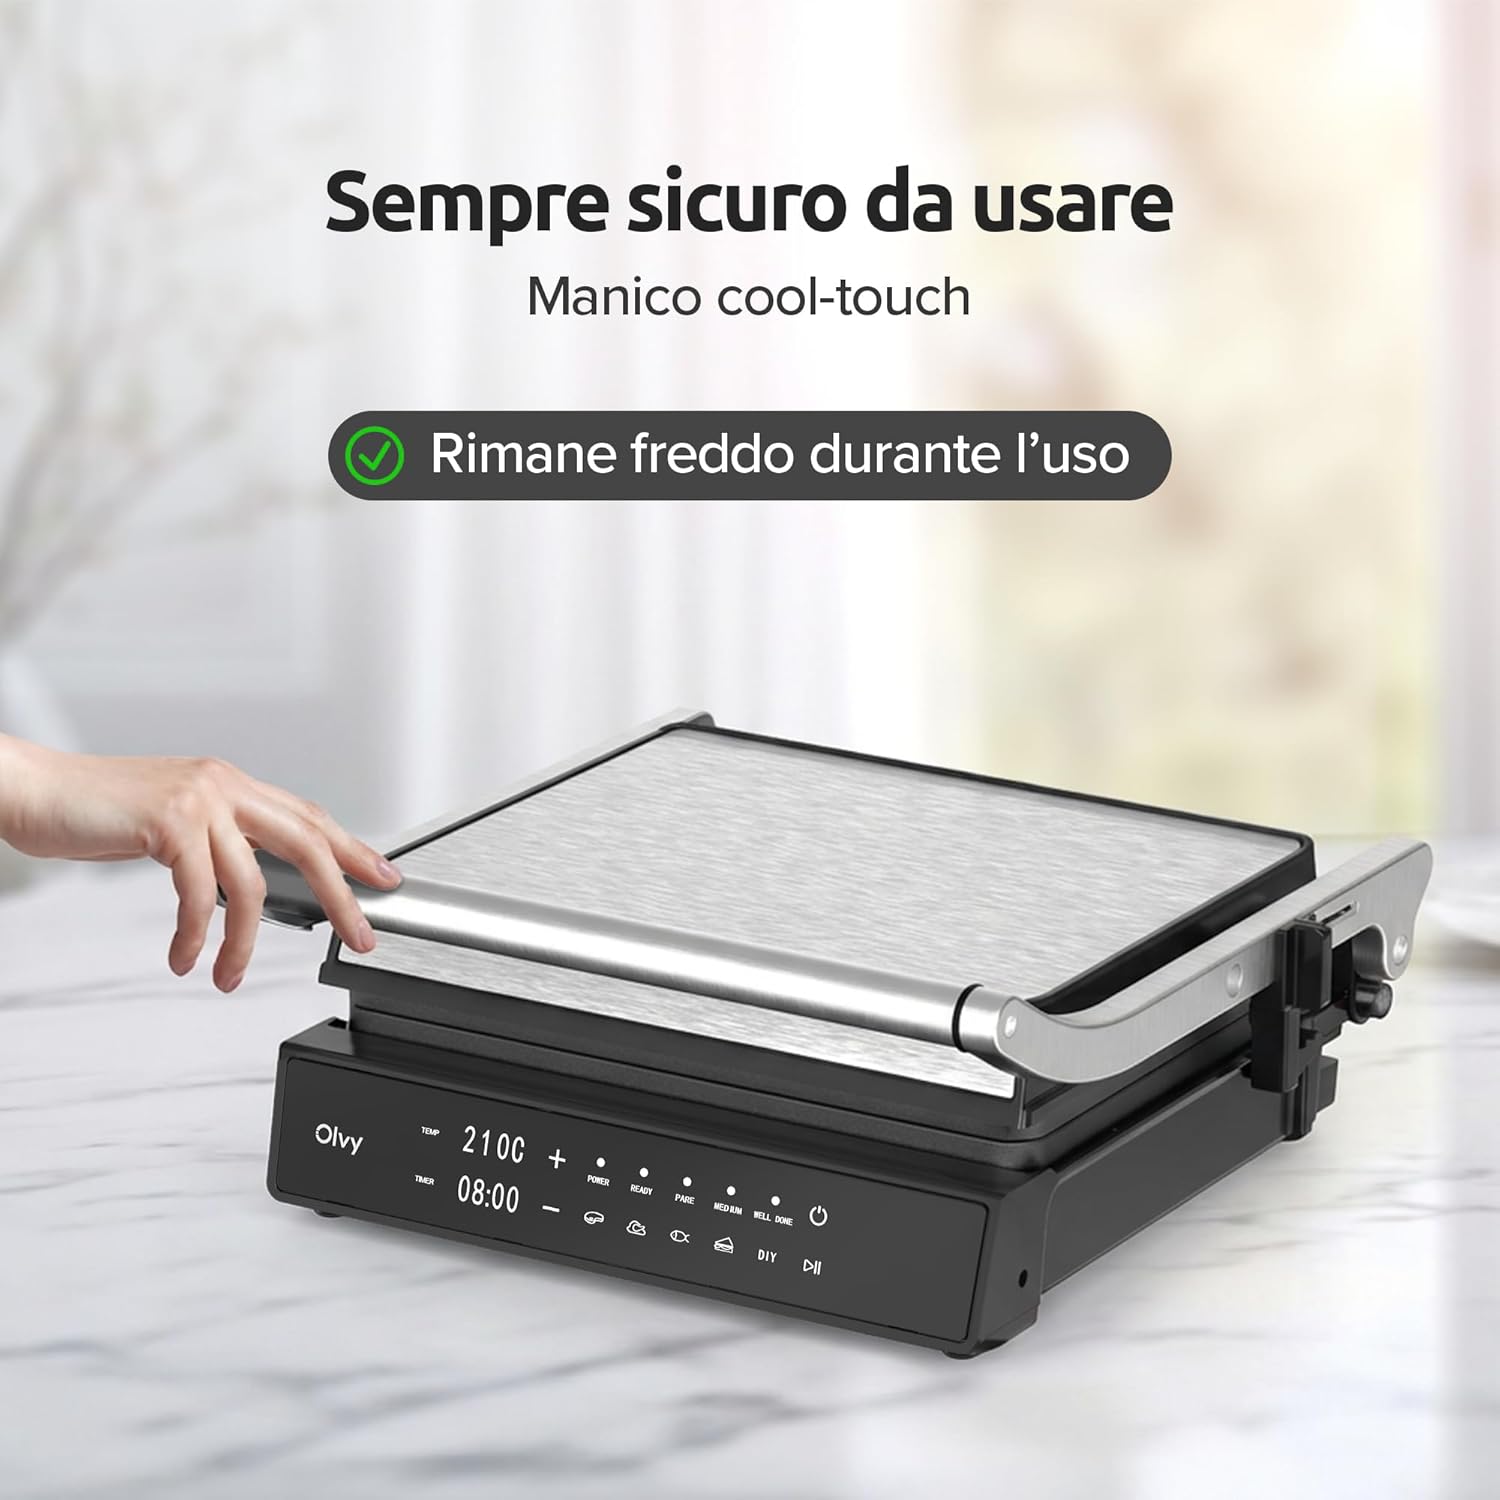
Image: A hand demonstrating the cool-touch handle feature of the Olvy Contact Grill, ensuring safe operation.
2. Product Overview
The Olvy 2000W Contact Grill is designed for versatile and efficient cooking. It features PFAS-free ceramic non-stick plates, 5 automatic cooking programs, and a 180° opening function.
Components:
- Upper Grill Plate
- Lower Grill Plate
- Control Panel with LED Display
- Cool-Touch Handle
- Drip Tray
- Power Cord

Image: The Olvy Contact Grill cooking sandwiches, showcasing its PFAS-free ceramic non-stick plates.

Image: A detailed view of the intelligent LED display and touch controls on the Olvy Contact Grill.
3. Setup
- Unpack: Carefully remove the grill and all accessories from the packaging.
- Initial Cleaning: Before first use, wipe the grill plates and exterior with a damp cloth. Ensure all parts are completely dry.
- Placement: Place the grill on a flat, stable, and heat-resistant surface, away from walls and flammable materials. Ensure adequate ventilation.
- Drip Tray: Insert the drip tray into its designated slot at the front of the grill.
- Power Connection: Plug the power cord into a grounded electrical outlet. The display will illuminate.
4. Operating Instructions
4.1 Preheating the Grill
- Close the grill plates.
- Press the power button to turn on the appliance.
- Select your desired cooking program or set the temperature manually.
- Allow the grill to preheat. The "READY" indicator light will illuminate when the grill has reached the set temperature.
4.2 Using Automatic Programs
The grill features 5 automatic programs designed for specific food types, optimizing temperature and cooking time.
- Steak: For grilling beef steaks to various doneness levels.
- Sandwich: Ideal for toasted sandwiches and paninis.
- Chicken: For grilling chicken pieces or fillets.
- Barbecue: Suitable for various BBQ items.
- Fish: For grilling fish fillets or whole fish.
- After preheating, place your food on the lower grill plate.
- Close the upper grill plate.
- Press the corresponding program button on the control panel. The grill will automatically adjust temperature and time.
- An audible signal will indicate when cooking is complete.

Image: The control panel of the Olvy Contact Grill showing the 5 automatic programs for different food types.
4.3 Manual Mode (DIY)
For custom cooking, use the manual mode to set your desired temperature and timer.
- After preheating, press the "DIY" button.
- Use the temperature control buttons (+/-) to adjust the temperature.
- Use the timer control buttons (+/-) to set the cooking duration.
- Place your food on the lower grill plate and close the upper plate.
- The grill will start cooking according to your settings.

Image: A hand interacting with the digital timer and temperature controls on the Olvy Contact Grill.
4.4 180° Open Grill Function
The grill can be fully opened to a 180° flat position, providing a larger cooking surface for grilling multiple items simultaneously.
- Ensure the grill is powered on and preheated.
- Carefully push the release button located on the side of the grill.
- Gently open the upper grill plate until it lies flat, creating two parallel cooking surfaces.
- Place food on both surfaces as desired.
- When finished, carefully close the grill by lifting the upper plate and locking it back into position.

Image: The Olvy Contact Grill demonstrating its 180-degree opening feature, allowing use as a full flat grill.
4.5 Cooking Tips
- For best results, always preheat the grill before adding food.
- Lightly brush food with oil to prevent sticking and enhance flavor.
- Avoid overcrowding the grill plates to ensure even cooking.
- Use a meat thermometer to check internal temperatures for doneness, especially for poultry and pork.

Image: Examples of grilled steaks showing different levels of doneness: rare, medium, and well-done.
5. Cleaning and Maintenance
Regular cleaning ensures optimal performance and extends the life of your Olvy Contact Grill.
- Unplug and Cool: Always unplug the grill from the power outlet and allow it to cool completely before cleaning.
- Remove Grill Plates: Press the release buttons on the side of the grill to detach the upper and lower grill plates.
- Clean Grill Plates: The removable grill plates are dishwasher safe. Alternatively, wash them by hand with warm, soapy water and a non-abrasive sponge. Rinse thoroughly and dry completely.
- Empty Drip Tray: Remove the drip tray and discard any collected fats or juices. Wash the drip tray with warm, soapy water, rinse, and dry.
- Clean Exterior: Wipe the exterior of the grill body with a damp cloth. Do not use abrasive cleaners or immerse the main unit in water.
- Storage: Once clean and dry, reattach the grill plates and store the appliance in a dry place.

Image: A user demonstrating the removal of a grill plate for easy cleaning.

Image: A hand removing the integrated drip tray for easy emptying and cleaning.
6. Troubleshooting
| Problem | Possible Cause | Solution |
|---|---|---|
| Grill does not turn on. | Not plugged in; power outlet malfunction; appliance malfunction. | Ensure the power cord is securely plugged into a working outlet. Check the circuit breaker. If the issue persists, contact customer support. |
| Food sticks to grill plates. | Plates not properly cleaned; insufficient oil; food type. | Ensure plates are clean and dry before use. Lightly brush food or plates with cooking oil. Ensure the grill is preheated. |
| Grill not heating properly. | Incorrect temperature setting; preheating not complete. | Verify the temperature setting. Wait for the "READY" indicator light to illuminate before placing food. |
| Smoke coming from the grill. | Excess fat/oil; food residue on plates. | Ensure the drip tray is empty. Clean grill plates thoroughly after each use. Use less oil if possible. |
7. Specifications
| Model Number: | JPM-168A |
| Brand: | Olvy |
| Power: | 2000 Watts |
| Material: | Stainless Steel (exterior), PFAS-Free Ceramic (plates) |
| Color: | Black |
| Dimensions (DxWxH): | 17.5 cm x 36.5 cm x 36.5 cm |
| Special Features: | 180° Opening, Cool Touch Handle, Programmable, Removable Surfaces, Digital Timer, Adjustable Thermostat |
| Number of Programs: | 5 Automatic Programs |

Image: The Olvy Contact Grill displaying its cooking surface dimensions and product packaging.
8. Warranty and Support
For warranty information and customer support, please refer to the warranty card included with your product or visit the official Olvy website.
Manufacturer: Olvy
Country of Origin: China


