
1. Introduction
Thank you for choosing the LPQVIATAS 9000W Peak Dual Motor Full Suspension Electric Fat Tire Bike. This manual provides essential information for the safe assembly, operation, and maintenance of your new electric bicycle. Please read it thoroughly before your first ride and keep it for future reference.
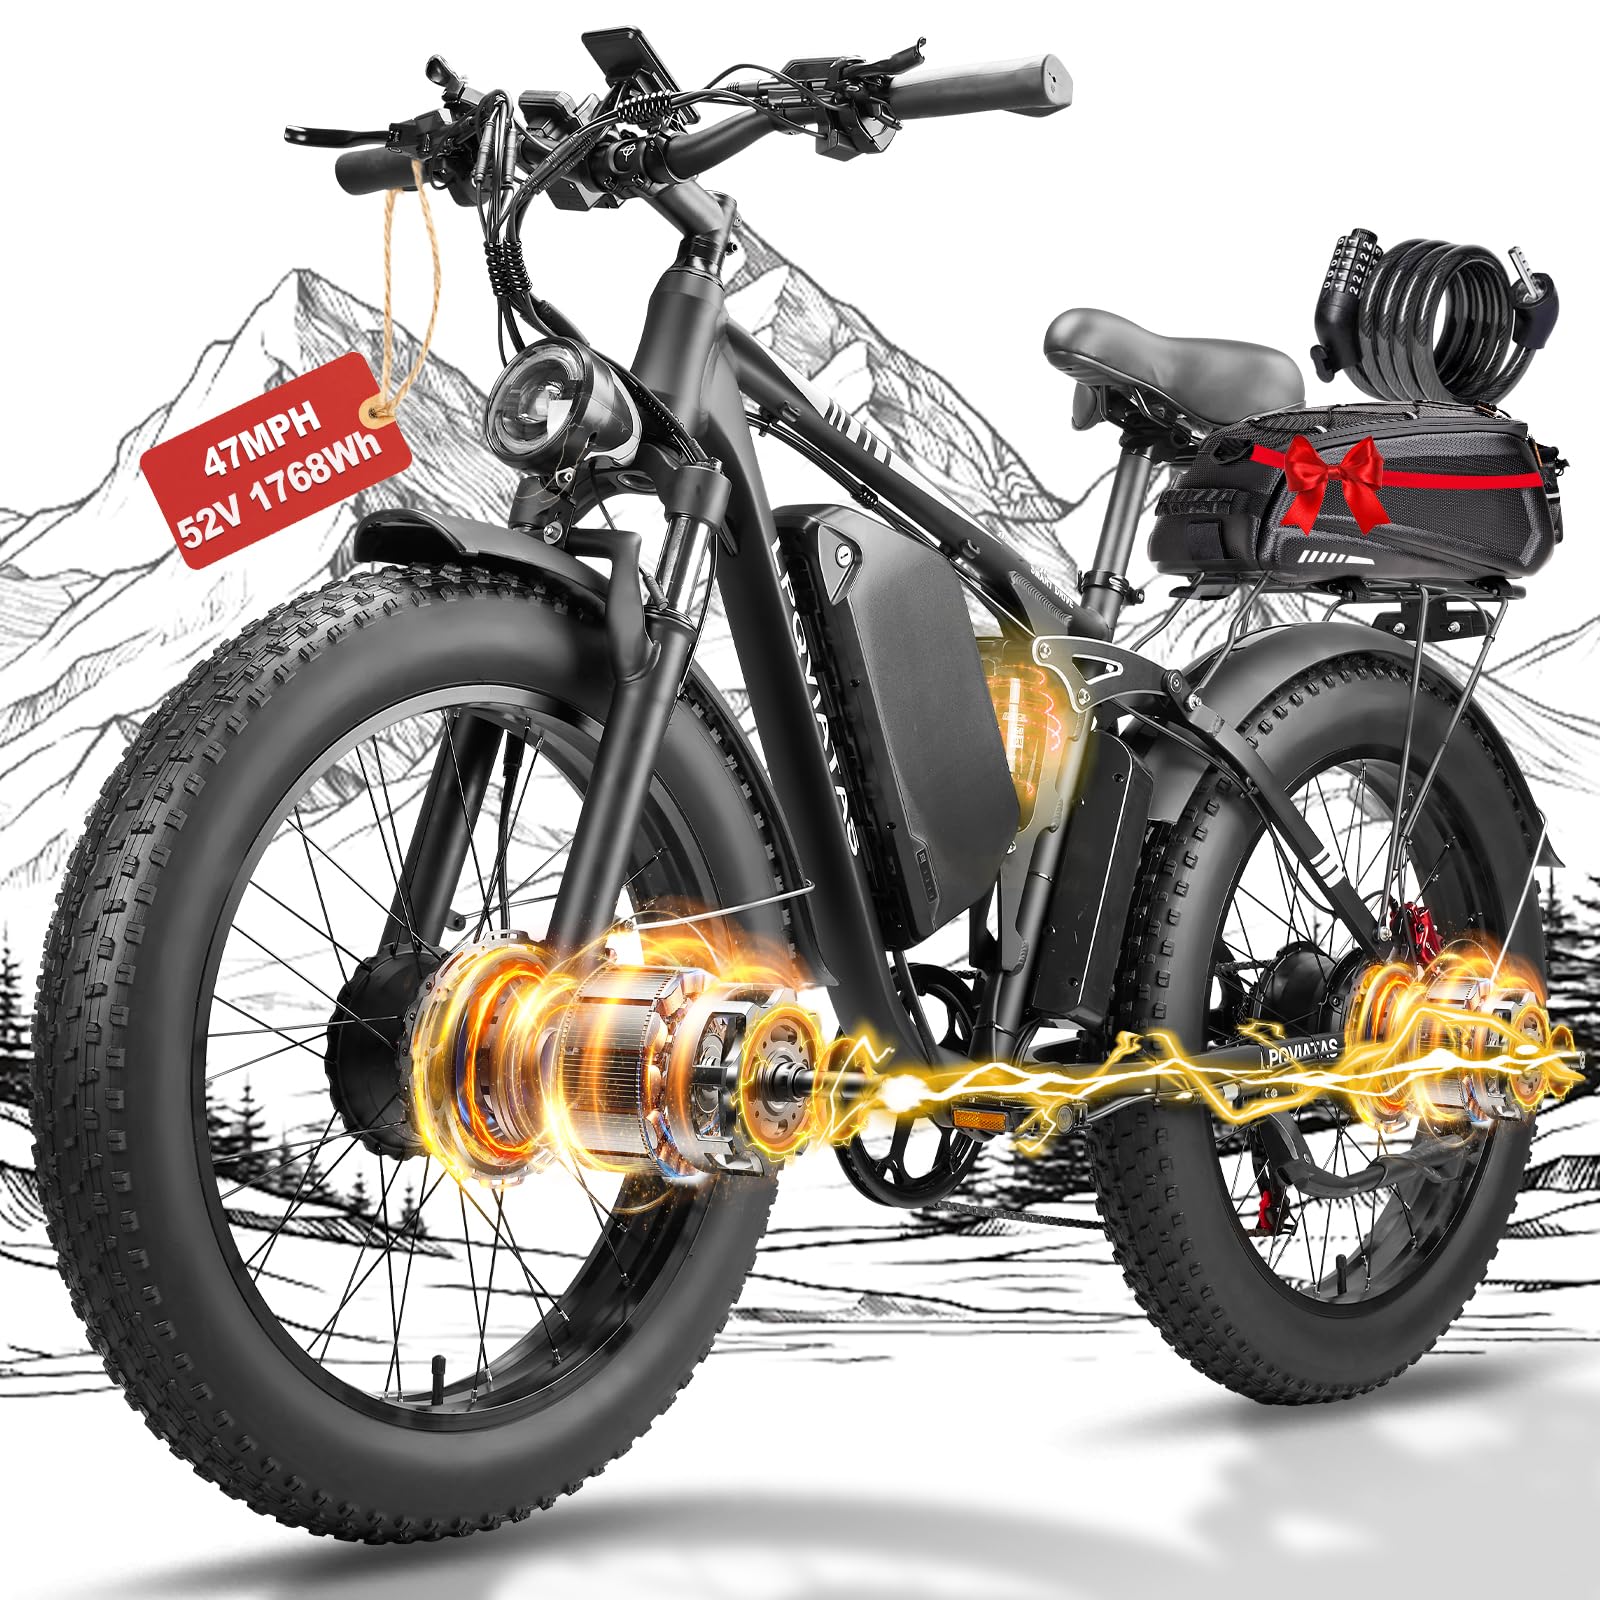
Image: The LPQVIATAS 9000W Peak Dual Motor Full Suspension Electric Fat Tire Bike, showcasing its robust design and fat tires.
2. Safety Information
Your safety is paramount. Always wear a helmet and appropriate safety gear when riding. Be aware of local traffic laws and regulations. Regular maintenance is crucial for safe operation.
- Always perform a pre-ride inspection, checking brakes, tires, battery, and lights.
- Do not ride under the influence of alcohol or drugs.
- Be cautious in wet conditions, as braking distance may increase.
- Ensure the battery is securely locked before riding.
- Familiarize yourself with all controls before operating the e-bike.
This product contains chemicals known to the State of California to cause cancer and birth defects or other reproductive harm (Proposition 65 warning).
3. What's in the Box
Upon unpacking, ensure all components are present:
- LPQVIATAS Electric Fat Tire Bike (main frame with rear wheel and motor)
- Front Wheel with Motor
- 52V 34Ah Lithium Battery
- Battery Charger
- Front Fender
- Rear Rack
- Headlight
- Horn
- Kickstand
- Tool Kit
- Adjustable Saddle
- Phone Holder
- Tail Light (Rechargeable)
- Owner's Manual

Image: All components of the LPQVIATAS Electric Fat Tire Bike laid out after unboxing, including the main frame, wheels, battery, and accessories.
4. Assembly Instructions
Follow these steps carefully to assemble your LPQVIATAS Electric Fat Tire Bike. Refer to the accompanying video for visual guidance on all steps.
Video: Comprehensive guide on how to install the dual motor e-bike, covering all assembly steps.
4.1. Unboxing and Initial Setup (Video: 0:00 - 0:21)
Carefully open the packaging and remove all components. Ensure no parts are damaged during transit.
4.2. Install Handlebar (Video: 0:21 - 0:45)
- Remove the four screws from the handlebar stem.
- Place the handlebar into the stem.
- Tighten the four screws to secure the handlebar.
- Adjust the handlebar to your preferred riding position and tighten the screws to fix its position.
4.3. Install Front Wheel (Video: 0:45 - 1:49)
- Remove the protection and bolts from the front fork.
- Remove the red protective tabs from the forks.
- Remove the black washers and bolts from both sides of the front wheel axle.
- Leave one silver washer on the left side of the axle.
- Place two silver washers on the right side of the axle.
- Lift the wheel and carefully insert the disc rotor into the caliper assembly, then align the axle with the fork dropouts.
- Tighten the three screws and bolts on both the right and left sides of the axle.
- Plug in the power cord for the front drive, ensuring the arrow directions align.
4.4. Install Front Fenders and Headlights (Video: 1:49 - 2:44)
- Remove the pre-installed silver washers, nuts, and bolts from the front fork.
- Install and secure the headlights and fenders using the silver washers, nuts, and bolts.
- Attach the bracket of the fenders to both sides of the front fork.
- Connect the headlight cable, aligning the arrow directions.
4.5. Install Phone Holder (Video: 2:44 - 3:02)
- Loosen the screws on the phone holder, fasten it to the handlebars, and then tighten the screws.
- Connect the phone holder charging cable, aligning the arrow directions.
4.6. Install Pedals (Video: 3:02 - 3:13)
- Identify the "L" (left) and "R" (right) pedals.
- Install the "L" pedal by rotating it according to the direction of the arrow (counter-clockwise).
- Install the "R" pedal by rotating it according to the direction of the arrow (clockwise).
4.7. Install Rear Rack (Video: 3:13 - 3:30)
- Remove the pre-installed nuts and bolts from the rear wheel area. Be careful not to lose any bolts or washers.
- Align the rear rack with the rear wheels and secure it correctly.
- Use the previously removed screws to secure the rear rack.
4.8. Install Battery (Video: 3:30 - 3:41)
- Place the battery safely onto the battery base on the bike frame.
- Remove the two battery keys from the handlebars.
- Turn the key in a clockwise direction to lock the battery and prevent it from falling out.
- Connect the battery charger. When fully charged, the indicator light turns green.
4.9. Install Driving Light and Tail Light (Video: 4:06 - 4:31)
- Install the two screws behind the driving light onto the rear rack.
- Connect the driving light cable according to the direction of the arrow.
- Install the tail light under the saddle. Gently press the bottom of the light to change the light mode.

Image: The LPQVIATAS Electric Fat Tire Bike featuring its safety lighting system, including a bright headlight, brake light, and tail light for enhanced visibility.
5. Operating Instructions
5.1. Turning On the Power and Display Settings (Video: 3:41 - 4:06)
- Press the button on the battery to "-".
- Long press the power button on the handlebars to turn on the LCD display.
- Press together "+" and "-" to enter the parameter changing state.
- Press together "+" and "-" to select the parameter.
- Press "i" to save the setting and return to the personalized setting.
- Press "+/-" to select the electric or pedal assist or both pedal and electric mode, and press "i" to save the setting.
The e-bike has five speed levels: 18/24/28/34/38 mph. Please note: The top speed depends on the battery charge, road conditions, and rider weight.
Video: Demonstrates the full performance and maximum speed capabilities of the e-bike.
Video: Shows the maximum speed without load, brake light, and tail light functionality.
5.2. Riding Modes
Your e-bike offers 6 distinct riding modes:
- Walk Mode: Push with ease.
- PAS Mode: Pedal Assist System with 5 levels of assistance.
- Dual Motor Pure Electric: Utilizes both motors for maximum power.
- Single Motor Pure Electric: Uses one motor for efficient electric propulsion.
- Bike Mode: Traditional cycling for exercise.
- Manual Mode: Shimano 7-speed gear system for unassisted riding.

Image: Visual representation of the six riding modes available on the LPQVIATAS Electric Fat Tire Bike.
5.3. Suspension System
The e-bike features a full suspension system for enhanced comfort and control:
- Lockable Double Shoulder Front Suspension: Absorbs bumps on rough terrain. Can be locked for smoother surfaces.
- Rear Suspension: Further reduces shock, providing a smoother ride.
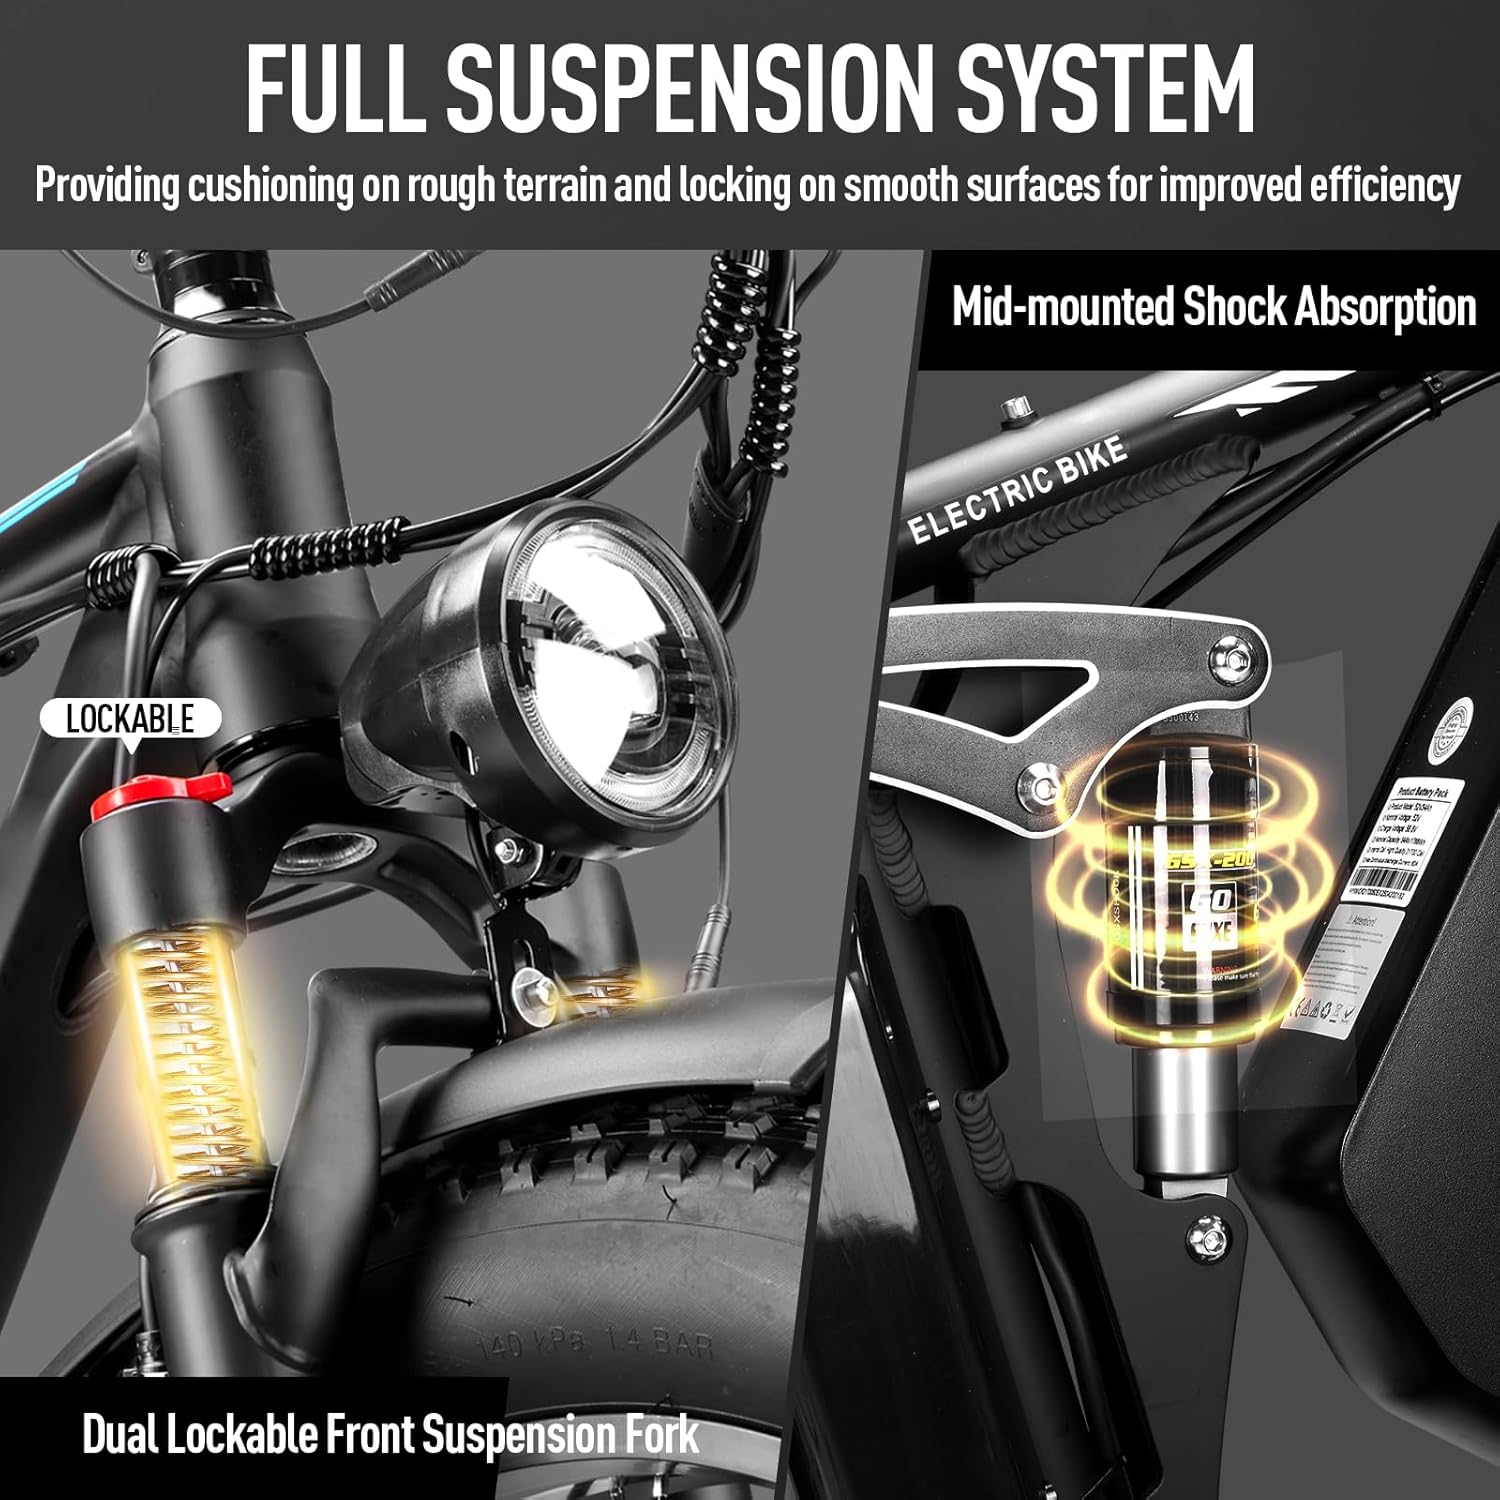
Image: Close-up view of the full suspension system, highlighting the lockable front fork and mid-mounted rear shock absorber.
5.4. Braking System
The e-bike is equipped with dual hydraulic disc brakes for reliable stopping power in various conditions.
- 4-Piston Disc Hydraulic Brakes: Provide strong and safe braking.
- Larger Brake Pads and Rotors: Contribute to longer lifespan and all-weather suitability.
6. Maintenance
Regular maintenance ensures the longevity and safe operation of your e-bike.
- Battery Care: Charge the 52V 34Ah lithium battery regularly. Avoid fully discharging it. Store in a cool, dry place. Charging time is typically 6-9 hours.
- Tire Pressure: Maintain appropriate tire pressure for the 24"x4.0" fat tires. Refer to the tire sidewall for recommended pressure.
- Brakes: Periodically check brake pads for wear and ensure hydraulic fluid levels are adequate. Adjust as needed.
- Chain: Keep the chain clean and lubricated for smooth gear changes and to prevent rust.
- Fasteners: Regularly check all bolts and screws for tightness, especially after the first few rides.
- Cleaning: Clean the e-bike with a damp cloth. Avoid high-pressure washing directly on electrical components.
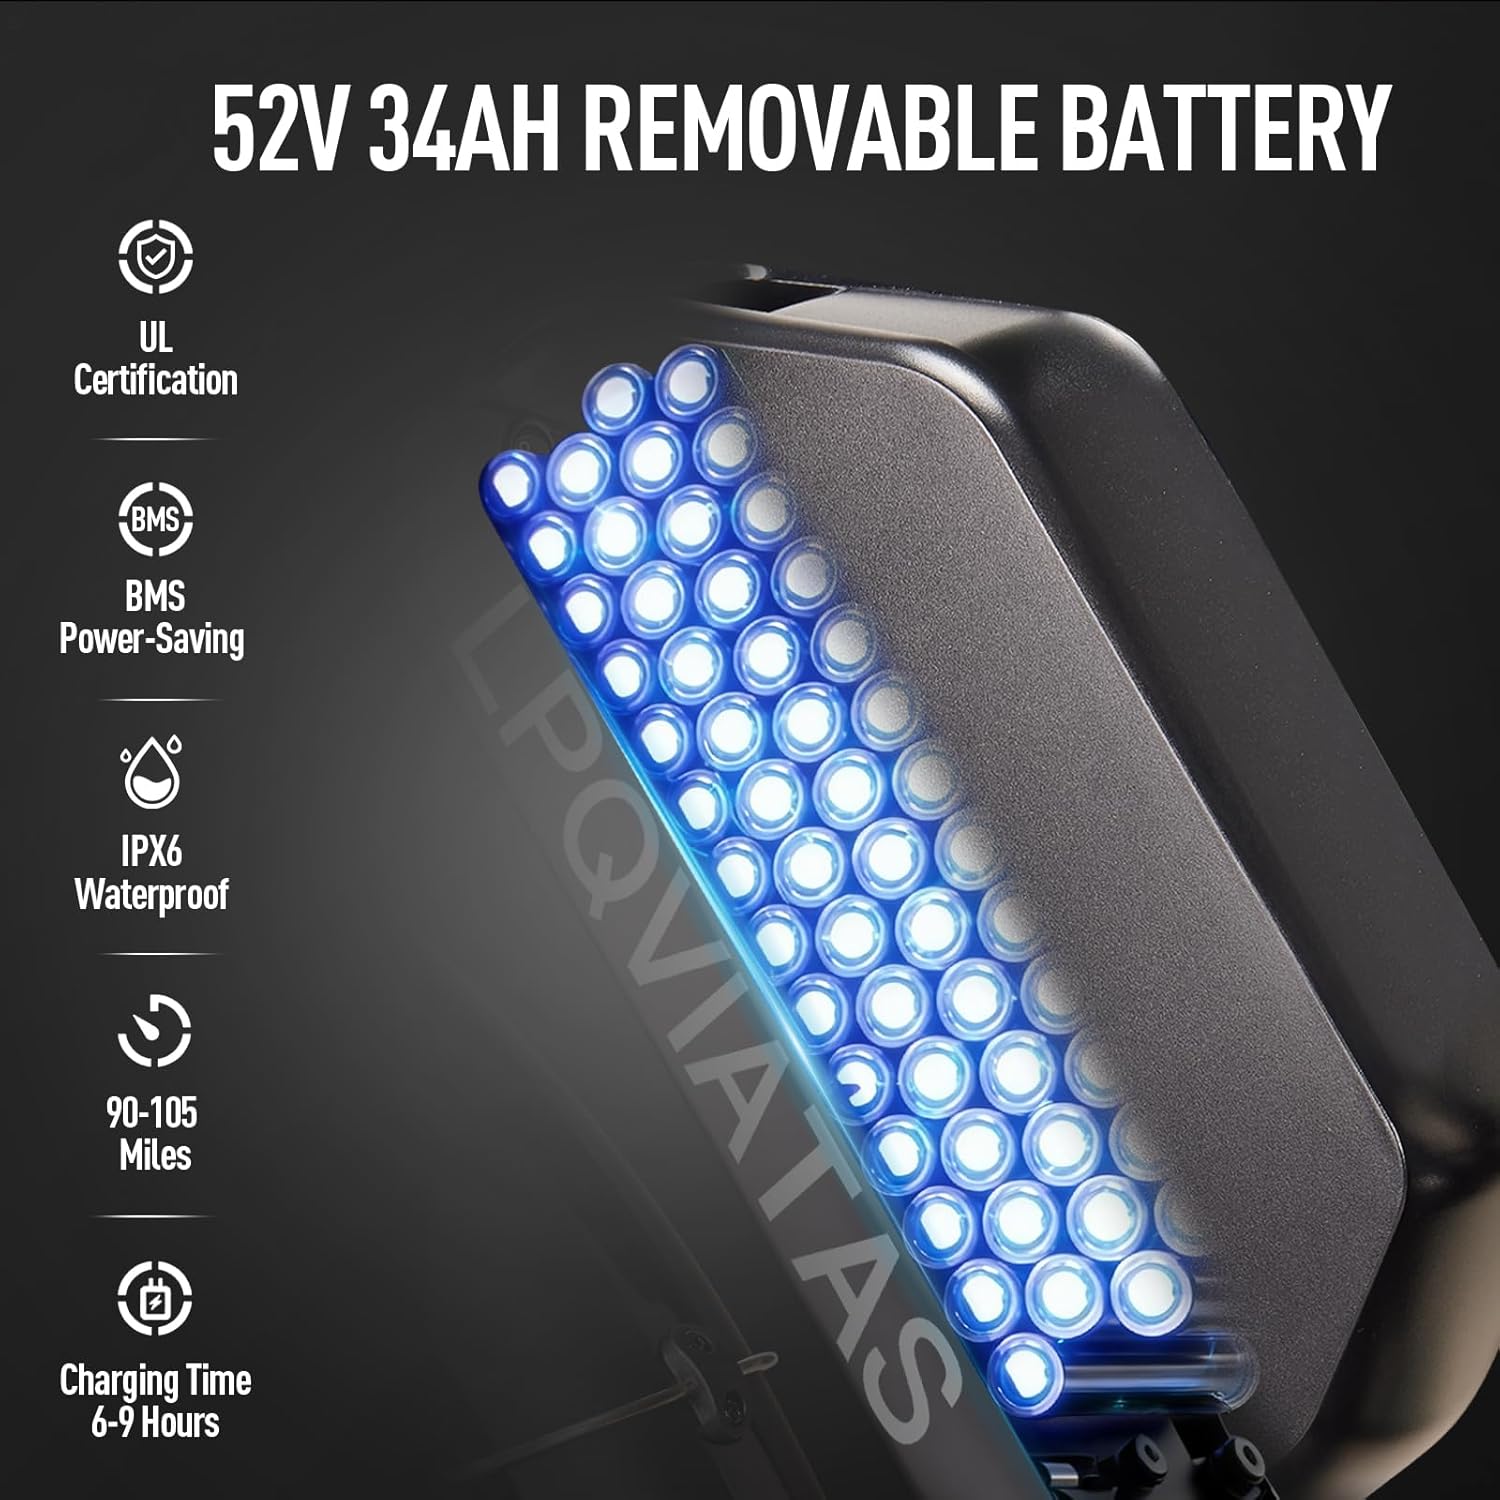
Image: The 52V 34Ah removable lithium battery, highlighting its UL certification, BMS power-saving features, IPX6 waterproof rating, and range capabilities.
7. Troubleshooting
This section addresses common issues you might encounter with your e-bike.
| Problem | Possible Cause | Solution |
|---|---|---|
| E-bike does not power on | Battery not charged or not properly installed/locked. | Ensure battery is charged and securely locked into the frame. Check battery connection. |
| Motor not assisting | PAS level set to 0, motor cable disconnected, or sensor issue. | Increase PAS level on the display. Check all motor cable connections. Consult customer support if issue persists. |
| Brakes feel weak | Worn brake pads, air in hydraulic lines, or misaligned calipers. | Inspect brake pads and replace if worn. Bleed hydraulic lines if necessary (professional service recommended). Adjust caliper alignment. |
| Unusual noises during ride | Loose components, dry chain, or issues with gears/derailleur. | Check all bolts and fasteners. Lubricate the chain. Inspect gears and derailleur for damage or misalignment. |
For issues not covered here, please contact LPQVIATAS customer support.
8. Specifications
| Feature | Detail |
|---|---|
| Bike Type | Electric Bike |
| Age Range (Description) | Adult |
| Brand | LPQVIATAS |
| Number of Speeds | 7 |
| Color | Black |
| Wheel Size | 24 Inches |
| Frame Material | Aluminum |
| Suspension Type | Dual |
| Special Feature | Disc, LCD-Display, Rechargeable, Waterproof, wheels |
| Included Components | Cargo Rack, Horn, Kickstand, Tool Kit, adjustable saddle |
| Additional Features | Disc, LCD-Display, Rechargeable, Waterproof, wheels |
| Brake Style | Disc |
| Specific Uses For Product | Snow |
| Power Source | Powered |
| Lithium Battery Energy Content | 1768 Watt Hours (52V 34Ah) |
| Bicycle Gear Shifter Type | Twist Grip |
| Derailleur Configuration | Rear |
| Bicycle Drivetrain Type | electric |
| Electric Assist Type | dual motor |
| Battery Life (PAS Mode) | Up to 90-105 miles |
| Battery Life (Pure Electric) | Up to 37 miles |
| Size | 24 Inch |
| Wheel Width | 4 Inches |
| Item Weight | 38.8 Kilograms |
| Model Name | 8000W-Peak-Dual-Motor-Ebike |
| Manufacturer | LPQVIATAS |
| Frame Material Type | Aluminum |
| Wheel Material | Rubber |
9. Warranty and Support
LPQVIATAS offers a 1-Year Warranty and Lifetime Technical Support for your e-bike. For any questions or assistance, please contact customer support.
- Customer Support Email: lpqviatas123@gmail.com
- Responses typically within 8 hours.
- Return Policy: 30-day easy returns.

Image: A customer service representative ready to assist with inquiries.