
1. Introduction
Thank you for choosing the IDEALHOUSE Cat Litter Box Enclosure. This furniture piece is designed to discreetly house your cat's litter box while offering additional functionality as a stylish cabinet with storage. It provides a private space for your cat and helps manage odors and litter tracking within your home. Please read this manual thoroughly before assembly and use to ensure proper setup and safe operation.
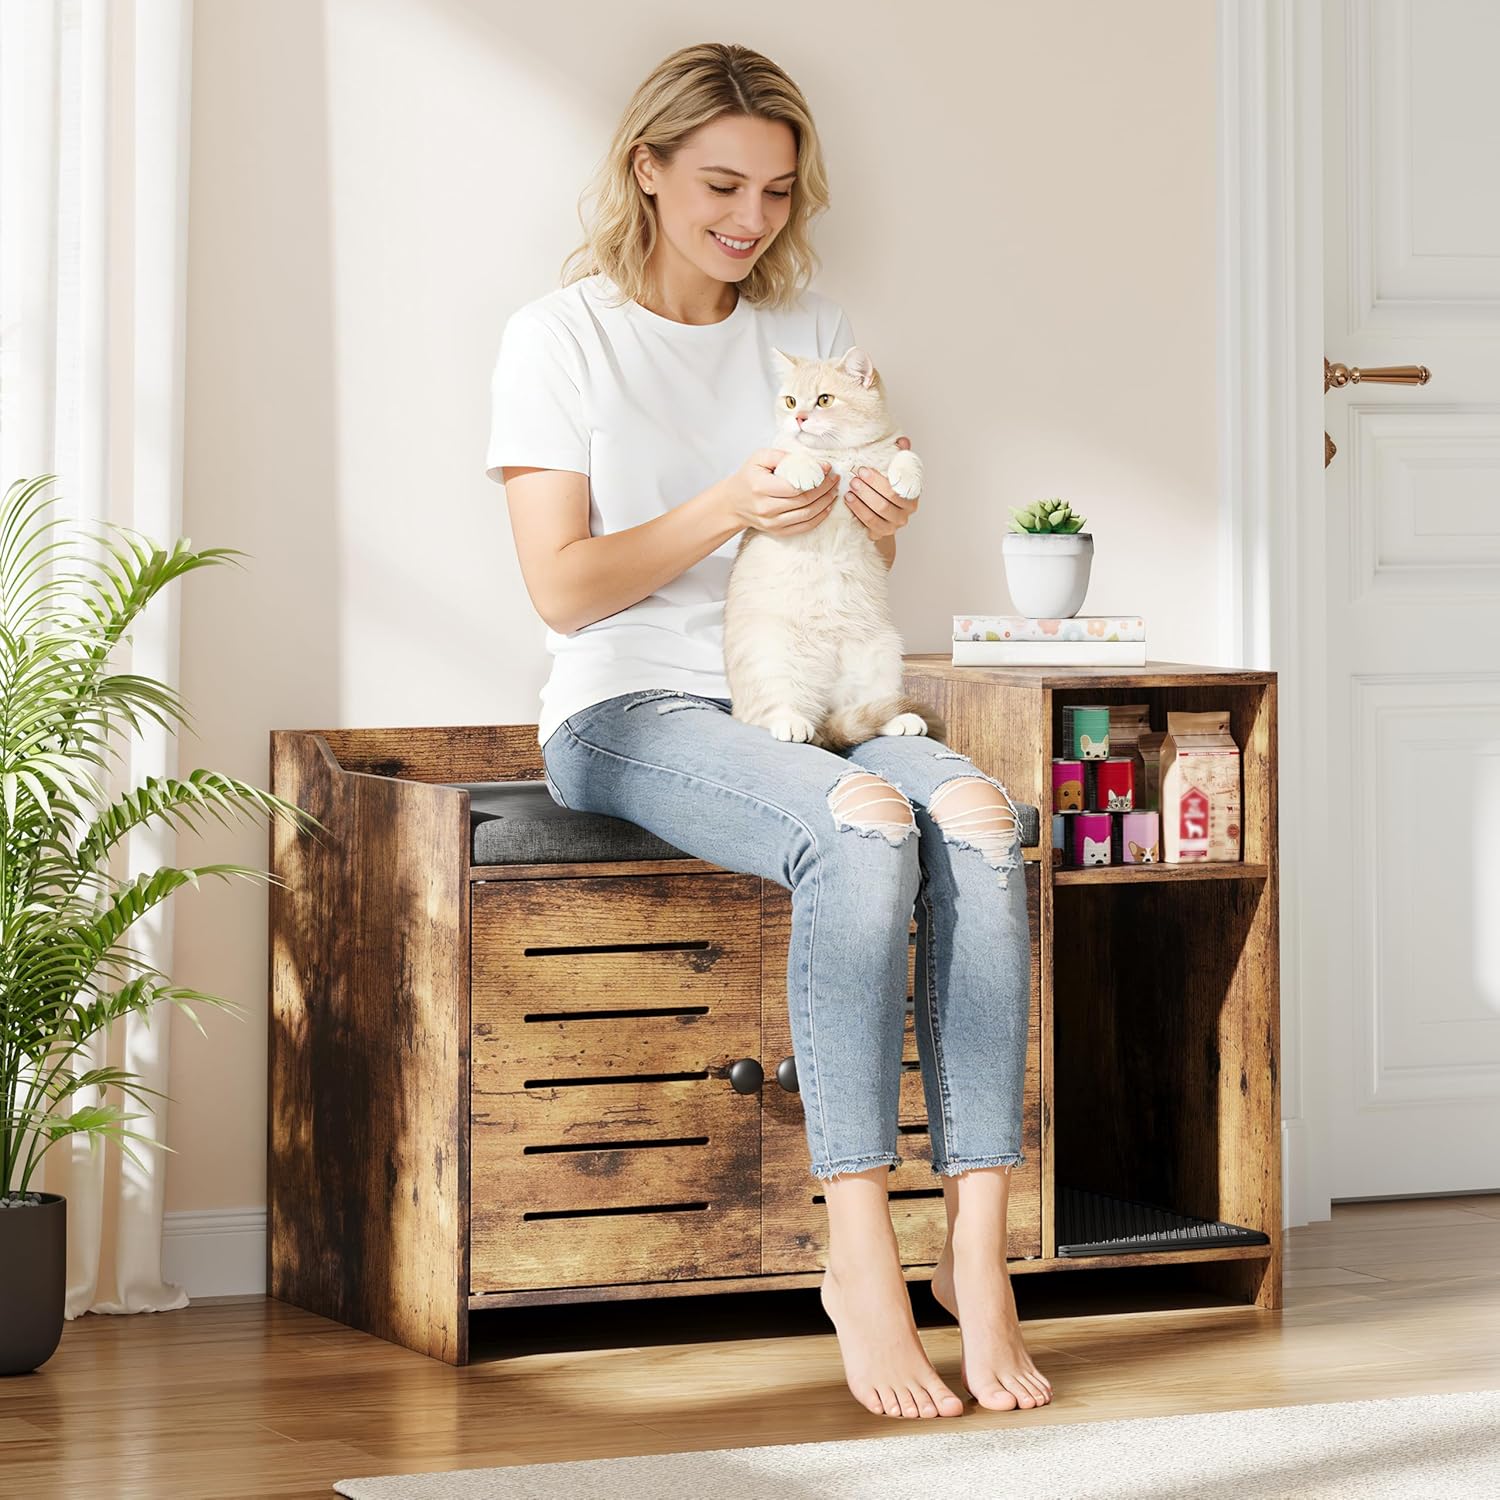
Image 1.1: The IDEALHOUSE Cat Litter Box Enclosure, showcasing its integration into a home environment.
2. Safety Information
- Keep all small parts and packaging materials away from children and pets during assembly to prevent choking hazards.
- Ensure all screws and fasteners are securely tightened before use. Periodically check for loose connections.
- Do not overload the top surface or storage compartments. Refer to the specifications for weight limits.
- Place the enclosure on a flat, stable surface to prevent tipping.
- This product is intended for indoor use only.
3. Package Contents
Please verify that all components are present before beginning assembly. If any parts are missing or damaged, please contact customer support.
- All necessary wooden panels for the enclosure structure.
- Hardware kit (screws, dowels, cam locks, hinges, door handles).
- Soft cushion for the top surface.
- Cat litter mat.
- Assembly instructions manual.
4. Assembly Instructions
Assembly typically requires two people for best results and can be completed quickly with the provided instructions and hardware.
- Unpack and Identify Parts: Carefully remove all components from the packaging. Lay them out on a clean, soft surface to prevent scratches. Identify each part using the provided parts list in the separate assembly guide.
- Assemble the Base: Attach the side panels to the bottom panel using the designated screws and dowels. Ensure proper alignment.
- Install Interior Dividers: Secure any interior divider panels or shelves as indicated in the assembly guide.
- Attach Back Panel: Fasten the back panel to the assembled structure.
- Assemble Doors: Attach hinges to the doors and then to the main cabinet frame. Install door handles.
- Place Cushion and Mat: Position the soft cushion on the top surface and the cat litter mat in the designated lower compartment.
- Final Check: Ensure all connections are tight and the enclosure is stable.

Image 4.1: Detailed dimensions and weight capacities for the enclosure.
5. Operating Instructions
5.1 Placing the Litter Box
Open the double doors of the main compartment. Place a standard-sized litter box inside. The enclosure is designed to accommodate various litter box sizes. Ensure there is enough space for your cat to comfortably enter, exit, and use the litter box.

Image 5.1: Examples of compatible litter box and cat bed sizes.
5.2 Utilizing the Scratch Pad and Storage
The built-in scratch pad at the entrance of the side compartment helps satisfy your cat's natural scratching instincts and reduces litter tracking. The open compartment and top surface provide space for storing pet supplies, toys, or decorative items.

Image 5.2: Detailed view of the cushion, storage, and litter mat.
5.3 Odor Control and Privacy
The enclosed design provides a private restroom for your cat. Ventilation holes assist in containing odors, contributing to a fresher home environment.

Image 5.3: Illustrating the benefit of contained litter compared to an open litter box.
6. Maintenance and Care
6.1 Cleaning the Enclosure
Regular cleaning of the enclosure is recommended to maintain hygiene. Wipe down surfaces with a damp cloth and mild cleaner. Avoid abrasive cleaners that may damage the finish.

Image 6.1: Easy access for litter box maintenance.
6.2 Litter Mat Care
The cat litter mat can be easily removed for cleaning. Shake off loose litter and wash with soap and water as needed. Ensure it is dry before placing it back in the enclosure.
6.3 Cushion Care
The cushion can be spot cleaned with a mild detergent. Allow it to air dry completely.
7. Troubleshooting
- Enclosure feels wobbly: Ensure all screws and fasteners are tightened. Check that the enclosure is on a level surface.
- Odor persists: Ensure the litter box is cleaned regularly. Consider using a higher quality litter or an odor-absorbing product within the enclosure.
- Cat not using the enclosure: Introduce your cat to the enclosure gradually. Place familiar items inside, such as a favorite toy or blanket. Ensure the litter box is clean and accessible.
8. Specifications
| Feature | Detail |
|---|---|
| Product Dimensions (L x W x H) | 27.56" x 22.44" x 7.68" |
| Item Weight | 59.5 Pounds |
| Brand | IDEALHOUSE |
| Model Number | 4OQ-NMHWRPVMIATBSHMYTC |
| Color | Vintage Brown |
| Material | Wood (implied from images/description) |
| Litter Box Type | Covered Litter Box (enclosure) |
| Additional Features | Waterproof (surface), Divider, Scratch Pad, Storage Layer, Cushion |
9. Warranty and Customer Support
For warranty information or assistance with your IDEALHOUSE Cat Litter Box Enclosure, please refer to the purchase documentation or contact the retailer where the product was purchased. For direct support, you may also visit the official IDEALHOUSE website or contact their customer service department.
Please have your model number (4OQ-NMHWRPVMIATBSHMYTC) and proof of purchase available when contacting support.