
1. Introduction
Thank you for choosing the MELLCOM Louvered Pergola. This manual provides essential information for the safe assembly, operation, and maintenance of your new outdoor shelter. Please read all instructions carefully before beginning assembly and retain this manual for future reference.
2. Safety Information
Always follow the manufacturer's instructions for assembly, installation, and use. Secure the shelter to a stable foundation to prevent tipping or movement. Be cautious when operating the louvered roofs, ensuring that children and pets are kept at a safe distance. Always inspect the shelter before use, and do not use if any components appear damaged or worn.
General Safety Precautions:
- Ensure all parts are present and undamaged before assembly.
- Wear appropriate safety gear (gloves, eye protection) during assembly.
- Do not attempt to assemble in strong winds or adverse weather conditions.
- Securely anchor the pergola to a solid surface using the provided expansion bolts.
- Keep children and pets away from the assembly area.
- Regularly check all bolts and connections for tightness.
3. Package Contents
Your MELLCOM Louvered Pergola is delivered in multiple boxes. Before starting assembly, unpack all components and verify against the parts list provided in your physical manual. Ensure all hardware and structural elements are accounted for and undamaged.

Image: All components of the pergola laid out for a pre-installation check, including posts, beams, louvers, and hardware.
4. Setup and Assembly
Assembly typically requires 2-4 hours with at least two people. Follow the steps below and refer to the installation video for visual guidance.
Required Tools:
- Power Drill
- Tape Measure
- Hammer
- Screwdriver
- Ladder
- Scissors
Assembly Steps:
- Pre-installation Parts Check: Unpack all boxes and identify each part. Verify against the parts list in your manual.
- Install the Base Posts: Attach the base plates to the bottom of each post using the provided screws. Ensure a secure connection.
- Install the Beams: Assemble the main beams by connecting the individual beam sections. Use the designated screws and ensure all connections are tight.
- Connect the Posts and Beams: Carefully lift and connect the assembled beams to the top of the posts. Secure all corner and mid-point connections with screws.
- Apply Waterproof Tape: Apply waterproof tape to cross beam grooves, avoiding screw holes, to prevent leaks. This is a critical step for water management.
- Install the Cross Beams: Attach the cross beams to the main frame, ensuring they are properly aligned and secured.
- Install the Louver Drive System: Assemble the louver drive mechanisms. These will allow you to adjust the louvers.
- Secure the Drive Mechanism: Attach the assembled drive mechanisms to the pergola frame.
- Install Louver Support Brackets: Secure the louver support brackets to the frame, which will hold the adjustable louvers in place.
- Install Adjustable Louvers: Place each adjustable louver into its designated position and secure it.
- Install Fixed Louvers: Install any fixed louver sections as per the manual.
- Install Anchor Stakes: Securely anchor the pergola to your patio or deck using the provided expansion bolts.
- Insert Hooks Into the Curtain Track: Slide the curtain hooks into the track along the perimeter of the pergola.
- Insert End Caps: Place end caps on the curtain tracks to prevent hooks from sliding out.
- Install Curtains and Mosquito Netting: Hang the pre-matched mesh and curtain panels onto the hooks. Unzip one side at a time to hang each panel in order.
Video: Official MELLCOM Louvered Pergola 10x20 Installation Guide. This video demonstrates the step-by-step assembly process, from unpacking to installing the louvers and curtains.

Image: Detailed dimensions of the 10x12ft MELLCOM Louvered Pergola, including height, length, and width measurements for the top, left, and right sections.

Image: A close-up view of the stable base stand, illustrating the pre-drilled holes designed to accept expansion screws for secure ground anchoring.
5. Operating Instructions
Adjusting the Louvered Roof:
The pergola features two independently controlled louvered roofs. Use the sturdy crank handles to adjust the louvers from 0 to 90 degrees. This allows you to effortlessly balance shade and openness, or achieve full closure for weather protection.
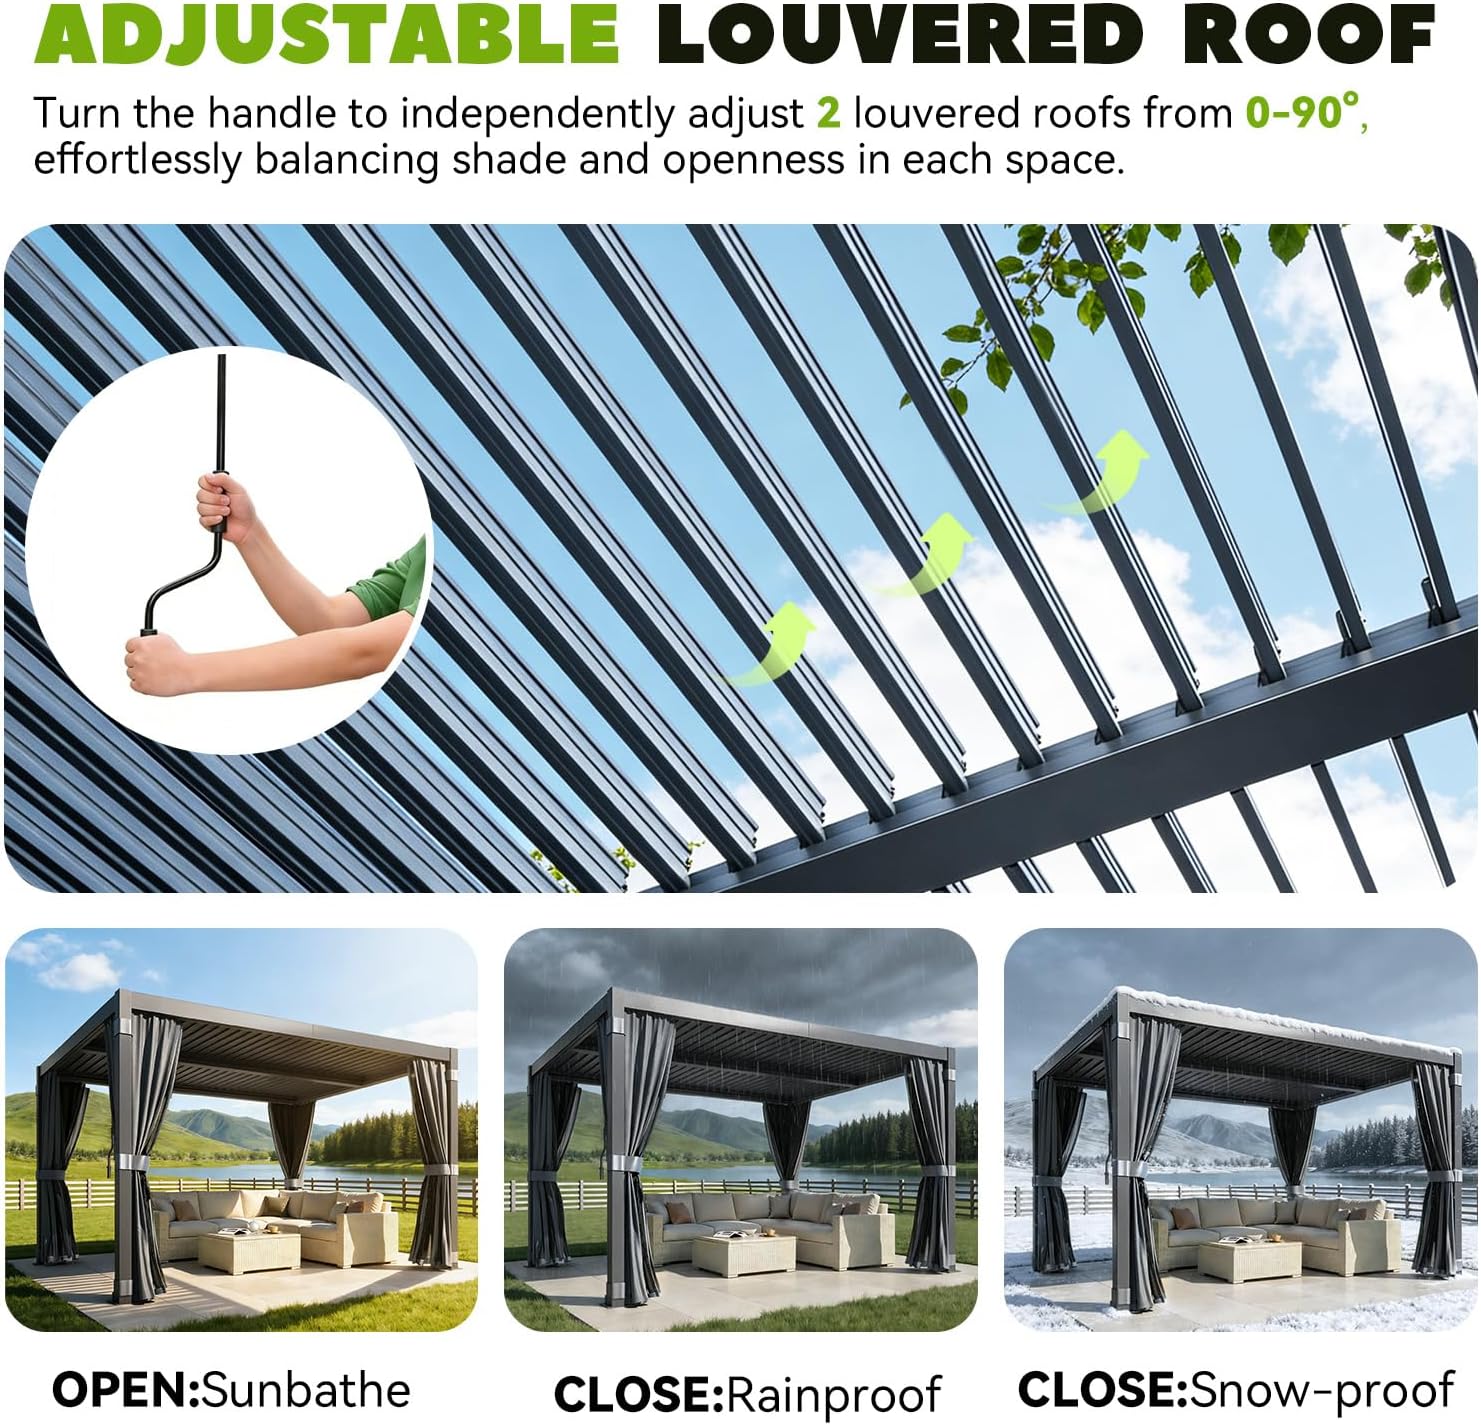
Image: The adjustable louvered roof system, demonstrating how the louvers can be opened for sunbathing, closed for rain protection, or partially adjusted for shade.

Image: A detachable handle used to manually adjust the louvers, providing precise control over light and airflow.
Using Curtains and Netting:
The detachable curtains and netting provide protection against insects and rain, while also offering privacy. The curtains and netting are fitted with reliable straps at the top, middle, and bottom near the posts to keep them firmly in place.
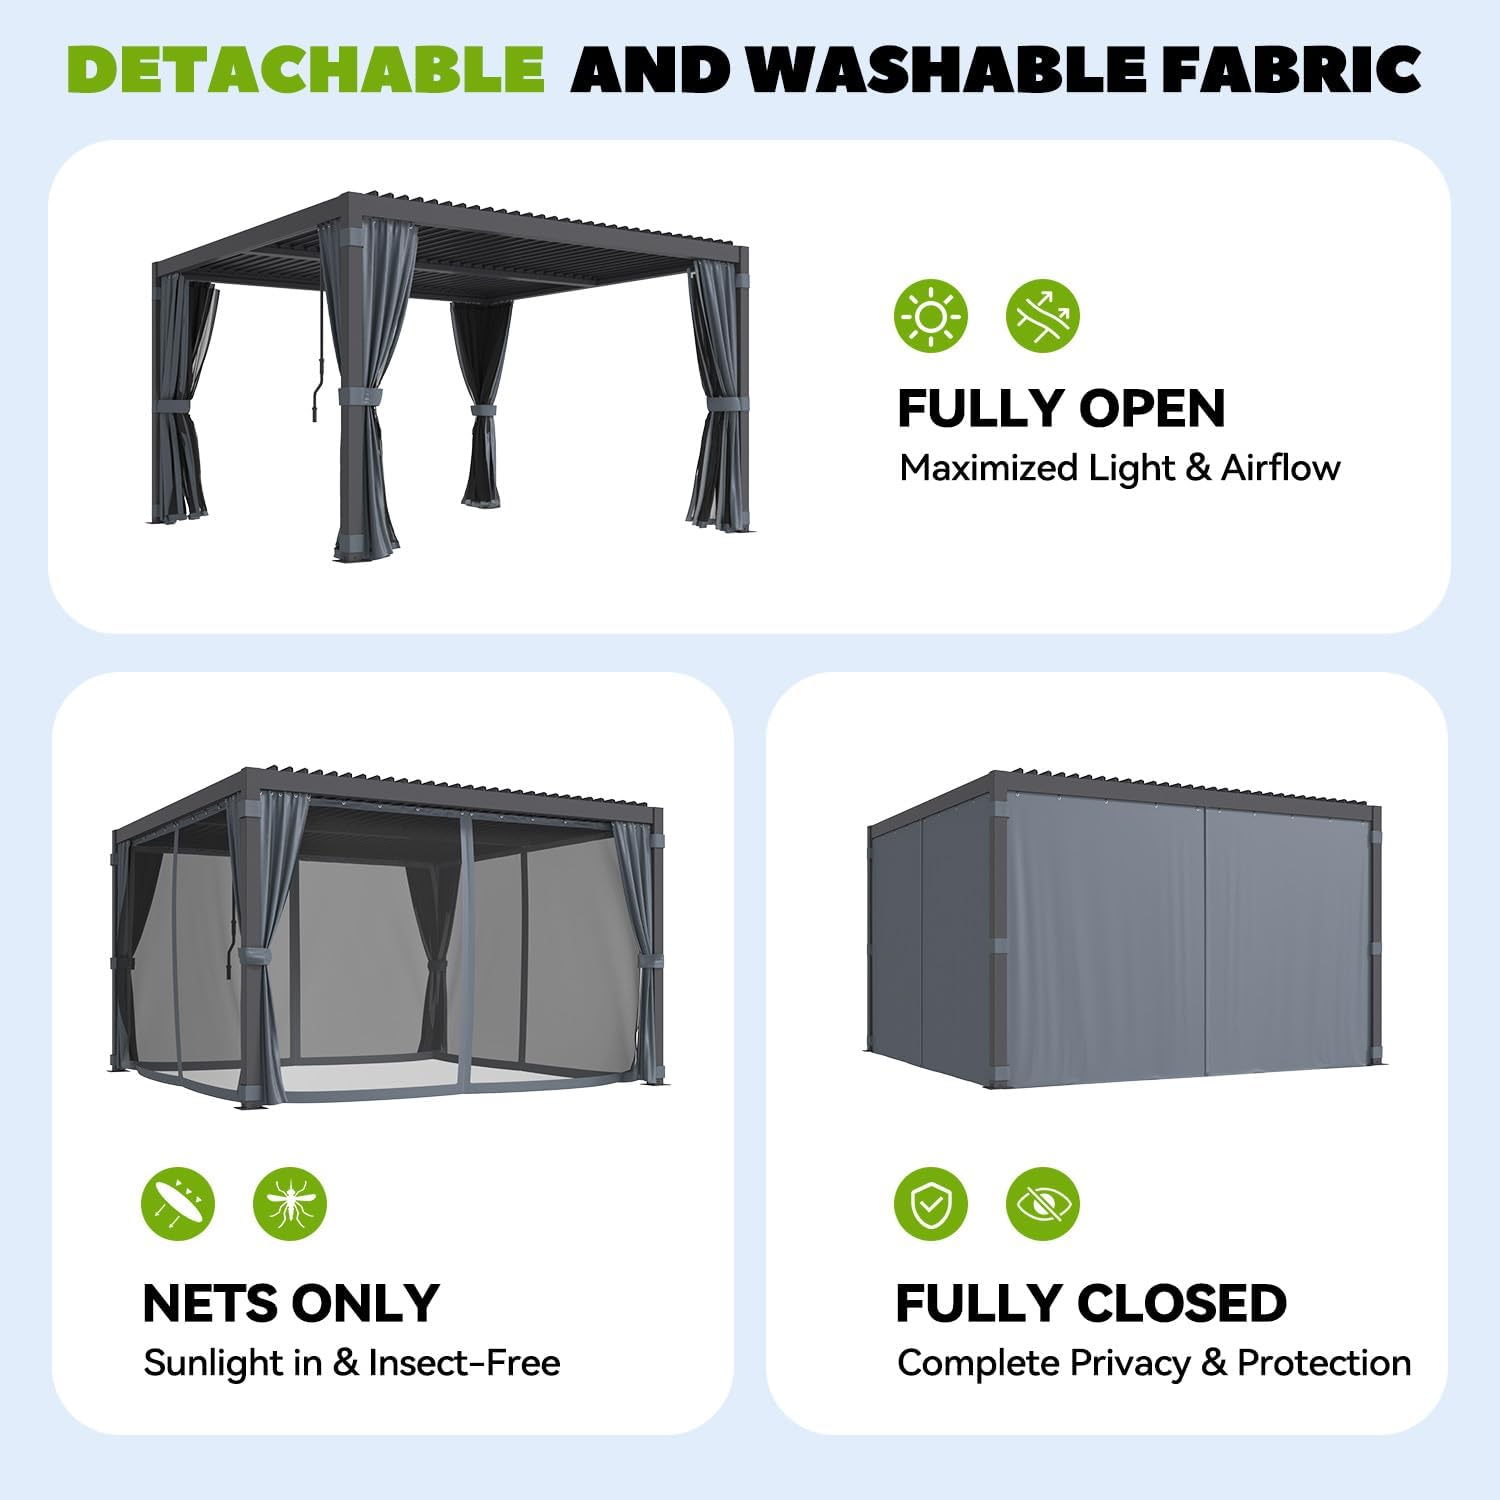
Image: The pergola showcasing its detachable curtains and netting, illustrating configurations for maximized light/airflow, insect protection, and complete privacy/weather protection.
6. Maintenance
To ensure the longevity and optimal performance of your MELLCOM Louvered Pergola, regular maintenance is recommended.
- Cleaning the Frame: Wipe the aluminum and steel frame with a soft cloth and mild soap and water. Avoid abrasive cleaners or harsh chemicals that could damage the powder coating.
- Cleaning Louvers: Periodically clean the louvers to prevent debris buildup that could affect their operation.
- Curtains and Netting: The fabric is detachable and washable. Follow care instructions on the fabric tags. Ensure they are completely dry before storing or reattaching to prevent mildew.
- Drainage System: Regularly check the integrated drainage system for blockages (leaves, dirt) to ensure efficient water runoff.
- Hardware Check: Annually inspect all screws, bolts, and connections for tightness. Tighten any loose fasteners to maintain structural integrity.
- Winter Care: In areas with heavy snowfall, it is recommended to keep the louvers open to prevent snow accumulation and potential damage to the roof structure.

Image: Features of the pergola's reinforced construction, highlighting watertight louvers, multi-layer protection, bolt-down anchor base, and convenient tie straps for curtains.
7. Troubleshooting
Common Issues and Solutions:
- Louvers are stiff or difficult to adjust:
Check for any obstructions in the louver mechanism. Ensure all screws in the drive system are properly tightened but not overtightened. Apply a silicone-based lubricant to moving parts if necessary. - Water leakage from the roof:
Verify that the louvers are fully closed. Inspect the waterproof tape applied during assembly at the beam joints. Reapply or reinforce tape if any gaps are visible. Check the internal drainage channels for blockages. - Curtains/Netting not sliding smoothly:
Ensure the curtain track is clean and free of debris. Check that all hooks are properly inserted and not bent. Apply a silicone spray to the track if needed. - Pergola feels unstable:
Re-check all frame connections and ensure all bolts are securely tightened. Verify that the anchor stakes are firmly secured to the ground or patio surface.

Image: A diagram detailing the integrated drainage system, showing how rainwater is channeled from the louvers, through the horizontal frame, down the support posts, and discharged at the base.

Image: A visual comparison highlighting the dual leak-proof gutter upgrade, featuring a widened and raised beam, waterproof tape, and cover caps for enhanced water sealing.
8. Specifications
| Feature | Detail |
|---|---|
| Brand | MELLCOM |
| Model | 10x12 Louvered Pergola |
| Material | Metal (Steel & Aluminum Frame) |
| Color | Dark Grey |
| Product Dimensions (L x W x H) | 143.2"L x 117"W x 88.2"H |
| Item Weight | 342.8 Pounds |
| Water Resistance Level | Waterproof |
| Ultraviolet Light Protection | 100% |
| Assembly Required | Yes |
| Floor Area | 120 Square Feet |
9. Warranty and Support
For any questions regarding assembly, missing parts, or product performance, please contact MELLCOM customer support directly. Refer to your purchase documentation for specific warranty details and contact information.
MELLCOM offers various protection plans for extended coverage. Please check your purchase options or contact the seller for more information on available plans.