
1. Product Overview
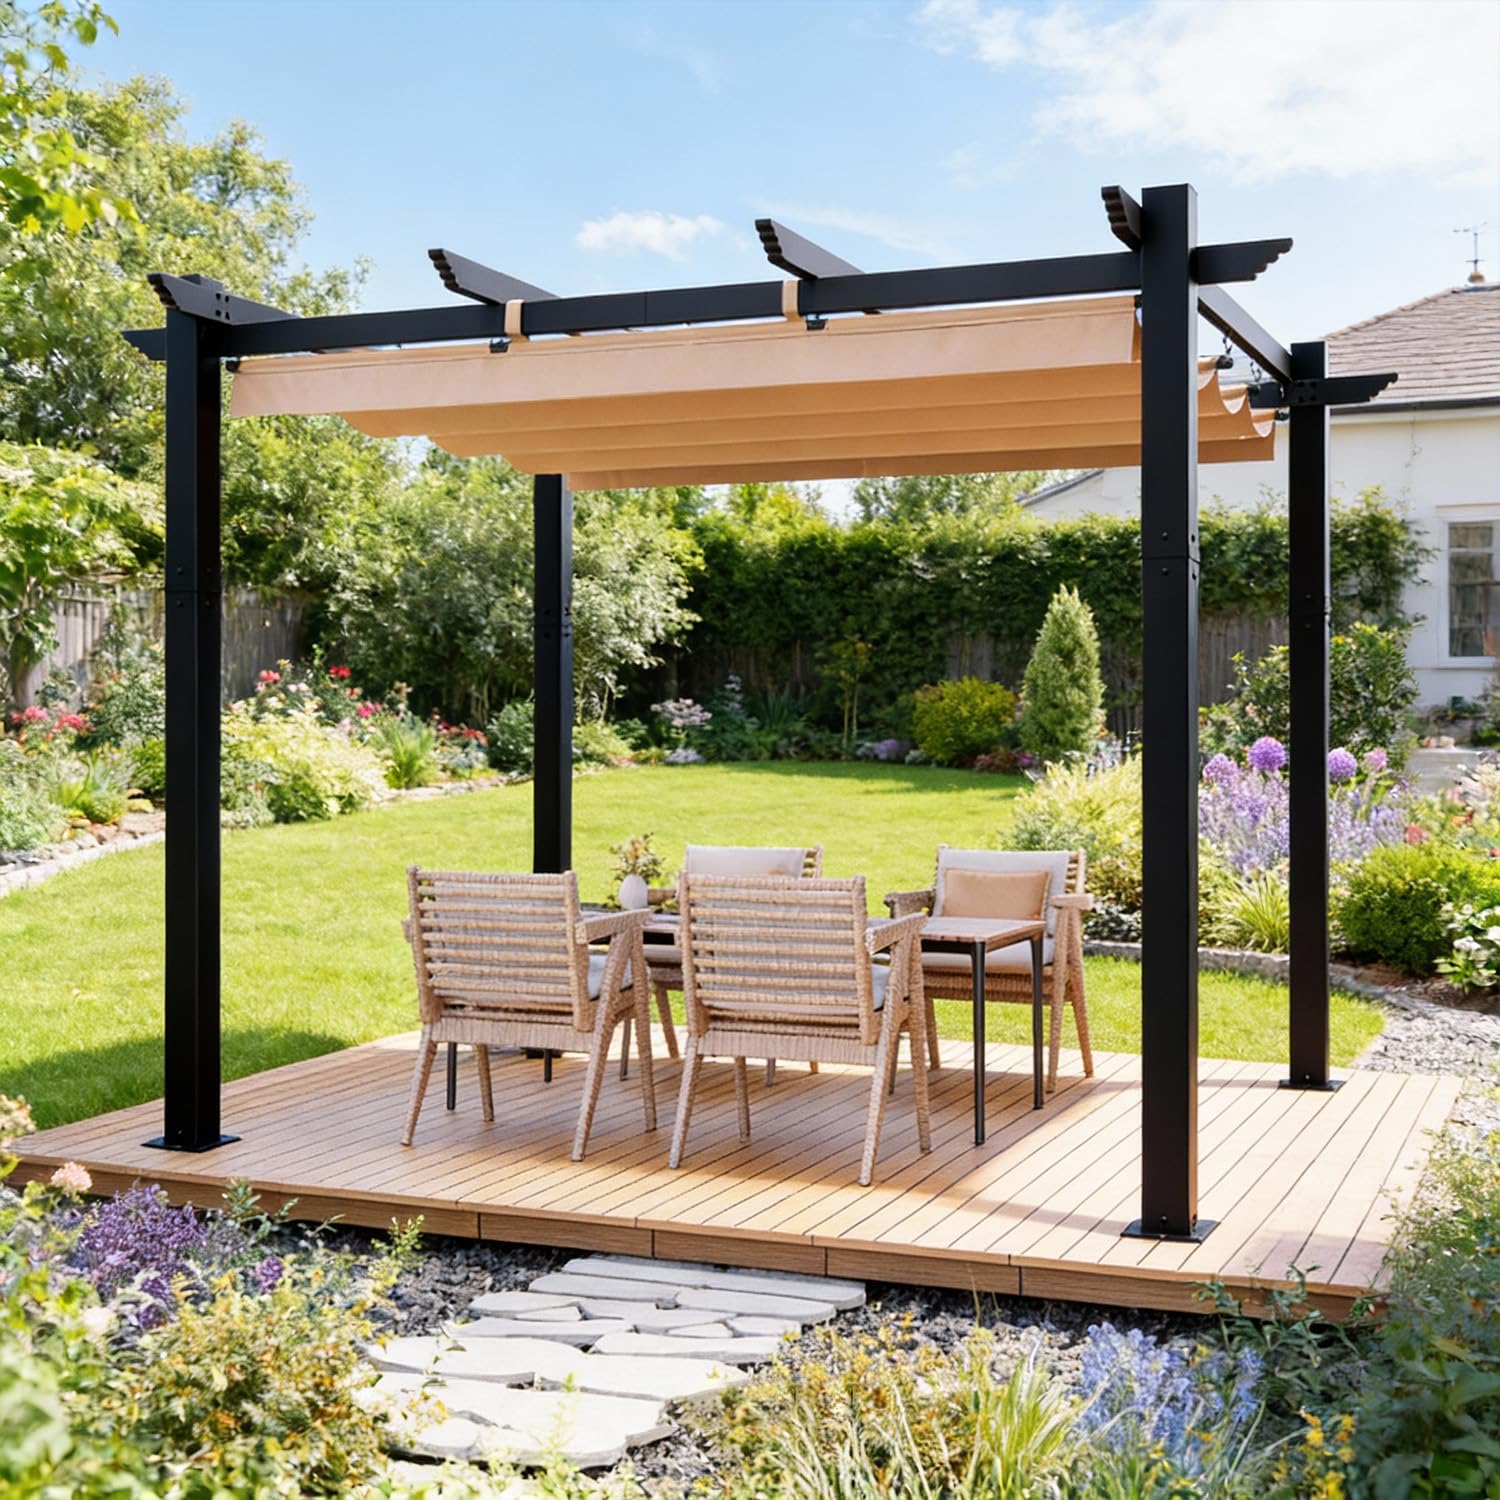
The MELLCOM Retractable 10' x 12' Pergola is a versatile outdoor shelter designed to provide adjustable shade for patios, backyards, and other outdoor spaces. It features a sturdy metal frame and a retractable canopy, offering flexibility for various weather conditions and activities.
Key Features:
- Retractable Canopy: Easily adjust shade with a hand-pull rope. Features a magnetic locking system for stability.
- Sturdy Frame: Constructed from galvanized iron and aluminum alloy for strength and durability. Rust-resistant metal posts and aluminum beams.
- Premium Fabric: Canopy made of durable polyester with PU coating, offering UV-resistance, tear-resistance, and waterproofing. Includes drainage holes for water management.
- Spacious Design: Measures 10x12 feet, suitable for various outdoor activities and relaxation.
2. Safety Information
Please read and understand all safety instructions before assembly and use. Failure to follow these instructions may result in injury or damage to the product.
- Always secure the shelter to a stable foundation using the provided expansion bolts to prevent wind-related movement.
- Be cautious when extending or retracting the canopy, as the magnetic locking system may cause sudden movement.
- Keep children and pets away from the shelter during assembly, disassembly, and while the canopy is in motion.
- Do not use the pergola in extreme weather conditions such as heavy winds, snow, or thunderstorms. Retract the canopy fully during such conditions.
- Regularly inspect all components for wear and tear. Replace damaged parts immediately.
3. Setup and Assembly
The MELLCOM Retractable Pergola is designed for easy assembly. It is recommended that two people assemble this product. Ensure all parts are present before beginning assembly.
3.1 Package Contents
Verify that all components listed in the parts diagram (refer to the included physical manual) are present and undamaged.
3.2 Assembly Steps
- Prepare the Area: Choose a flat, stable surface for installation. Ensure adequate clearance around the pergola.
- Assemble the Frame: Follow the step-by-step instructions in the provided manual to connect the main support posts and beams. Ensure all connections are secure.
- Install the Canopy Rails: Attach the sliding rails for the canopy to the main frame structure.
- Attach the Canopy Fabric: Carefully attach the retractable canopy fabric to the sliding rails, ensuring it is correctly aligned and secured.
- Secure to Ground: Use the provided expansion bolts to firmly secure the pergola's base plates to the ground. This is crucial for wind resistance.


4. Operating Instructions
4.1 Retracting and Extending the Canopy
The pergola features a hand-pull rope system for easy adjustment of the canopy. The dual-end telescoping design allows for flexible sunshade adjustment.
- To extend the canopy: Gently pull the rope to slide the canopy sections outwards until the desired shade level is achieved. The magnetic locking system will help secure it in place.
- To retract the canopy: Gently pull the rope to slide the canopy sections inwards, folding them neatly. Ensure the canopy is fully retracted during strong winds or heavy rain to prevent damage.


4.2 Water Drainage
The canopy fabric is designed with drainage holes to prevent water buildup. However, in heavy rain or severe weather, it is recommended to retract the canopy to one side to allow water to run off more effectively and prevent pooling.

5. Maintenance
Proper maintenance will extend the life and appearance of your MELLCOM Pergola.
- Canopy Cleaning: The polyester canopy fabric is machine-washable. Remove the fabric from the frame and wash according to fabric care instructions (typically cold water, gentle cycle). Air dry completely before reattaching.
- Frame Cleaning: Wipe the metal frame with a damp cloth and mild soap. Avoid abrasive cleaners that could damage the anti-rust coating.
- Seasonal Storage: For prolonged periods of non-use or during harsh winter conditions, it is recommended to remove the canopy fabric and store it indoors. Ensure the frame is clean and dry before covering or storing.
- Hardware Check: Periodically check all bolts and connections to ensure they remain tight and secure.

6. Troubleshooting
This section addresses common issues you might encounter with your MELLCOM Retractable Pergola.
6.1 Canopy Not Retracting/Extending Smoothly
- Check for Obstructions: Ensure there are no debris, leaves, or other objects blocking the sliding rails.
- Inspect Rails: Verify that the sliding rails are clean and free from damage. A light silicone-based lubricant can be applied if needed, but avoid oil-based lubricants that attract dirt.
- Rope Condition: Check the hand-pull rope for any fraying or tangles.
6.2 Pergola Instability
- Ground Anchoring: Re-check that all expansion bolts are securely fastened to a stable foundation.
- Frame Connections: Ensure all frame connections (bolts, screws) are tight.
- Weather Conditions: Retract the canopy during strong winds to reduce stress on the structure.
6.3 Water Accumulation on Canopy
- Drainage Holes: Ensure drainage holes in the canopy are clear of debris.
- Canopy Retraction: In heavy rain, partially retract the canopy to one side to allow water to run off more effectively and prevent pooling.
7. Specifications
| Feature | Detail |
|---|---|
| Model Number | KRKYOT261KK-CD |
| Product Dimensions (L x W x H) | 3.6L x 3W x 2.3H Meters (10' x 12' x 7.5') |
| Item Weight | 43.41 kg (95.7 lbs) |
| Frame Material | Galvanized Iron and Aluminum Alloy |
| Canopy Material | Polyester with PU Coating |
| Color | Khaki |
| Water Resistance Level | Waterproof |
| UV Protection | UV-resistant |
| Assembly Required | Yes |

8. Warranty and Support
For any questions, concerns, or assistance with your MELLCOM Retractable Pergola, please contact MELLCOM customer support. Refer to your purchase documentation for specific warranty details, as warranty terms may vary.
You can often find support contact information on the MELLCOM brand website or through the retailer where you purchased the product.
MELLCOM Store Link: Visit the MELLCOM Store on Amazon