1. Introduction
This manual provides detailed instructions for the installation, operation, and maintenance of your Surakey 9.7-inch Android Car Stereo Radio. Please read this manual thoroughly before installation and use to ensure proper functionality and to avoid damage.
2. Compatibility
This car stereo radio is designed for compatibility with Jeep Compass models from 2009 to 2017. Before proceeding with your order and installation, it is crucial to verify your vehicle's specific model year. If you are uncertain about compatibility, please provide a complete image of the plugs on the back of your vehicle's center console and the original main unit to the manufacturer for confirmation regarding wiring harnesses or adapters.
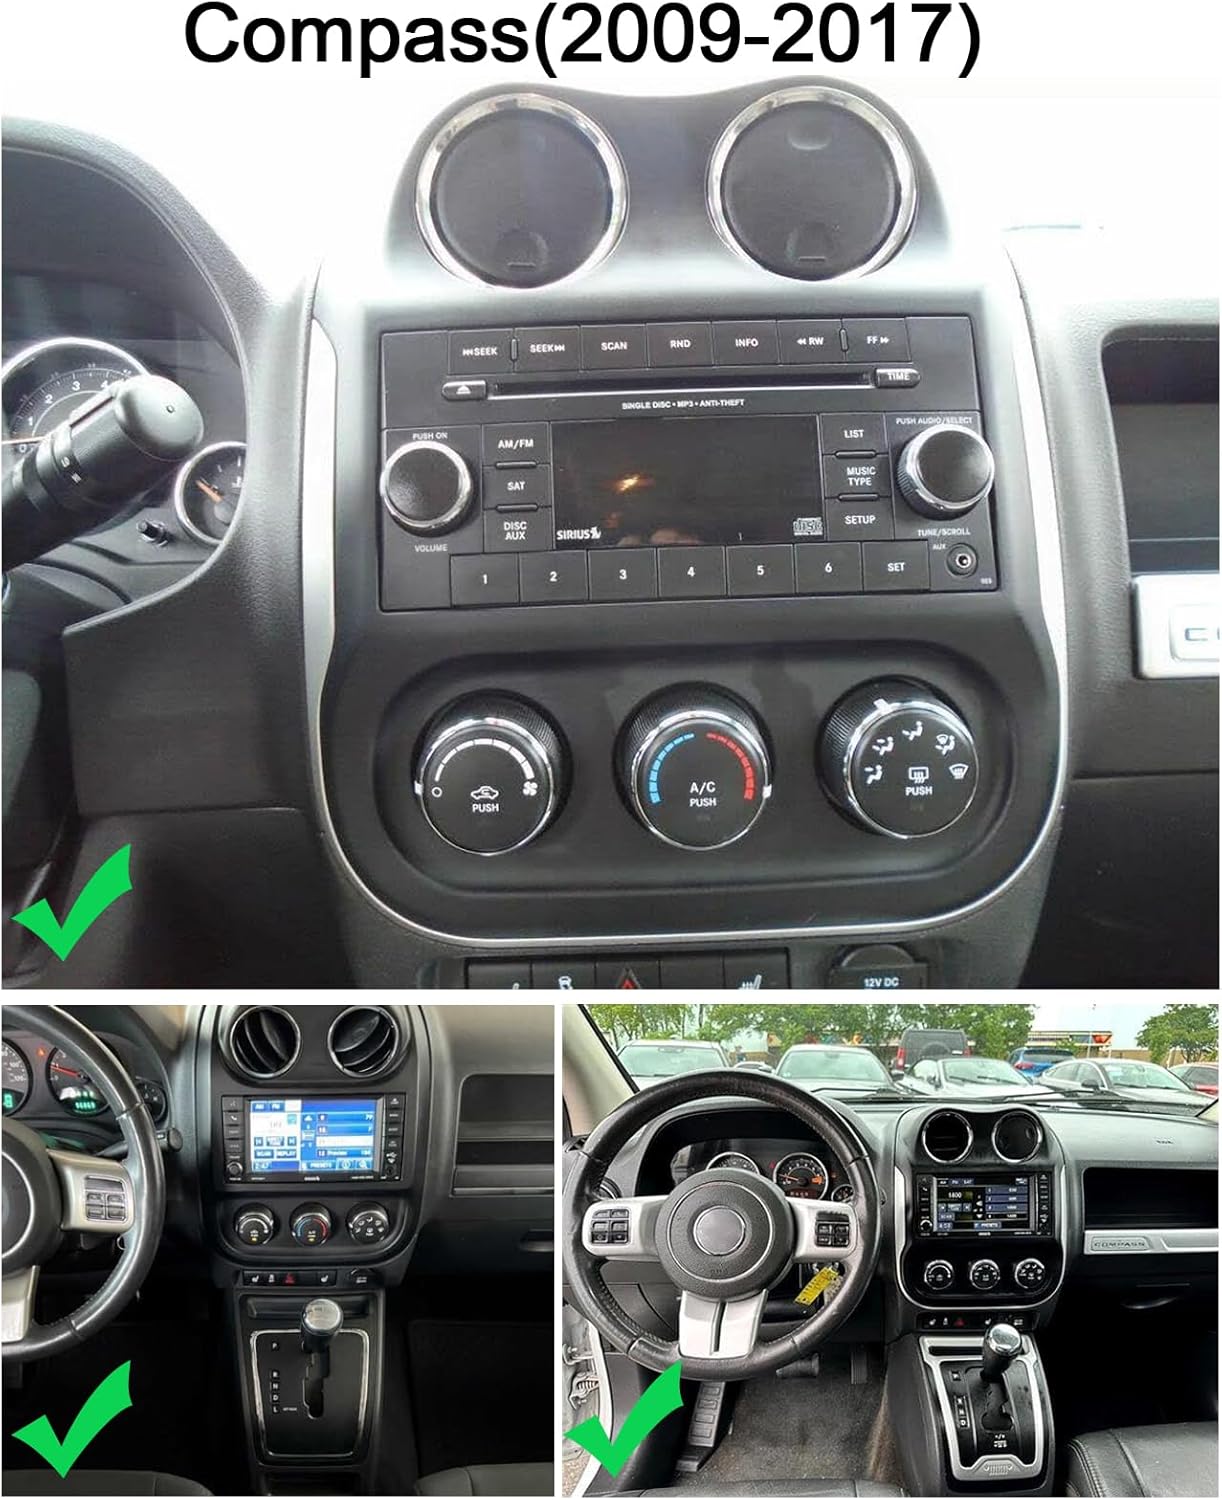
Figure 2.1: Dashboard compatibility for Jeep Compass (2009-2017).
3. Setup and Installation
3.1 Pre-installation Check
Always confirm the correct wiring diagram for your specific vehicle model. Depending on the vehicle, different power cords and protocols may be required. Ensure you have the appropriate components before beginning installation.
3.2 Product Wiring
Refer to the wiring diagram provided to correctly connect the car stereo to your vehicle's electrical system. This includes connections for power, speakers, and other accessories.

Figure 3.1: Product Wiring Diagram.
3.3 Reversing Camera Installation
The unit supports OEM CVBS 720P backup cameras. 360-degree panoramic cameras are not supported. If your OEM camera is incompatible, use the included backup camera. The reversing input must be connected even if the camera is not used.
- Connect the camera's positive wire to the positive pole of the car's reversing light.
- Connect the camera's negative wire to the negative pole of the car's reversing light.
- The reversing trigger is controlled by the stereo and does not require a separate connection.
Important Note: The white plug must be connected to the main device for Bluetooth and Wi-Fi signals to function correctly.

Figure 3.2: Reversing Camera Wiring Diagram.
3.4 Backup Camera Format and Resolution Setup
To configure the backup camera settings:
- Tap the settings icon to open the settings menu.
- Select "Factory Settings" and enter the password "8888".
- Navigate to "Protocol Parameter Settings".
- Select "Reverse video resolution settings".
- Choose the correct setting based on your camera type: NTSC/PAL for OEM cameras, or AHD/25 for the included camera.


Figure 3.3: Backup Camera Resolution Setup Steps.
Video 3.1: Demonstration of accessing reversing settings for the car stereo. This video shows how to navigate through the system menus to find and adjust settings related to the backup camera, including options for reverse track, radar, image, color, and video resolution.
4. Operating Instructions
4.1 Wireless Apple CarPlay and Android Auto
Connect your iOS or Android smartphone wirelessly via Bluetooth and Wi-Fi, or using a wired USB cable, to access CarPlay or Android Auto. This allows integration with your phone's address book, mail, notifications, map navigation, music, calls, and voice control features.

Figure 4.1: Wireless CarPlay and Android Auto Interface.
4.2 Mirror Link
The unit supports screen mirroring from both iOS and Android smartphones via Wi-Fi, allowing you to display your phone's content directly on the car stereo screen.

Figure 4.2: Mirror Link Functionality.
4.3 Split Screen Display
Utilize the split-screen feature to display two applications simultaneously, such as navigation and music playback. This enhances multitasking and provides a safer driving experience.

Figure 4.3: Split Screen Display.
4.4 GPS Navigation
The car stereo offers both offline and online navigation options. You can use offline navigation by connecting the included GPS module or download online navigation apps via Wi-Fi/WLAN connection.

Figure 4.4: GPS Navigation Interface.
4.5 Steering Wheel Control (SWC)
The steering wheel control function allows you to manage calls, change music tracks, and adjust volume directly from your steering wheel buttons, promoting safer driving.

Figure 4.5: Steering Wheel Control Function.
4.6 Built-in DSP (Digital Signal Processor)
The integrated DSP enhances audio quality by reducing noise, distortion, and interference, offering personalized audio settings and an optimized soundstage.

Figure 4.6: Built-in DSP Interface.
4.7 FM Radio Function
Enjoy comprehensive FM and RDS channel support for easy access to news, music, and real-time traffic updates, enriching your driving experience.

Figure 4.7: FM Radio Interface.
4.8 Bluetooth Connectivity
The unit features Bluetooth with A2DP for hands-free calls, phone book access, caller ID, voice calls, and Bluetooth music playback.

Figure 4.8: Bluetooth Interface.
4.9 Wi-Fi Connection
Connect to Wi-Fi for online maps, app downloads, streaming online content, and browsing the web. The built-in Bluetooth also allows for hands-free phone calls and music playback.

Figure 4.9: Wi-Fi Connectivity and Online Features.
5. Maintenance
To ensure the longevity and optimal performance of your car stereo, follow these general maintenance guidelines:
- Cleaning: Use a soft, dry cloth to clean the screen and exterior surfaces. Avoid abrasive cleaners or solvents that could damage the finish.
- Temperature: Avoid exposing the unit to extreme temperatures, both hot and cold, for extended periods.
- Software Updates: Periodically check for and install any available software updates to ensure the system runs efficiently and securely.
- Cable Connections: Ensure all cables are securely connected and free from damage. Loose connections can lead to intermittent issues.
6. Troubleshooting
6.1 Backup Camera Issues
If your backup camera is not functioning correctly:
- Compatibility: Ensure your camera is an OEM CVBS 720P type. 360-degree panoramic cameras are not supported.
- Included Camera: If your OEM camera is incompatible, use the backup camera provided with the unit.
- Wiring: Double-check all camera wiring connections as per the installation diagram (Section 3.3). Ensure the reversing input is connected.
- Settings: Verify the backup camera format and resolution settings in the system menu (Section 3.4).
- White Plug: Confirm the white plug is securely connected to the main device, as this affects signal reception.
6.2 General Issues
- No Power: Check all power connections and fuses. Ensure the vehicle's ignition is on.
- No Sound: Verify speaker connections, volume levels, and audio source selection. Check DSP settings if applicable.
- Touchscreen Unresponsive: Try restarting the unit. If the issue persists, a factory reset might be necessary (consult support).
- GPS Signal Loss: Ensure the GPS antenna is properly installed and has a clear view of the sky.
- Bluetooth/Wi-Fi Connectivity: Check that the white plug is connected to the main device. Ensure Bluetooth and Wi-Fi are enabled in settings.
7. Specifications
| Feature | Detail |
|---|---|
| Model | 9.7-inch Android Car Stereo Radio (2+32G) |
| Operating System | Android 15 |
| RAM | 2GB |
| ROM | 32GB |
| Screen Size | 9.7 inches |
| Display Type | 2.5D HD Touch Screen |
| Connectivity | Wireless Apple CarPlay, Wireless Android Auto, Bluetooth, Wi-Fi, USB |
| Navigation | GPS (Offline/Online) |
| Audio Features | Built-in DSP, FM/RDS Radio |
| Additional Features | Mirror Link, Split Screen, Steering Wheel Control, Rearview Camera Support (OEM CVBS 720P), External MIC, APP Download, MP3/AUX/USB |
| Package Dimensions | 1.97 x 1.18 x 1.18 inches |
| Item Weight | 1.6 ounces |
| Manufacturer | Surakey |
| ASIN | B0GV5PMVYS |
8. Support and Warranty
For any questions regarding product installation, wiring diagrams, or specific vehicle compatibility, please contact Surakey customer support. Our team is available to assist you with technical inquiries and troubleshooting.
8.1 Customer Support
Email: Fuyatongus@outlook.com
We offer 24-hour customer support to address your concerns.

Figure 8.1: Surakey Customer Support.
8.2 Warranty Information
Specific warranty details are typically provided with your purchase documentation. Please retain your proof of purchase for any warranty claims. For issues related to backup camera compatibility or other product malfunctions, please reach out to customer support for assistance.