1. Overview
This instruction manual provides detailed guidance for the assembly and use of the Yahboom Aluminum Alloy Case, designed for Jetson Orin Nano Super and Jetson Orin NX Super development boards. The case offers robust protection, enhanced connectivity, and efficient thermal management for your mini-computer.
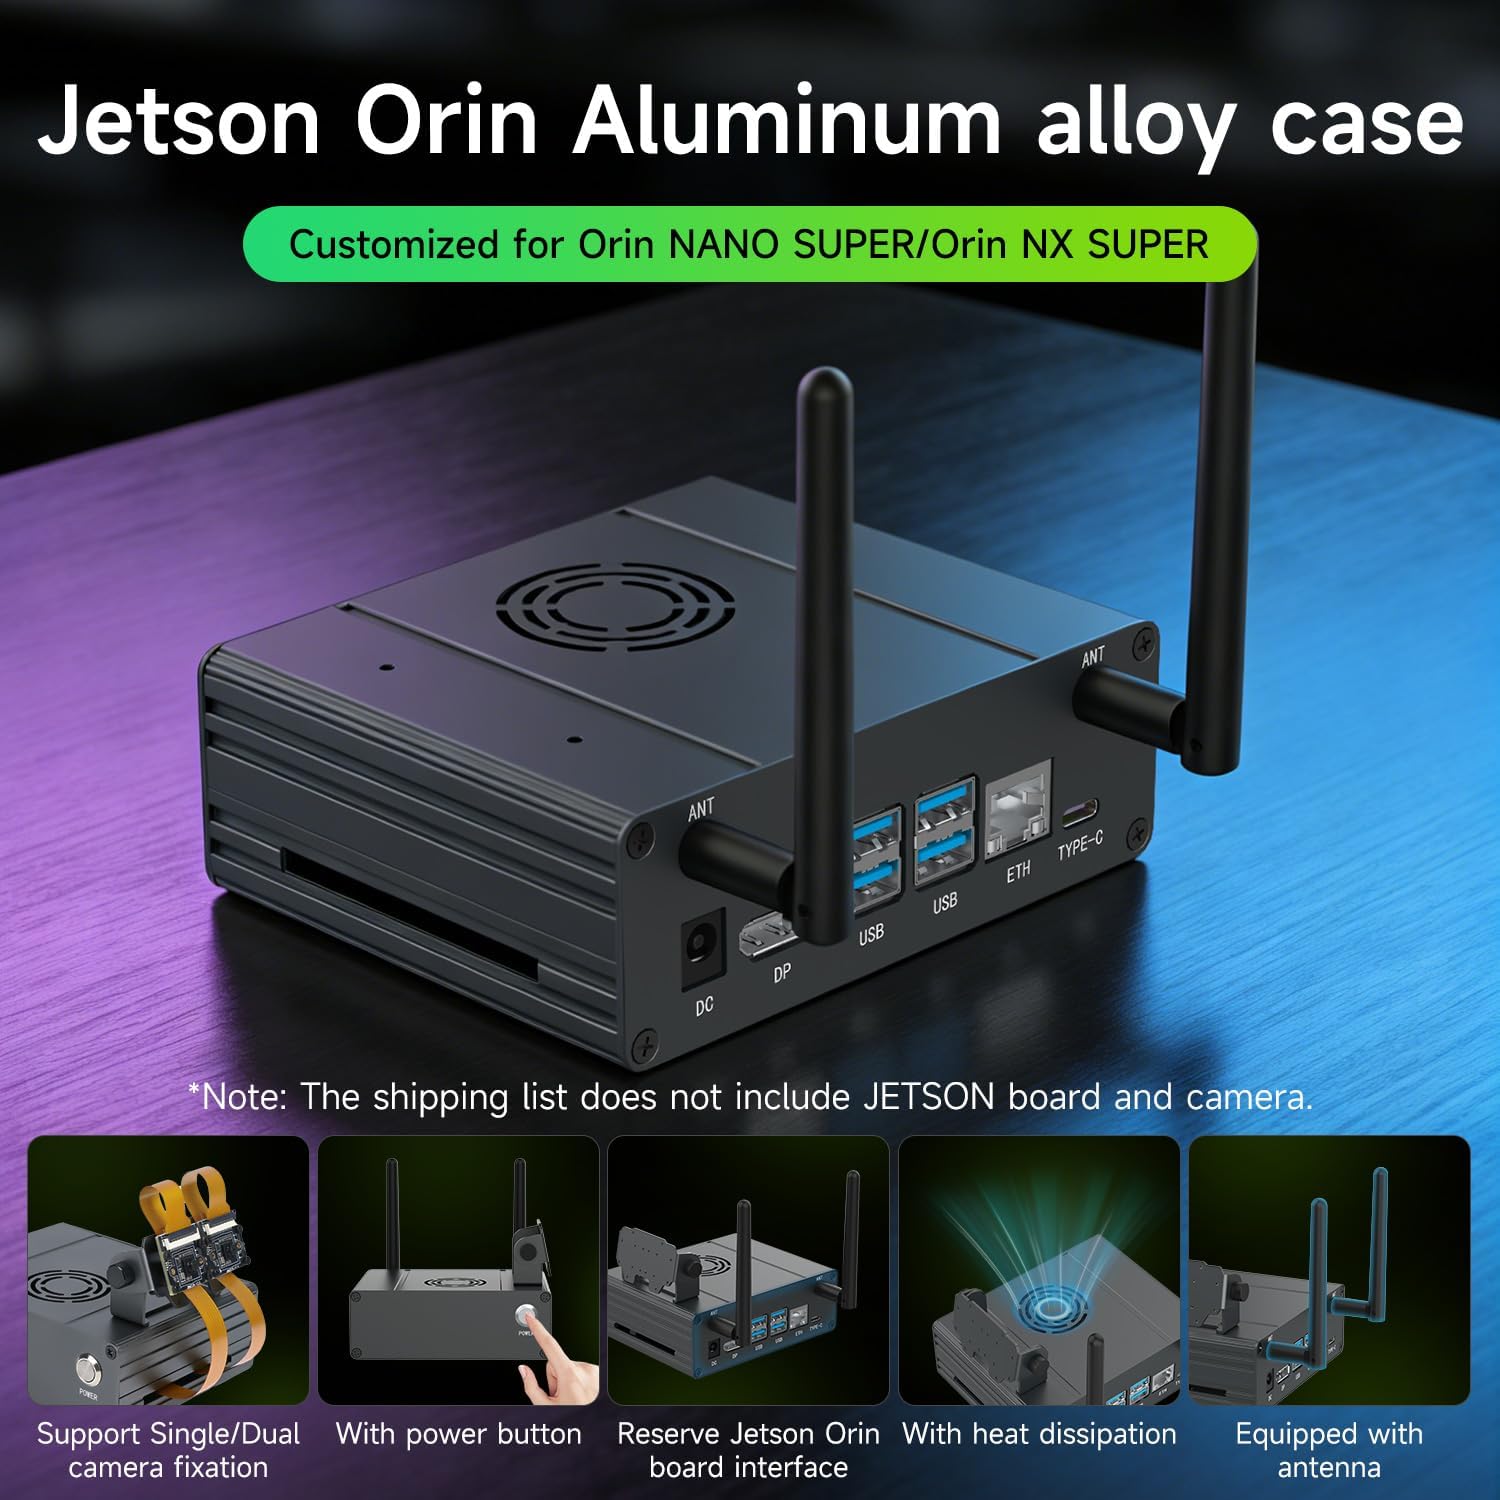
Image: The Yahboom Aluminum Alloy Case with a Jetson Orin board, dual antennas, and a camera module attached, showcasing its compact and functional design.
Key features include:
- Durable anodized aluminum alloy construction.
- Compatibility with Jetson Orin Nano Super and Orin NX Super.
- Integrated antenna for improved signal.
- Dual camera mounting positions with 180° rotation capability.
- Dedicated reset and power buttons.
- Optimized ventilation for heat dissipation.
2. Package Contents
Please verify that all items listed below are included in your package:
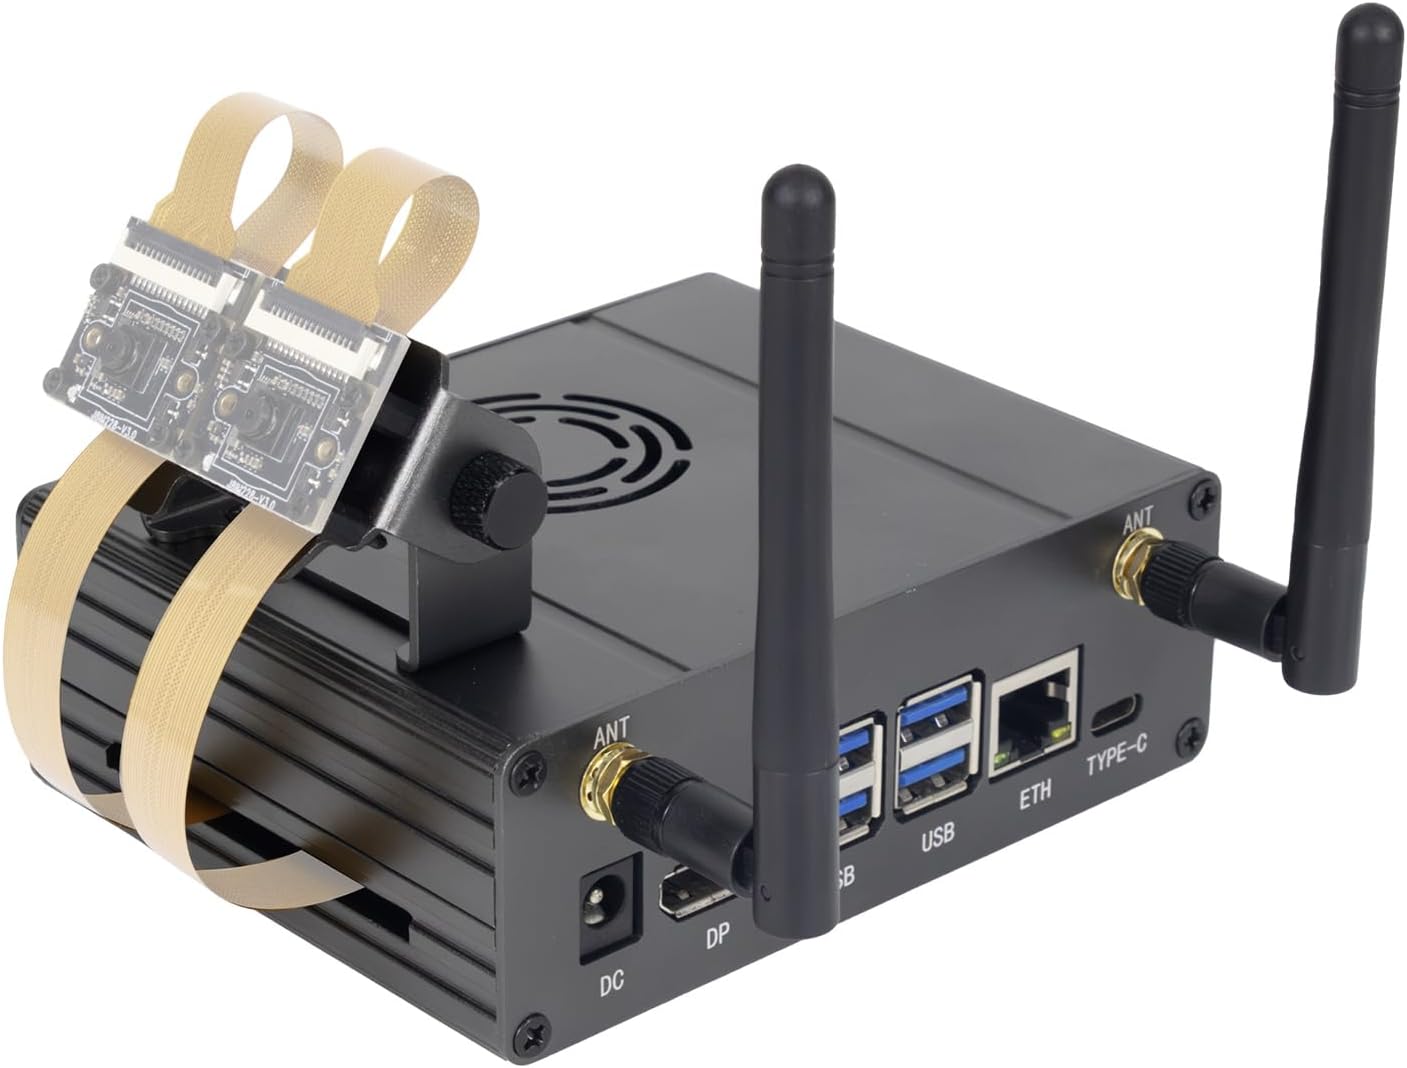
Image: A visual representation of the package contents, detailing the aluminum alloy case components, 40 PIN gray cable, switch button, antennas, SMA cable, silicone foot mats, screwdriver, and screw accessory package. An optional camera bracket kit is also shown.
- Aluminum Alloy Case (Top and Bottom Plates)
- 40 PIN Gray Cable
- Switch Button with Wires
- Antennas (2)
- SMA Cables (2)
- Silicone Foot Mats (4)
- Screwdriver
- Screw Accessory Package
- Interface Panel
- Optional: Camera Bracket Base, Camera Mounting Bracket, M2*6+5mm single pass nylon post (8), M2*5mm nylon screws (8), CSI camera + cable (2)
Note: The package does not include the network card, camera, or Jetson Orin device.
3. Setup and Installation
Follow these steps carefully to assemble your Yahboom Aluminum Alloy Case. It is recommended to watch the installation video for visual guidance.
Video: Detailed installation guide for the Jetson Orin Metal Case, demonstrating each step of the assembly process.
3.1. Prepare the Jetson Orin Board
Before starting, ensure your Jetson Orin Nano Super or Orin NX Super board is ready. The base of the Orin needs to be removed prior to installation into the case.
3.2. Install SSD and SMA Cables
- Install your SSD onto the Jetson Orin board.
- Connect the SMA cables to the appropriate ports on the Jetson Orin board.
- Attach the SMA cable connectors to the interface panel.
3.3. Install Switch Buttons
- Insert the power and reset switch buttons into their designated holes on the switch panel.
- Secure them with the provided nuts.
- Connect the switch button wires to the corresponding pins on the Jetson Orin board.
3.4. Fixed Motherboard
- Carefully place the Jetson Orin board into the aluminum alloy case bottom plate, ensuring the interface pattern faces the metal panel.
- Secure the motherboard using the M2.5*5mm round head screws (4).
3.5. Install Switch and Interface Panels
- Align the switch panel and interface panel with the case and the Jetson Orin board's ports.
- Secure these panels using the M3*6 countersunk screws (4).
3.6. Pre-installed CSI Camera Cable (Optional)
If using CSI cameras, connect the CSI camera cables to the Jetson Orin board. A single camera configuration can be plugged into any available interface.
3.7. Assemble the Aluminum Alloy Case
- Place the aluminum alloy case top plate onto the assembled base.
- Secure the top plate using the M3*6 countersunk screws (4).
3.8. Install Silicone Non-skid Feet
Attach the four silicone non-skid feet to the bottom of the case to provide stability and prevent slipping.
3.9. Install Antennas
Screw the two antennas into the SMA connectors on the interface panel.
3.10. Install Camera Bracket Base (Optional)
If using a camera, attach the camera bracket base to the case using the M3*6 countersunk screws (2).
3.11. Install Camera (Optional)
- Attach the CSI camera(s) to the camera mounting bracket using M2*6+5mm single pass nylon posts (8) and M2*5mm nylon screws (8).
- Connect the CSI camera cables to the camera module(s).
3.12. Install Camera Mounting Bracket (Optional)
Attach the assembled camera mounting bracket to the camera bracket base using M3*6mm hand screws (2). This allows for 180° rotation of the camera(s).
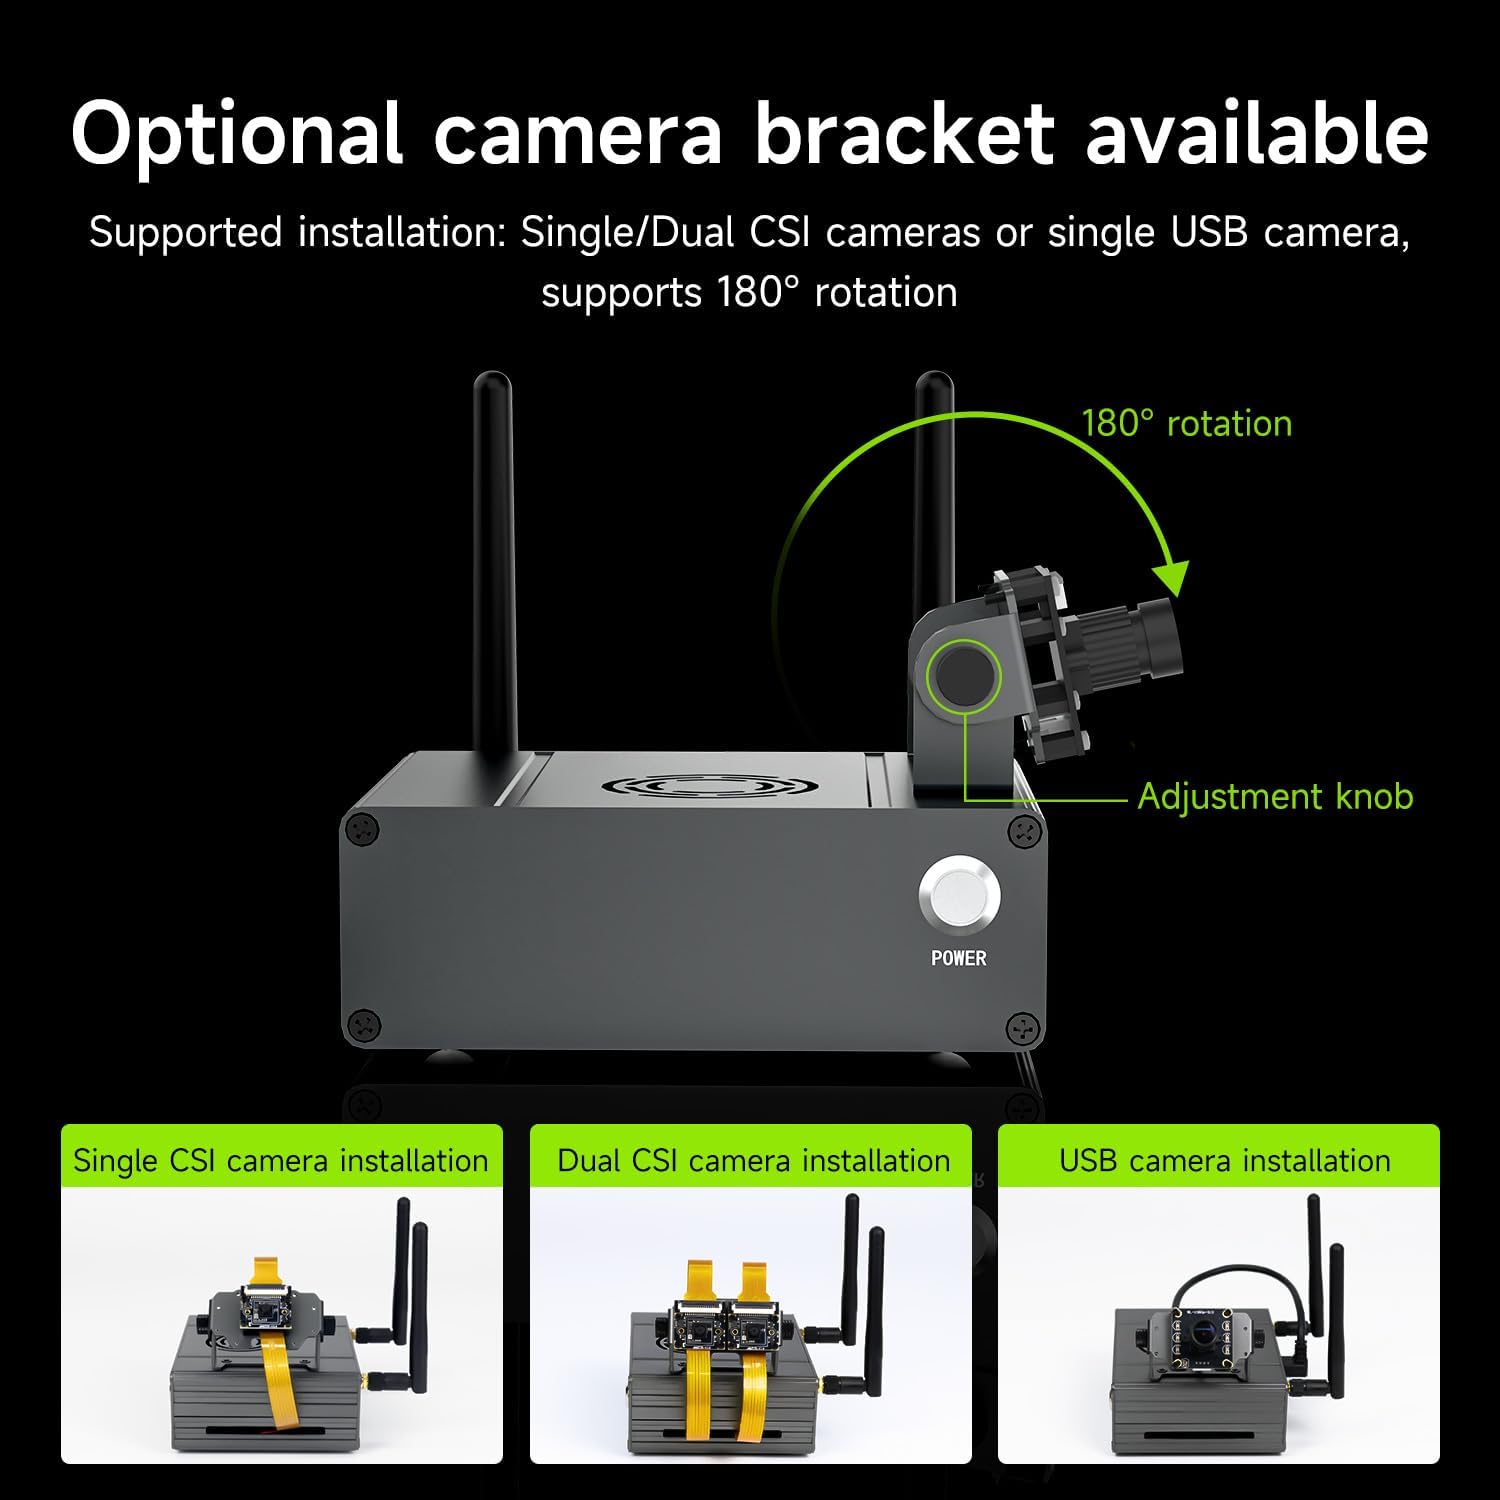
Image: The camera bracket with an adjustment knob, illustrating its 180° rotation capability for flexible camera positioning.
4. Operating Instructions
4.1. Powering On/Off
The case includes a dedicated power button for convenient startup and shutdown of your Jetson Orin board. Press the button to power on or initiate a shutdown sequence.

Image: The integrated power button on the case, designed for easy operation, alongside a visual of the 40PIN GPIO interface for expansion.
4.2. Antenna Usage
The included rod antennas enhance signal penetration, extend the effective operating distance, and improve device connection stability and smoothness for wireless communication.

Image: The case equipped with antennas, demonstrating their role in enhancing signal transmission and improving connection stability.
5. Maintenance
5.1. Heat Dissipation
The aluminum alloy case features a multi-directional ventilation and heat dissipation design. Numerous ventilation holes on the top of the case allow for efficient air circulation, effectively reducing internal temperature and ensuring stable operation. Users may also install an additional cooling fan if desired.

Image: The case's design highlighting the scientific air duct layout for quick removal of internal heat, promoting stable and reliable operation.
5.2. Cleaning
To maintain optimal performance and appearance, regularly clean the case with a soft, dry cloth. Avoid using abrasive cleaners or solvents that could damage the anodized aluminum finish.
6. Troubleshooting
If you encounter any issues during assembly or operation, please refer to the following general advice:
- Installation Issues: Double-check all connections, especially ribbon cables and screw placements, against the installation video and diagrams. Ensure the Orin board's base has been removed as instructed.
- Power Issues: Verify that the power button wires are correctly connected to the Jetson Orin board. Ensure the power supply is adequate and properly connected.
- Connectivity Problems: Confirm that the SMA cables are securely attached to both the board and the antennas. Ensure antennas are properly tightened.
- Camera Malfunction: Check CSI camera cable connections. Ensure the camera is correctly mounted and oriented.
For more detailed troubleshooting or specific technical support, please consult the official Yahboom installation tutorial or contact Yahboom customer support.
7. Specifications
| Feature | Detail |
|---|---|
| Brand | Yahboom |
| Case Type | Desktop |
| Recommended Uses | AI and Robotics |
| Color | only Case |
| Cooling Method | Air |
| Special Features | Dual Camera Mounting, Reset & Power Buttons, Integrated Antenna |
| Compatible Devices | Jetson Orin Nano Super, Orin NX Super |
| Number of Items | 1 |
| Unit Count | 1.0 Count |
| Manufacturer | Yahboom |

Image: Detailed size parameters and material specifications for the case, including dimensions, material type, process, mounting hole size, and weight.
8. Warranty and Support
Warranty Description: Product delivery within 90 days.
For further assistance, technical support, or warranty claims, please contact Yahboom customer service. Refer to the official Yahboom website or your purchase documentation for contact details.