
1. Introduction
This manual provides detailed instructions for the safe and efficient operation of your Ausic HY-8186 Portable Rechargeable Oscillating Fan. Please read this manual thoroughly before using the product and retain it for future reference.
The Ausic HY-8186 is a versatile fan designed for both indoor and outdoor use, featuring a powerful turbo blade, a large capacity rechargeable battery, 3D oscillation, and remote control functionality.
2. Product Overview
Familiarize yourself with the components of your Ausic HY-8186 fan.
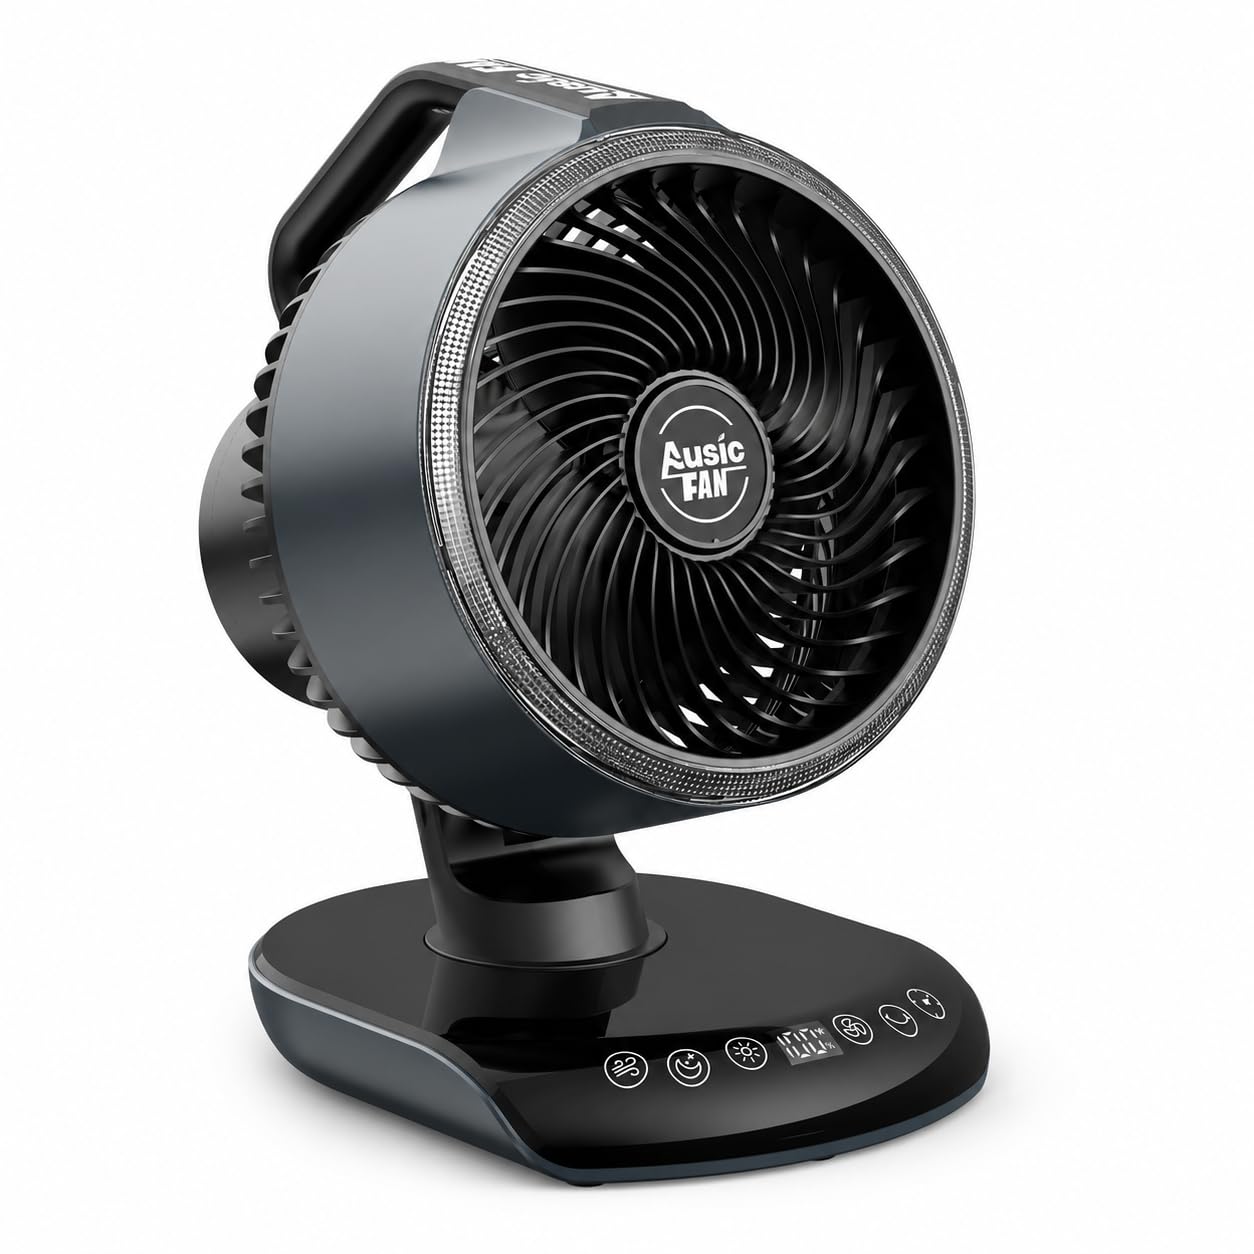
Image 2.1: Front view of the Ausic HY-8186 Portable Rechargeable Oscillating Fan.

Image 2.2: Overview of additional features including remote control, natural wind mode, magnetic remote storage, and touch control panel.
3. Setup
3.1 Unpacking
Carefully remove all components from the packaging. Ensure all items listed in the 'Included Components' section of the specifications are present.
3.2 Initial Charging
Before first use, fully charge the fan's internal 30000mAh battery. Connect the provided Type-C charging cable to the fan's charging port and to a suitable USB power adapter (not included). The LED display will indicate charging status. A full charge can take several hours.
3.3 Remote Control Battery Installation
The remote control requires a CR2032 battery (included). Open the battery compartment on the back of the remote and insert the battery with the positive (+) side facing up. Close the compartment securely.
4. Operating Instructions
4.1 Power On/Off
Press the power button on the fan's control panel or the remote control to turn the fan on or off.
4.2 Adjusting Fan Speed
The fan has 5 manual speed settings. Press the speed button on the control panel or remote to cycle through speeds 1 to 5. The LED display will show the current speed.

Image 4.1: Fan speed settings and natural wind mode illustration.
4.3 Oscillation Control
The fan supports 60° and 120° horizontal oscillation. Press the oscillation button on the control panel or remote to activate or change the oscillation angle. The fan head can also be manually tilted 90° vertically to direct airflow.

Image 4.2: Illustration of the fan's 3D oscillation capabilities.
4.4 Natural Wind Mode
Activate the natural wind mode by pressing the dedicated button on the remote control. This mode simulates varying outdoor breezes for a more comfortable experience.
4.5 LED Light Function
The fan features a 3-level adjustable warm LED light. Press the light button on the control panel or remote to cycle through the brightness levels (low, medium, high) or turn the light off.

Image 4.3: Fan displaying its 3-level dimmable warm light feature and timer settings.
4.6 Timer Settings
Set the fan to automatically turn off after a specified period (1-8 hours). Press the timer button on the control panel or remote to select the desired duration. The LED display will show the remaining time.
4.7 Remote Control Usage
The included remote control allows convenient operation of all fan functions from a distance. Ensure the remote is pointed towards the fan's receiver for optimal performance. The remote can be magnetically attached to the fan for storage.
5. Maintenance
5.1 Cleaning
Before cleaning, ensure the fan is turned off and unplugged from any power source. Use a soft, dry cloth to wipe the exterior surfaces of the fan. For stubborn dirt, a slightly damp cloth can be used, followed by a dry cloth. Do not use abrasive cleaners or allow water to enter the fan's motor or electrical components.
Periodically clean the fan blades and grille to prevent dust buildup, which can affect performance. Use a soft brush or vacuum cleaner with a brush attachment to remove dust from the grille openings.
5.2 Storage
When not in use for extended periods, store the fan in a cool, dry place, away from direct sunlight and extreme temperatures. It is recommended to fully charge the battery before storing and to recharge it every 3-6 months to maintain battery health.
6. Troubleshooting
If you encounter issues with your fan, refer to the following troubleshooting guide:
| Problem | Possible Cause | Solution |
|---|---|---|
| Fan does not turn on. | Battery is depleted. Power cable not connected. | Charge the fan fully. Ensure the Type-C charging cable is securely connected. |
| Remote control not working. | Remote battery is low or incorrectly installed. Obstruction between remote and fan. | Replace the CR2032 battery. Ensure correct polarity. Remove any obstructions and point the remote directly at the fan. |
| Weak airflow. | Fan speed is too low. Grille or blades are dusty. | Increase the fan speed. Clean the fan grille and blades as described in the Maintenance section. |
| Oscillation not working. | Oscillation function is not activated. | Press the oscillation button on the control panel or remote to activate. |
| LED light not turning on. | Light function is off or set to lowest brightness. | Press the light button to cycle through brightness levels. |
7. Specifications
Detailed technical specifications for the Ausic HY-8186 fan:
| Feature | Detail |
|---|---|
| Brand | Ausic |
| Model Name | HY-8186 |
| Power Source | Battery Powered |
| Battery Capacity | 30000mAh |
| Fan Speeds | 5 |
| Wind Modes | 2 (Normal, Natural Wind) |
| Oscillation | 60°/120° Horizontal, 90° Manual Vertical Tilt |
| LED Light | 3-Level Dimmable Warm Light |
| Timer Settings | 1-8 Hours |
| Control Method | Remote, Touch Control |
| Product Dimensions (D x W x H) | 10.71" x 12.72" x 6.65" |
| Wattage | 50 watts |
| Included Components | Portable desk fan, Type-C charging cable, User manual |
8. Warranty and Support
For warranty information or technical support, please refer to the contact details provided with your purchase documentation or visit the official Ausic website. Keep your purchase receipt as proof of purchase for warranty claims.