Introduction
Thank you for choosing the FOTING Sand Filter. This manual provides essential information for the safe and efficient installation, operation, and maintenance of your sand filter. Please read all instructions carefully before attempting to install or operate the unit. Keep this manual for future reference.
Important Safety Instructions
When installing and using this electrical equipment, basic safety precautions should always be followed, including the following:
- Read and follow all instructions. Failure to do so can result in serious injury or death.
- Disconnect power to the filter pump and any other equipment connected to the filter before performing any service or maintenance.
- Ensure proper grounding. All electrical connections must be made by a qualified electrician and comply with local codes.
- Do not operate the filter if any part is damaged. Contact customer support for replacement parts.
- Keep children away from the filter and pump area.
- Never operate the filter without water. This can damage the pump and filter components.
- Do not exceed the maximum operating pressure indicated on the filter.
Product Components
The FOTING Sand Filter system typically includes the following main components:
- Filter Tank
- Multi-Port Valve
- Pressure Gauge
- Drain Plug
- Filter Base/Stand
- Internal Laterals and Standpipe (inside the tank)
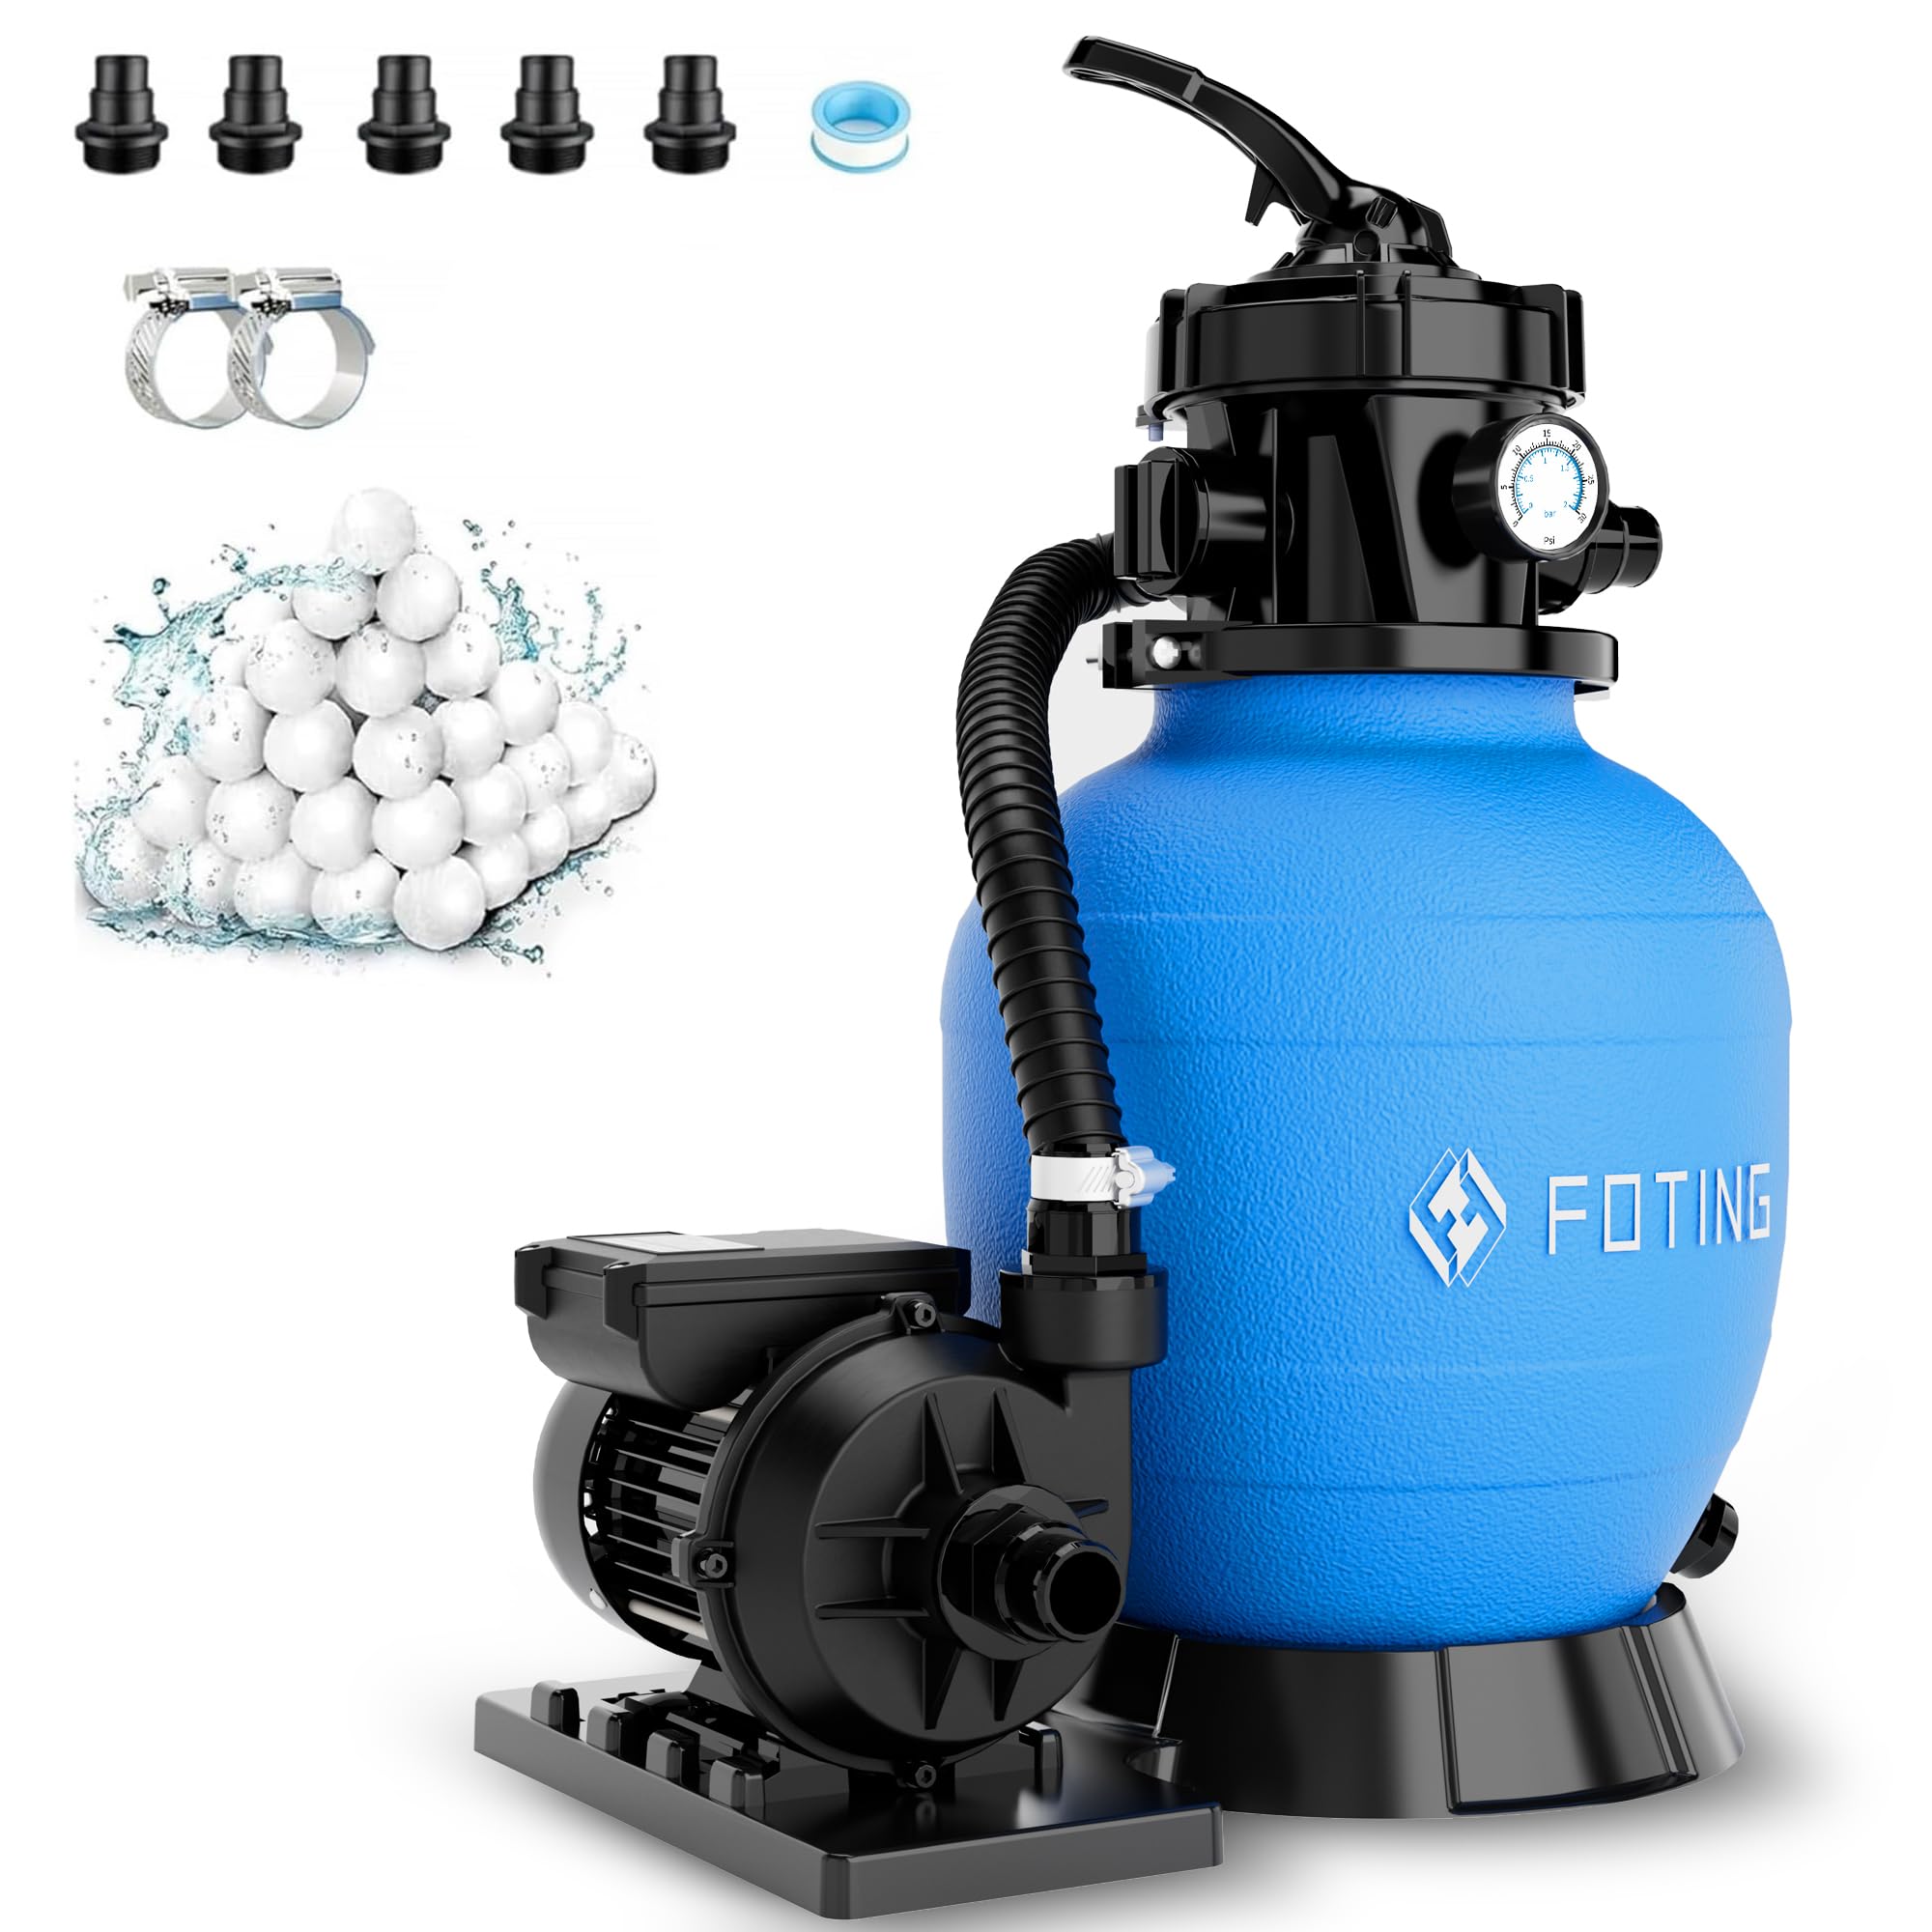
Figure 1: Overview of the FOTING Sand Filter FT-CLP4002AF-VINE318. This image displays the complete sand filter unit, including the blue filter tank, the multi-port valve on top, and the pressure gauge. The overall design is compact and suitable for pool water filtration.
Setup
1. Unpacking and Inspection
- Carefully remove all components from the packaging.
- Inspect all parts for any shipping damage. If damage is found, do not proceed with installation and contact your supplier immediately.
- Ensure all listed components are present.
2. Choosing a Location
- Place the filter on a firm, level surface, preferably concrete.
- The location should be protected from direct sunlight and harsh weather conditions.
- Ensure adequate ventilation and accessibility for maintenance and servicing.
- Position the filter as close to the pool as possible to minimize friction loss from plumbing.
3. Loading Filter Sand
- Remove the multi-port valve and any internal protective covers from the top of the filter tank.
- Partially fill the tank with water to cover the laterals. This helps cushion the laterals when adding sand.
- Place the standpipe protector (if provided) over the standpipe to prevent sand from entering it.
- Carefully pour the recommended grade and amount of filter sand (typically #20 silica sand) into the tank. Refer to the filter specifications for the correct quantity.
- Once sand is loaded, remove the standpipe protector and rinse any sand from the tank's top opening.
- Fill the tank with water until the sand is completely submerged.
4. Installing the Multi-Port Valve
- Ensure the O-ring is properly seated in the valve flange.
- Carefully lower the multi-port valve onto the tank, ensuring the standpipe aligns and slides into the valve's opening. Do not force it.
- Secure the valve to the tank using the provided clamp or bolts, tightening evenly.
- Install the pressure gauge into the designated port on the valve.
5. Plumbing Connections
- Connect the pump discharge pipe to the port labeled 'PUMP' on the multi-port valve.
- Connect the return pipe to the pool to the port labeled 'RETURN' or 'POOL'.
- Connect a waste line to the port labeled 'WASTE' or 'DRAIN'. This line should lead to an appropriate disposal area, complying with local regulations.
- Use appropriate plumbing fittings and sealants to ensure watertight connections.
6. Electrical Connection
- Ensure the pump is properly wired and connected to a grounded electrical outlet with a Ground Fault Circuit Interrupter (GFCI) for safety.
- Consult a qualified electrician if you are unsure about electrical connections.
Operating Instructions
The multi-port valve controls the flow of water through the filter system. Always turn off the pump before changing the valve position to prevent damage.
Multi-Port Valve Positions:
- FILTER: Normal filtering operation. Water flows through the sand bed, is filtered, and returned to the pool.
- BACKWASH: Used to clean the filter sand. Water flows in reverse through the sand bed, dislodging trapped debris, and is sent out the waste port.
- RINSE: Used after backwashing to settle the sand bed and flush any remaining dirty water to waste before returning to filter mode.
- WASTE/DRAIN: Bypasses the filter and sends water directly out the waste port. Used for draining the pool or vacuuming heavy debris directly to waste.
- RECIRCULATE: Bypasses the filter and circulates water directly back to the pool. Used for chemical mixing without filtering.
- CLOSED: Shuts off all flow to the filter. Do not operate the pump with the valve in this position.
Starting the Filter System:
- Ensure the pool is filled to the proper level.
- Make sure all plumbing connections are secure.
- Set the multi-port valve to the BACKWASH position.
- Prime the pump according to its manufacturer's instructions.
- Turn on the pump. Run in BACKWASH mode for 2-3 minutes, or until the water flowing out of the waste line is clear.
- Turn off the pump.
- Set the multi-port valve to the RINSE position.
- Turn on the pump. Run in RINSE mode for 30-60 seconds.
- Turn off the pump.
- Set the multi-port valve to the FILTER position.
- Turn on the pump. The filter is now operating in normal filtration mode. Note the initial pressure gauge reading; this is your 'clean' pressure.
Maintenance
Backwashing the Filter:
Backwash your filter when the pressure gauge reading rises 8-10 PSI above the 'clean' pressure you noted during initial startup, or when pool water clarity decreases.
- Turn off the pump.
- Set the multi-port valve to the BACKWASH position.
- Turn on the pump. Run for 2-3 minutes, or until the water in the waste line sight glass (if present) runs clear.
- Turn off the pump.
- Set the multi-port valve to the RINSE position.
- Turn on the pump. Run for 30-60 seconds.
- Turn off the pump.
- Set the multi-port valve to the FILTER position.
- Turn on the pump. Resume normal filtration.
Sand Replacement:
Filter sand typically needs to be replaced every 3-5 years, depending on usage and water chemistry. Refer to a qualified pool technician for this procedure or consult detailed guides.
Winterization:
In areas subject to freezing temperatures, the filter system must be properly winterized to prevent damage.
- Drain all water from the filter tank by opening the drain plug.
- Remove the pressure gauge and store it in a warm, dry place.
- Remove the multi-port valve and store it indoors.
- Cover the filter tank to protect it from elements.
Troubleshooting
| Problem | Possible Cause | Solution |
|---|---|---|
| Low Water Flow / Poor Circulation |
|
|
| High Pressure Gauge Reading |
|
|
| Water Not Clear After Filtering |
|
|
| Water Leaking from Valve or Tank |
|
|
Specifications
| Feature | Detail |
|---|---|
| Brand | FOTING |
| Model Number | FT-CLP4002AF-VINE318 |
| UPC | 757939383444 |
| ASIN | B0GSY3C62Q |
| Power Source | Corded Electric |
| Color | Blue |
| Included Items | Sand Filter (main unit) |
Warranty Information
FOTING products are manufactured to high-quality standards. For detailed information regarding the warranty coverage for your FT-CLP4002AF-VINE318 Sand Filter, please refer to the warranty card included with your product packaging or visit the official FOTING website. Keep your purchase receipt as proof of purchase for any warranty claims.
Customer Support
Should you require technical assistance, have questions about installation, operation, or maintenance, or need to order replacement parts, please contact FOTING customer support. You can typically find contact information on the product packaging, the official FOTING website, or through the retailer where you purchased the product.
When contacting support, please have your model number (FT-CLP4002AF-VINE318) and purchase date readily available.