Introduction
This manual provides comprehensive instructions for the assembly, operation, and maintenance of your VASAGLE UHSC203BJ01S Shoe Storage Cabinet. Please read this document carefully before beginning assembly or using the product to ensure proper function and safety.

Image: The VASAGLE UHSC203BJ01S Shoe Storage Cabinet in an entryway setting.
Safety Information
Adhere to the following safety guidelines to prevent injury or damage to the product:
- Always secure the cabinet to the wall using the included anti-tip kit to prevent tipping. This is a critical safety measure.
- Do not overload the cabinet as it may compromise stability.
- Keep the area around the cabinet clear to prevent tripping hazards.
- Exercise caution when opening and closing the flip drawers to avoid pinch points.

Image: Illustration of the anti-tip kit installation for enhanced stability.
Package Contents
Verify that all components listed below are present before beginning assembly:
- 1 x Shoe Storage Cabinet (main components)
- 1 x Accessory Kit (hardware, tools)
- 1 x Anti-Tip Kit
- 1 x Instructions (this manual)
Specifications
| Feature | Detail |
|---|---|
| Dimensions (D x W x H) | 9.4"D x 32.7"W x 40"H (24 cm D x 83 cm W x 101.7 cm H) |
| Material | Engineered Wood (MDF, Particleboard) |
| Weight | 42.1 Pounds |
| Number of Drawers | 2 |
| Shoe Capacity | 14-16 pairs (up to US size 11) |
| Installation Type | Freestanding |
| Assembly Required | Yes |

Image: Detailed dimensions of the shoe storage cabinet.
Setup and Assembly
Assembly of the VASAGLE UHSC203BJ01S shoe cabinet requires careful attention to the included accessory kit instructions. Ensure all parts are present and follow the steps sequentially.
Step 1: Unpack and Identify Components
Carefully unpack all components from the packaging. Refer to the parts list in the accessory kit to identify and verify all pieces are present and undamaged.
Step 2: Assemble the Frame
Follow the step-by-step diagrams provided in the accessory kit to construct the main frame of the cabinet. Ensure all connections are secure before proceeding.
Step 3: Install Flip Drawers
Attach the flip drawer mechanisms and drawer fronts according to the instructions. Test the drawers to ensure they open and close smoothly.
Step 4: Attach Anti-Tip Kit
Securely attach the anti-tip kit to the back of the cabinet and to a wall stud. This step is crucial for safety and prevents the cabinet from tipping over, especially in households with children or pets.
Operating Instructions
Understand how to effectively use the features of your shoe storage cabinet.
Using the Flip Drawers
The cabinet is equipped with two flip drawers for organized shoe storage. To open, gently pull the handle on the drawer front, allowing it to tilt forward. Close by pushing the drawer back into its upright position.
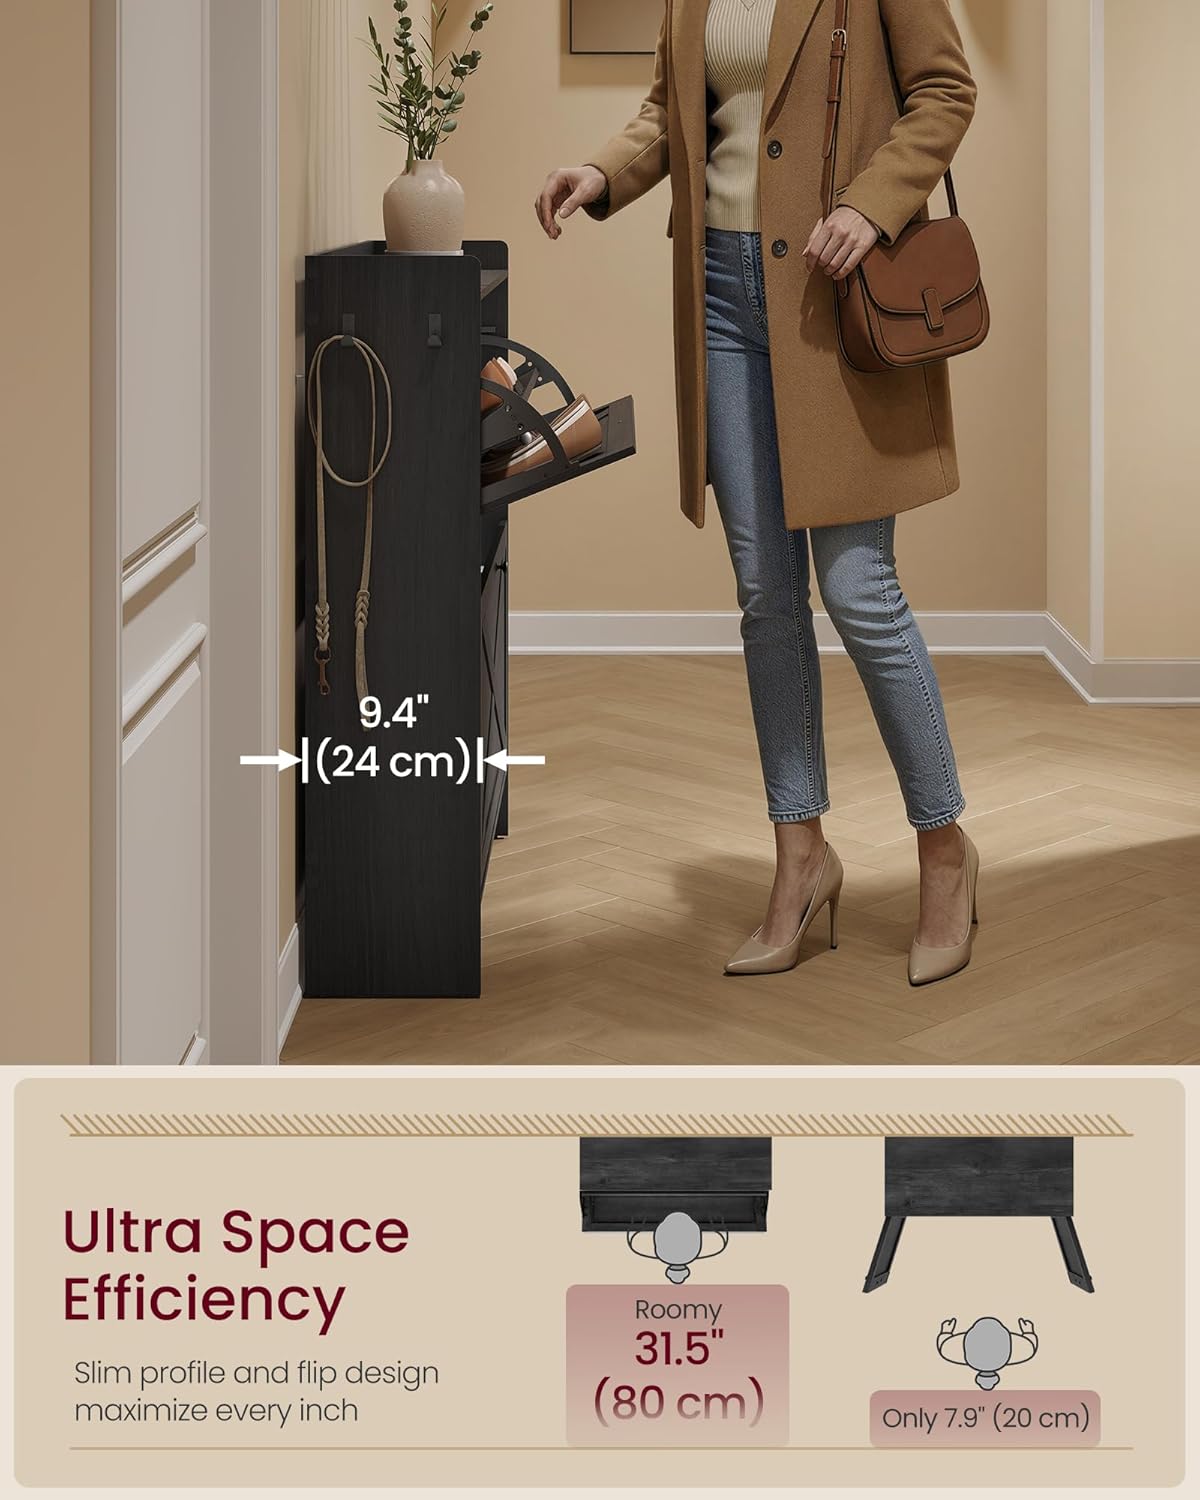
Image: Demonstrating the narrow profile and access to flip drawers.
Adjusting Shelf Height
Each flip drawer includes an adjustable shelf with three possible positions. To customize the height, remove the shelf, reposition the support pins to your desired level, and reinsert the shelf. This feature accommodates various shoe types, from flats and sneakers to heels.

Image: Illustration of the 3-level adjustable shelves.
Storing Boots and Taller Footwear
For storing boots or other taller footwear, the internal shelves within the flip drawers can be completely removed. This allows for greater vertical space. Note that removing shelves will reduce the overall shoe capacity per drawer.

Image: Visual guide for shoe capacity and boot storage with shelves removed.

Image: Example of boot storage by removing the internal divider.
Utilizing Side Hooks
The cabinet features two integrated side hooks. These are convenient for hanging items such as keys, bags, or umbrellas, keeping them easily accessible.

Image: Practical side hooks for hanging accessories.
Top Surface and Underneath Space
The top surface of the cabinet is designed with raised edges to prevent items from sliding off, making it suitable for displaying decor or storing small essentials. The open space underneath the cabinet provides room for slippers or allows for easy vacuuming.
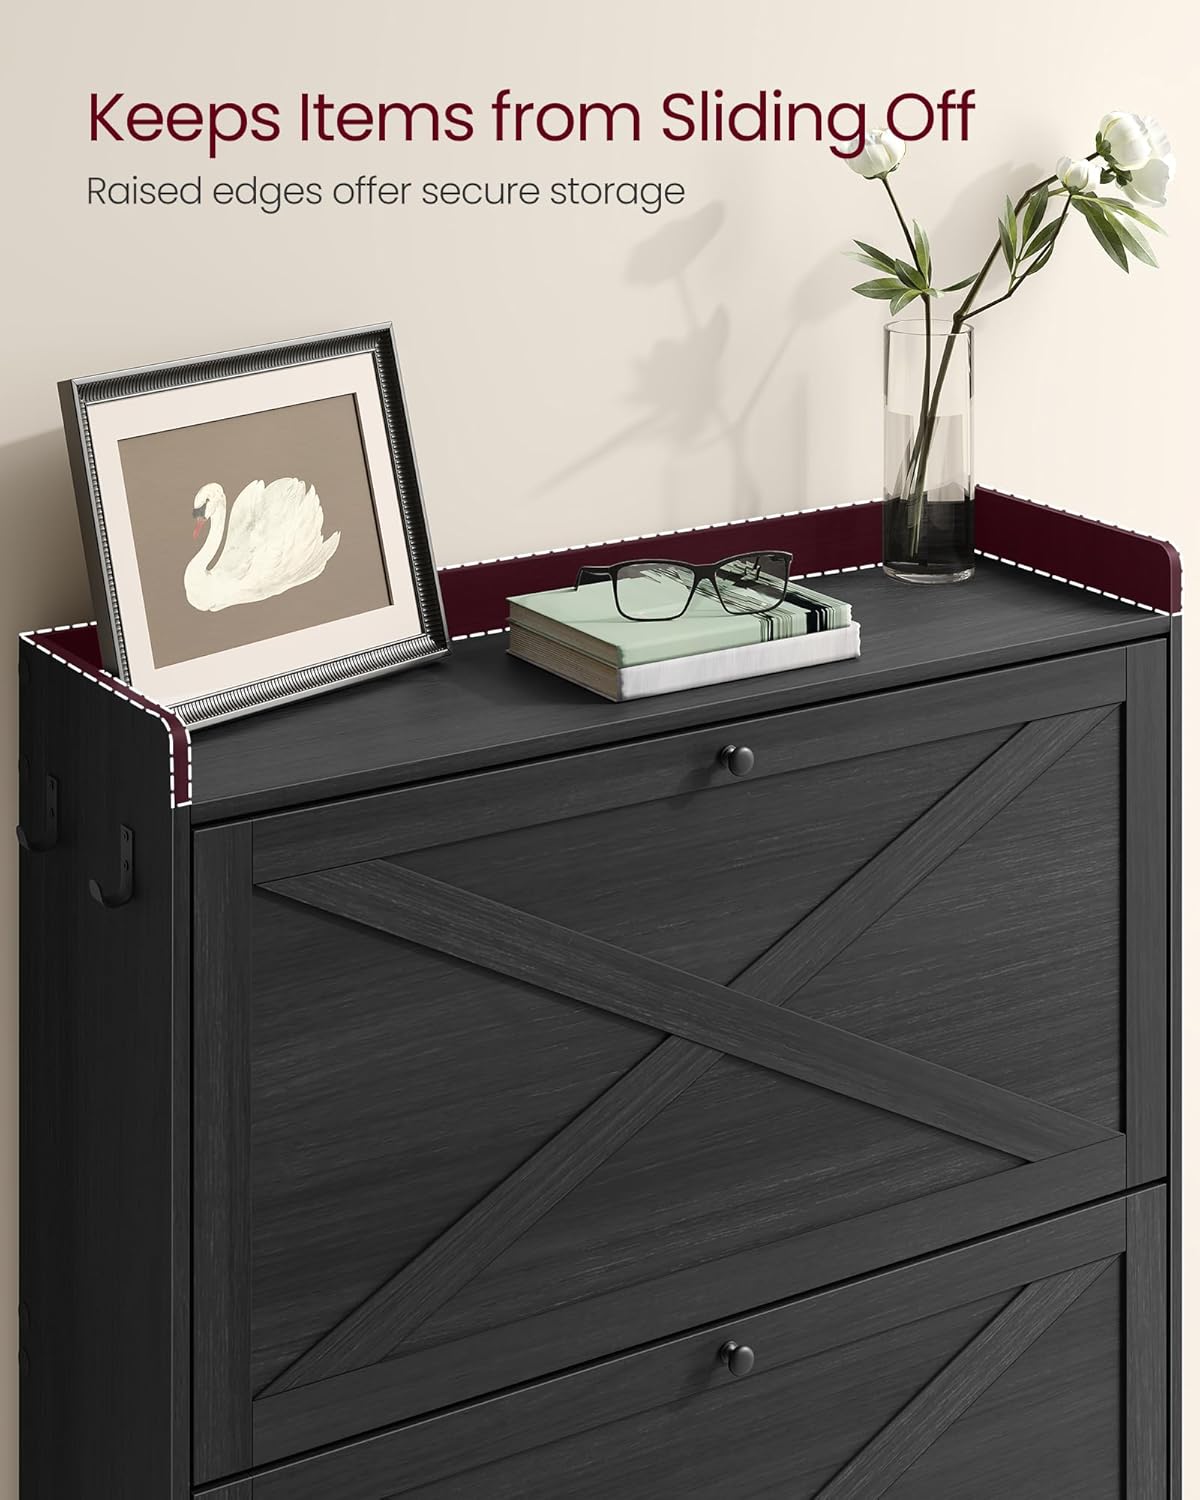
Image: Top surface with raised edges for secure item placement.

Image: Open space underneath the cabinet for slippers or cleaning.
Maintenance
Proper maintenance will extend the life and appearance of your shoe cabinet:
- Clean the cabinet surfaces with a soft, damp cloth. Avoid using harsh chemicals, abrasive cleaners, or excessive moisture.
- Wipe up any spills immediately to prevent water damage or staining to the engineered wood.
- Periodically inspect all screws and fasteners to ensure they remain tight. Retighten if any looseness is detected.
- Regularly check the anti-tip kit to confirm it is still securely fastened to both the cabinet and the wall.
Troubleshooting
Refer to these common issues and solutions:
Drawers Not Closing Properly
- Ensure that the shoes placed inside the drawer are not too large. The cabinet is designed to accommodate shoes up to US size 11.
- Verify that the adjustable shelf is correctly positioned or consider removing it if storing larger footwear like boots.
- Check for any foreign objects obstructing the drawer mechanism or preventing it from closing fully.
Cabinet Instability
- Confirm that the anti-tip kit is correctly installed and securely fastened to a wall stud.
- Ensure the cabinet is placed on a level and stable surface.
- Avoid overloading the cabinet, as excessive weight can affect its stability.
Missing Parts
- If any parts are missing upon unboxing, please contact VASAGLE customer support with your model number and purchase details for assistance.
Warranty and Support
For detailed warranty information regarding your VASAGLE UHSC203BJ01S Shoe Storage Cabinet, please refer to the documentation provided at the time of purchase. Alternatively, you may contact VASAGLE customer support directly.
For further assistance, troubleshooting, or to inquire about replacement parts, please visit the official VASAGLE website or contact their customer service department.
You can also visit the VASAGLE Store on Amazon for more product information and support resources.