Important Safety Information
Please read and understand all safety warnings and instructions before operating your Imdot Pressure Cleaner. Failure to follow these instructions may result in electric shock, fire, and/or serious injury.
- Always wear appropriate personal protective equipment, including safety glasses, gloves, and hearing protection, when operating the pressure cleaner.
- Never point the spray gun at people, pets, or electrical devices. The high-pressure spray can cause severe injury.
- Ensure the pressure cleaner is connected to a grounded outlet. Do not use extension cords unless they are rated for outdoor use and the appropriate amperage.
- Keep the operating area clear of children and pets.
- Do not operate the pressure cleaner if you are fatigued or under the influence of drugs or alcohol.
- Always turn off the water supply and release residual pressure before disconnecting hoses or performing maintenance.
Package Contents
Carefully unpack all items and ensure that all components are present and undamaged. If any items are missing or damaged, please contact customer support.

Image: Overview of the Imdot Pressure Cleaner and its included accessories.
- Pressure Cleaner Main Unit
- 20ft High-Pressure Hose with Reel
- Spray Gun
- Gun Lance
- Nozzles (4 types: 0°, 15°, 25°, 40°, plus a soap nozzle)
- 500ml Foam Bottle
- Instruction Manual (this document)
- Backup Battery (for spray gun pressure control)
- Screwdriver
Setup and Assembly
Follow these steps to correctly assemble your Imdot Pressure Cleaner before first use.
- Attach the Handle: Secure the metal handle to the main unit of the pressure cleaner. Ensure it is firmly in place.
- Connect the High-Pressure Hose: Connect one end of the high-pressure hose to the pressure cleaner's outlet (typically marked) and the other end to the spray gun. Hand-tighten all connections to prevent leaks.
- Install the Water Inlet Hose: Connect your standard garden hose to the water inlet on the pressure cleaner. Ensure a secure, leak-free connection. A filter may be present at the inlet; ensure it is clean.
- Attach Nozzles: Select the desired nozzle for your cleaning task and attach it to the spray gun lance. Push firmly until it clicks into place.
- Power Connection: Plug the pressure cleaner's power cord into a suitable grounded electrical outlet.

Image: Detailed view of the pressure cleaner's integrated components and features, including the handle, hose reel, and nozzle storage.
Operating Instructions
Before Starting
- Ensure all hose connections are secure and free from leaks.
- Turn on the water supply completely to the garden hose connected to the pressure cleaner.
- Squeeze the spray gun trigger to purge any air from the system. Continue until a steady stream of water emerges from the nozzle. This primes the pump and prevents damage.
Powering On
Locate the On/Off switch on the main unit of the pressure cleaner and turn it to the "On" position. The motor will start. Release the spray gun trigger to allow the motor to stop, as the unit features a Total Stop System (TSS) that automatically shuts off the pump when the trigger is not engaged.
Adjusting Water Pressure
The spray gun features a 3-level water pressure control system (Hard, Medium, Soft). Use the designated buttons on the spray gun to select the appropriate pressure setting for your cleaning task. An indicator light will confirm the selected level.

Image: The spray gun's control panel showing the three water pressure settings: Hard, Medium, and Soft.
Nozzle Selection and Usage
The pressure cleaner includes multiple quick-connect nozzles, each designed for specific spray patterns and cleaning intensities.
- 0° Nozzle (Red): Provides a concentrated, high-impact stream for tough stains and hard-to-reach areas. Use with extreme caution on surfaces that may be damaged by high pressure.
- 15° Nozzle (Yellow): Delivers an intense, narrow spray for aggressive cleaning of smaller areas, such as removing paint or rust.
- 25° Nozzle (Green): Offers a wider spray pattern for general cleaning tasks on various surfaces, including driveways, patios, and vehicles.
- 40° Nozzle (White): Provides the widest and gentlest spray, ideal for cleaning delicate surfaces, rinsing, or applying soap.
- Soap Nozzle (Black): Designed for applying detergent or cleaning solutions. It operates at a lower pressure to maximize foam production.

Image: Visual guide to the five spray modes available with the included nozzles, demonstrating their spray patterns.
Using the Foam Bottle
Fill the 500ml foam bottle with an appropriate pressure washer detergent. Attach it to the spray gun in place of a standard nozzle. The soap nozzle (black) is typically used for foam application. The pressure cleaner will draw the detergent and mix it with water to create foam for effective cleaning.
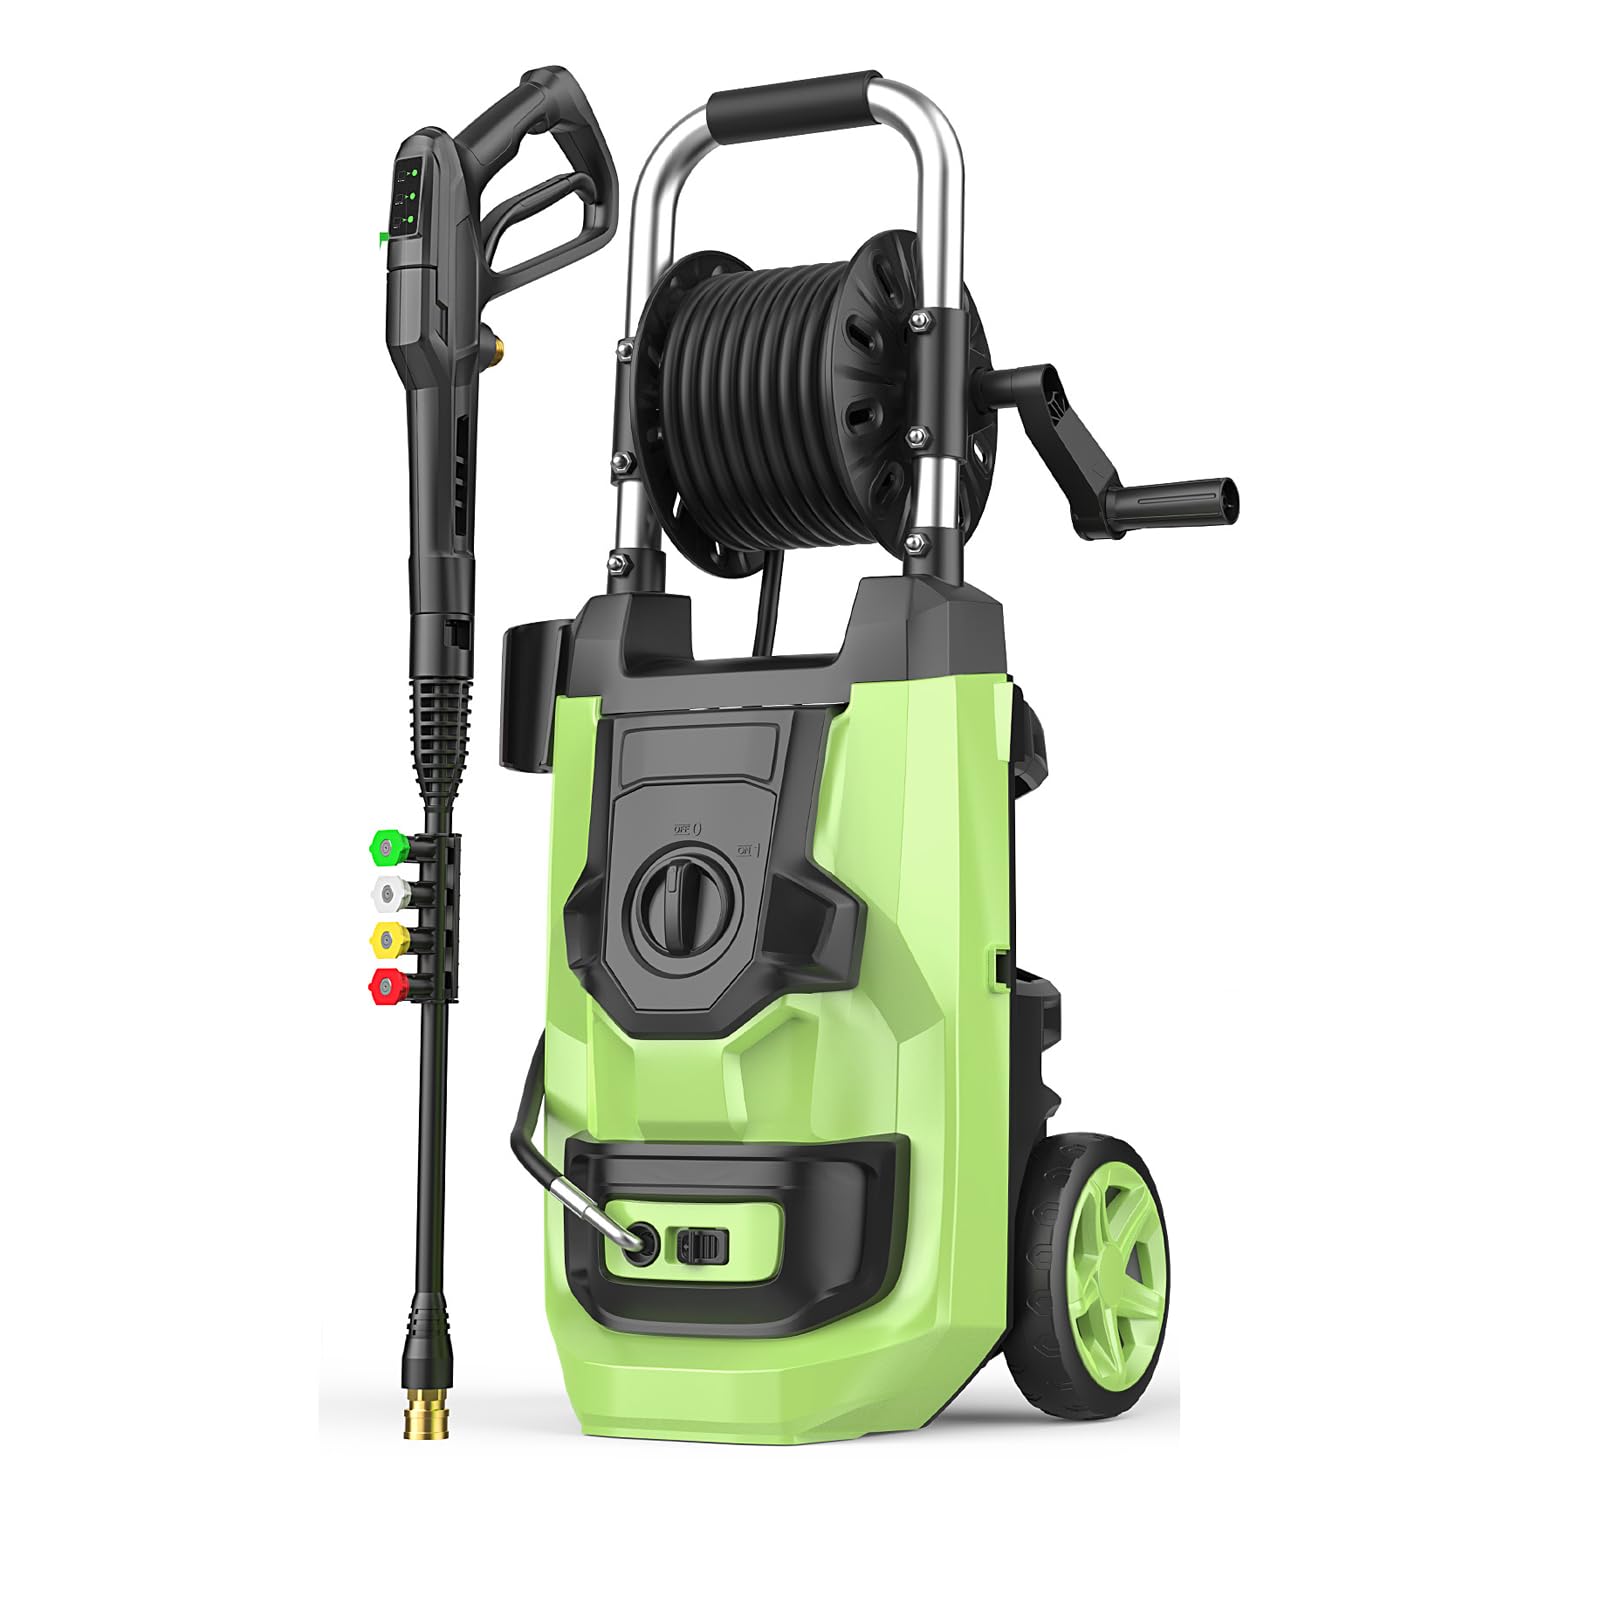
Image: The pressure cleaner in use, demonstrating its efficient cleaning power on a dirty vehicle with foam application.
Maintenance
Regular maintenance ensures optimal performance and extends the lifespan of your pressure cleaner.
After Each Use
- Turn Off Power: Switch off the pressure cleaner and unplug it from the electrical outlet.
- Turn Off Water Supply: Close the water tap connected to the garden hose.
- Relieve Pressure: Squeeze the spray gun trigger to release any remaining pressure in the system. This is crucial for safety and to prevent damage to components.
- Disconnect Hoses: Disconnect the garden hose and the high-pressure hose from the unit and the spray gun.
- Clean Nozzles: Remove any debris or blockages from the nozzles. A small wire or nozzle cleaning tool can be used.
- Drain Water: Ensure all water is drained from the pump, hoses, and foam bottle to prevent freezing damage in cold weather.
Storage
Store the pressure cleaner in a dry, frost-free area. Wrap the high-pressure hose neatly on the integrated hose reel. Store the power cord and accessories in their designated holders on the unit to keep them organized and prevent loss.
Image: The pressure cleaner showing its integrated hose reel and power cord holder for tidy storage.
Troubleshooting
Refer to the table below for common issues and their solutions.
| Problem | Possible Cause | Solution |
|---|---|---|
| Motor does not start | No power supply; tripped circuit breaker; On/Off switch off | Check power connection; reset circuit breaker; ensure switch is ON |
| Low pressure or no pressure | Insufficient water supply; clogged nozzle; air in pump; incorrect nozzle selected | Ensure full water supply; clean nozzle; purge air from system; select appropriate nozzle |
| Water leaks from connections | Loose connections; damaged O-rings or seals | Tighten all connections; inspect and replace damaged O-rings or seals |
| Unit cycles on and off when trigger is off | Air in pump; minor leak in system; pressure switch malfunction | Purge air from system; check all connections for leaks; if problem persists, contact support |
| Motor hums but does not start | Low voltage; thermal overload; seized pump | Check power supply; allow unit to cool; contact support if pump is seized |
Specifications
- Brand: Imdot
- Model: B0GSS432G3
- Color: Green
- Product Dimensions (L x W x H): 12.8" x 13.2" x 26.4"
- High-Pressure Hose Length: 20 ft
- Power Cord Length: 35 ft
- Nozzle Types: 0°, 15°, 25°, 40°, Soap Nozzle
- Water Pressure Control: 3-level (Hard, Medium, Soft)
- Unit Count: 1.0 Count
Warranty and Support
The Imdot Pressure Cleaner comes with a manufacturer's warranty. For specific details regarding warranty coverage, terms, and conditions, please refer to the warranty card included with your purchase or visit the official Imdot website. For technical support, troubleshooting assistance beyond this manual, or to inquire about replacement parts, please contact Imdot customer service through the contact information provided in your product packaging or on the official brand website.