
Introduction
This manual provides detailed instructions for the AOOCOO 8K HDMI KVM Switch, Model KC-8201-AO-US-805. This device allows two computers or laptops to share a single monitor and up to three USB 3.0 devices, such as a keyboard, mouse, printer, or webcam. It supports high-resolution video up to 8K@60Hz or 4K@120Hz, ensuring a high-quality visual experience.
Package Contents
Verify that all items are present in the package:
- 1x AOOCOO 8K HDMI KVM Switch
- 2x USB 3.0 A to A Cables (1.5 meters / 4.92 feet each)
- 1x Wired Remote Controller (1.5 meters / 4.92 feet cable)
- 1x Power Adapter (DC 12V)
- 1x User Manual
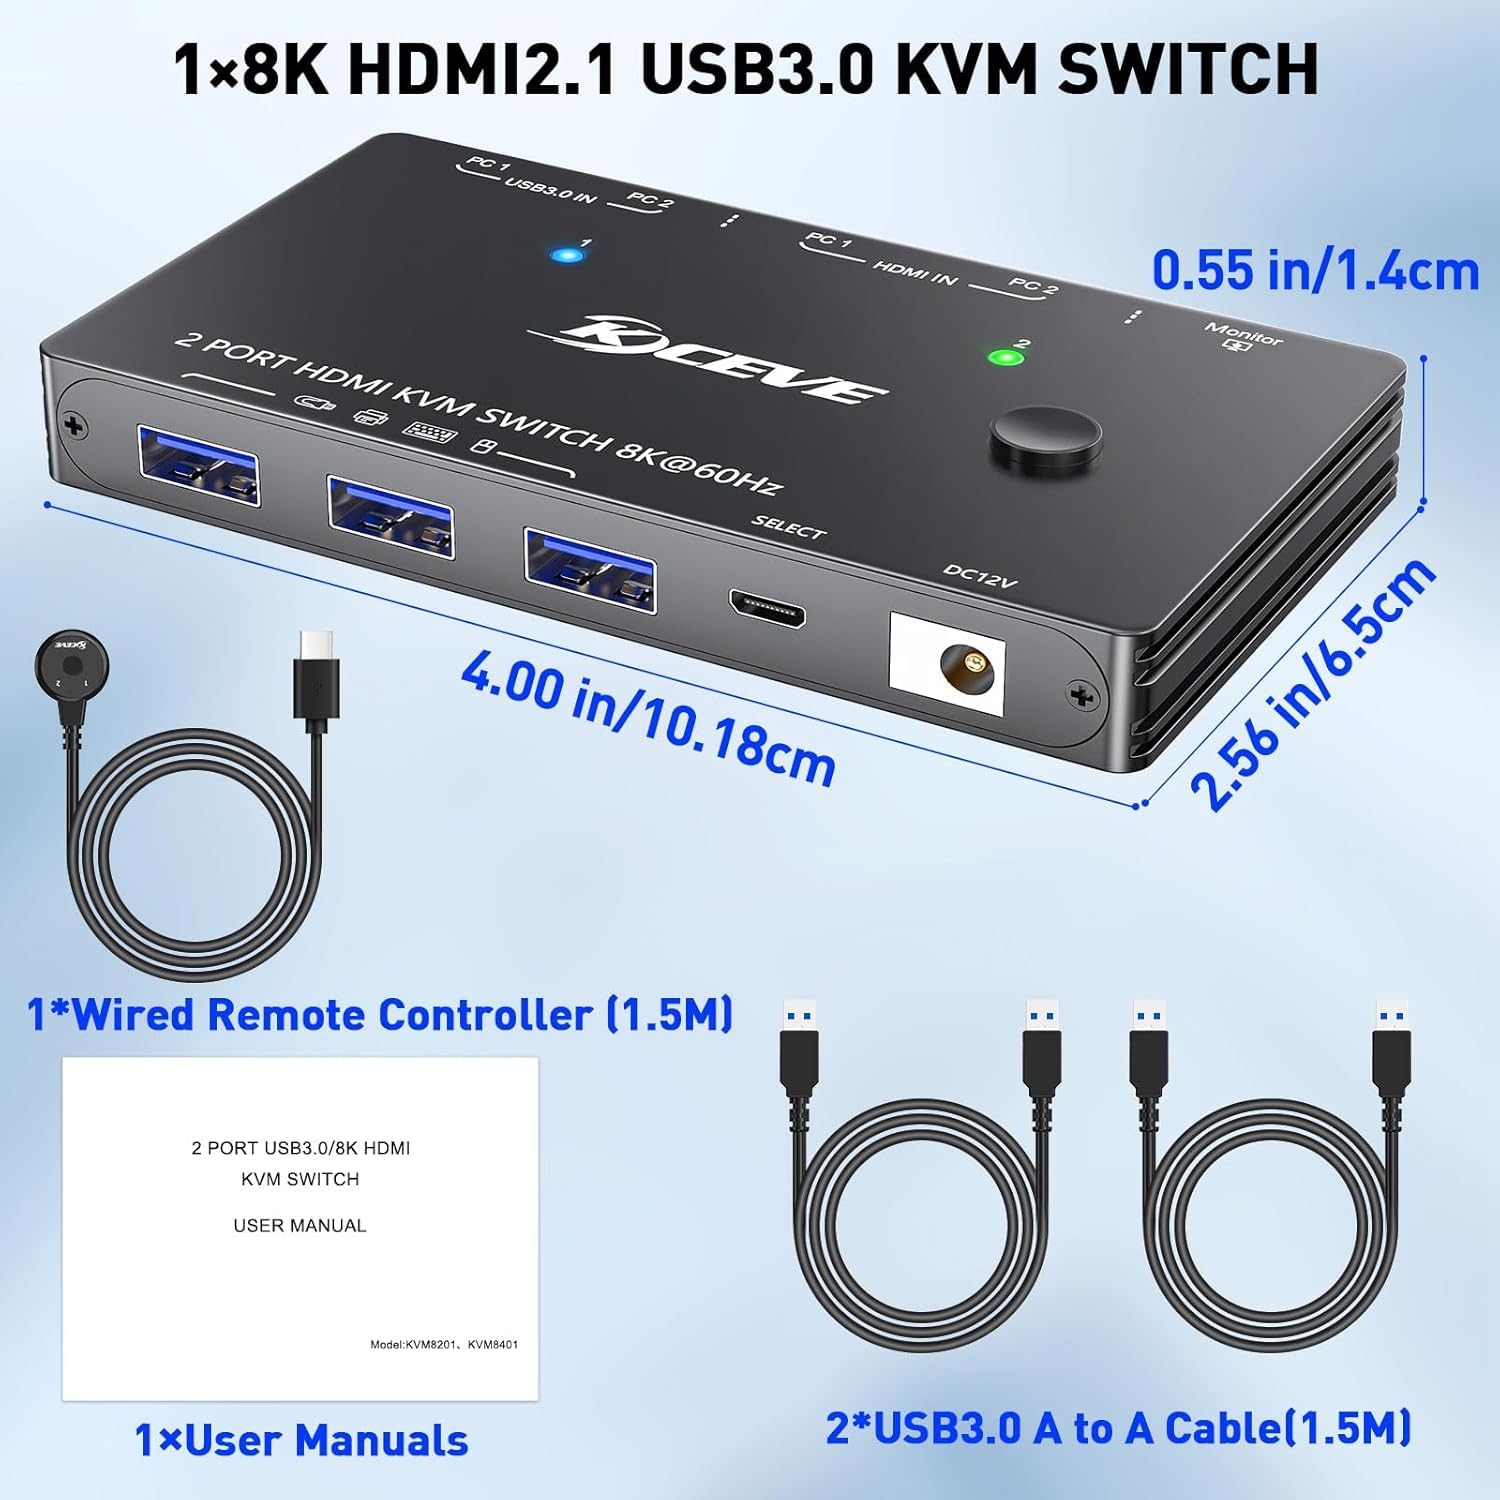
Image: Contents included in the AOOCOO 8K HDMI KVM Switch package.
Product Features
- HDMI KVM Switch: Connects 2 computers/laptops to 1 monitor.
- USB 3.0 Hub: Shares 3 USB 3.0 devices (keyboard, mouse, printer, webcam, etc.) between connected computers. Data transmission speed up to 5Gbps, backward compatible with USB 2.0.
- Ultra HD Resolution: Supports 8K@60Hz and 4K@120Hz for high-quality video output.
- Dual Switching Modes:
- One-key switching button on the KVM control panel.
- Wired remote controller for convenient switching from a distance (up to 1.5 meters).
- LED Indicators: Two color lights indicate which computer is currently active.
- Durable Construction: Made with a metal casing for enhanced durability.

Image: The KVM switch supports up to 8K@60Hz resolution.
Setup Instructions
Follow these steps to connect your AOOCOO 8K HDMI KVM Switch:
- Power Connection: Connect the provided DC 12V power adapter to the KVM switch's power input port and then to a power outlet.
- Monitor Connection: Connect your monitor to the KVM switch's HDMI OUT port using an HDMI cable (not included).
- Computer HDMI Connection: Connect HDMI cables (not included) from the HDMI output ports of PC 1 and PC 2 to the HDMI IN 1 and HDMI IN 2 ports on the KVM switch, respectively.
- Computer USB Connection: Connect the provided USB 3.0 A to A cables from the USB 3.0 ports of PC 1 and PC 2 to the USB 3.0 IN 1 and USB 3.0 IN 2 ports on the KVM switch, respectively. These connections enable USB device sharing.
- Peripheral Connection: Connect your USB keyboard, mouse, printer, webcam, or other USB 3.0 devices to the USB 3.0 ports on the KVM switch.
- Wired Remote (Optional): If desired, connect the wired remote controller to the dedicated remote port on the KVM switch.

Image: Diagram illustrating how to connect two computers, a monitor, and USB devices to the KVM switch.
Operating Instructions
The KVM switch offers two methods for switching between connected computers:
- Front Panel Button: Press the "SELECT" button located on the front panel of the KVM switch to toggle between PC 1 and PC 2. The LED indicators (1 or 2) will illuminate to show which computer is currently active.
- Wired Remote Controller: Press the button on the wired remote controller to switch between PC 1 and PC 2. This allows for convenient switching if the KVM switch unit is not easily accessible. The remote also has indicator lights.
Ensure both computers are powered on and properly connected for seamless switching.

Image: The KVM switch supports both button and wired remote switching.
Maintenance
To ensure the longevity and optimal performance of your KVM switch:
- Keep the device in a dry, well-ventilated area, away from direct sunlight and extreme temperatures.
- Avoid exposing the device to water or excessive moisture.
- Clean the exterior with a soft, dry cloth. Do not use liquid cleaners or aerosols.
- Ensure all cables are securely connected.
Troubleshooting
If you encounter issues with your KVM switch, refer to the following common solutions:
| Problem | Possible Cause / Solution |
|---|---|
| No display on monitor after switching. |
|
| Keyboard/Mouse or other USB devices are not recognized or lag. |
|
| Switching is slow or unresponsive. |
|
Specifications
| Feature | Detail |
|---|---|
| Brand | AOOCOO |
| Model Number | KC-8201-AO-US-805 |
| ASIN | B0FL7NCSND |
| Connector Type | Plug In (HDMI, USB 3.0) |
| Switch Type | Push Button |
| Control Method | Push Button, Wired Remote |
| Operating Voltage | 5 volts (via power adapter) |
| Current Rating | 2 A |
| Material | Metal |
| Item Dimensions (L x W x H) | 3.94 x 1.97 x 1.18 inches (10.0 x 5.0 x 3.0 cm) |
| Number of Positions | 2 (for computers) |
| Compatible Devices | Computers/Laptops, USB Keyboards, USB Mice, USB Printers, USB Webcams, Wired Controllers |
| Video Resolution Support | Up to 8K@60Hz, 4K@120Hz |
| USB Data Transfer Speed | Up to 5Gbps (USB 3.0) |
Image: Dimensions and components of the KVM switch.
Warranty and Support
For warranty information and technical support, please refer to the contact details provided with your purchase documentation or visit the official AOOCOO website. Keep your purchase receipt for warranty claims.
For further assistance, you may contact customer support through the platform where the product was purchased.