1. Introduction
The COTÃO SonoVax 4K Full HD Smart Dash Cam is designed to record your driving journey in high definition, providing security and evidence in case of incidents. This manual provides detailed instructions for installation, operation, and maintenance of your dash cam.
Key features include 4K front recording, 1080P rear recording, Wi-Fi connectivity for app control, ADAS alerts, GPS tracking, and Super Night Vision.
2. Package Contents
Please check the package for the following items:
- 1 x SonoVax 4K Dash Cam Unit
- 1 x Rear Camera
- 1 x Suction Mount
- 1 x 12V Power Cable
- 1 x Rear Camera Extension Cable
- 1 x Quick Guide

Image: Contents of the SonoVax 4K Dash Cam package.
3. Product Overview
Familiarize yourself with the main components of your SonoVax Dash Cam:
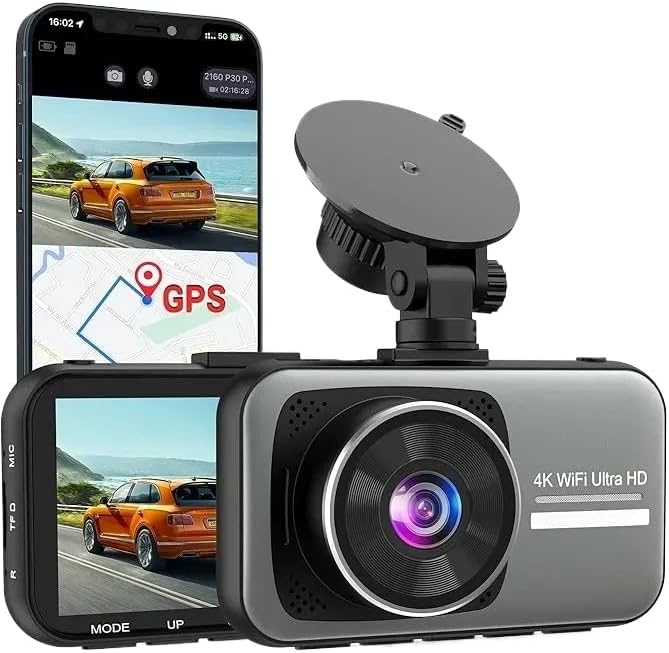
Image: SonoVax 4K Dash Cam with labeled components.
- Suction Mount: For attaching the dash cam to the windshield.
- GPS Module: Provides location and speed data for recordings.
- Rear Camera Port: Connects the rear camera.
- LCD Screen: Displays live view, settings, and playback.
- 4K WiFi UHD Lens: Main front recording lens.
4. Setup and Installation
4.1 Inserting the Memory Card
- Ensure the dash cam is powered off.
- Locate the memory card slot on the side of the dash cam.
- Insert a Class 10 or higher MicroSD card (up to 128GB, not included) with the contacts facing the screen, until it clicks into place.
- To remove, gently push the card until it springs out.
4.2 Mounting the Dash Cam
- Clean the area on your windshield where you intend to mount the dash cam.
- Attach the suction mount to the dash cam.
- Press the suction cup firmly against the windshield and flip the lever to secure it.
- Adjust the camera angle to ensure a clear view of the road ahead.
4.3 Power Connection
- Connect the 12V power cable to the dash cam's power input port.
- Plug the other end of the power cable into your vehicle's 12V power outlet (cigarette lighter socket).
- Route the cable neatly along the windshield trim to avoid obstructing your view.
4.4 Rear Camera Installation (Optional)
- Mount the rear camera on the rear windshield using its adhesive or screws, ensuring a clear view.
- Connect the rear camera to the main dash cam unit using the provided extension cable.
- Route the cable carefully from the front to the rear of the vehicle, tucking it under the headliner and pillar trims.

Image: Rear camera view with parking assist lines.
5. Operating Instructions
5.1 Powering On/Off
- The dash cam will automatically power on and begin recording when your vehicle's ignition is turned on.
- It will automatically power off shortly after the ignition is turned off.
- To manually power on/off, press and hold the power button.
5.2 Basic Recording
- Upon powering on, the dash cam will automatically start loop recording.
- Video files are saved in segments (e.g., 1, 3, or 5 minutes) to the MicroSD card.
- When the memory card is full, the oldest unlocked files will be overwritten by new recordings.

Image: Loop recording feature with memory card illustration.
5.3 Emergency Recording (G-Sensor)
- The built-in G-sensor detects sudden impacts or collisions.
- When triggered, the current video segment is automatically locked and protected from being overwritten.
- These files are stored in a separate folder on the memory card.
5.4 Parking Mode
- When parking mode is enabled and the vehicle is turned off, the dash cam will automatically start recording if it detects a vibration or impact.
- This feature requires a continuous power supply (e.g., hardwire kit, sold separately) to function 24/7.
5.5 Wi-Fi Connectivity and App Control
- Download the dedicated app (refer to the Quick Guide for app name and QR code) on your smartphone.
- Enable Wi-Fi on the dash cam through its menu settings.
- On your smartphone, connect to the dash cam's Wi-Fi network (SSID and password usually displayed on the dash cam screen).
- Open the app to view live footage, browse recorded videos, download files to your phone, and adjust settings.

Image: Wi-Fi connectivity and app control demonstration.
5.6 ADAS Alerts and GPS
- The Advanced Driver-Assistance Systems (ADAS) provide alerts such as Lane Departure Warning and Forward Collision Warning to enhance driving safety.
- The integrated GPS module records your vehicle's speed and location, which can be viewed during video playback using the dedicated PC viewer software (if provided) or the mobile app.

Image: Demonstration of 4K front and 1080P rear recording capabilities.
6. Maintenance
6.1 Cleaning the Dash Cam
- Use a soft, dry cloth to clean the dash cam body and screen.
- For the lens, use a specialized lens cleaning cloth to avoid scratches. Do not use abrasive cleaners or solvents.
6.2 Memory Card Management
- It is recommended to format the MicroSD card regularly (e.g., once a month) to maintain optimal performance and prevent data corruption. This can usually be done through the dash cam's menu settings.
- Replace the memory card if you notice frequent errors or decreased performance.
6.3 Firmware Updates
Check the manufacturer's website periodically for available firmware updates. Updating the firmware can improve performance, add new features, or fix bugs. Follow the instructions provided with the firmware update package carefully.
7. Troubleshooting
| Problem | Possible Cause | Solution |
|---|---|---|
| Dash cam does not power on. | No power supply; faulty cable; vehicle's 12V outlet is off. | Check power cable connection; test 12V outlet with another device; try a different power cable. |
| Recording stops or freezes. | Memory card full or corrupted; slow memory card; firmware issue. | Format the memory card; use a high-speed (Class 10 U3) MicroSD card; update firmware. |
| Poor video quality. | Dirty lens; protective film still on lens; incorrect resolution setting. | Clean the lens; remove any protective film; ensure 4K resolution is selected in settings. |
| Wi-Fi connection issues. | Incorrect password; Wi-Fi not enabled on dash cam; app issues. | Verify Wi-Fi password; enable Wi-Fi in dash cam settings; restart dash cam and phone app. |
| GPS not working. | GPS module not connected; poor satellite signal. | Ensure GPS module is securely connected; move to an open area for better signal reception. |
8. Specifications
| Feature | Detail |
|---|---|
| Model Name | SonoVax |
| Front Video Resolution | 4K (3840 x 2160 pixels) |
| Rear Video Resolution | 1080P (if rear camera connected) |
| Frame Rate | 30 FPS |
| Connectivity | Wi-Fi |
| Special Features | ADAS Alerts & GPS Location, Night Vision, Parking Mode |
| Storage | MicroSD card (up to 128GB, Class 10 U3 recommended) |
| Product Dimensions | 10D x 10W x 10H Centimetres |
| Manufacturer | COTAO |
9. Warranty and Support
9.1 Warranty Information
This product comes with a 30-day money-back guarantee. For specific warranty terms and conditions beyond this period, please refer to the documentation provided with your purchase or contact the manufacturer directly.
9.2 Customer Support
If you encounter any issues or have questions not covered in this manual, please contact COTÃO customer support. Refer to your product packaging or the manufacturer's official website for contact details.