1. Product Overview
This manual provides instructions for the Generic Nordic Walnut Wood LED Ceiling Chandelier, Model YCTUDEEYS-D40CM-WARM. This lighting fixture is designed for indoor use, providing warm LED illumination suitable for various rooms such as living rooms, dining areas, and bedrooms. It features a D40cm diameter and a walnut wood finish, crafted from high-quality materials for durability and aesthetic appeal.

Image: The D40cm Warm LED Ceiling Chandelier installed, showcasing its design and illumination.
2. Safety Information
- Electrical Safety: Always turn off the main power supply at the circuit breaker before beginning installation, maintenance, or cleaning.
- Qualified Electrician: Installation should be performed by a qualified electrician or a competent person familiar with electrical wiring.
- Voltage: Ensure the voltage supply matches the requirements of the fixture.
- Mounting: Ensure the mounting surface is structurally sound and can support the weight of the fixture.
- Handling: Handle the fixture with care to avoid damage to components.
- Indoor Use Only: This fixture is designed for indoor use only. Do not expose to moisture or outdoor elements.
3. What's in the Box
The package for your Generic Nordic Walnut Wood LED Ceiling Chandelier (Model YCTUDEEYS-D40CM-WARM) should contain the following items:
- Chandelier fixture with integrated LED bulbs
- Mounting hardware (screws, anchors, wire connectors)
- Instruction Manual
4. Specifications
Refer to the following table for detailed specifications of the D40cm Warm LED Ceiling Chandelier:
| Feature | Detail |
|---|---|
| Brand | Generic |
| Model Name | YCTUDEEYS-D40CM-WARM |
| Color | D40cm Warm |
| Material | Acrylic, Walnut Wood |
| Light Source | Integrated LED |
| Power Source | Corded Electric |
| Item Dimensions (D x H) | 40cm x 14cm (approx. 15.75" x 5.5") |
| Power Consumption | 24W |
| Recommended Area | 5-8 square meters |
| Installation Type | Surface Mounted |
| Required Assembly | No |
| Indoor/Outdoor Usage | Indoor |
| Specification Met | UL |
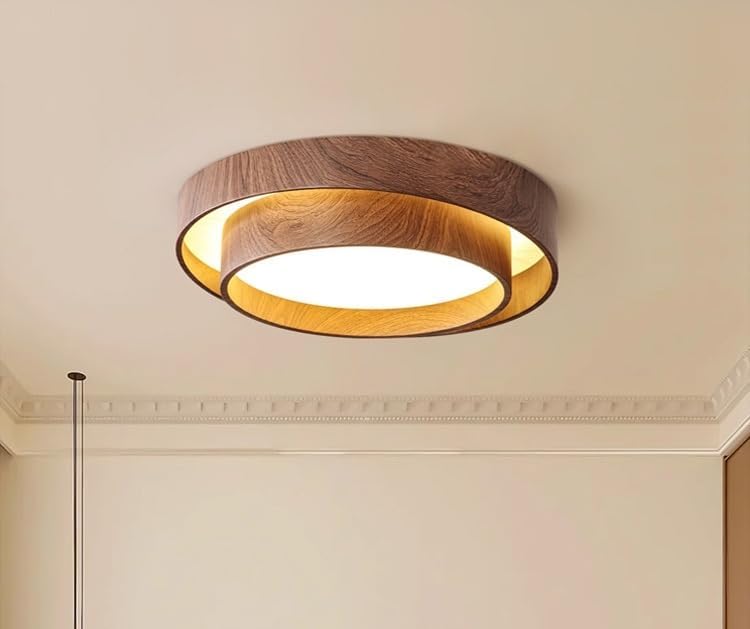
Image: Technical specifications and dimensions of the D40cm Warm LED Ceiling Chandelier.
5. Installation Guide
Follow these steps carefully to install your ceiling chandelier. It is recommended to have a second person assist during installation.
- Prepare for Installation:
- Turn off the power at the main circuit breaker to the junction box where the fixture will be installed.
- Ensure the power is off by testing with a voltage tester.
- Gather necessary tools: screwdriver, wire strippers, electrical tape, ladder.
- Mount the Mounting Bracket:
- Attach the mounting bracket (usually included with the fixture) to the ceiling junction box using the provided screws. Ensure it is securely fastened.
- Wire the Fixture:
- Carefully connect the wires from the fixture to the wires in the junction box.
- Connect the black wire (live/hot) from the fixture to the black wire from the junction box.
- Connect the white wire (neutral) from the fixture to the white wire from the junction box.
- Connect the ground wire (bare copper or green) from the fixture to the ground wire from the junction box.
- Secure all connections with wire connectors and wrap with electrical tape for added safety.
- Attach the Fixture to the Mounting Bracket:
- Carefully lift the chandelier and align the fixture with the mounting bracket.
- Secure the fixture to the bracket using the provided screws or fasteners. Ensure it is flush against the ceiling and stable.
- Restore Power:
- Once the fixture is securely installed, turn the power back on at the main circuit breaker.
- Test the light to ensure it functions correctly.
6. Operating Instructions
The Generic Nordic Walnut Wood LED Ceiling Chandelier is designed for simple operation.
- Turning On/Off: Operate the chandelier using a standard wall switch connected to the fixture's electrical circuit.
- Light Output: This model provides a warm light output. It is not designed for dimming unless connected to a compatible dimming switch and the fixture explicitly states dimmable capabilities (this specific model is 'Warm', not 'Dimmable').
7. Maintenance
Proper maintenance will ensure the longevity and appearance of your chandelier.
- Cleaning:
- Always turn off the power supply before cleaning.
- Use a soft, dry, or slightly damp cloth to wipe the surface of the fixture.
- Do not use abrasive cleaners, solvents, or polishes as they may damage the finish or acrylic components.
- Bulb Replacement: The LED bulbs in this fixture are integrated and not user-replaceable. If the LEDs fail, the entire fixture may need to be replaced.
8. Troubleshooting
If you encounter issues with your chandelier, refer to the following common problems and solutions:
| Problem | Possible Cause | Solution |
|---|---|---|
| Light does not turn on | No power supply; Loose wiring; Faulty wall switch | Check circuit breaker; Verify wire connections; Test wall switch. Consult a qualified electrician if issues persist. |
| Light flickers | Loose wiring; Incompatible dimmer switch (if applicable); Power fluctuations | Check wire connections; Ensure dimmer switch compatibility (if used); Consult an electrician for power supply issues. |
| Fixture is unstable after installation | Improper mounting; Loose screws | Ensure mounting bracket is securely fastened to the junction box and the fixture is tightly attached to the bracket. |
9. Warranty and Support
Warranty: The manufacturer's warranty description for this product is listed as None.
Customer Support: For any questions regarding installation, operation, or troubleshooting that are not covered in this manual, please contact the retailer or seller from whom you purchased the product for assistance.