1. Safety Information
Your safety is paramount. Always wear a helmet and appropriate protective gear when operating the Roinside Electric Scooter. Familiarize yourself with local laws and regulations regarding electric scooter usage.
- The scooter has passed UL2272 certification, ensuring high safety standards.
- The dual braking system (disc braking and EABS regenerative anti-lock braking) provides reliable stopping power.
- Ensure the scooter is fully charged before each use.
- Do not ride in heavy rain or through deep puddles, despite its IP64 waterproof rating, to prevent damage to electronic components.
- Always check for loose parts or damage before riding.
2. Product Overview
The Roinside UP6 Electric Scooter is designed for efficient and comfortable commuting. It features an 8.5-inch solid tire system, a powerful 350W motor, and smart app integration.
Key Features:
- 8.5-inch Solid Tires: Maintenance-free, anti-slip, durable, and provide better grip.
- 350W Motor: Provides strong power for speeds up to 19 MPH and a maximum range of 23 miles.
- Dual Braking System: Combines disc braking and EABS regenerative anti-lock braking for enhanced safety.
- Foldable Design: One-click lock mechanism for easy portability and storage.
- Smart App Connectivity: Control LED display, cruise system, Bluetooth, speed mode, and scooter lock function via your smartphone.
- IP64 Waterproof: Designed to withstand light rain during commuting.
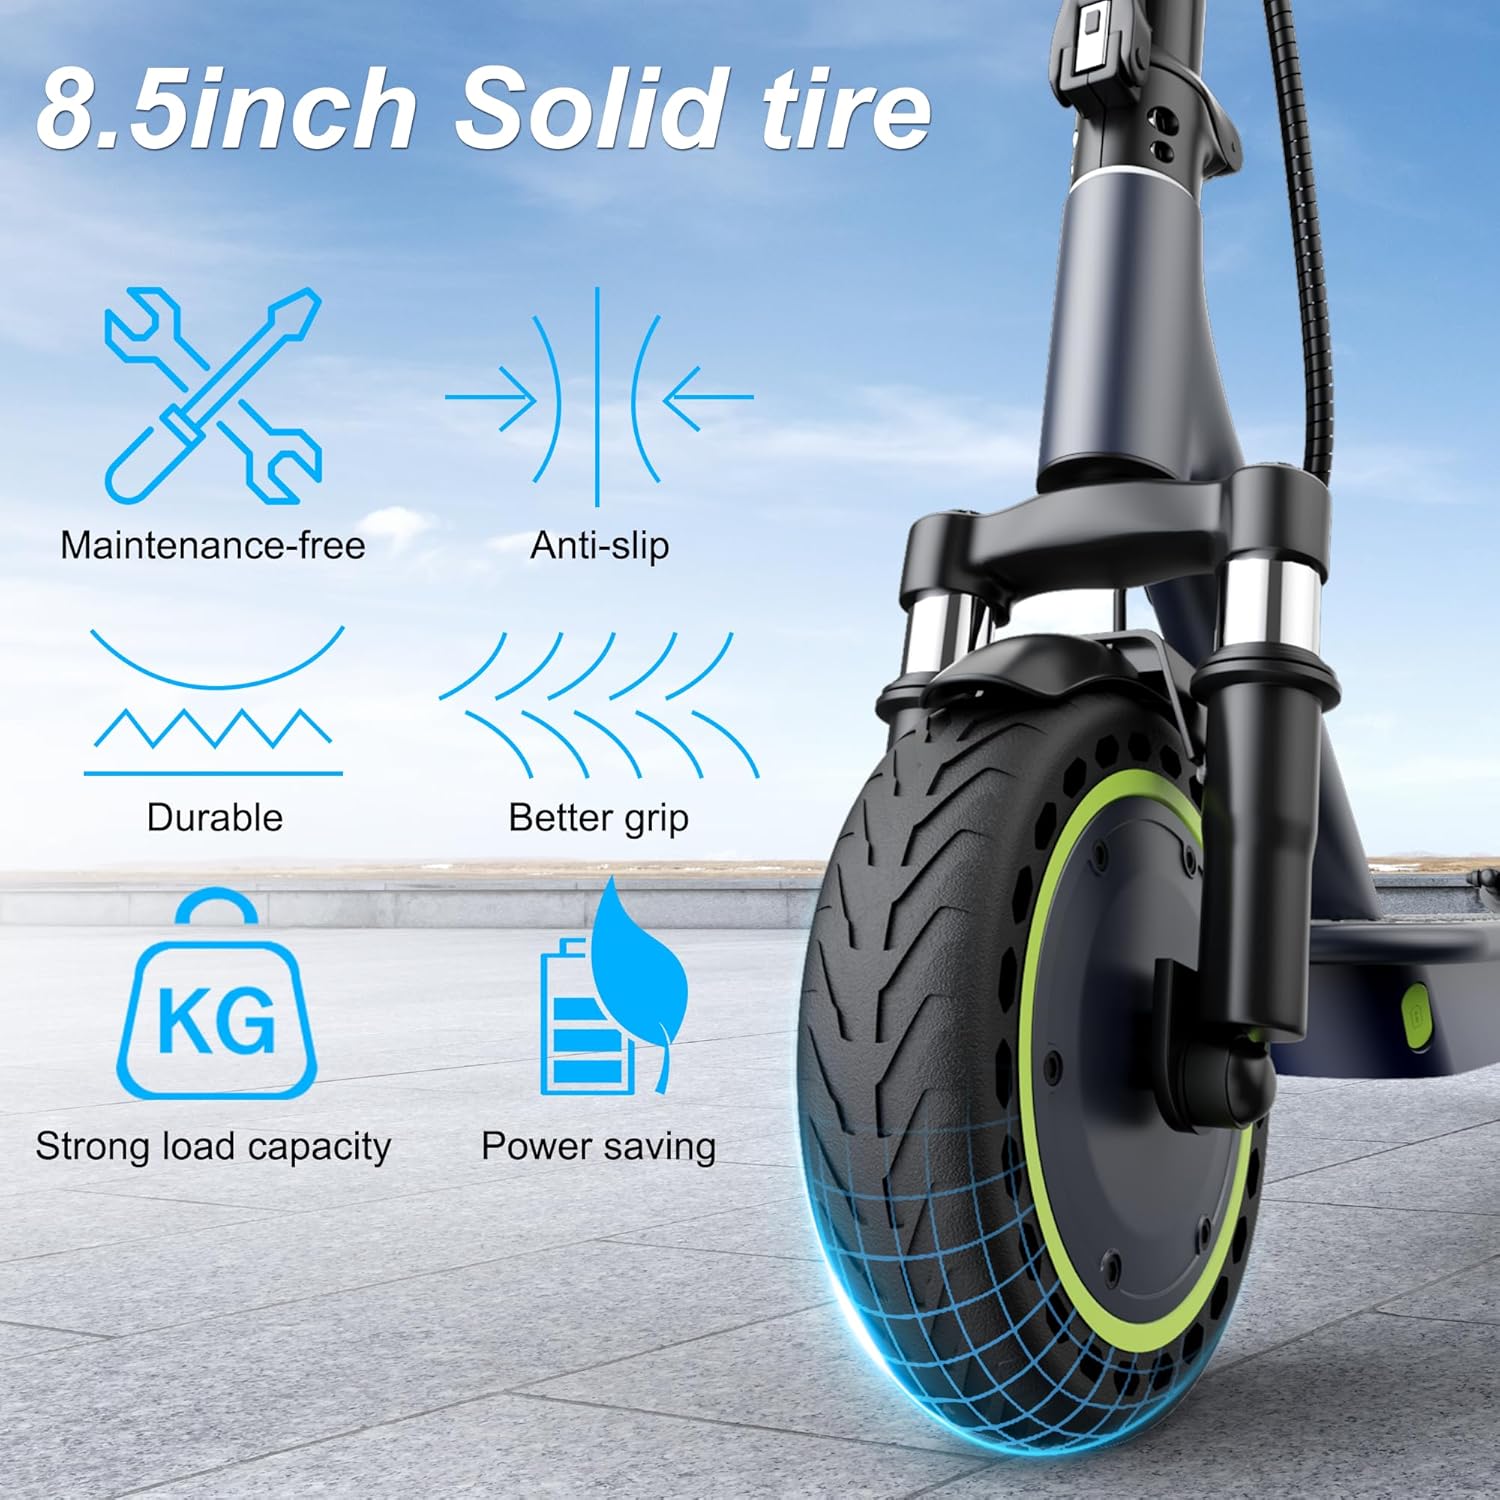
Figure 1: 8.5-inch Solid Tire Features
The 8.5-inch solid tires are designed for durability and require no air maintenance, offering a smooth and stable ride. They provide excellent grip and support a strong load capacity while being power-saving.

Figure 2: Smart App and Console Overview
The integrated smart app allows for comprehensive control and monitoring of your scooter, including speed, battery status, and activating cruise mode for a worry-free riding experience.

Figure 3: Dual Braking System in Action
The scooter's dual braking system ensures quick and secure stops, providing an added layer of safety during your rides.
3. Setup
Unfolding the Scooter:
- Place the scooter on a flat surface.
- Lift the handlebar stem until it locks into the upright position. Ensure the locking mechanism is securely engaged.
- Adjust the handlebar height if necessary.
Charging the Battery:
- Locate the charging port, typically on the side of the deck.
- Connect the charger to the scooter and then to a power outlet.
- The indicator light on the charger will change (e.g., from red to green) when charging is complete.

Figure 4: Scooter Dimensions and Folded State
The scooter's foldable design allows for easy transport and storage. To fold, simply release the lever on the stem and fold it down until it latches onto the rear fender.
4. Operating Instructions
Power On/Off:
- Press and hold the power button on the display to turn the scooter on or off.
Starting Modes:
- Glide Start Mode: Push off with your foot to gain initial speed (approx. 3 seconds), then engage the throttle.
- Electric Start Mode: Engage the throttle directly from a standstill.
Controls:
- Throttle: Located on the right handlebar, push to accelerate.
- Brake Lever: Located on the left handlebar, squeeze to activate the dual braking system. The rear brake light will flash when braking.
- Bell: Use the bell on the left handlebar to alert others.
- Headlight: Double-click the power button to turn the headlight on or off for night riding.
Display and Modes:
- The digital display shows current speed, battery level, and selected riding mode.
- Press the power button once to cycle through riding modes: Sport, Eco, and Driving.
- Triple-click the power button to switch between Miles Per Hour (MPH) and Kilometers Per Hour (KM/H).
Kickstand:
- To deploy, push the kickstand down with your foot until it clicks into place.
- To retract, push the kickstand back up against the scooter's body.
5. Maintenance
Regular maintenance ensures the longevity and safe operation of your scooter.
- Tires: The 8.5-inch solid tires are maintenance-free and do not require inflation. Regularly inspect them for wear and tear.
- Brakes: Periodically check the brake levers and cables for proper function and adjustment. Ensure the disc brake is clean and free from debris.
- Battery: Charge the battery regularly, even if the scooter is not in use, to maintain battery health. Avoid completely draining the battery.
- Cleaning: Wipe down the scooter with a damp cloth. Do not use high-pressure water or immerse the scooter in water.
- Fasteners: Check all screws and bolts periodically to ensure they are tight.

Figure 5: Scooter Design for Easy Maintenance
The robust design of the Roinside UP6 simplifies maintenance, allowing you to focus more on riding.
6. Troubleshooting
If you encounter issues with your Roinside Electric Scooter, refer to the following general troubleshooting tips:
- Scooter not turning on: Ensure the battery is charged. Check all connections.
- Loss of power/speed: The battery might be low. Check for obstructions in the wheels.
- Brakes not responding: Inspect brake cables and pads for wear or damage. Adjust as needed.
- App connectivity issues: Ensure Bluetooth is enabled on your smartphone and the scooter is powered on. Try restarting both devices.
For persistent issues, please contact customer support.
7. Specifications
| Brand | Roinside |
| Model Name | UP6 |
| Wheel Size | 8.5 Inches |
| Motor Power | 350W |
| Maximum Speed | Up to 19 MPH |
| Maximum Distance Range | 23 Miles |
| Weight Limit | 265 Pounds |
| Brake Style | Disc Brake and Regenerative |
| Special Feature | Digital Display, App Control |
| Suspension Type | Dual Suspension |
| Wheel Type | Solid |
| Handlebar Type | Adjustable |
| GTIN/UPC | 714855963280 |
| Item Dimensions (LxWxH) | 40 x 5.5 x 16 inches |
8. Warranty and Support
The Roinside Electric Scooter comes with a 12-month service warranty for various parts, including returns and exchanges. For any questions or support needs, please refer to your purchase documentation for contact details or visit the official Roinside website.
Always retain your proof of purchase for warranty claims.