Introduction
This manual provides detailed instructions for the installation, operation, and maintenance of your VBESTLIFE 4-Channel 1080P Dash Cam. Please read this manual thoroughly before using the device to ensure proper functionality and safety.
Package Contents
Verify that all items are present in the package:
- 1 x Dash Cam Unit
- 1 x Power Supply Cord (Car Charger)
- 1 x Rear Camera
- 1 x Rear Camera Cable
- 1 x Instruction Manual
- 1 x Mounting Bracket
- 1 x Adhesive Pad
- 2 x Screws
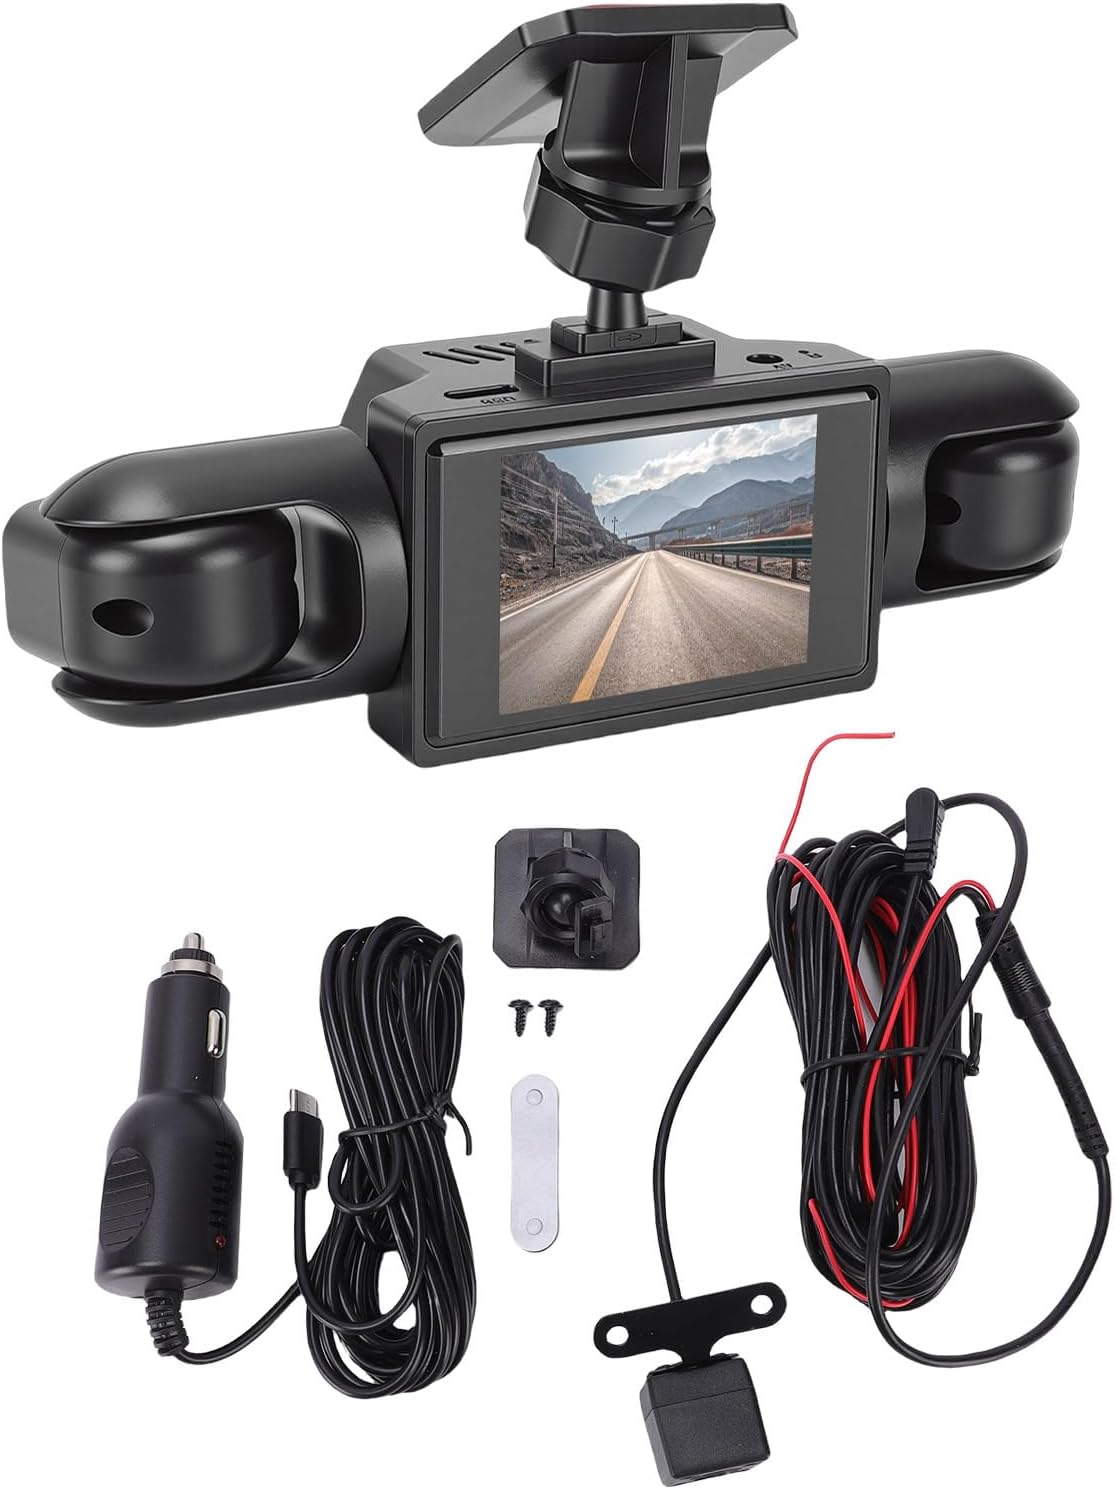
Image: Contents of the VBESTLIFE Dash Cam package, showing the main unit, rear camera, various cables, mounting accessories, and car charger.
Product Features
- 4-Channel Recording: Records simultaneously from front, rear, and both side cameras for 360° coverage.
- 1080P High Definition: Captures clear video footage.
- 2.0 Inch Screen: For real-time viewing and playback.
- Loop Recording: Automatically overwrites older, unprotected files to ensure continuous recording.
- G-Sensor (Collision Detection): Detects sudden impacts and automatically locks the current video segment to prevent overwriting.
- Motion Detection: Records when motion is detected in front of the vehicle (requires continuous power).
- Low Light Performance: Equipped for clear video capture in low light conditions.
- Universal Compatibility: Suitable for various vehicle types including cars, trucks, and SUVs.

Image: Visual representation of the dash cam's main features, including 1080P resolution, 360-degree recording, four cameras, collision detection, motion detection, and loop recording.
Setup and Installation
1. Prepare the Micro SD Card
Insert a Class 10 or higher Micro SD card (up to 128GB, not included) into the dash cam's Micro SD card slot. Format the card within the dash cam's settings before first use to ensure optimal performance.
2. Mount the Main Dash Cam Unit
- Clean the windshield area where the dash cam will be mounted.
- Attach the mounting bracket to the dash cam unit.
- Peel off the protective film from the adhesive pad on the mounting bracket.
- Firmly press the dash cam onto the desired location on the windshield, ensuring a clear view of the road and easy access to controls.
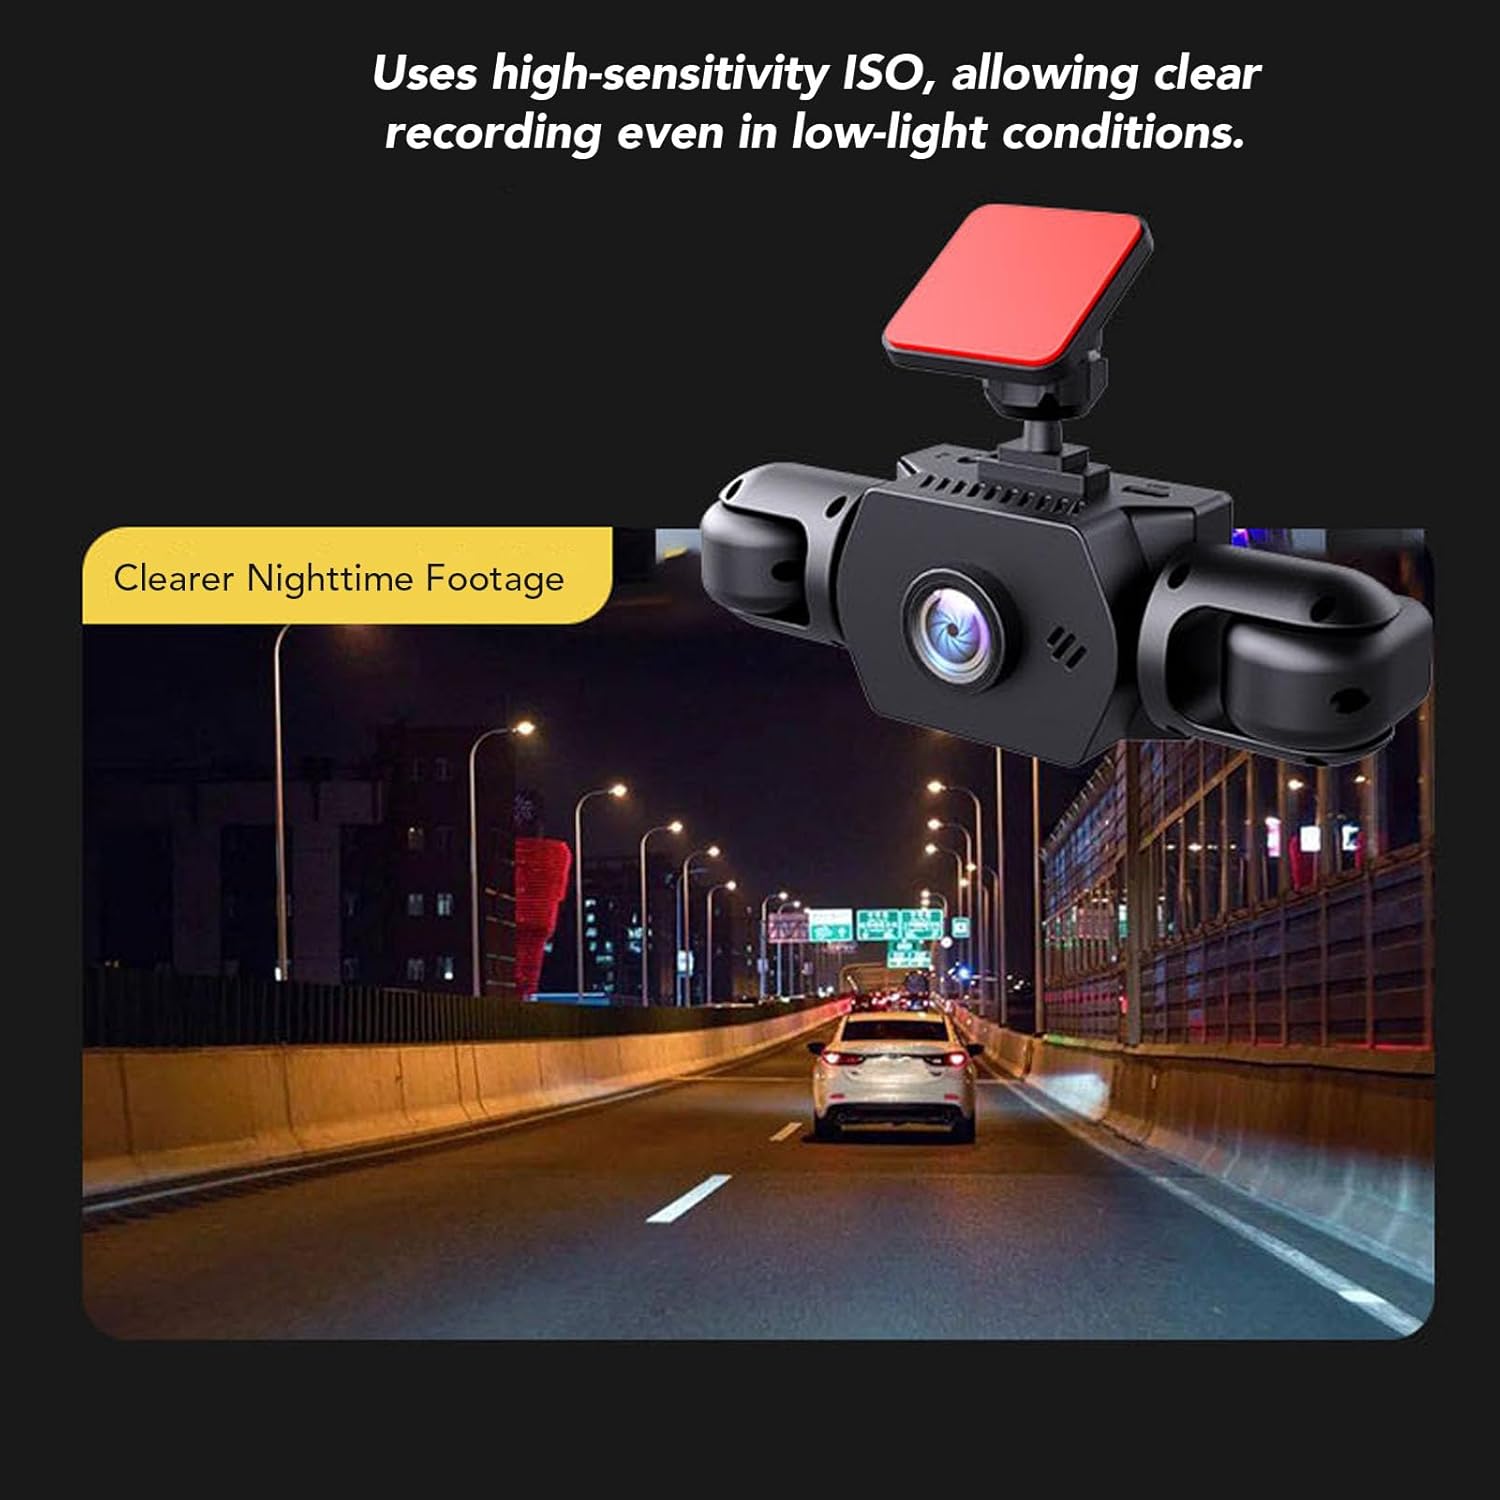
Image: The main dash cam unit, featuring a central screen and two integrated side cameras, mounted on a vehicle's windshield.
3. Install the Rear Camera
- Identify a suitable location for the rear camera, typically on the rear windshield or near the license plate.
- Use the provided adhesive or screws to secure the rear camera.
- Route the rear camera cable to the main dash cam unit, ensuring it does not interfere with vehicle operations or safety features.
- Connect the rear camera cable to the designated port on the main dash cam unit.

Image: The compact rear camera, designed for external mounting, showing its lens and integrated LED lights for improved night vision.
4. Power Connection
- Connect the power supply cord (car charger) to the dash cam's power input port.
- Plug the other end of the power supply cord into your vehicle's 12V power outlet (cigarette lighter socket).
- The dash cam will typically power on automatically when the vehicle's ignition is turned on and begin recording.
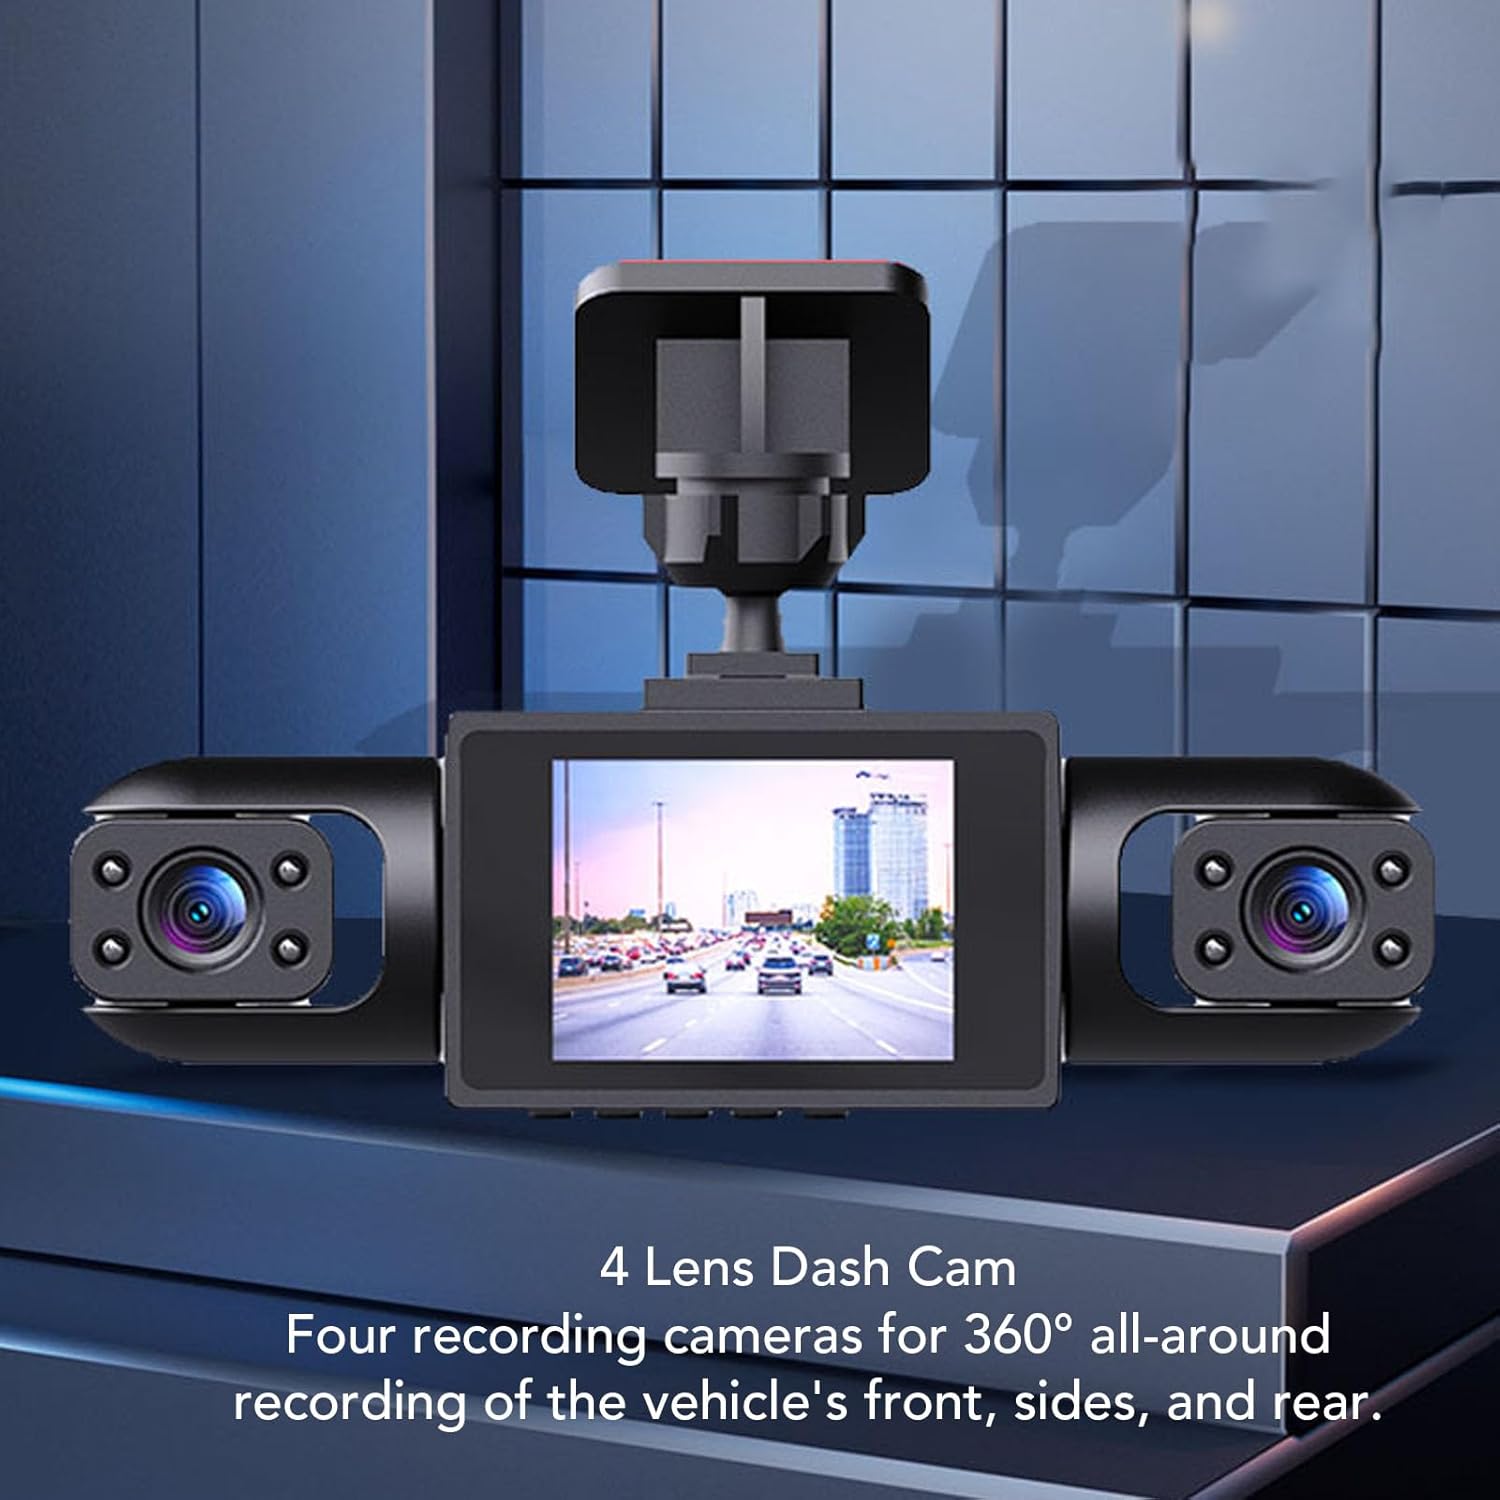
Image: An overhead diagram showing the placement of the front, left, right, and rear cameras to achieve 360-degree recording coverage around the vehicle.
Operating Instructions
Basic Operation
- Power On/Off: The dash cam powers on automatically with vehicle ignition and powers off when the ignition is turned off. You can also manually power it on/off using the power button.
- Recording: Once powered on, the dash cam automatically begins loop recording. A recording indicator (e.g., flashing red dot) will be visible on the screen.
- Screen Display: The 2.0-inch screen displays real-time footage from the cameras. You can typically switch between camera views or display multiple views simultaneously through the menu settings.
Menu Settings
Access the menu by pressing the Menu button (refer to your device for exact button layout). Common settings include:
- Resolution: Set video resolution (e.g., 1080P).
- Loop Recording: Adjust the duration of video segments (e.g., 1, 3, 5 minutes).
- G-Sensor Sensitivity: Adjust the sensitivity of collision detection (Low, Medium, High). Higher sensitivity means minor bumps will trigger recording lock.
- Motion Detection: Enable or disable this feature. When enabled, the camera will record when motion is detected while parked.
- Date/Time Stamp: Ensure the correct date and time are set for accurate recording timestamps.
- Format SD Card: Use this option to erase all data on the Micro SD card.
Loop Recording Function
The dash cam records video in continuous loops. When the Micro SD card is full, the oldest unprotected files are automatically overwritten by new recordings. Files protected by the G-Sensor or manual locking will not be overwritten.

Image: A circular diagram demonstrating how loop recording functions, with new video segments replacing the oldest unprotected segments on the memory card.
G-Sensor (Collision Detection)
The built-in 3-axis G-sensor detects sudden acceleration, braking, or collisions. When triggered, it automatically locks the current video segment, preventing it from being overwritten by loop recording. These locked files are stored in a separate folder on the SD card.

Image: The dash cam operating in a vehicle, with an overlay indicating the activation of the collision detection feature during an incident.
Low Light Performance
The dash cam is designed to capture clear, low-noise video even in low light conditions, ensuring important details like license plates remain visible during nighttime recordings.

Image: A nighttime view from the dash cam, demonstrating its ability to record clear footage in low-light environments, with visible streetlights and vehicle lights.
Maintenance
- Clean the Lenses: Regularly clean the camera lenses with a soft, lint-free cloth to ensure clear video quality.
- Format SD Card: It is recommended to format the Micro SD card every 2-4 weeks to prevent data corruption and ensure optimal recording performance.
- Temperature: Avoid exposing the dash cam to extreme temperatures for extended periods, as this can affect battery life and device performance.
- Firmware Updates: Check the manufacturer's website periodically for any available firmware updates to improve performance and add new features.
Troubleshooting
| Problem | Possible Cause | Solution |
|---|---|---|
| Dash cam does not power on. | No power supply; faulty power cable; vehicle's 12V outlet is not working. | Check power cable connection. Test the 12V outlet with another device. Ensure vehicle ignition is on. |
| Recording stops or freezes. | SD card is full; SD card is too slow or corrupted; device malfunction. | Format the SD card. Use a Class 10 or higher Micro SD card. Replace the SD card if corrupted. |
| Video footage is blurry or unclear. | Camera lens is dirty; protective film still on lens; poor lighting conditions. | Clean the camera lenses. Remove any protective film. Ensure adequate lighting where possible. |
| G-Sensor is too sensitive/not sensitive enough. | G-Sensor sensitivity setting is incorrect. | Adjust G-Sensor sensitivity in the menu settings. |
| Rear camera not displaying. | Rear camera cable is loose or damaged; rear camera is faulty. | Check the connection of the rear camera cable to the main unit. Inspect the cable for damage. |
Specifications
| Feature | Detail |
|---|---|
| Model Number | VBESTLIFEouhil9gmk5 |
| Screen Size | 2.0 Inch |
| Video Resolution | 1080P |
| Battery Type | 500mAh Li Battery (Built-in) |
| Storage | Supports up to 128GB Micro SD Card (Class 10 or higher, excluded) |
| Dimensions (D x W x H) | 5.91"D x 4.33"W x 2.76"H |
| Special Features | 4-Channel Recording, Loop Recording, G-Sensor, Motion Detection, Low Light Performance |
Warranty Information
This product comes with a manufacturer warranty for 90 days from the date of purchase. Please retain your proof of purchase for warranty claims. The warranty covers defects in materials and workmanship under normal use. It does not cover damage caused by misuse, accident, unauthorized modification, or external causes.
Customer Support
For technical assistance, troubleshooting, or warranty inquiries, please contact VBESTLIFE customer support. Refer to the contact information provided on the product packaging or the official VBESTLIFE website.