1. Introduction
Thank you for choosing the LUXOAK YSS003 Outdoor Resin Storage Shed. This manual provides essential information for the safe assembly, operation, and maintenance of your new storage shed. Please read all instructions carefully before beginning assembly and retain this manual for future reference.
2. Safety Information
- Always wear appropriate safety gear, including gloves and eye protection, during assembly.
- Ensure the assembly area is clear of obstructions and level.
- Do not attempt to assemble the shed alone. Two people are recommended for safe and efficient assembly.
- Keep children and pets away from the assembly area.
- Do not climb on the shed roof or walls.
- Secure the shed to the ground using appropriate anchoring methods to prevent wind damage.
- Do not store flammable liquids or hazardous materials inside the shed.
3. Package Contents
The LUXOAK YSS003 storage shed is typically shipped in multiple packages. Please verify that all packages have arrived and inspect all components for damage or missing parts before beginning assembly. Refer to the parts list provided in your separate assembly guide for a complete inventory.

Image: The shed components are delivered in three separate packages. Please check all packages upon arrival.
4. Assembly Instructions
Assembly of the LUXOAK YSS003 shed requires two individuals and typically takes 3-4 hours. Each part is numbered for easy identification. Follow the detailed step-by-step instructions provided in the separate assembly manual included with your product. Below is a general overview of the assembly process:
- Prepare the Foundation: Ensure a level and stable foundation. If installing on an uneven surface, a custom platform may be required.
- Assemble the Floor: Connect the floor panels according to the instructions. The shed includes a durable floor.
- Construct the Walls: Slide the wall panels together, securing them with the provided brackets and wall mounts.
- Install Windows and Doors: Integrate the transparent window and attach the double doors.
- Assemble the Roof: Secure the roof panels and support bars. The roof is designed for durability and load-bearing capacity.
- Finalize and Secure: Ensure all connections are tight and install the stainless steel lock for security.
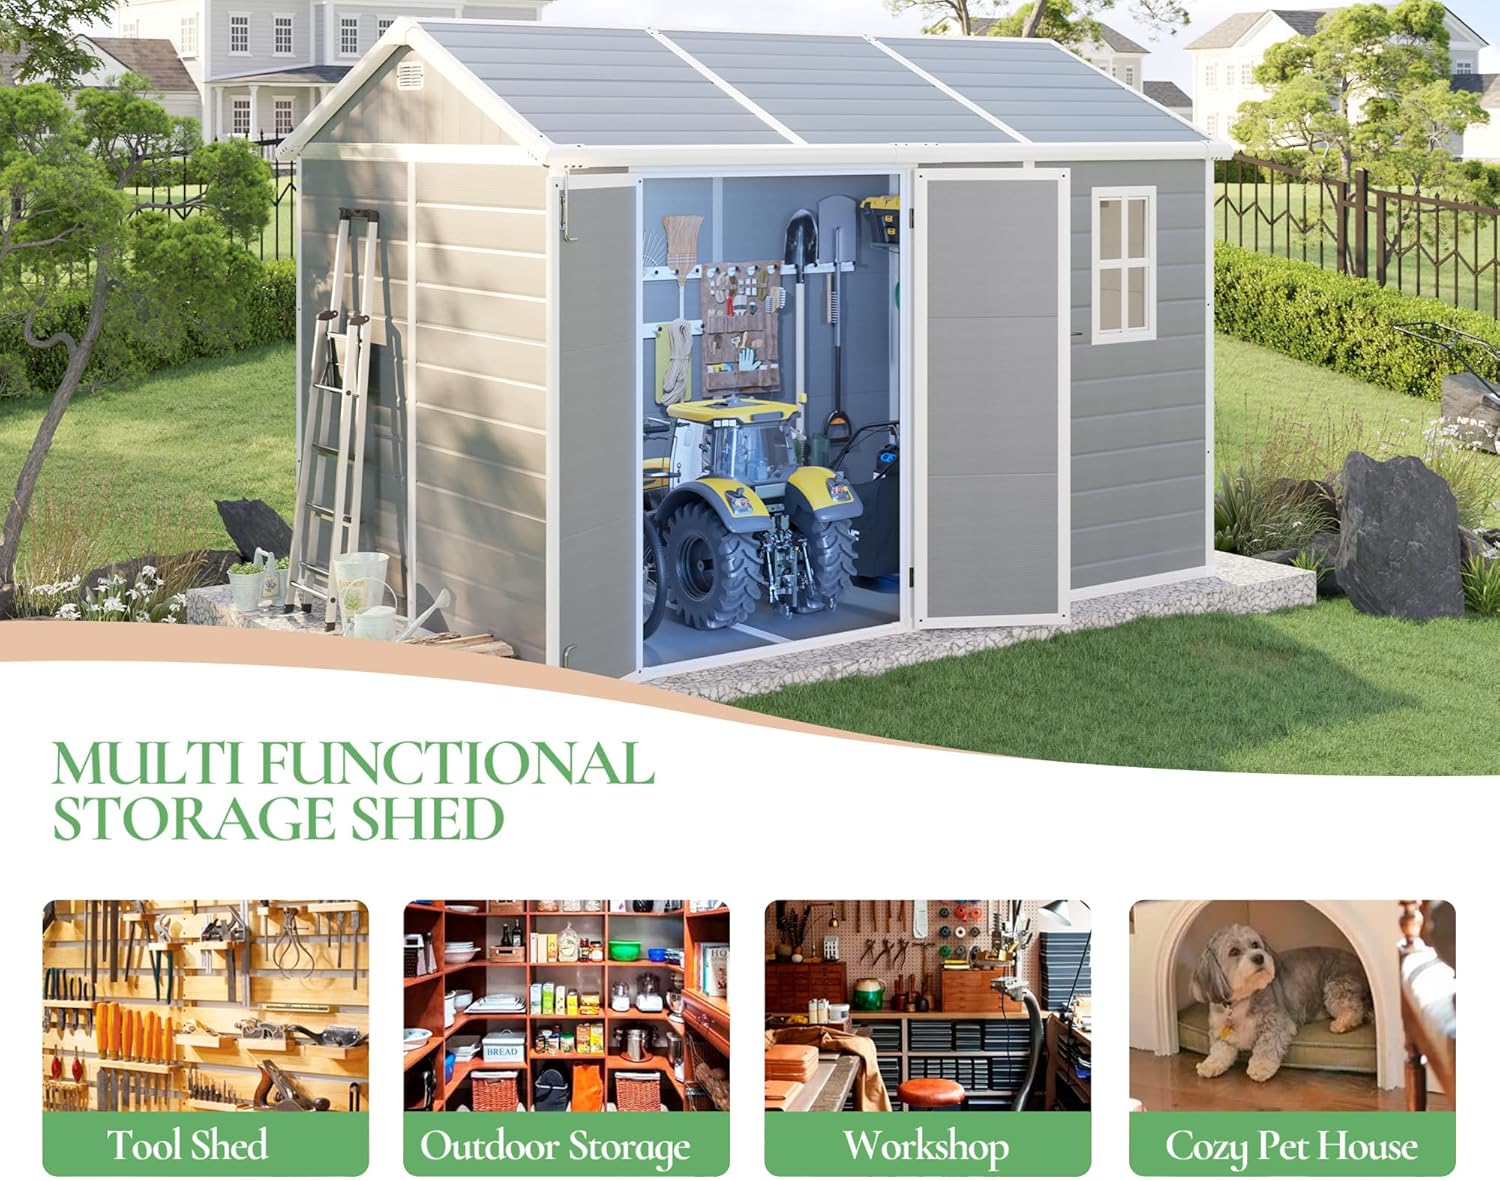
Image: Interior view during assembly, showing the interlocking wall panels and roof frame.

Image: The fully assembled shed with doors open, ready for use.
5. Product Features
- Spacious & Versatile Storage: Dimensions of 91"(L) x 126"(W) x 90"(H) provide ample space for lawnmowers, bicycles, and storage racks, suitable for various uses including a tool shed or small workshop.
- High-Quality PP Material: Constructed from premium polypropylene (PP) material, offering UV ray and rain resistance. Door frames and connecting panels are reinforced with stainless steel cores for enhanced stability.
- Ventilated & Well-Lit: Features a transparent window and dual ventilation ports to reduce humidity, allow natural light, and maintain a fresh interior.
- Enhanced Structural Integrity: Includes wear-resistant ABS corner protectors and drainage outlets at each corner to prevent water accumulation. The roof is designed to withstand heavy loads.
- Secure Design: Equipped with a stainless steel lock on the door for added security.

Image: The shed's versatility for various storage and utility purposes.

Image: Illustrates the spacious interior for various equipment and tools.

Image: Details of the shed's durable construction and security features.

Image: Demonstrates the ventilation system and robust corner guards.
6. Operation
- Doors: The shed features double doors for wide access. Use the integrated stainless steel lock to secure the doors when not in use.
- Windows: The transparent window allows natural light into the shed. Ensure it is properly sealed to prevent water entry.
- Air Vents: The dual ventilation ports promote air circulation and reduce humidity. Ensure they are not blocked by stored items.
7. Maintenance
- Cleaning: Clean the shed periodically with mild soap and water. Avoid abrasive cleaners or harsh chemicals that could damage the resin material.
- Inspection: Regularly inspect the shed for any signs of wear, damage, or loose fasteners. Tighten any loose screws or bolts.
- Drainage: Ensure the drainage outlets at the corners are clear of debris to prevent water accumulation.
- Winter Care: While the shed is designed to withstand various weather conditions, clearing heavy snow loads from the roof is recommended to prevent excessive stress.
8. Troubleshooting
- Water Leakage: Check all panel connections and roof seals. Ensure the shed is on a level surface and drainage is clear.
- Door Misalignment: Verify that the shed foundation is level. Adjust hinges if necessary, ensuring all screws are tight.
- Parts Missing/Damaged: If you discover missing or damaged parts upon unboxing, contact LUXOAK customer support immediately for assistance.
9. Specifications

Image: Detailed product dimensions and capacities.
| Specification | Detail |
|---|---|
| Brand | LUXOAK |
| Model Number | YSS003 |
| Color | Gray |
| Material | Polypropylene (PP), Resin, Stainless Steel |
| Product Dimensions (D x W x H) | 91"D x 120"W x 90"H (approx. 7.58'D x 10'W x 7.5'H) |
| Item Weight | 308 Pounds |
| Floor Area | 79.8 Square Feet |
| Door Width | 45 Inches |
| Door Height | 68 Inches |
| Water Resistance Level | Waterproof |
| Assembly Required | Yes |
10. Warranty and Support
For warranty information, please refer to the documentation included with your purchase or contact LUXOAK customer support directly. If you require assistance with assembly, parts, or have any questions regarding your shed, please reach out to the manufacturer's customer service team.