Introduction
Thank you for choosing the LTC DVB-T2 TV Tuner Stick LXDVB213M. This device allows you to receive terrestrial digital television broadcasts in Full HD 1080 quality. It features TIMESHIFT functionality, PVR recording, and a multimedia player. This manual provides detailed instructions for setup, operation, and maintenance to ensure optimal performance.
What's in the Box
Please check the contents of your package. If any items are missing or damaged, contact your retailer.
- LTC DVB-T2 TV Tuner Stick LXDVB213M
- Remote Control
- USB Power Cable
- External IR Receiver Cable
- User Manual (this document)
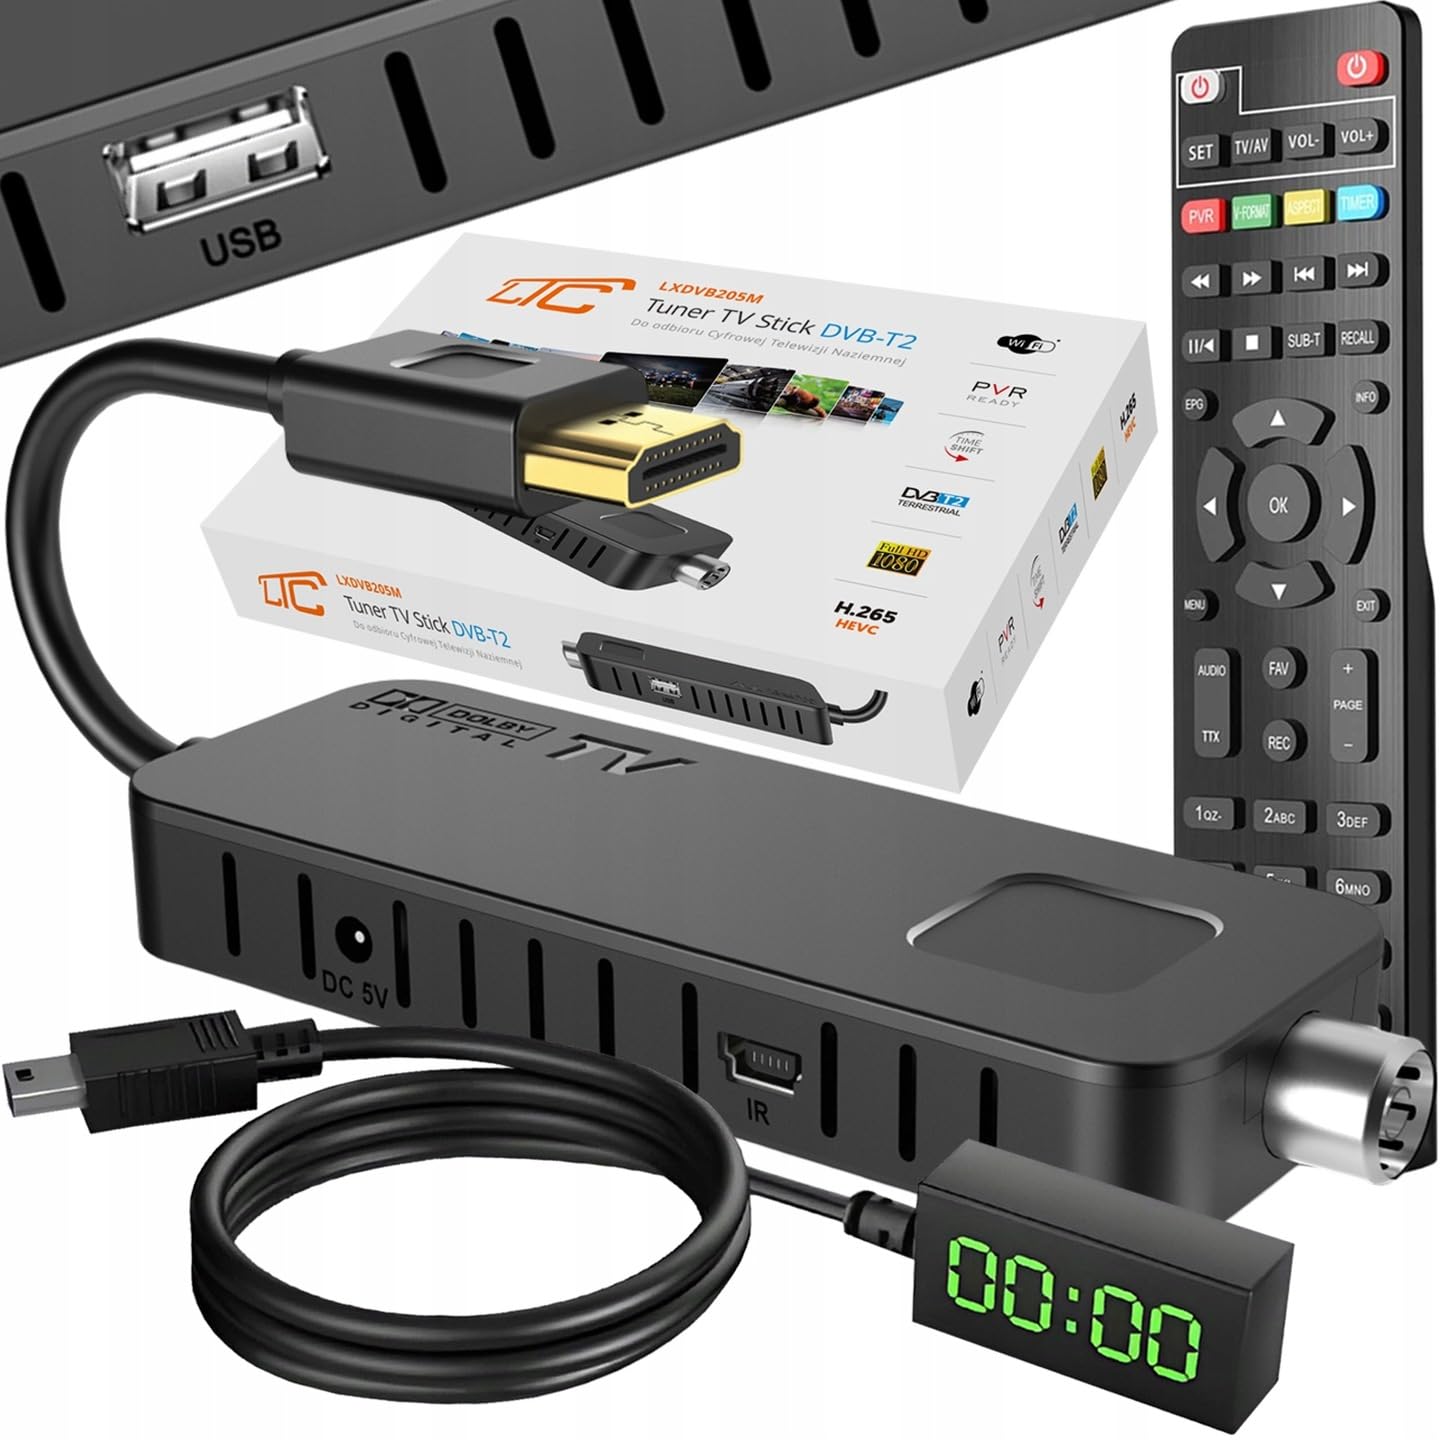
Image: The LTC DVB-T2 TV Tuner Stick LXDVB213M package contents, including the tuner stick, remote control, USB power cable, and external IR receiver.
Product Overview
The LTC DVB-T2 TV Tuner Stick is a compact device designed for digital terrestrial television reception. It connects directly to your TV's HDMI port.
Tuner Stick Components

Image: The DVB-T2 tuner stick with its integrated HDMI connector and the accompanying remote control.
- HDMI Connector: For connecting to your television.
- Antenna Input (RF IN): For connecting your DVB-T2 terrestrial antenna.
- USB 2.0 Port: For connecting USB storage devices for PVR and media playback, and for Wi-Fi adapter (not included).
- DC 5V Input: For power supply using the provided USB power cable.
- IR Port: For connecting the external IR receiver cable for remote control functionality.

Image: Close-up view of the LTC DVB-T2 TV Tuner Stick showing the DC 5V power input, IR receiver port, and USB port.
Remote Control
The included remote control provides full functionality for navigating menus, changing channels, and accessing features like TIMESHIFT and PVR.
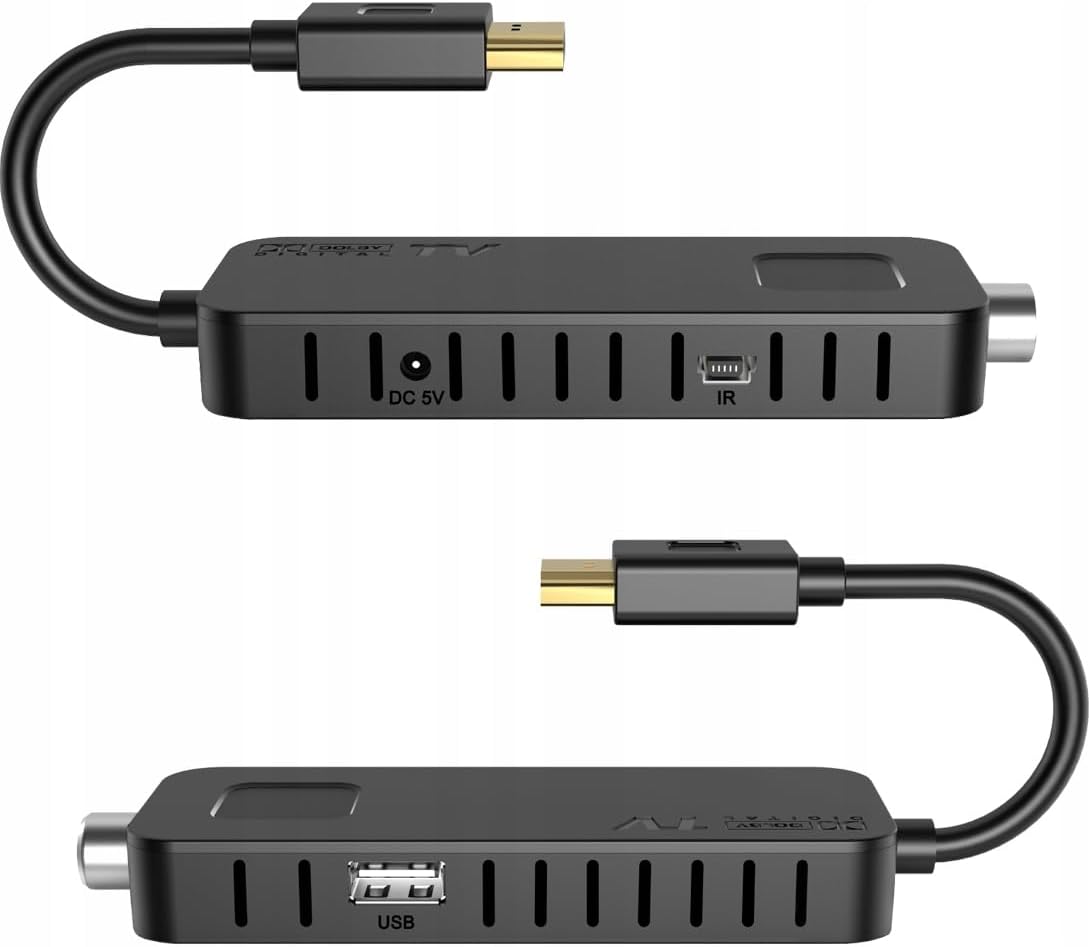
Image: Detailed view of the remote control for the LTC DVB-T2 TV Tuner Stick, highlighting its various buttons for power, volume, channel, menu, EPG, PVR, and multimedia functions.
Setup Instructions
- Connect to TV: Plug the HDMI connector of the DVB-T2 Tuner Stick directly into an available HDMI port on your television.
- Connect Antenna: Connect your DVB-T2 terrestrial antenna cable to the RF IN port on the tuner stick.
- Connect IR Receiver: Plug the external IR receiver cable into the IR port on the tuner stick. Position the IR receiver in a location where it has a clear line of sight to your remote control.
- Connect Power: Connect the provided USB power cable to the DC 5V input on the tuner stick and plug the other end into a USB port on your TV or a USB power adapter (5V/1A, not included).
- Power On: Turn on your television and select the correct HDMI input source using your TV's remote control.
- Initial Setup: The device should power on automatically. Follow the on-screen instructions for initial setup, including language selection and automatic channel search. The intuitive menu system and automatic channel search will have the receiver ready in minutes.
- Wi-Fi Connection (Optional): To use internet applications like YouTube, connect a compatible external Wi-Fi antenna (not provided) to the USB port. Then, navigate to the network settings in the menu to configure the Wi-Fi connection.

Image: The LTC DVB-T2 TV Tuner Stick connected to a television via HDMI, with the external IR receiver and USB power cable also attached.
Operating Instructions
This section details the primary functions and features of your DVB-T2 Tuner Stick.
Basic TV Viewing
- Channel Selection: Use the CH+/CH- buttons or the numeric keypad on the remote control to change channels.
- Volume Control: Use the VOL+/VOL- buttons to adjust the volume.
- Menu Navigation: Press the MENU button to access the main menu. Use the arrow keys (UP/DOWN/LEFT/RIGHT) to navigate and OK to confirm selections. Press EXIT to return to live TV.
- Electronic Program Guide (EPG): Press the EPG button to view the program schedule.
- Teletext and Subtitles: Press the TTX button for teletext and SUB-T for subtitles, if available on the broadcast.
TIMESHIFT Function
The TIMESHIFT function allows you to pause live television and resume watching later.
- Connect a USB storage device (e.g., USB flash drive) to the USB 2.0 port on the tuner stick.
- While watching live TV, press the PAUSE button (often represented by || or a pause icon) on the remote control. The program will pause.
- To resume, press the PLAY button (often represented by > or a play icon).
- You can also fast-forward or rewind using the FF/REW buttons.
PVR (Personal Video Recorder)
Record your favorite programs directly to a connected USB storage device.
- Ensure a USB storage device is connected and has sufficient free space.
- Instant Recording: While watching a program, press the REC button on the remote control to start recording immediately. Press STOP to end the recording.
- Scheduled Recording: Access the EPG (EPG button), select the desired program, and follow the on-screen prompts to schedule a recording. You can also set manual timers via the menu.
- Playback: Access recorded programs through the "PVR" or "Media Player" section in the main menu.
Multimedia Player
The tuner stick can play various media files (MKV, AVI, MP4, etc.) from a connected USB storage device.
- Connect a USB storage device containing your media files to the USB 2.0 port.
- Press the MENU button and navigate to the "Media Player" or "USB" section.
- Select the type of media (Video, Music, Photo) and browse your files.
- Select a file and press OK to play.

Image: An illustration highlighting the main functions and advantages of the DVB-T2 decoder, including PVR & TIMESHIFT, Media Player, Full HD 1080 resolution, and easy installation.
Maintenance
- Cleaning: Use a soft, dry cloth to clean the device. Do not use liquid cleaners or aerosols.
- Ventilation: Ensure the tuner stick has adequate ventilation. Avoid placing it in enclosed spaces or covering its ventilation slots.
- Storage: When not in use for extended periods, disconnect the device from power and store it in a cool, dry place.
- Firmware Updates: Periodically check the manufacturer's website for any available firmware updates to ensure optimal performance and compatibility.
Troubleshooting
| Problem | Possible Cause | Solution |
|---|---|---|
| No power / Device not turning on. |
|
|
| No signal / "No Channel" message. |
|
|
| Remote control not working. |
|
|
| Device freezes or becomes unresponsive. |
|
|
Specifications
| Feature | Detail |
|---|---|
| Model Number | LXDVB213M (DVB213M) |
| Brand | LTC |
| Connectivity Technology | HDMI, USB, Wi-Fi (with external adapter) |
| Weight | 400 Grams |
| Power Consumption | 10 Watts |
| Video Compression | H.265 HEVC (DVB-T2 standard) |
| Audio Compression | Dolby Digital Plus |
| HDMI Standard | 1.3 |
| USB Port | USB 2.0 |
| Features | DVB-T2 compatible, Full HD 1080, TIMESHIFT, PVR, Media Player, Multilingual OSD, Teletext, Subtitles, EPG |
| Country of Origin | China |

Image: A comparison chart illustrating the difference between older DVB-T (MPEG-2) and newer DVB-T2 (HEVC) video transfer standards, highlighting the sharper and more detailed image quality of DVB-T2.
Warranty and Support
Warranty Information
This product is covered by a manufacturer's warranty. For specific details regarding the warranty period and terms, please refer to the documentation included with your purchase or contact the retailer. The return policy typically allows for returns/replacements within 30 days of purchase.
Customer Support
If you encounter any issues or have questions not covered in this manual, please contact your retailer or the manufacturer's customer support. Keep your purchase receipt and model number (LXDVB213M) handy when contacting support.