
1. Introduction
This manual provides detailed instructions for the installation, operation, and maintenance of your Sxhlseller H110 Gaming Motherboard. Please read this manual thoroughly before proceeding with installation to ensure proper setup and functionality.
The Sxhlseller H110 Motherboard is based on the H110 chipset and is designed for 6th, 7th, and 8th generation Intel Core i7, i5, Pentium, and Celeron processors. It features dual-channel DDR4 memory support, high-speed M.2 NVMe and M.2 WiFi slots, and a comprehensive set of I/O ports for versatile connectivity.
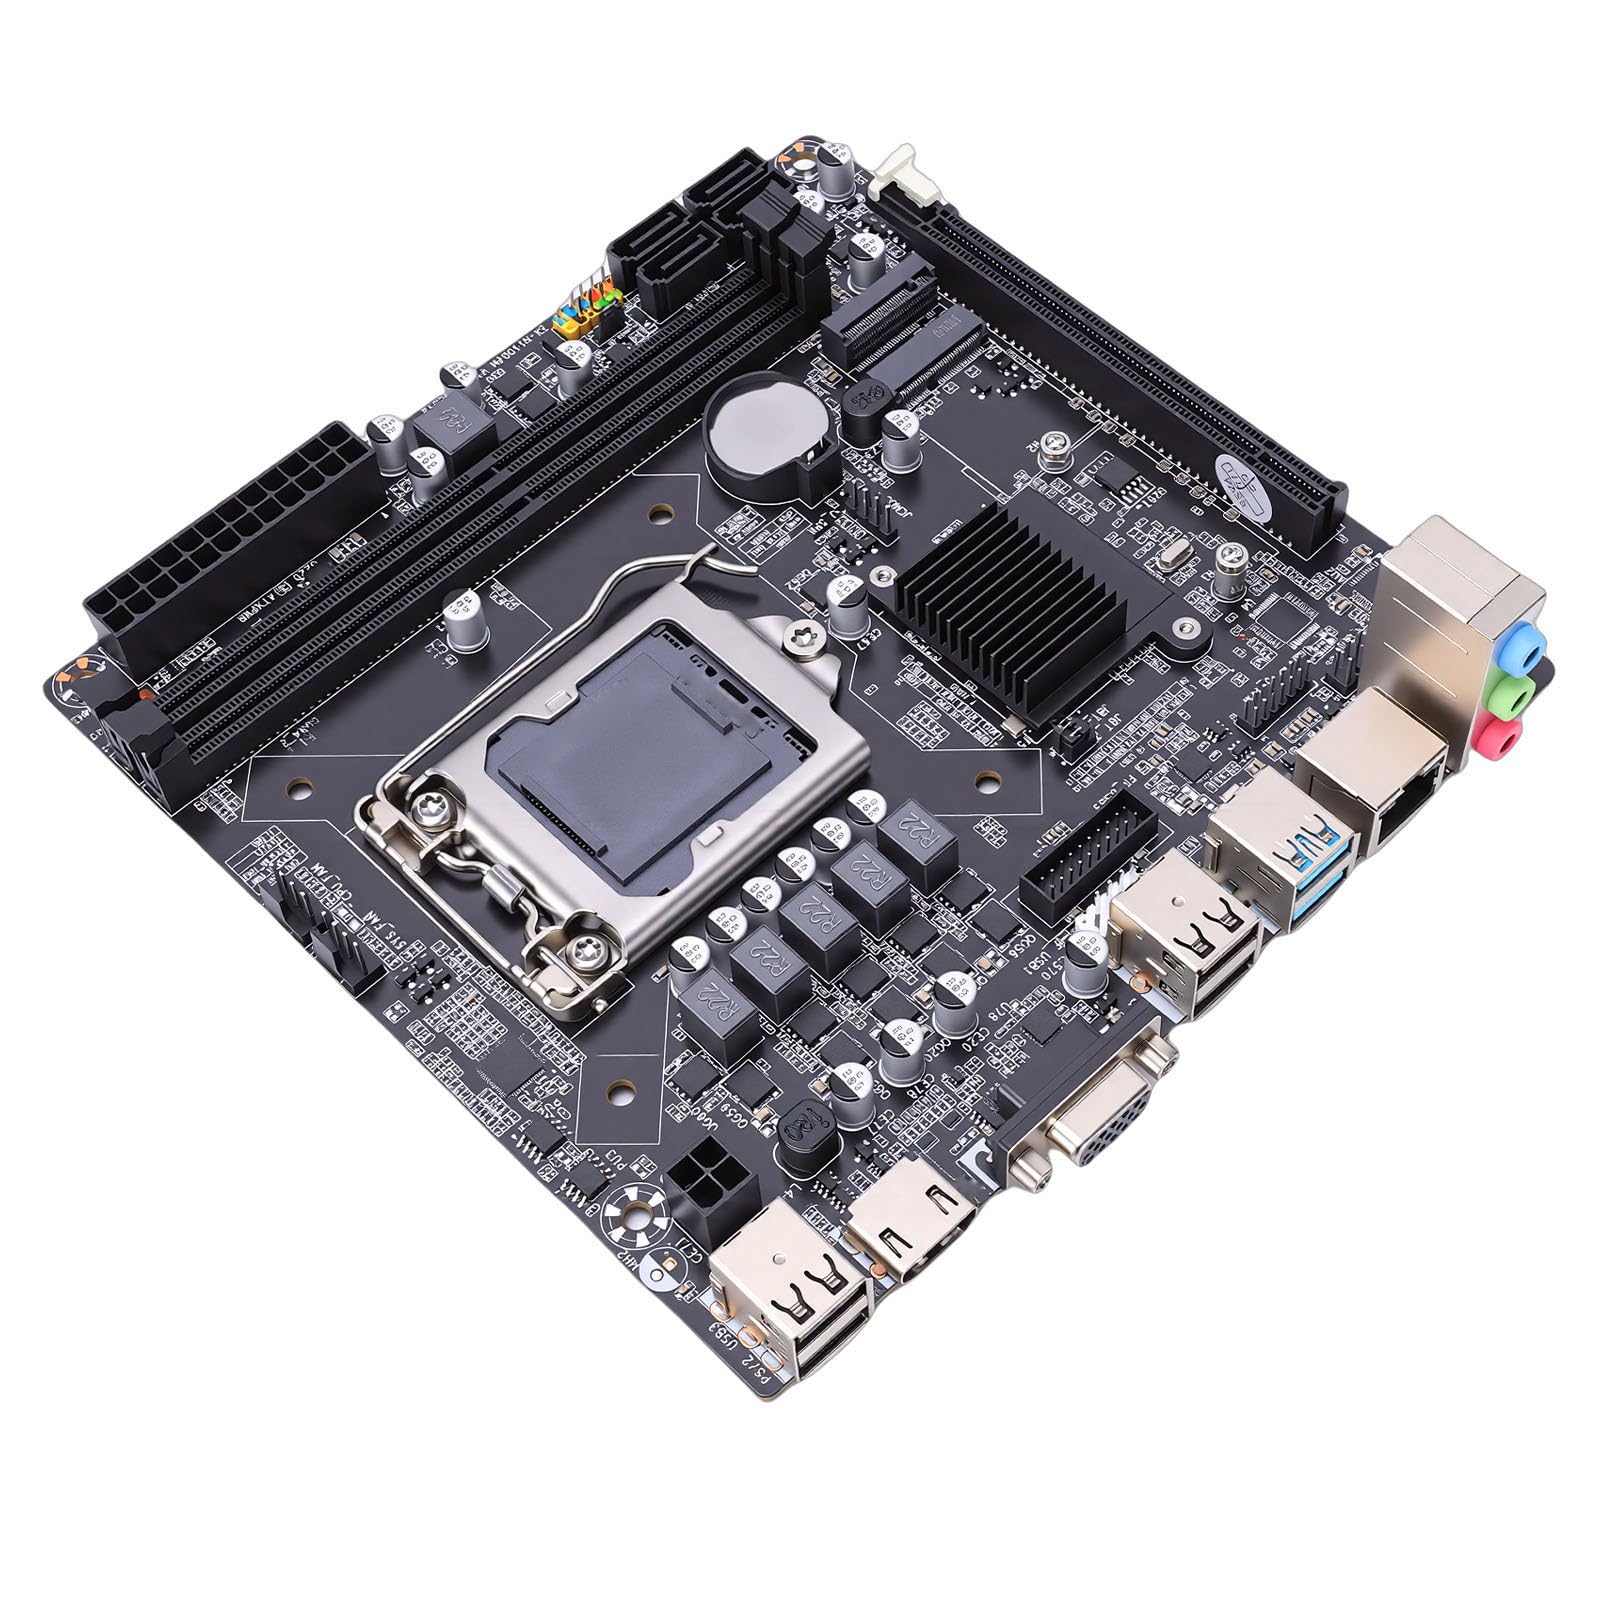
Figure 1: Sxhlseller H110 Gaming Motherboard, top-down view.
2. Setup and Installation
Before beginning installation, ensure your system is powered off and disconnected from the power source. Wear an anti-static wrist strap to prevent electrostatic discharge (ESD) damage to components.
2.1. CPU Installation
Follow these steps carefully to install the CPU onto the LGA 1151 socket:
- Step 1: Press down on the lever of the CPU socket and lift it.
- Step 2: Open the CPU cover.
- Step 3: Align the triangle symbols on the CPU and the socket, then gently place the CPU into the socket.
- Step 4: Remove the CPU plastic cover.
- Step 5: Align the groove with the screw hole and lower the lever to secure the CPU.
Important Installation Considerations:
- Do not touch CPU contacts with your bare hands.
- Do not touch CPU pins on the motherboard.

Figure 2: Visual guide for CPU installation.
2.2. Memory (RAM) Installation
The motherboard supports two 240-pin DDR4 SDRAM desktop memory slots. It supports dual-channel frequencies of DDR4 2133, 2400, and 2666 MHz, with a maximum capacity of 32GB per slot, totaling 64GB.
- Locate the DDR4 memory slots on the motherboard.
- Open the clips at both ends of the memory slot.
- Align the notch on the memory module with the key in the slot.
- Press down firmly on both ends of the memory module until the clips snap into place.

Figure 3: Motherboard with DDR4 memory slots.
2.3. Storage Device Installation (M.2 NVMe & SATA)
The computer motherboard features a high-speed M.2 NVMe hard drive interface and four Serial ATA 3.0 (6 GB/s) ports.
- M.2 NVMe SSD: Locate the M.2 slot. Insert the M.2 SSD at an angle and secure it with the provided screw.
- SATA Drives: Connect your SATA hard drives or SSDs to the SATA 3.0 ports using SATA data cables. Connect power from your power supply to the drives.
2.4. Expansion Card Installation (PCIe X16)
The PC motherboard includes one PCI-Express x16 slot for graphics cards or other expansion cards, and an M.2 WiFi slot.
- Locate the PCIe x16 slot.
- Remove the corresponding expansion slot cover from your PC case.
- Align the expansion card with the slot and press down firmly until it is seated correctly.
- Secure the card to the case with a screw.

Figure 4: Overview of motherboard interfaces and expansion slots.
3. Operating Instructions
Once all components are installed and connected, you can power on your system.
3.1. Initial Boot-up
- Connect your monitor, keyboard, and mouse to the appropriate I/O ports.
- Connect the power supply to the motherboard (24-pin ATX and 8-pin CPU power connectors).
- Turn on the power supply and press the power button on your PC case.
- The system should boot to the BIOS/UEFI or your operating system if already installed.
3.2. BIOS/UEFI Configuration
During boot-up, press the designated key (usually DEL or F2) to enter the BIOS/UEFI setup. Here you can configure boot order, system time, and other hardware settings.
3.3. Driver Installation
After installing your operating system, install the necessary drivers for the motherboard's components, including chipset, audio (Realtek ALC662), and network (Realtek 10/100/1000 Mbps LAN). Drivers are typically available on the manufacturer's website.
4. Maintenance
Regular maintenance helps ensure the longevity and optimal performance of your motherboard.
- Dust Removal: Periodically clean dust from the motherboard and other components using compressed air. Ensure the system is powered off and unplugged before cleaning.
- BIOS/UEFI Updates: Check the manufacturer's website for BIOS/UEFI updates. Updates can improve compatibility, stability, and performance. Follow update instructions carefully.
- Cable Management: Ensure all cables are neatly routed and not obstructing airflow.
5. Troubleshooting
If you encounter issues, refer to the following common troubleshooting steps:
- No Power:
- Check if the power supply is connected correctly to the motherboard (24-pin ATX and 8-pin CPU).
- Ensure the power supply switch is in the ON position.
- Verify the power button connection to the motherboard.
- No Display:
- Ensure the monitor is connected to the correct graphics output (either integrated or dedicated GPU).
- Reseat the graphics card and memory modules.
- Test with a different monitor or cable if possible.
- System Instability/Crashes:
- Check CPU and GPU temperatures.
- Verify memory modules are properly seated and functioning (test one module at a time).
- Ensure all drivers are up to date.
- Peripheral Not Detected:
- Try connecting the peripheral to a different port.
- Install or update the peripheral's drivers.
- Check BIOS/UEFI settings to ensure the port is enabled.
6. Specifications
Below are the technical specifications for the Sxhlseller H110 Gaming Motherboard:
| Feature | Specification |
|---|---|
| Brand | Sxhlseller |
| Model Name | Sxhlsellerza2i8401xc |
| CPU Socket | LGA 1151 |
| Supported Processors | 6th, 7th, 8th Gen Intel Core i7, i5, Pentium, Celeron |
| RAM Technology | DDR4 |
| Memory Slots | 2 (240-pin DDR4 SDRAM) |
| Memory Frequencies | 2133, 2400, 2666 MHz |
| Max RAM Capacity | 64 GB (32 GB per slot) |
| Graphics Interface | Integrated |
| PCIe Slots | 1 x PCI-Express x16 |
| Storage Interfaces | 1 x M.2 NVMe, 4 x Serial ATA 3.0 (6 GB/s) |
| Wireless Connectivity | 1 x M.2 WiFi slot |
| USB Ports | 4 x USB 2.0, 2 x USB 3.0 (Total 6) |
| Video Outputs | 1 x VGA, 1 x HD Multimedia Interface (HDMI) |
| Network | 1 x RJ45 (Realtek 10/100/1000 Mbps) |
| Audio | Realtek ALC662 (3-in-1 sound port: Line-In, Line-Out, Mic-In) |
| PCB Layers | 8-layer PCB |
| Power Design | 8-phase power supply, 24+8-pin power connectors |
7. Warranty and Support
7.1. Product Warranty
This Sxhlseller H110 Gaming Motherboard comes with a 3-year manufacturer's warranty from the date of purchase. This warranty covers defects in materials and workmanship under normal use. Please retain your proof of purchase for warranty claims.
For warranty service, please contact your retailer or Sxhlseller customer support. The return policy allows for a refund/replacement within 14 days of purchase, subject to retailer terms.
7.2. Technical Support
For technical assistance, driver downloads, or further inquiries, please visit the official Sxhlseller website or contact their customer support. You may also refer to online resources and community forums for additional help.
Note: Always refer to the latest information available on the manufacturer's official website for the most up-to-date drivers and support resources.