Introduction
This manual provides comprehensive instructions for the installation, operation, and maintenance of your SCS Sentinel PAF0009 Wired Audio Intercom System. Designed for reliability and ease of use, this 2-wire audio intercom enhances security by controlling access to your home or workplace. Please read this manual thoroughly before installation and use to ensure proper function and longevity of the product.
Product Overview
The SCS Sentinel PAF0009 is a wired audio intercom system consisting of an indoor handset and an outdoor flush-mounted door station. It features a 2-wire connection for all functions, simplifying installation. The system allows for clear audio communication with visitors and includes a door opening button for convenient access control.
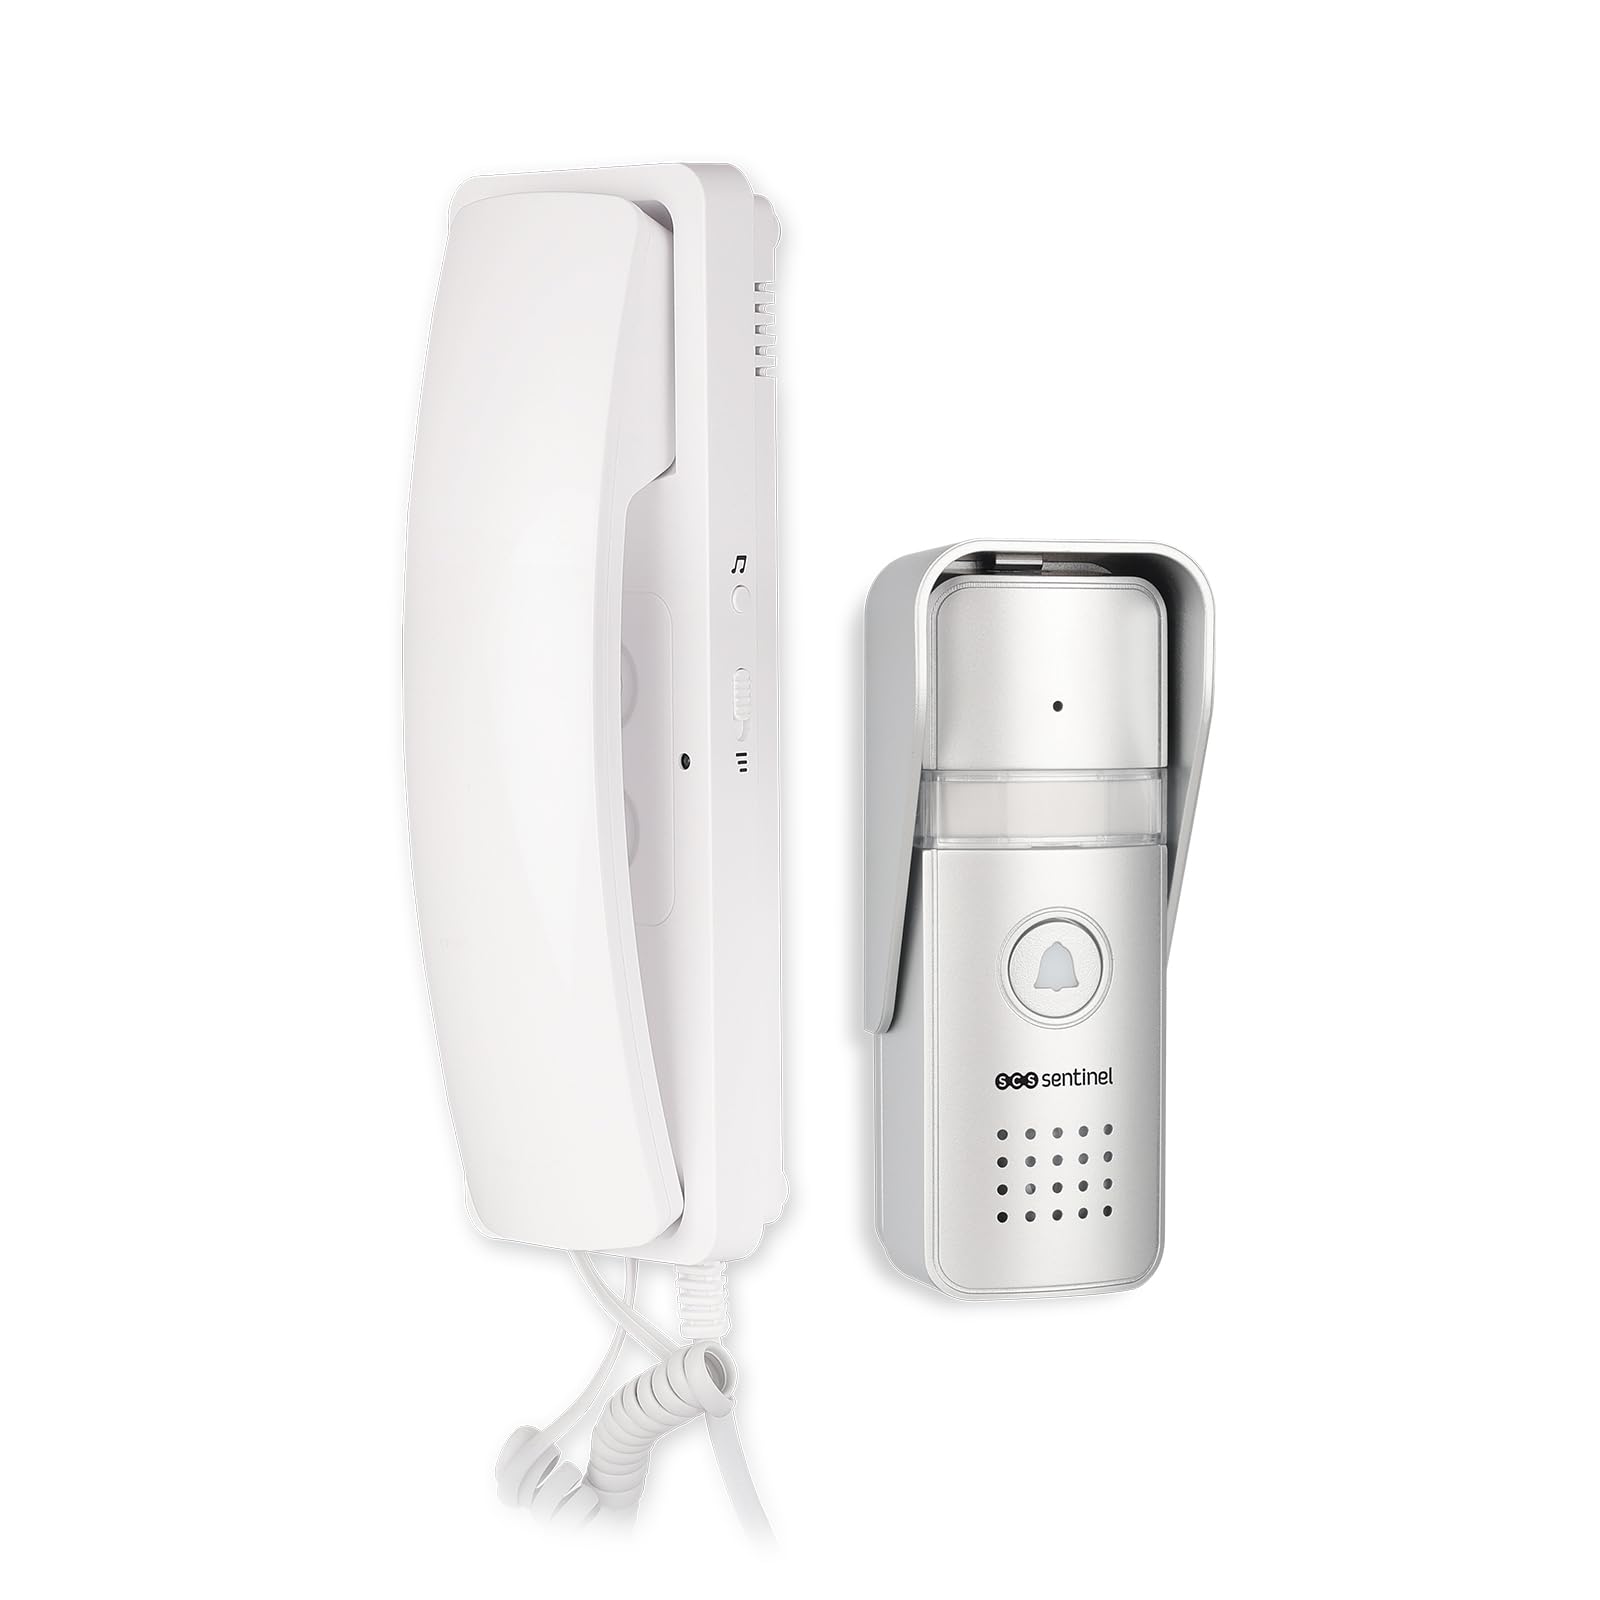
Figure 1: SCS Sentinel PAF0009 Wired Audio Intercom System components. This image shows the complete intercom system, including the indoor handset and the outdoor door station.
Package Contents
Verify that all items listed below are present in your package. If any items are missing or damaged, please contact customer support.
- 1 x Indoor Audio Handset (Combined unit)
- 1 x Outdoor Flush-Mounted Door Station (Aluminum facade)
- Necessary screws for installation
- 1 x User Manual (This document serves as the English guide)

Figure 2: Product packaging showing the included components. This image displays the retail box of the SCS Sentinel AudioDoor intercom, illustrating the indoor handset and outdoor unit.
Specifications
| Feature | Specification |
|---|---|
| Brand | SCS Sentinel |
| Model | PAF0009 |
| Intercom Type | Wired Audio Intercom |
| Wiring | 2-wire integral for all functions |
| Cable Section (not included) | 0-30 meters = 0.75 mm² / 31-50 meters = 1 mm² |
| Door Opening Function | Yes |
| Electric Strike Output | 12V 15W maximum (for compatible electric strikes) |
| Remote Control | No |
| Outdoor Door Station Material | Aluminum facade |
| Outdoor Door Station Mounting | Flush-mounted (with visor) |
| Backlit Label Holder | Yes |
| Indoor Handset | White apartment station with door open button, integrated transformer |
| Ringtone Volume Adjustment | 2 levels |
| Number of Melodies | 1 |
| Power Source | Wired (Integrated transformer in indoor unit) |
| Outdoor Door Station Dimensions (LxWxH) | 199 x 100 x 32 mm (approx. 7.8 x 3.9 x 1.3 inches) |
| Indoor Handset Dimensions (LxWxH) | 116 x 198 x 55 mm (approx. 4.6 x 7.8 x 2.2 inches) |
| Item Weight | 591.6 Grams (approx. 1.3 lbs) |
Setup and Installation
The SCS Sentinel PAF0009 intercom system is designed for simplified installation, requiring only two wires to connect the outdoor door station to the indoor handset.
1. Wiring Requirements
- The system operates with a 2-wire connection for all functions (audio, power, door release).
- Cable Type: Use a suitable 2-core cable (not included).
- Cable Section:
- For distances up to 30 meters (approx. 98 feet): 0.75 mm² cable.
- For distances between 31 and 50 meters (approx. 102-164 feet): 1 mm² cable.
- Maximum operating distance is 100 meters (approx. 328 feet).
2. Outdoor Door Station Installation
The outdoor door station is designed for flush-mounted installation and is resistant to weather conditions.
- Choose a suitable location for the outdoor unit, typically near the entrance door or gate. Ensure it is protected from direct heavy rain if possible, despite its weather resistance.
- Prepare the wall for flush mounting according to the dimensions of the door station.
- Connect the two wires from the indoor handset to the appropriate terminals on the outdoor unit. Refer to the wiring diagram in the original manual for exact terminal identification (typically marked 1 and 2 for communication/power, and 3 and 4 for the impulse/switch for door release). Polarity for terminals 3 and 4 is generally not critical as they act as a normally open contact.
- Secure the outdoor unit to the wall using the provided screws. Ensure the protective visor is correctly positioned.

Figure 3: Close-up of the outdoor door station. This image shows the flush-mounted outdoor unit with its bell button, microphone, speaker, and backlit label holder.

Figure 4: Rear view of the outdoor door station showing mounting points. This image illustrates the back of the outdoor unit, revealing the mounting bracket and potential wiring access points.
3. Indoor Handset Installation
The indoor handset includes an integrated transformer and is designed for surface mounting.
- Select a convenient indoor location for the handset, typically near the main entrance or in a central area.
- Mount the handset to the wall using the provided screws.
- Connect the two wires from the outdoor unit to the corresponding terminals on the indoor handset.
- Plug the indoor handset's power adapter into a standard electrical outlet. The integrated transformer will power the system.

Figure 5: The indoor audio handset. This image shows the white indoor unit with its coiled cord and buttons.
Operating Instructions
1. Receiving a Call
- When a visitor presses the call button on the outdoor door station, the indoor handset will ring.
- Lift the handset to establish two-way audio communication with the visitor.

Figure 6: A hand pressing the call button on the outdoor unit. This image demonstrates a visitor initiating a call from the outdoor door station.

Figure 7: A user answering a call on the indoor handset. This image shows a person holding the indoor handset and interacting with the intercom.
2. Opening the Door/Gate
- While communicating with a visitor, press the door opening button on the indoor handset to release the electric strike or compatible gate mechanism.
- The system provides a contact output for an electric strike (12V 15W maximum). It does not directly control motorized gates.
3. Adjusting Ringtone Volume
- The indoor handset features a switch or button to adjust the ringtone volume to one of two available levels. Locate this control on the side or bottom of the handset.
4. Backlit Label Holder
- The outdoor door station includes a backlit label holder, ensuring visibility of names or apartment numbers during nighttime.
Maintenance
To ensure optimal performance and longevity of your SCS Sentinel PAF0009 intercom system, follow these simple maintenance guidelines:
- Cleaning: Regularly wipe the indoor handset and outdoor door station with a soft, damp cloth. Avoid using abrasive cleaners, solvents, or harsh chemicals, as these can damage the surfaces.
- Inspection: Periodically check the wiring connections for any signs of wear or damage. Ensure all screws are tight, especially on the outdoor unit.
- Label Holder: If the label in the outdoor unit's holder becomes faded or damaged, replace it with a new one.
Troubleshooting
If you encounter issues with your intercom system, refer to the following troubleshooting steps.
| Problem | Possible Cause | Solution |
|---|---|---|
| No sound from indoor handset or outdoor unit. |
|
|
| Door opening function does not work. |
|
|
| Ringtone is too quiet or too loud. |
|
|
| Backlit label holder not illuminating. |
|
|
Warranty and Support
SCS Sentinel is committed to providing reliable and innovative technical products. We guarantee the quality and ease of installation and use of our products.
- Warranty: This product comes with a standard manufacturer's warranty. Please refer to your purchase documentation for specific warranty terms and duration.
- Technical Support: Our technical support team, based in France, is available to assist you with product installation and any technical queries. Our technicians provide expert and personalized advice to ensure your satisfaction.
- Contact: For support, please visit the SCS Sentinel website or refer to the contact information provided with your product packaging.