
1. Introduction
Thank you for choosing the HomeTro Walking Pad Treadmill. This manual provides essential information for the safe and efficient operation, setup, and maintenance of your new fitness equipment. Please read this manual thoroughly before initial use and retain it for future reference.
2. Important Safety Information
To reduce the risk of serious injury, read all important precautions and instructions in this manual before using the treadmill. HomeTro assumes no responsibility for personal injury or property damage sustained by or through the use of this product.
- Weight Capacity: Do not exceed the maximum user weight of 300 lbs (136 kg).
- Placement: Place the treadmill on a level, stable surface with at least 2 feet (0.6 meters) of clear space behind it and 1 foot (0.3 meters) on each side.
- Power: Connect the treadmill to a properly grounded outlet. Do not use extension cords or adapters.
- Children and Pets: Keep children and pets away from the treadmill, especially during operation.
- Emergency Stop: Always attach the safety key clip to your clothing before starting a workout. In an emergency, pulling the safety key will immediately stop the treadmill.
- Footwear: Always wear appropriate athletic footwear when using the treadmill.
- Health: Consult your physician before starting any exercise program. Stop exercising immediately if you feel faint, dizzy, or experience pain.
- Incline Adjustment: Ensure the treadmill is stable before and after adjusting the incline.
3. Package Contents
Upon unpacking, please ensure all components are present and undamaged:
- HomeTro Walking Pad Treadmill (Main Unit)
- Front Footpads (requires attachment)
- Remote Control
- Safety Key
- Power Cord
- User Manual (this document)
4. Setup Instructions
The HomeTro Walking Pad Treadmill is largely pre-assembled. Follow these steps for quick setup:
- Unpack: Carefully remove the treadmill from its packaging.
- Attach Front Footpads: Locate the front footpads and securely attach them to the designated areas on the treadmill base.
- Unfold the Handle (if desired): If you plan to use the treadmill in running mode or prefer the handle for support, gently lift the handle until it locks into its upright position. Ensure it is securely locked.
- Positioning: Place the treadmill on a flat, stable surface. Ensure adequate clearance around the unit as described in the safety section.
- Power Connection: Plug the power cord into the treadmill's power port, then into a grounded electrical outlet.
- Initial Power On: Flip the main power switch (usually located near the power cord inlet) to the 'ON' position. The display should illuminate.

5. Operating Instructions
Your HomeTro Walking Pad Treadmill offers multiple modes and control options for a versatile workout experience.
5.1 Treadmill Modes and Speed Ranges
- Handle Raised (Running Mode): Speeds from 0.6 mph to 7.5 mph. Suitable for running and brisk walking.
- Handle Lowered (Walking Pad Mode): Speeds from 0.6 mph to 5 mph. Ideal for work-walking or casual walking under a desk.

5.2 Incline Adjustment
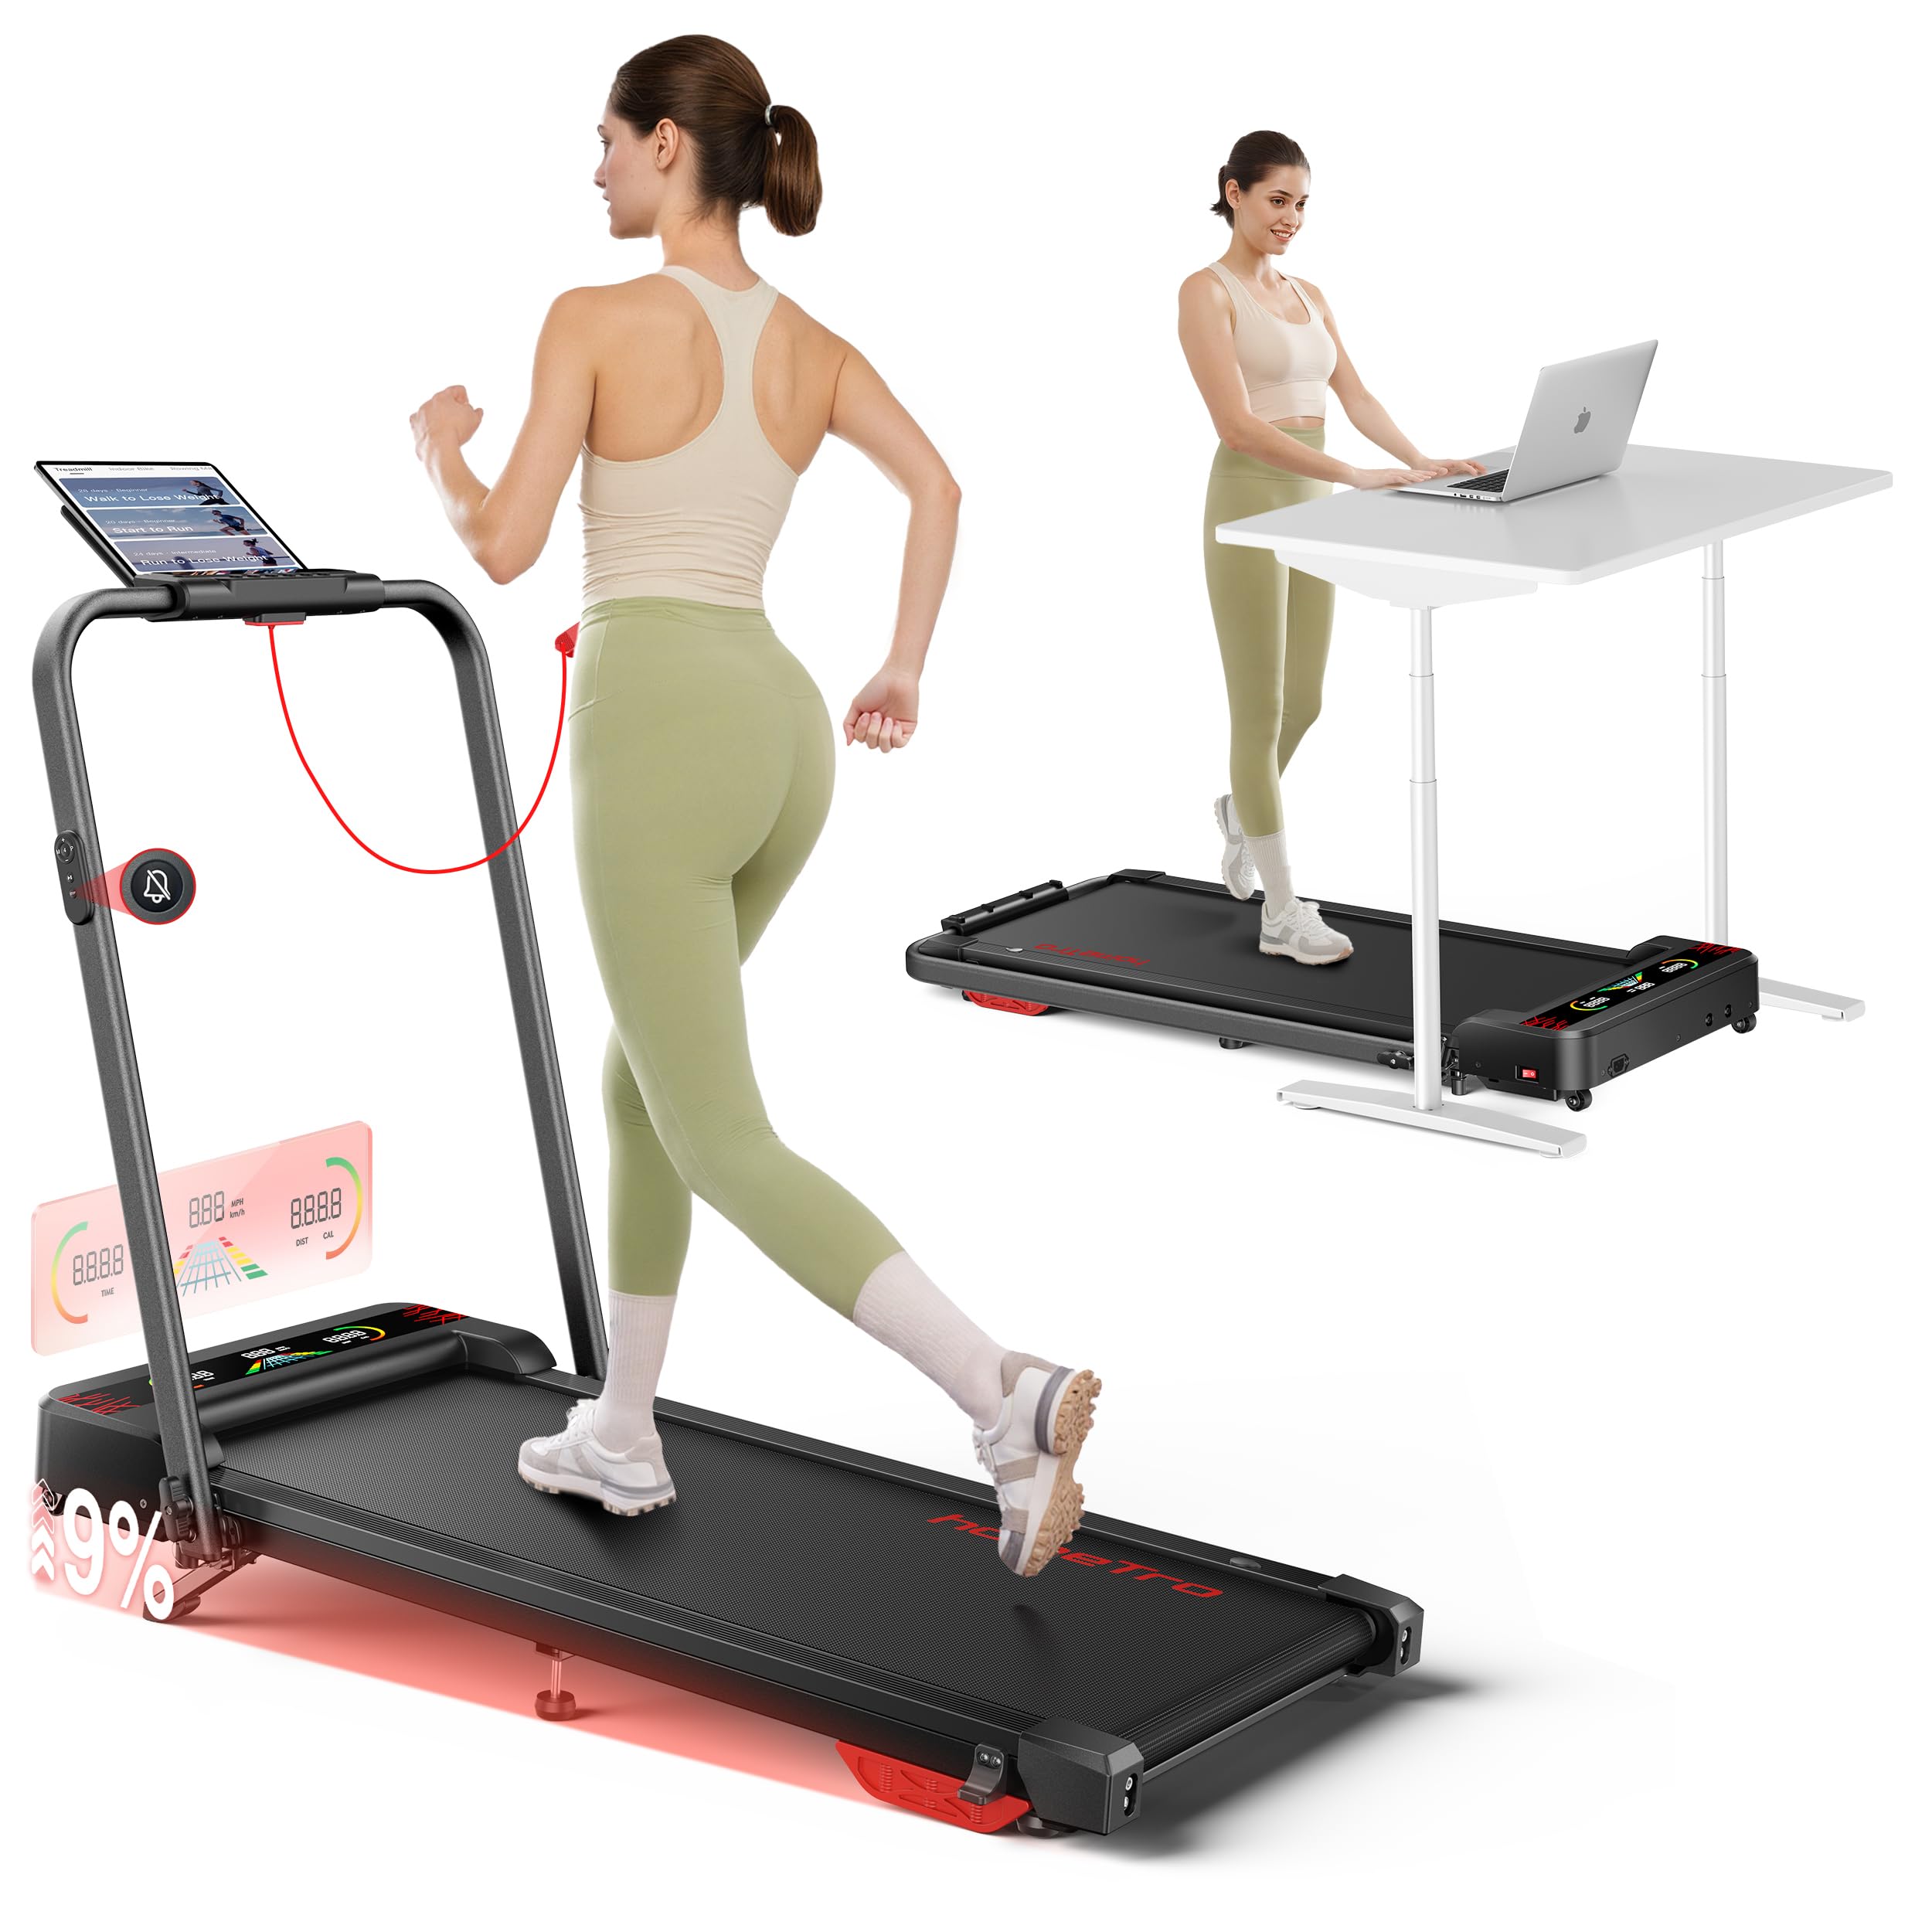
The treadmill features a 9% incline, which can be adjusted manually without tools. To adjust the incline, ensure the treadmill is off and unplugged. Lift the rear of the treadmill and position the incline support to the desired setting. Ensure it is securely locked before use.
5.3 Control Options
You can control your treadmill using the remote control, handrail buttons, or the FITSHOW App.
- Remote Control: The magnetic remote allows for easy adjustments. It includes a mute button to silence operational beeps.
- Handrail Buttons: Quick access buttons on the handrail provide convenient control during your workout.
- FITSHOW App (Bluetooth): Connect your treadmill via Bluetooth to the FITSHOW App on your smartphone or tablet. The app offers various training courses, real-time tracking, and guided workouts.

5.4 Display Screens
The treadmill features dual display screens for comprehensive workout feedback.
- Main LED Display: Located on the running machine, this RGB LED display lights up dynamically, providing an interactive visual experience.
- Handrail LED Display: A secondary display on the handrail clearly shows key metrics such as speed, time, distance, and calories burned.

5.5 Using the Safety Key
The safety key is a critical safety feature. Attach the clip of the safety key to your clothing before beginning your workout. If you need to stop the treadmill quickly, simply pull the safety key from its receptacle, and the treadmill will immediately cease operation.
6. Maintenance
Regular maintenance ensures the longevity and optimal performance of your treadmill.
- Cleaning: Wipe down the treadmill surfaces with a damp cloth after each use. Avoid using abrasive cleaners or solvents.
- Belt Lubrication: Periodically check the running belt for dryness. Lubricate the belt according to the instructions provided with your treadmill's lubricant (usually every 3-6 months depending on usage).
- Belt Tension and Alignment: If the running belt feels loose or drifts to one side, refer to the troubleshooting section or contact customer support for instructions on adjusting tension and alignment.
- Storage: When not in use, the treadmill can be folded for compact storage. Use the built-in front wheels to easily move the folded unit. Store in a dry, cool place away from direct sunlight.
7. Troubleshooting
If you encounter issues with your treadmill, refer to the common problems and solutions below. If the problem persists, contact customer support.
| Problem | Possible Cause | Solution |
|---|---|---|
| Treadmill does not power on. | Power cord unplugged, main power switch off, circuit breaker tripped. | Ensure power cord is securely plugged in. Turn main power switch to 'ON'. Check household circuit breaker. |
| Running belt stops unexpectedly. | Safety key removed, motor overload, loose connection. | Ensure safety key is properly inserted. Reduce load on treadmill. Check power connections. |
| Running belt slips or feels loose. | Belt tension too low. | Adjust belt tension using the rear roller bolts (refer to specific instructions or contact support). |
| Running belt drifts to one side. | Belt misalignment. | Adjust belt alignment using the rear roller bolts (refer to specific instructions or contact support). |
| Unusual noise during operation. | Lack of lubrication, loose parts, foreign object. | Lubricate running belt. Check for and tighten any loose screws. Inspect for foreign objects. |
8. Specifications
| Feature | Specification |
|---|---|
| Brand | HomeTro |
| Model Number (ASIN) | B0GN6DFVNQ |
| Motor Power | 2.5 HP (Peak) |
| Speed Range (Handle Raised) | 0.6 - 7.5 mph |
| Speed Range (Handle Lowered) | 0.6 - 5 mph |
| Incline | 9% (Manual Adjustment) |
| Maximum User Weight | 300 lbs (136 kg) |
| Noise Level | < 45 dB |
| Running Belt Construction | 5 non-slip layers, 6 silicone shock absorbers, 2 soft rubber pads |
| Unfolded Dimensions (L x W x H) | 50" x 23" x 42" (127 cm x 58.4 cm x 106.7 cm) |
| Folded Dimensions (L x W x H) | 50" x 25" x 4.4" (127 cm x 63.5 cm x 11.2 cm) |
| Product Weight | 21 kg (46.3 lbs) |
| Color | Black |
| Control Methods | Remote Control, Handrail Buttons, FITSHOW App (Bluetooth) |

9. Warranty and Support
For warranty information, technical support, or service inquiries, please refer to the warranty card included with your product or contact HomeTro customer service directly. Please have your model number (B0GN6DFVNQ) and purchase date available when contacting support.
Contact Information: Please visit the official HomeTro website or your retailer's support page for the most current contact details.