
1. Introduction
This manual provides detailed instructions for the installation, operation, and maintenance of your XTRONS TAD128 10.1-inch Double DIN Android Car Stereo. This unit features a QLED IPS touch screen, integrated ADAS camera support, wireless and wired CarPlay/Android Auto compatibility, Bluetooth 5.4, a built-in Digital Sound Processor (DSP), and dual-band Wi-Fi (2.4/5.8GHz). Please read this manual thoroughly before using the product to ensure proper functionality and safety.
2. Package Contents
Verify that all items listed below are included in your package:
- 1 x ADAS Camera
- 1 x ISO Wiring Harness
- 1 x Camera Cable
- 1 x RCA Cables
- 2 x USB Cable
- 1 x GPS Antenna
- 1 x Rear Output Cable
- 1 x Adhesive Pad
- 2 x Fitting Kits
- 8 x Screws
- 1 x User Manual (this document)
- 1 x Installation Instruction
3. Setup and Installation
3.1 Compatibility Information
This unit is designed for standard double DIN slots, measuring approximately 178mm (Width) x 100mm (Height) x 108mm (Depth). Ensure your vehicle has a compatible double DIN slot for installation.

Note: For specific car models, a custom fit fascia and ISO cable with CANbus box may be required. Please consult with a professional installer or XTRONS support for detailed information regarding your vehicle.
3.2 Monitor Assembly Steps
Before assembly, ensure your vehicle's ignition is off and the key is removed.
- Step 1: Connect the power cable to the monitor.
- Step 2: Pick up the monitor and align the spring buckles to the holder on the main unit.
- Step 3: Open the spring buckles and push the monitor down into the correct position on the main unit.
- Step 4: Release your hands to complete the assembly.

4. Operating Instructions
4.1 QLED IPS Display
The unit features a 10.1-inch QLED IPS display with a resolution of 1280x800 pixels. Quantum Dot technology provides a wide color gamut and high brightness for vibrant visuals. The IPS panel ensures consistent colors and sharp clarity from various viewing angles, reducing glare and distortion.

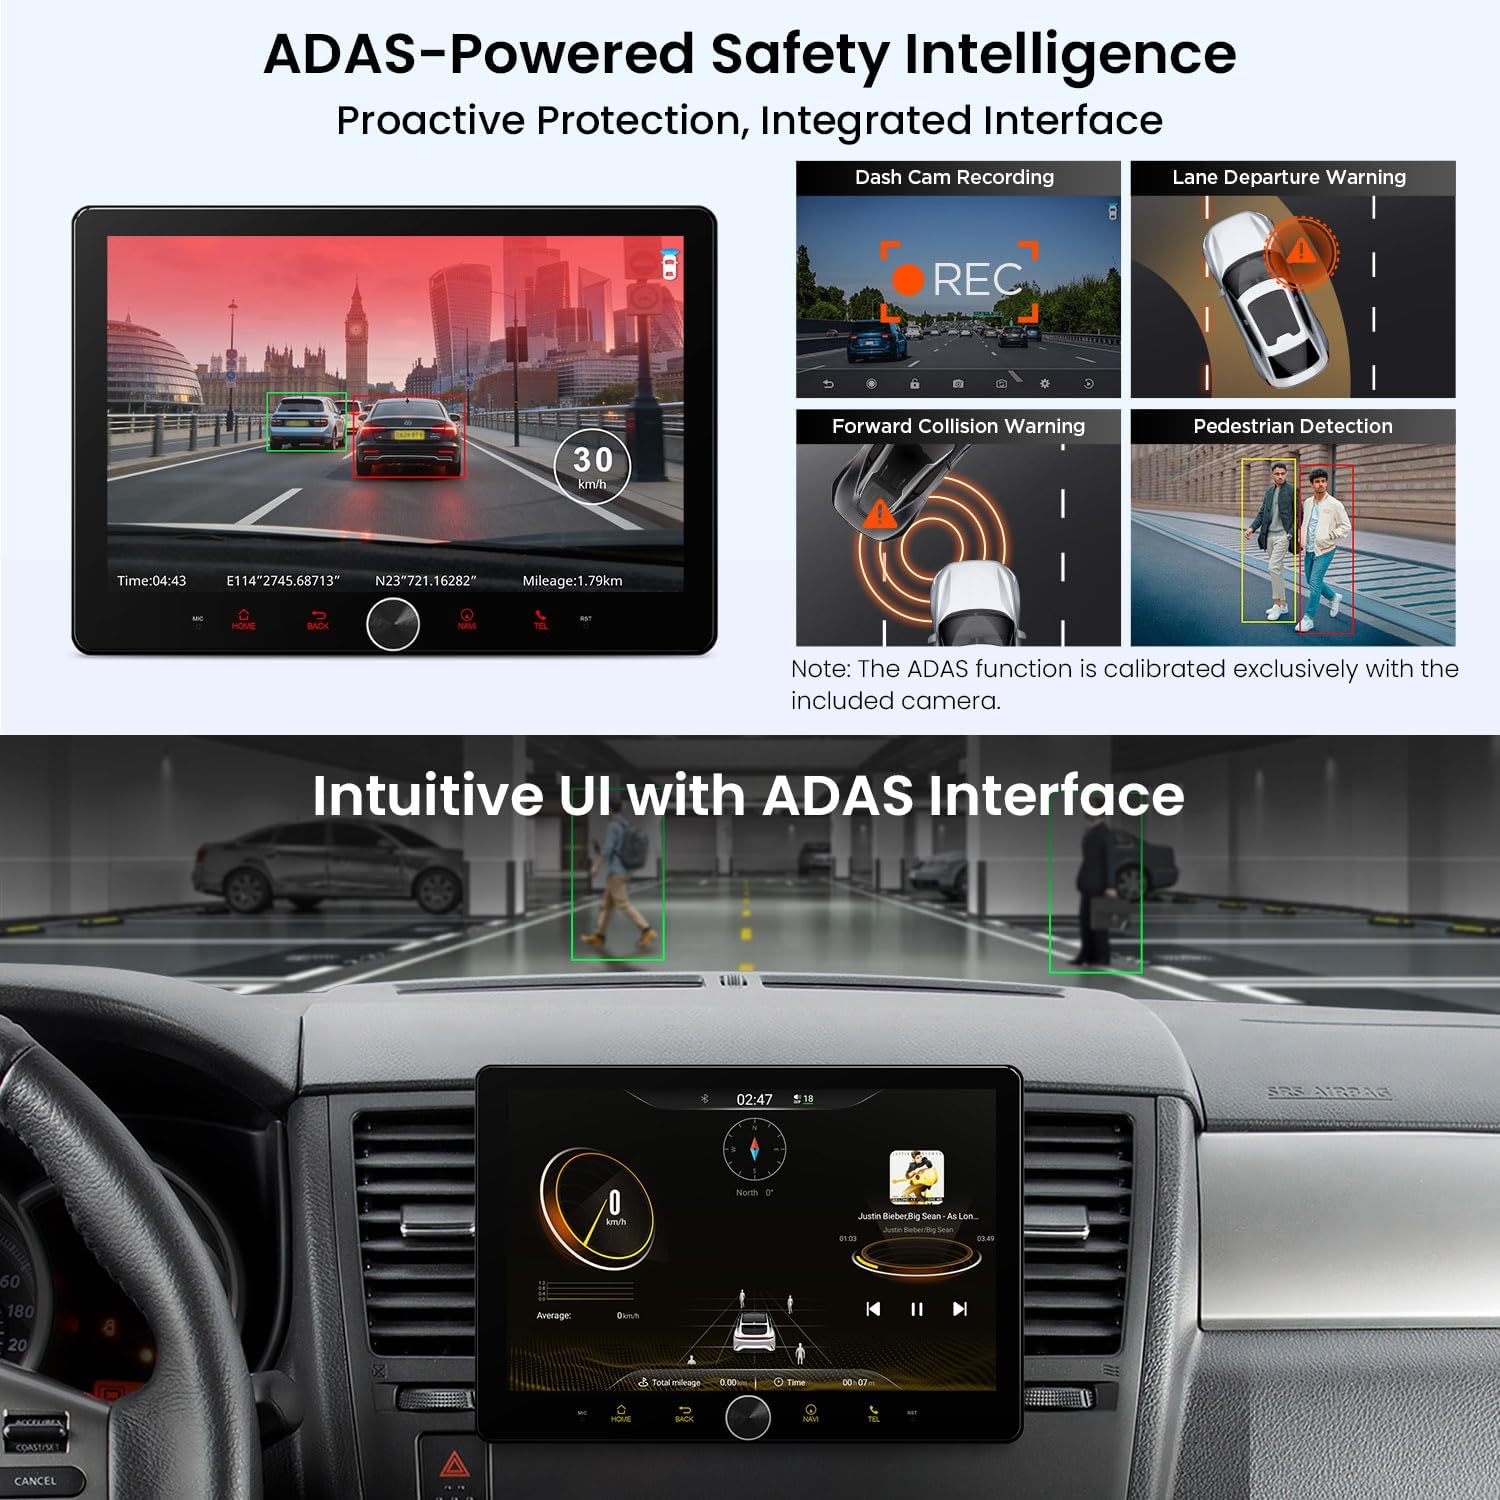
4.2 ADAS Safety Intelligence
Connect the included front ADAS camera to enable real-time driving assistance features. The system provides timely warnings for:
- Lane Departure Warning (LDW): Alerts you if the vehicle drifts out of its lane.
- Forward Collision Warning (FCW): Notifies you of potential frontal collisions.
- Pedestrian Detection: Identifies pedestrians in the vehicle's path.
The ADAS function is calibrated exclusively with the included camera.
4.3 CarPlay & Android Auto
Connect your iPhone or Android device for seamless integration. Both wireless and wired connection options are available. Access GPS navigation, make hands-free calls, stream music, and use voice assistants (Siri, Google Assistant) directly from the car stereo display.

4.4 Advanced DSP Audio
The built-in Digital Sound Processor (DSP) allows for fine-tuning of audio settings. Adjust equalization, sound effects, and other audio parameters to customize your listening experience.

4.5 Bluetooth 5.4 and Dual-Band Wi-Fi
Bluetooth 5.4 provides faster and more stable wireless connectivity for clear hands-free calls with noise cancellation and high-quality audio streaming. Dual-band Wi-Fi supports both 2.4GHz for wider coverage and 5.8GHz for high-speed, low-latency performance, ensuring a responsive in-car network for navigation, media, and system updates.
4.6 Steering Wheel Control
Maintain control of your music, answer calls, and manage other functions directly from your vehicle's original steering wheel buttons, allowing you to stay focused on the road.

4.7 Floating Panel Mechanism
The unit features a floating panel design with a 3-way position adjustment. This includes 60mm vertical adjustment to prevent blocking vehicle vents or controls, and the ability to tilt and swivel the screen up to 30 degrees for optimal viewing angles.

4.8 Picture-in-Picture
The Picture-in-Picture (PiP) function allows you to watch a video while simultaneously using other applications, such as navigation or browsing, on the same screen.
5. Specifications
| Feature | Specification |
|---|---|
| Brand | XTRONS |
| Model | TAD128 |
| Screen Size | 10.1 Inches |
| Display Type | QLED IPS Touch Screen |
| Resolution | 1280x800 Pixels |
| Operating System | Android |
| RAM | 4GB DDR4 |
| Storage | 64GB High-Speed Storage |
| Processor | Advanced Processor with 3 TOPS AI computing capability |
| Bluetooth | Bluetooth 5.4 |
| Wi-Fi | Dual-Band (2.4GHz/5.8GHz) |
| Car Integration | Wireless & Wired CarPlay, Android Auto |
| Special Features | ADAS Camera Support, Built-in DSP, GPS Navigation, Picture-in-Picture, Steering Wheel Control |
| Vehicle Service Type | Car |
| Compatible Devices | Smartphone, iPhone |
6. Troubleshooting
If you encounter issues with your XTRONS TAD128 unit, please refer to the following common troubleshooting steps:
- No Power: Check all power connections and fuses. Ensure the vehicle's ignition is on.
- No Sound: Verify speaker connections. Check volume levels and audio settings (including DSP). Ensure the mute function is not active.
- Bluetooth/Wi-Fi Connectivity Issues: Ensure Bluetooth/Wi-Fi is enabled on both the unit and your device. Try restarting both devices. For Wi-Fi, check network password and signal strength.
- CarPlay/Android Auto Not Connecting: Ensure your phone is compatible and the connection (wireless or wired) is stable. Try reconnecting or restarting your phone and the head unit.
- ADAS Camera Not Working: Ensure the ADAS camera is properly connected and calibrated. Check camera settings in the unit's menu.
- Touch Screen Unresponsive: Try restarting the unit. If the issue persists, contact support.
For more complex issues, please refer to the XTRONS support website or contact their customer service.
7. Maintenance
To ensure the longevity and optimal performance of your XTRONS TAD128 car stereo, follow these maintenance guidelines:
- Cleaning the Screen: Use a soft, lint-free cloth to gently wipe the screen. For stubborn smudges, slightly dampen the cloth with water or a screen-safe cleaner. Avoid harsh chemicals or abrasive materials.
- Software Updates: Periodically check for software updates provided by XTRONS to ensure you have the latest features and bug fixes. Follow the instructions provided with the update carefully.
- Environmental Conditions: Avoid exposing the unit to extreme temperatures, direct sunlight for prolonged periods, or excessive moisture.
- Cable Connections: Ensure all cables are securely connected and not pinched or damaged.
8. Warranty and Support
Your XTRONS TAD128 unit is covered by a manufacturer's warranty. Please refer to the warranty card included in your package or visit the official XTRONS website for detailed warranty terms and conditions.
For technical support, product inquiries, or service requests, please contact XTRONS customer support or visit their official store page:
XTRONS Official Store: https://www.amazon.com/stores/XTRONS/page/8EE1F454-1060-4D1E-AEC9-A5D390083FBE


