1. Introduction
Thank you for choosing the COWSAR Single Serve Coffee Maker. This appliance is designed for convenient and efficient brewing of both K-Cup coffee pods and ground coffee. Please read this manual thoroughly before operating the coffee maker to ensure safe and optimal performance. Keep this manual for future reference.
2. Important Safety Instructions
- Read all instructions before use.
- Do not touch hot surfaces. Use handles or knobs.
- To protect against fire, electric shock, and injury to persons, do not immerse cord, plugs, or coffee maker in water or other liquid.
- Close supervision is necessary when any appliance is used by or near children.
- Unplug from outlet when not in use and before cleaning. Allow to cool before putting on or taking off parts, and before cleaning the appliance.
- Do not operate any appliance with a damaged cord or plug, or after the appliance malfunctions or has been damaged in any manner.
- The use of accessory attachments not recommended by the appliance manufacturer may result in fire, electric shock, or injury to persons.
- Do not use outdoors.
- Do not let cord hang over edge of table or counter, or touch hot surfaces.
- Do not place on or near a hot gas or electric burner, or in a heated oven.
- Always attach plug to appliance first, then plug cord into the wall outlet. To disconnect, turn any control to "off," then remove plug from wall outlet.
- Do not use appliance for other than intended use.
- The appliance features an auto shut-off safety function if the lid is open or improperly closed.
3. Product Components
Familiarize yourself with the main parts of your COWSAR Single Serve Coffee Maker:
- Water Reservoir (14 oz capacity)
- Lid
- Brew Button / Power Button
- K-Cup Pod Holder
- Ground Coffee Filter Basket
- Adjustable Funnel Handle
- Drip Tray
- Power Cord
4. Setup
4.1 Unpacking and Initial Cleaning
- Carefully remove all packaging materials from the coffee maker.
- Wipe the exterior of the coffee maker with a damp cloth.
- Wash the K-Cup pod holder, ground coffee filter basket, and drip tray in warm, soapy water. Rinse thoroughly and dry.
- Perform an initial cleaning cycle by filling the water reservoir to the MAX line and running a brew cycle without any coffee pod or grounds. Discard the hot water.
4.2 Placement
Place the coffee maker on a stable, flat, heat-resistant surface. Ensure there is adequate clearance around the unit for proper ventilation.
5. Operating Instructions
5.1 Adding Water
Open the lid of the water reservoir. Pour fresh, cold water into the reservoir, observing the internal markings for desired brew size (6oz, 8oz, 10oz, 12oz, 14oz). Do not exceed the MAX fill line.

Image: Top view of the water reservoir, showing the various fill lines for different brew sizes.
5.2 Using K-Cup Pods or Ground Coffee
The COWSAR coffee maker supports both K-Cup pods and ground coffee using interchangeable holders.

Image: Demonstrates the two types of coffee holders: one for K-Cup pods and one for fresh ground coffee.
For K-Cup Pods:
- Insert a K-Cup pod into the K-Cup pod holder.
- Place the filled holder into the brewing chamber.
- Close the lid firmly.
For Ground Coffee:
- Fill the ground coffee filter basket with your desired amount of ground coffee (do not overfill).
- Place the filled filter basket into the brewing chamber.
- Close the lid firmly.
5.3 Adjusting Funnel Height
The coffee maker features an adjustable funnel handle to accommodate various cup and travel mug sizes, preventing splashes.

Image: Illustration of the adjustable funnel handle, demonstrating its use for various cup sizes.
5.4 Brewing Coffee
- Ensure the water reservoir is filled and the coffee holder (K-Cup or ground) is correctly inserted and the lid is closed.
- Place your cup on the drip tray. Adjust the funnel height if necessary.
- Press the brew button once to start the brewing process. The button will illuminate.
- The coffee maker will automatically stop brewing once the selected water amount has been dispensed.
- To stop brewing at any time, press the brew button again.

Image: The coffee maker in operation, dispensing freshly brewed coffee into a cup.
5.5 Safety Feature
The coffee maker includes a smart safety feature. If the top cover is not closed or is opened suddenly during operation, the brew button will flash 3 times, and the machine will automatically shut down to prevent accidents.
6. Maintenance
6.1 Daily Cleaning
- Always unplug the coffee maker before cleaning.
- Remove and empty the K-Cup pod holder or ground coffee filter basket after each use. Wash with warm, soapy water and rinse.
- Empty and clean the drip tray regularly.
- Wipe the exterior of the coffee maker with a damp, soft cloth. Do not use abrasive cleaners or scouring pads.
6.2 Self-Cleaning Function
The coffee maker is equipped with a self-cleaning function to flush internal water pathways.
- Ensure the water reservoir is filled with clean water.
- Place an empty cup on the drip tray.
- Long press the brew button for more than 3 seconds to activate the 60-second self-cleaning cycle.
- Discard the water collected in the cup.

Image: Internal diagram illustrating the self-cleaning water circulation within the coffee maker.
6.3 Descaling
Over time, mineral deposits (scale) can build up in your coffee maker, affecting performance. Descale your coffee maker every 3-6 months, or more frequently if you have hard water.
- Fill the water reservoir with a mixture of white vinegar and water (e.g., 1:2 ratio) or a commercial descaling solution according to its instructions.
- Place a large empty mug on the drip tray.
- Run several brew cycles until the reservoir is empty.
- Rinse the reservoir thoroughly and run several cycles with fresh, clean water to flush out any remaining descaling solution.
7. Troubleshooting
| Problem | Possible Cause | Solution |
|---|---|---|
| Coffee maker does not turn on. | Not plugged in; power outage. | Ensure the power cord is securely plugged into a working outlet. Check circuit breaker. |
| Coffee does not brew. | Insufficient water in reservoir; lid not closed properly; coffee holder not inserted correctly. | Fill water reservoir to desired level. Ensure lid is firmly closed. Verify coffee holder is correctly seated. |
| Brewing is slow. | Mineral buildup (scale). | Perform a descaling cycle as described in Section 6.3. |
| Water not flowing through ground coffee. | Ground coffee too fine or overfilled filter basket. | Use a coarser grind of coffee. Do not overfill the ground coffee filter basket. |
| Water leaks from the machine. | Water reservoir overfilled; coffee holder not seated correctly. | Do not fill water past the MAX line. Ensure coffee holder is properly inserted. |
| Brew button flashes 3 times and machine shuts off. | Safety feature activated due to open or improperly closed lid. | Ensure the lid is securely closed before and during operation. |
8. Specifications
| Feature | Detail |
|---|---|
| Brand | COWSAR |
| Model Name | CM3740-BLACK |
| Model Number | CM9440-UL |
| Capacity | 14 ounces |
| Color | Black |
| Product Dimensions (D x W x H) | 10.87" x 4.61" x 10.94" |
| Weight | 4.4 Pounds |
| Special Features | Auto Shut-Off, Lightweight, Portable, Self-Cleaning, Single Cup Brew |
| Coffee Maker Type | Drip Coffee Machine |
| Operation Mode | Fully Automatic |
| Wattage | 1050 watts |
| Voltage | 120 Volts |
| Coffee Input Type | Ground, Pod (K-Cup compatible) |
| Power Source | AC adapter |
| Dishwasher Safe | No |
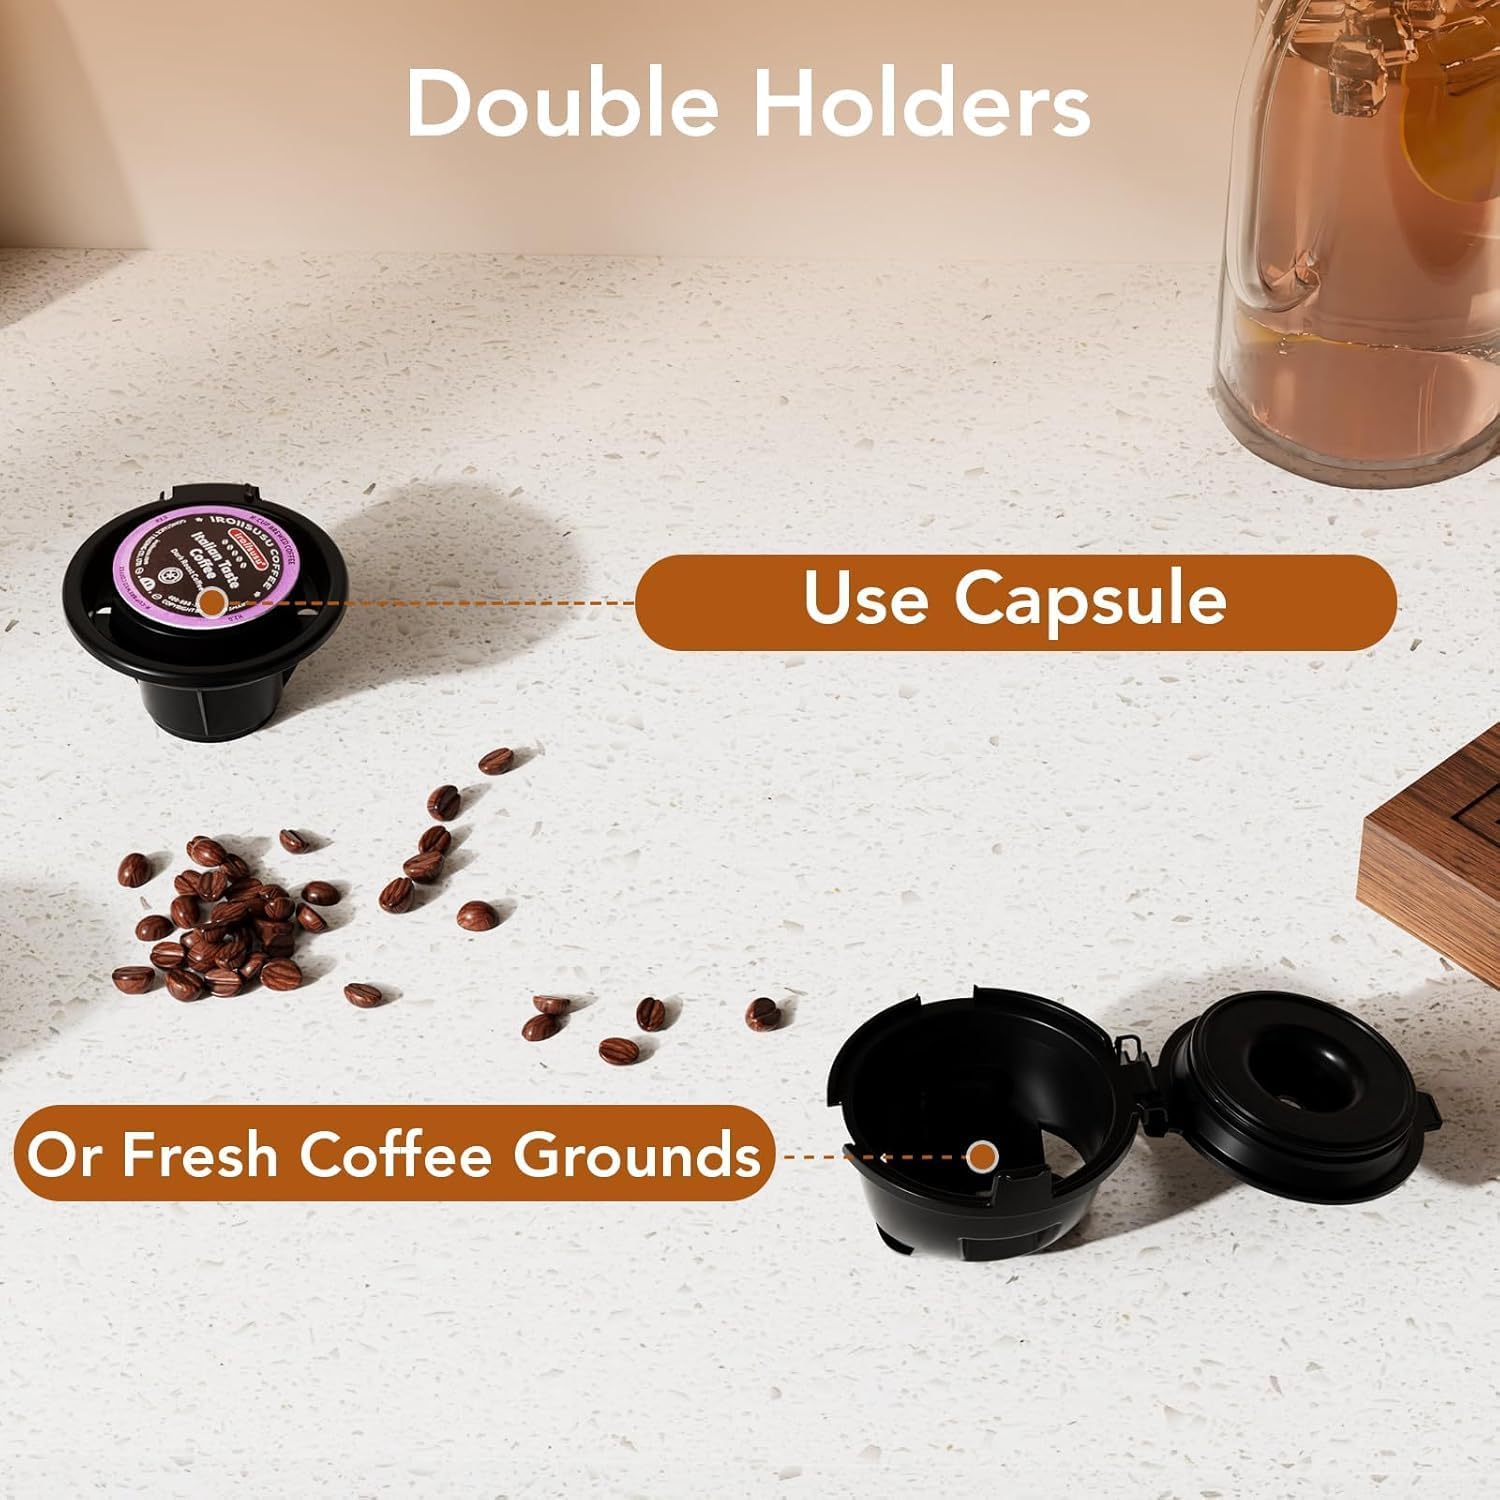
Image: The COWSAR coffee maker, highlighting its compact dimensions and sleek design.
9. Product Video
Video: An overview of the COWSAR Single Serve Coffee Maker, demonstrating its features and ease of use.
10. Warranty and Support
For warranty information and customer support, please refer to the documentation included with your purchase or visit the official COWSAR website. Keep your purchase receipt as proof of purchase for any warranty claims.