
1. Introduction
This manual provides essential information for the safe assembly, operation, and maintenance of your AMERISUN 14-inch 2-in-1 Corded Electric Lawn Mower, Model AM8015. Please read these instructions thoroughly before using the product and retain them for future reference. This electric lawn mower is designed for residential use on small to medium-sized lawns, offering both mulching and bagging capabilities.
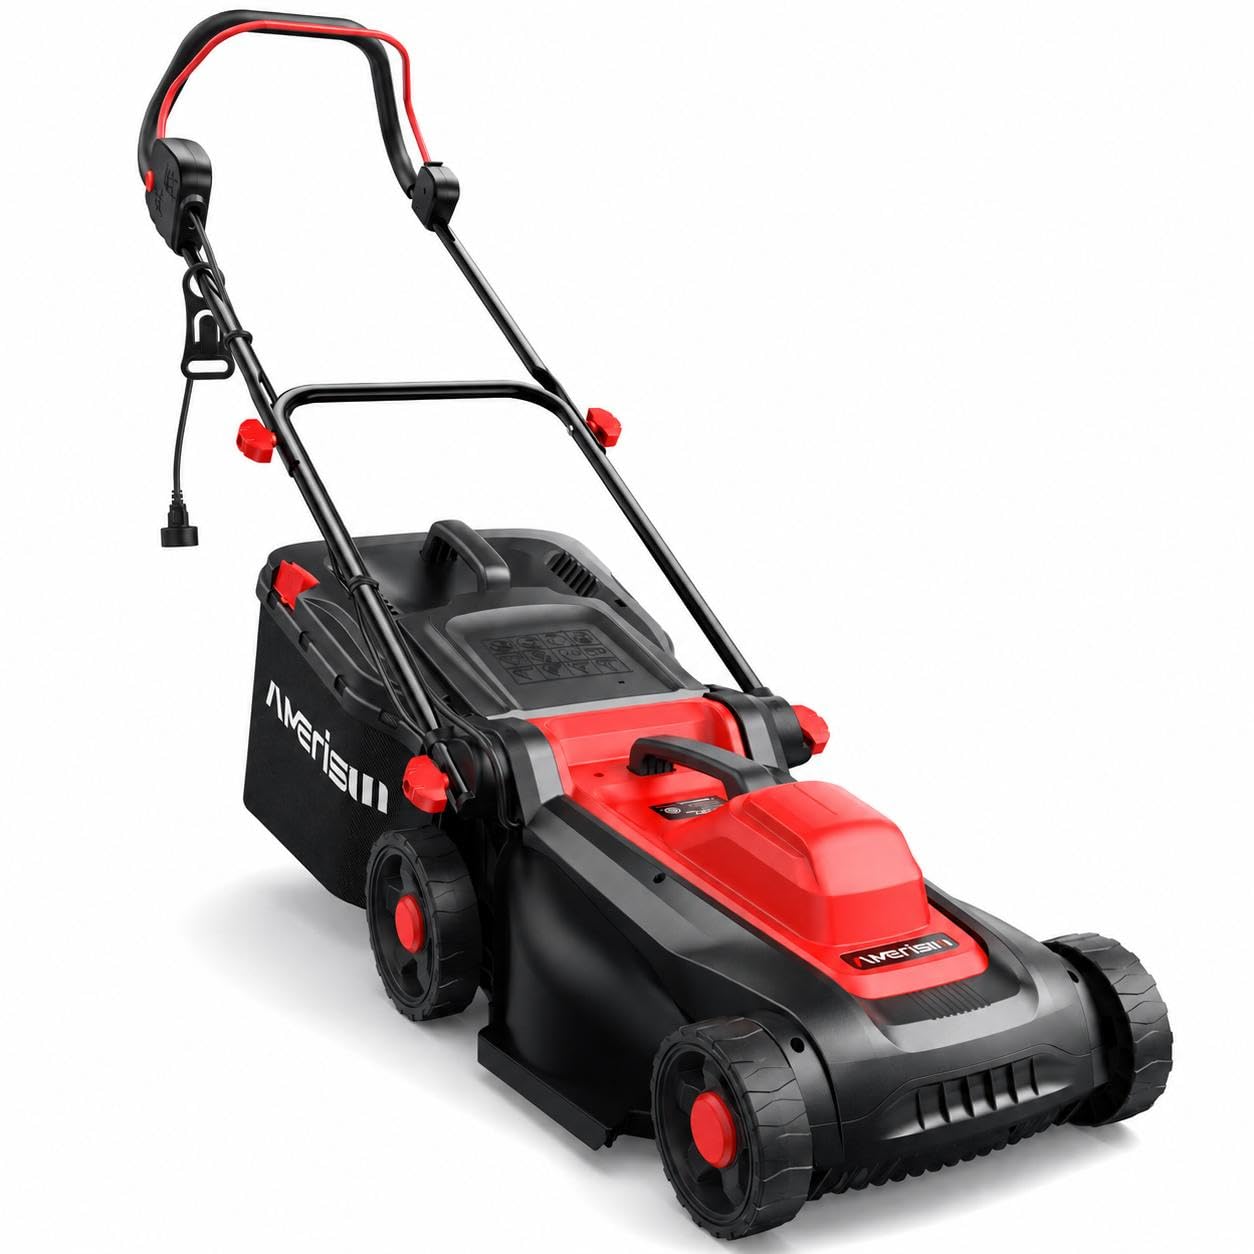
Figure 1: AMERISUN 14-inch 2-in-1 Corded Electric Lawn Mower
2. Safety Instructions
WARNING: Read all safety warnings and instructions. Failure to follow the warnings and instructions may result in electric shock, fire, and/or serious injury.
- Personal Safety: Always wear appropriate personal protective equipment, including eye protection, hearing protection, and sturdy footwear. Do not operate the mower barefoot or in open-toed sandals.
- Electrical Safety: Ensure the power cord is in good condition and suitable for outdoor use. Always connect to a properly grounded outlet. Avoid operating the mower in wet conditions or rain. Keep the cord clear of the cutting blade.
- Work Area Safety: Keep children, pets, and bystanders away from the operating area. Clear the area of any objects (rocks, sticks, wires) that could be thrown by the blade.
- Operation Safety: Never place hands or feet near rotating parts. Disconnect the power supply before cleaning, adjusting, or performing maintenance. Do not force the mower; let it work at its intended pace.
- Slope Operation: Exercise extreme caution when mowing on slopes. Mow across the face of slopes, never up and down. Avoid mowing excessively steep slopes.
3. Package Contents
Verify that all items are present in the package before assembly. If any parts are missing or damaged, contact customer support.
- AMERISUN 14-inch Electric Lawn Mower Unit
- Upper Handle Assembly
- Lower Handle Assembly
- Grass Collection Bag (10-gallon capacity)
- Mulching Plug
- Power Cord Retainer Clips
- User Manual
4. Setup and Assembly
Follow these steps to assemble your AMERISUN electric lawn mower.
4.1 Handle Assembly
Attach the lower handle to the mower base, then connect the upper handle to the lower handle. Secure all connections with the provided hardware. Ensure the quick-release levers are properly tightened to lock the handle in place.
Video 1: Installation guide for the 2-in-1 14-inch Corded Lawn Mower, demonstrating handle assembly and other setup steps.
4.2 Grass Collection Bag / Mulching Plug Installation
Your mower supports both grass collection and mulching. To use the grass collection bag, lift the rear discharge flap and hook the bag onto the mower. For mulching, insert the mulching plug into the discharge opening before closing the flap.

Figure 2: Illustration of the 2-in-1 design, showing the 10-gallon rear bag for grass collection and the mulching function.
4.3 Adjusting Handle Height
The handle can be adjusted to three different heights for user comfort. Loosen the quick-release levers on the handle, adjust to the desired height (35.4", 38.6", or 42.1"), and then securely tighten the levers.
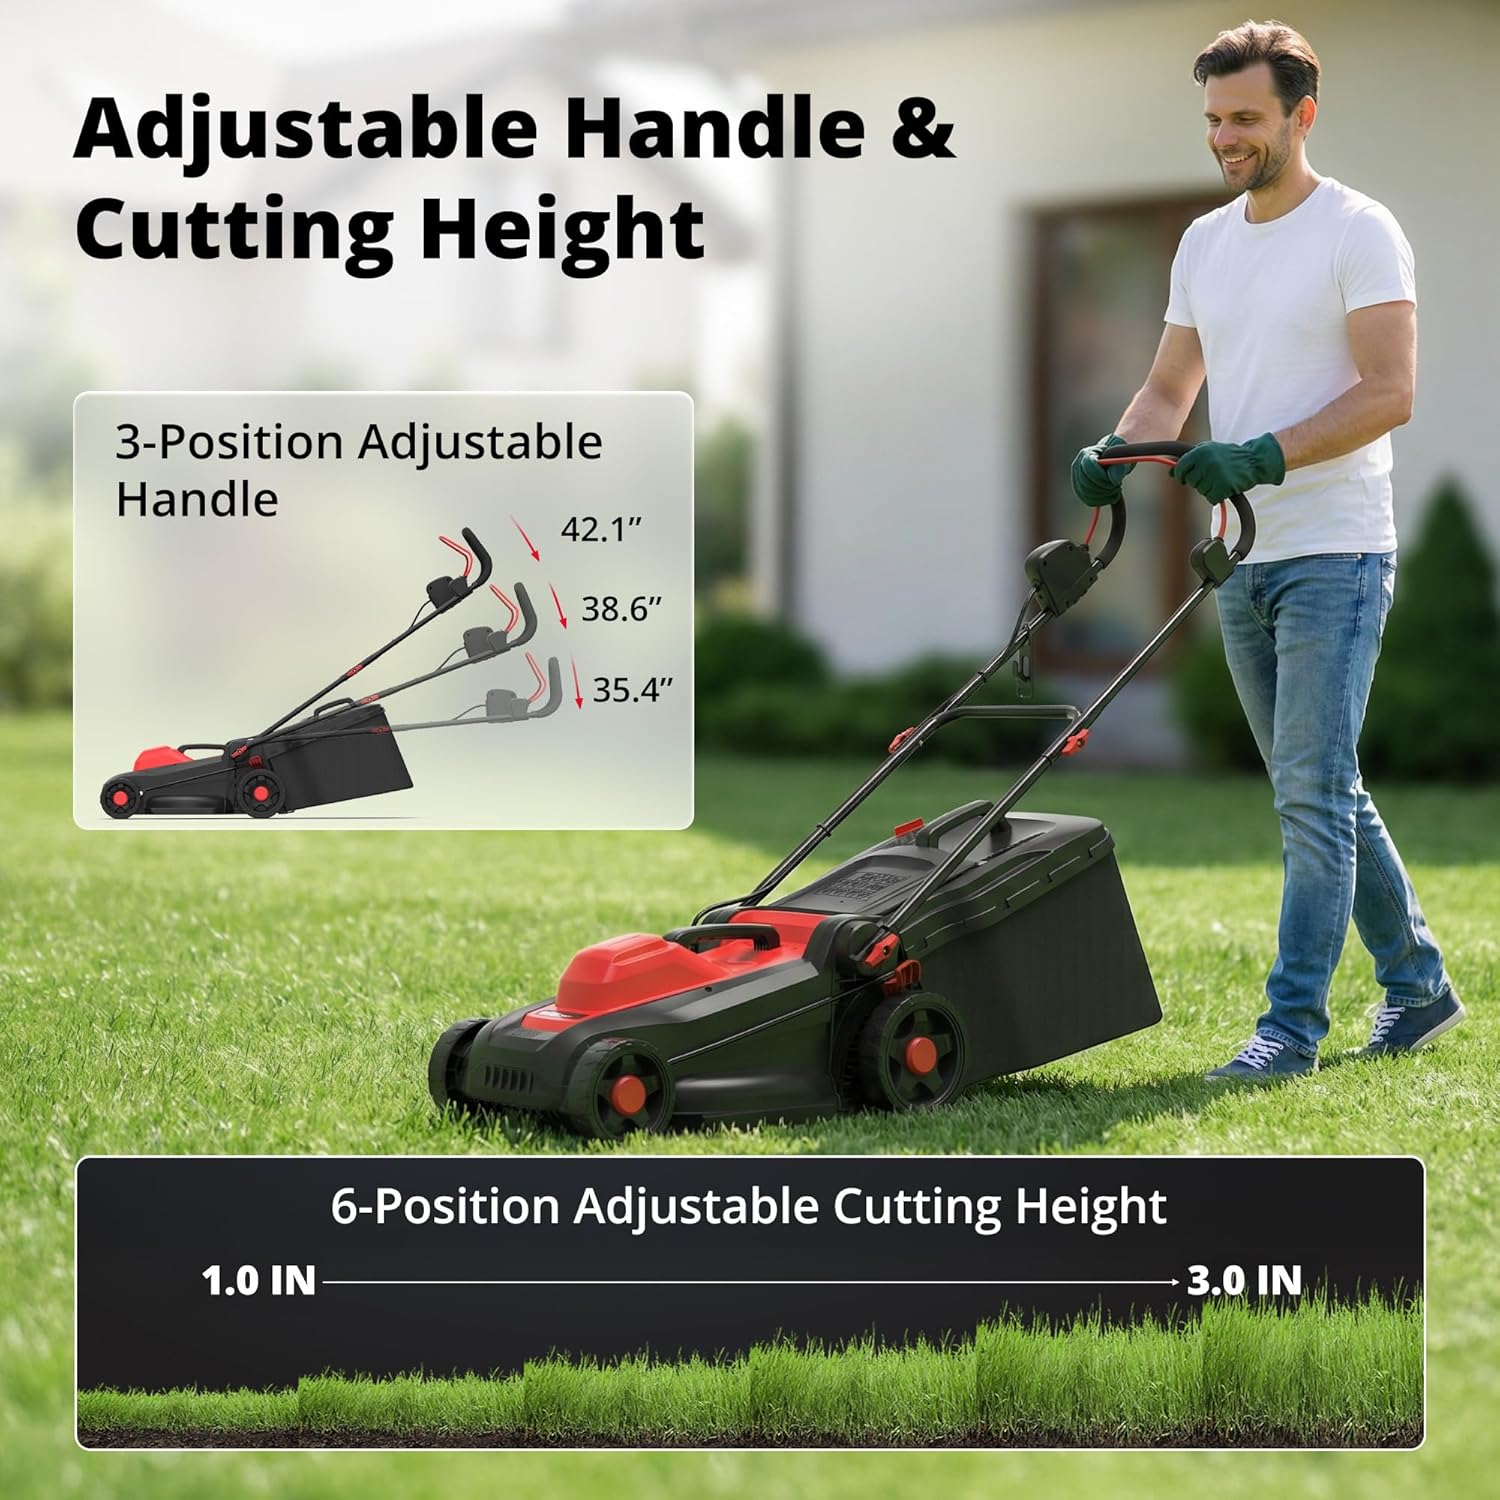
Figure 3: Visual guide for adjusting the handle to one of three positions and setting the cutting height.
4.4 Foldable Design for Storage
The mower features a foldable design for compact storage. To fold, loosen the handle levers and collapse the handle downwards. Ensure the power cord is safely tucked away.
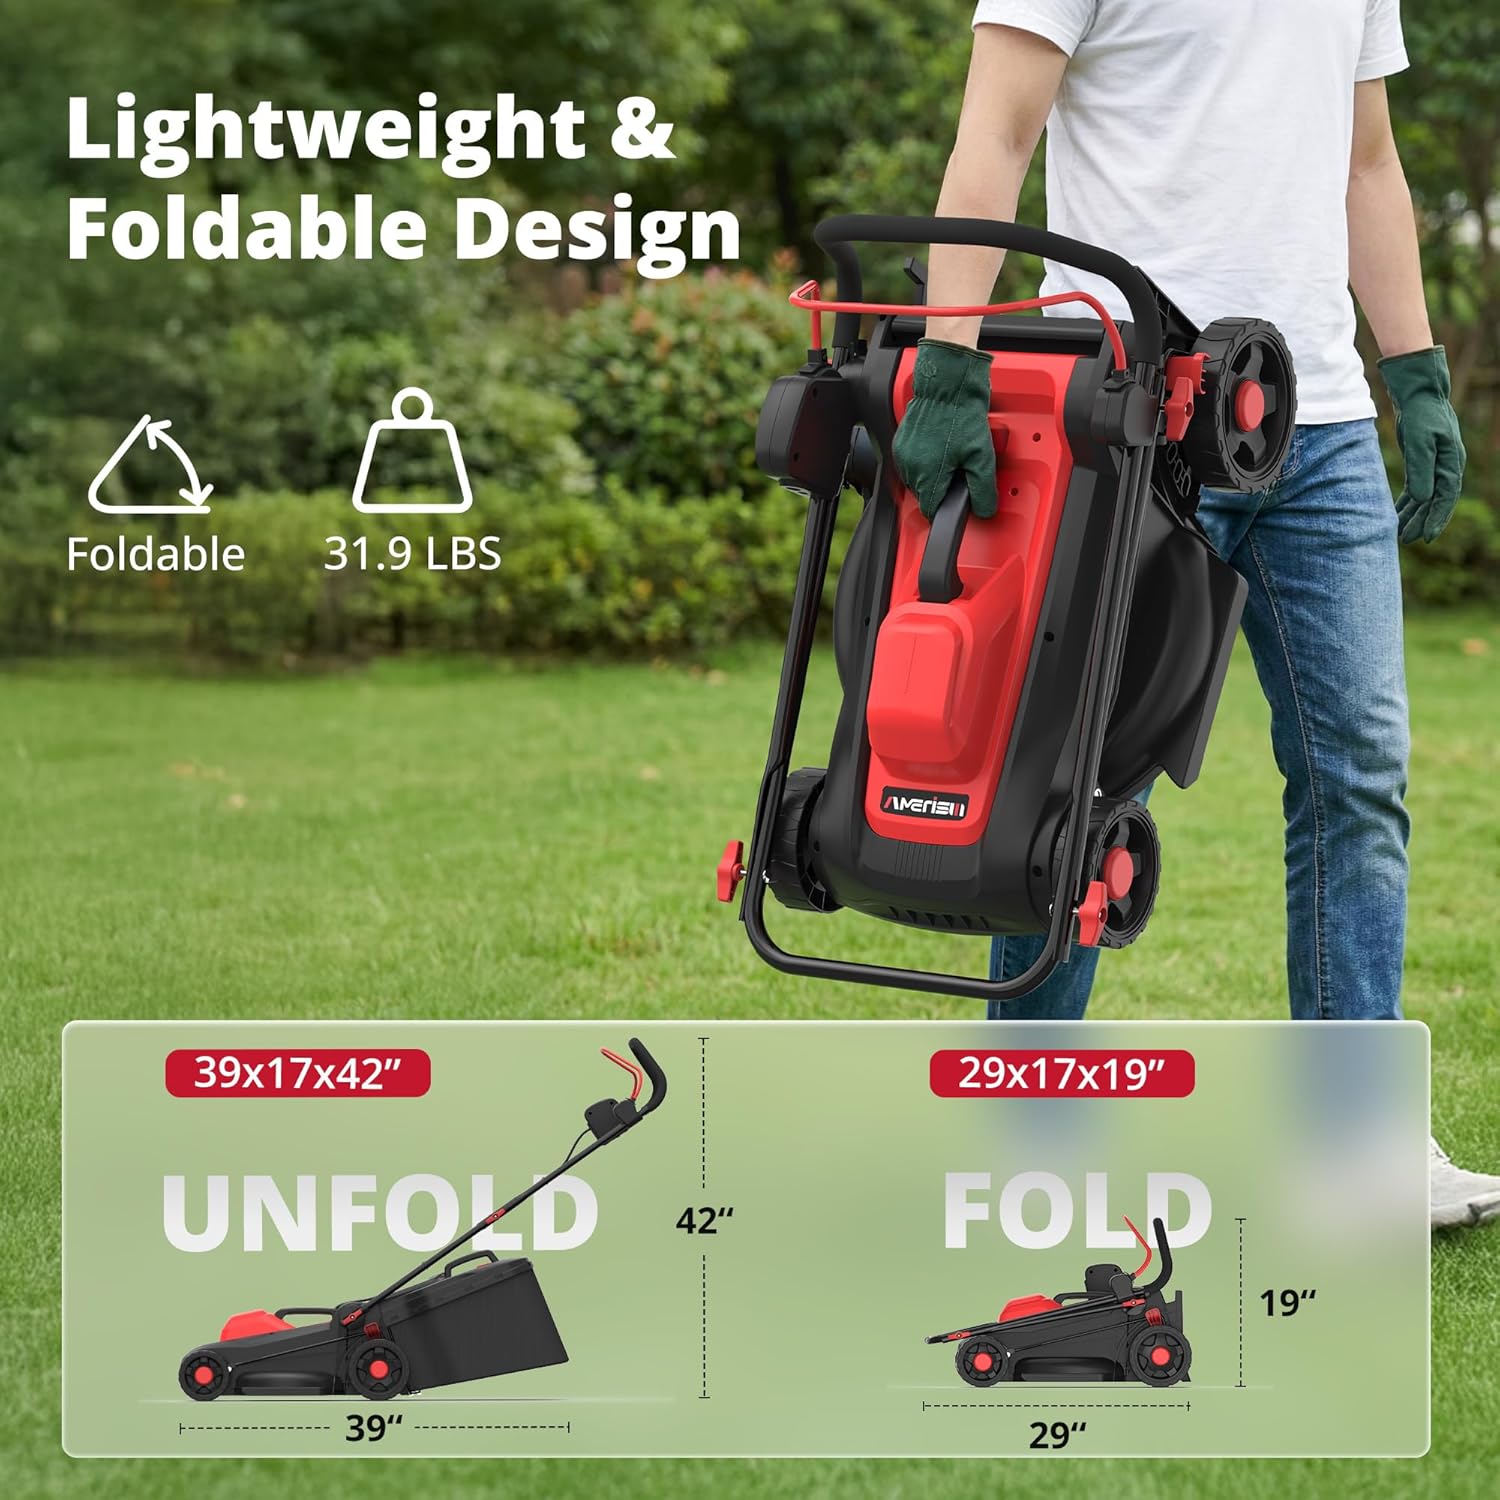
Figure 4: The mower's lightweight (31.9 lbs) and foldable design, showing unfolded (39x17x42") and folded (29x17x19") dimensions for storage.
5. Operation
5.1 Starting and Stopping the Mower
To start the mower, first press the safety lock-off switch, then pull the bail bar towards the handle. To stop, release the bail bar. The mower is equipped with a dual switch mechanism for safety.

Figure 5: Safety features including the dual switch (press lock-off, pull bail bar) and IPX4 waterproof protection for outdoor use.
5.2 Adjusting Cutting Height
The mower offers 6 cutting height positions, ranging from 1.0 inches to 3.0 inches. To adjust, locate the height adjustment lever on each wheel and move it to the desired setting. Ensure all wheels are set to the same height for an even cut.
Figure 6: Visual guide for adjusting the handle to one of three positions and setting the cutting height.
5.3 Mowing Techniques
For best results, mow dry grass. Overlap cutting swaths slightly to ensure complete coverage. When using the grass collection bag, monitor the fill indicator and empty the bag when full to maintain optimal performance. For mulching, ensure the mulching plug is correctly installed.

Figure 7: The mower's compact size and 14-inch cutting width, ideal for residential yards.
6. Maintenance
Regular maintenance ensures the longevity and optimal performance of your lawn mower. Always disconnect the power supply before performing any maintenance.
6.1 Cleaning
After each use, clean the mower deck and discharge chute to prevent grass buildup. Use a brush or cloth; avoid using water jets directly on electrical components. Ensure the grass collection bag is emptied and cleaned as needed.
6.2 Blade Care
Periodically inspect the cutting blade for sharpness and damage. A dull or damaged blade can lead to poor cutting performance and strain the motor. If necessary, have the blade sharpened or replaced by a qualified service technician. Always wear heavy-duty gloves when handling the blade.
6.3 Storage
Store the mower in a dry, secure location, away from children and pets. The foldable handle allows for compact storage. Ensure the power cord is neatly wrapped and stored to prevent damage.
7. Troubleshooting
This section addresses common issues you might encounter with your AMERISUN electric lawn mower.
| Problem | Possible Cause | Solution |
|---|---|---|
| Mower does not start | No power supply; Safety switch not engaged; Loose connection | Check power outlet and cord; Ensure safety lock-off switch is pressed and bail bar is pulled; Verify all connections are secure. |
| Poor cutting performance | Dull or damaged blade; Cutting height too low for grass type; Grass too wet or long | Inspect and sharpen/replace blade; Adjust cutting height; Mow dry grass; Cut long grass in stages. |
| Excessive vibration | Damaged or unbalanced blade; Loose components | Inspect blade for damage and balance; Tighten all fasteners. If vibration persists, contact support. |
| Motor stops during operation | Overload protection activated; Grass buildup in deck | Allow motor to cool down; Clear any grass buildup from the deck and blade area. Avoid cutting excessively thick or wet grass. |
8. Specifications
Below are the technical specifications for the AMERISUN 14-inch 2-in-1 Corded Electric Lawn Mower (Model AM8015).
- Model Number: AM8015
- Power Source: AC Corded Electric
- Motor: 12.5 Amp (1500W)
- No-Load Speed: 3400 RPM
- Cutting Width: 14 inches
- Cutting Height Positions: 6 positions (1.0" to 3.0")
- Grass Collection Bag Capacity: 10 Gallons
- Functions: 2-in-1 (Mulching & Bagging)
- Weight: 31.9 lbs
- Product Dimensions (Unfolded): 26"D x 13.2"W x 17"H
- Wheel Size: 6-inch front, 7-inch rear
- Safety Features: IPX4 Water Resistance, Rear Safety Shield, Safety Lock-off Switch
- UPC: 840432713556

Figure 8: Illustration highlighting the powerful 12.5 Amp (1500W) motor, delivering up to 3400 RPM for efficient cutting.
9. Warranty and Support
9.1 Limited Warranty
AMERISUN warrants this product against defects in material and workmanship for a period of one (1) year from the original date of purchase. This warranty does not cover normal wear and tear, misuse, abuse, or damage caused by improper assembly or maintenance. Proof of purchase is required for all warranty claims.
9.2 Customer Support
For technical assistance, replacement parts, or warranty inquiries, please contact AMERISUN Customer Service:
- Website: www.amerisun.com (example)
- Email: support@amerisun.com (example)
- Phone: 1-800-XXX-XXXX (example)
Please have your model number (AM8015) and date of purchase available when contacting support.