1. Introduction
The OLAX Scorpio X60 AC1200 Dual Band WiFi Router is designed to provide high-speed, reliable wireless connectivity for your home or office. Featuring dual-band technology, MU-MIMO, and EasyMesh support, this router ensures extensive coverage and efficient data transfer. This manual provides detailed instructions for setting up, operating, maintaining, and troubleshooting your device.
2. Package Contents
Before you begin, please verify that all items are present in your package:
- OLAX Scorpio X60 Router
- Power Adapter
- Ethernet Cable
- Quick Start Guide
- 4 External Antennas

Image: Included accessories - Power Adapter and Ethernet Cable.
3. Product Overview
3.1 Front Panel and Indicators
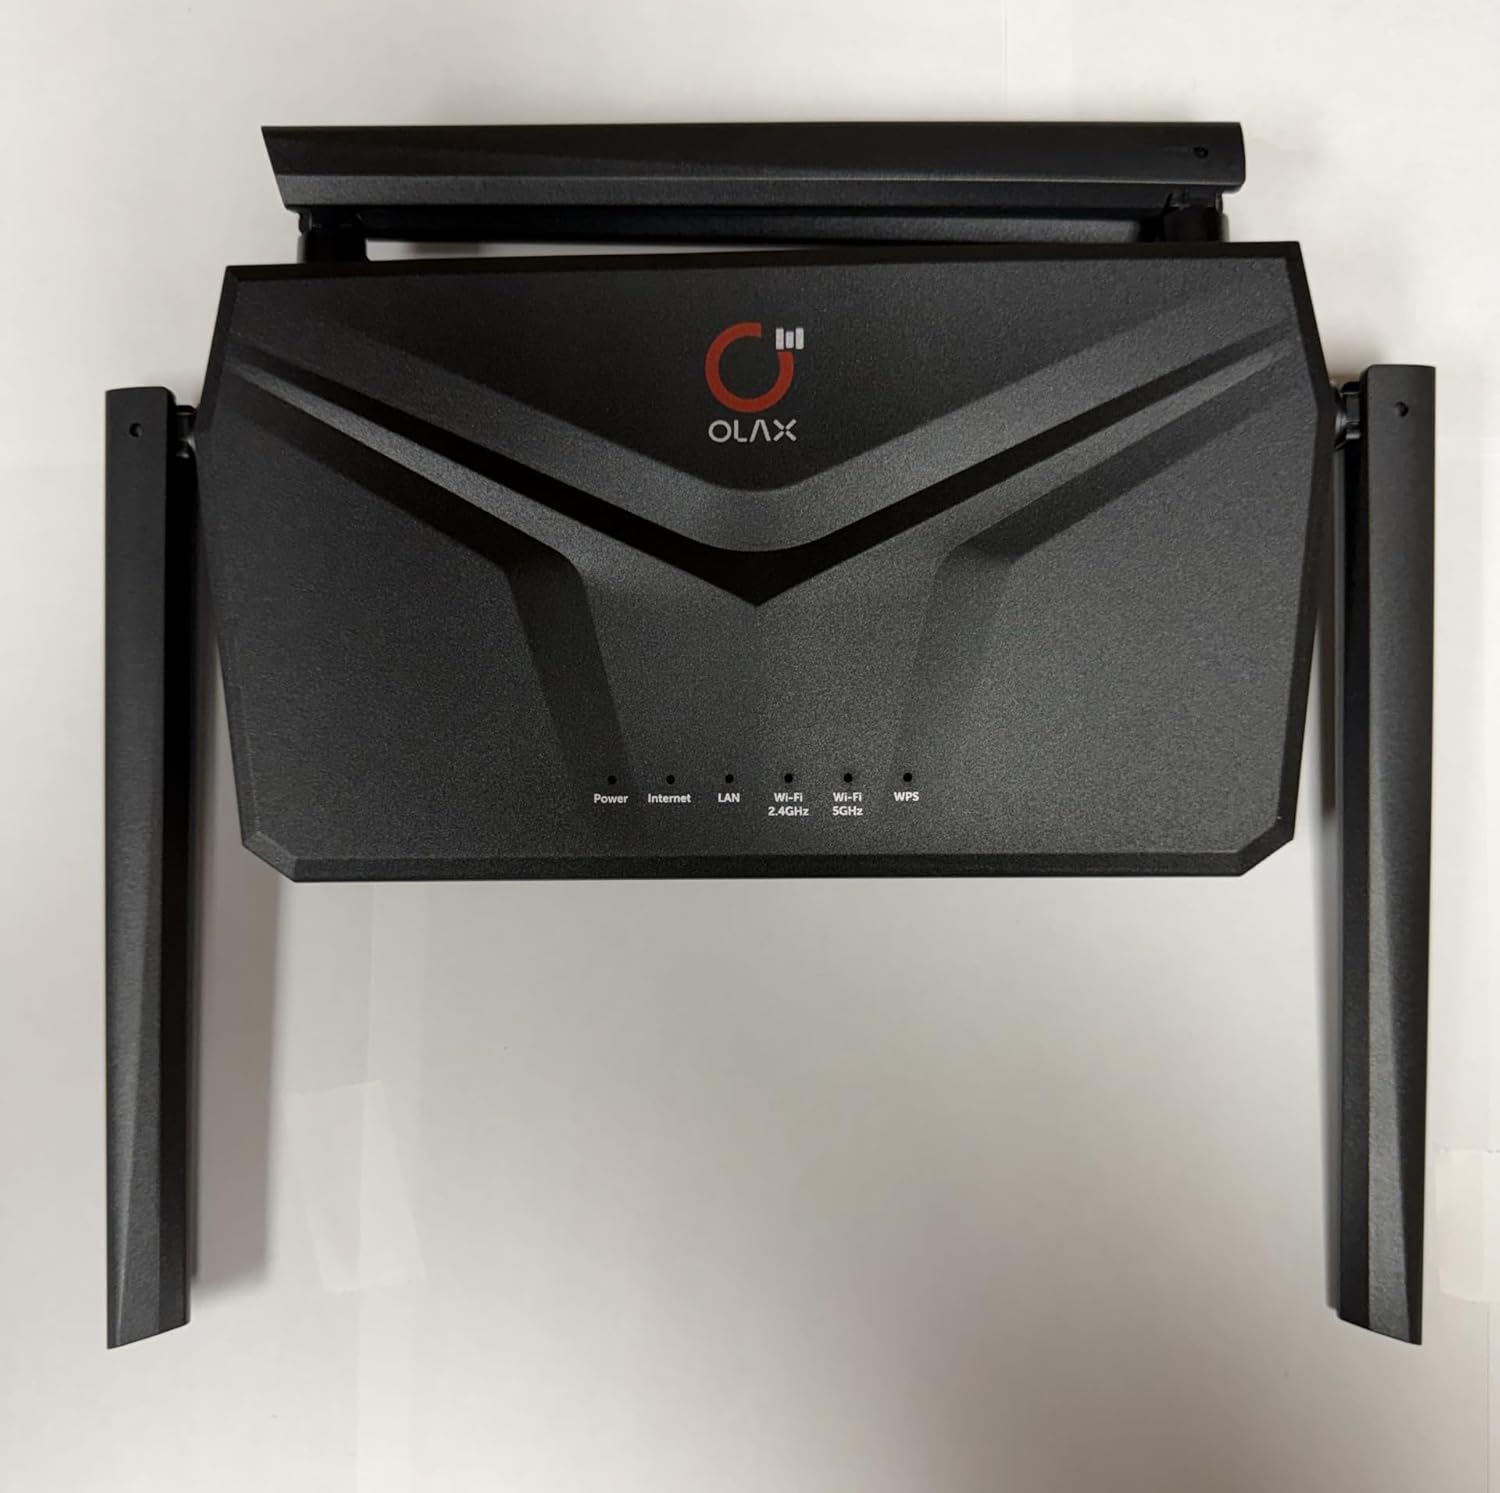
Image: Front view of the OLAX Scorpio X60 Router, showing LED indicators for Power, Internet, LAN, Wi-Fi 2.4GHz, Wi-Fi 5GHz, and WPS.
The front panel features several LED indicators that provide real-time status of the router's operation:
- Power: Indicates the power status of the device.
- Internet: Shows the status of the internet connection.
- LAN: Indicates activity on the Local Area Network ports.
- Wi-Fi 2.4GHz: Shows the status of the 2.4GHz wireless network.
- Wi-Fi 5GHz: Shows the status of the 5GHz wireless network.
- WPS: Indicates the status of the Wi-Fi Protected Setup function.
3.2 Rear Panel and Ports

Image: Rear view of the OLAX Scorpio X60 Router, displaying the WAN port, LAN ports, power input, and reset button.
The rear panel provides all necessary connection ports:
- WAN Port: Connects to your modem for internet access.
- LAN Ports (4x Gigabit): Connects to wired devices such as computers, gaming consoles, or smart TVs.
- Power Input: Connects to the included power adapter.
- Reset Button: Used to restore the router to factory default settings.
- WPS Button: For quick and secure connection to Wi-Fi devices.
4. Setup Guide
4.1 Hardware Connection
- Position the Router: Place the router in a central location in your home, away from obstructions and sources of interference. Ensure the antennas are oriented vertically for optimal signal.
- Connect the Antennas: Ensure all four external antennas are securely attached and adjusted.
- Connect to Modem: Connect one end of the provided Ethernet cable to the WAN port (usually blue) on your OLAX Scorpio X60 router and the other end to your modem's Ethernet port.
- Power On: Connect the power adapter to the router's power input and then plug it into a power outlet. Wait for the Power LED to become solid.
- Verify Internet Connection: Wait for the Internet LED to turn solid, indicating a successful connection to your modem and the internet. This may take a few minutes.
4.2 Initial Configuration (Web Interface)
- Connect to the Router:
- Wired Connection: Connect your computer to one of the router's LAN ports using an Ethernet cable.
- Wireless Connection: Connect your wireless device (laptop, smartphone) to the router's default Wi-Fi network. The default Wi-Fi name (SSID) and password are usually printed on a label on the bottom of the router.
- Access the Web Interface: Open a web browser (e.g., Chrome, Firefox, Edge) and enter the default IP address of the router in the address bar. The default IP address is typically
192.168.1.1or192.168.0.1. Refer to the label on your router for the exact address. - Log In: Enter the default username and password. These are also usually found on the router's label (common defaults are admin/admin or admin/password).
- Run Setup Wizard: Follow the on-screen instructions of the setup wizard to configure your internet connection, change the default Wi-Fi name (SSID) and password, and set an administrator password for the router. It is highly recommended to change the default administrator password for security.
4.3 WPS (Wi-Fi Protected Setup)
WPS allows you to connect Wi-Fi devices to your network without entering the password manually.
- Press the WPS button on your OLAX Scorpio X60 router.
- Within two minutes, press the WPS button on your client device (e.g., wireless adapter, printer).
- The devices will automatically connect to the Wi-Fi network.
5. Operating Instructions
5.1 Dual Band Operation
The OLAX Scorpio X60 operates on two frequency bands: 2.4GHz and 5GHz.
- 2.4GHz Band: Offers wider coverage and better penetration through walls, suitable for general internet use and devices further from the router.
- 5GHz Band: Provides faster speeds and lower latency, ideal for gaming, 4K streaming, and devices closer to the router.
You can configure separate SSIDs for each band or use a single SSID with Smart Connect (if available) for the router to automatically assign devices to the optimal band.
5.2 EasyMesh Technology
The router supports EasyMesh, allowing you to create a seamless whole-home Wi-Fi network by adding compatible EasyMesh devices. This eliminates Wi-Fi dead zones and provides a single network name for all devices.
- Ensure your OLAX Scorpio X60 is set up as the primary router.
- Refer to the instructions provided with your EasyMesh compatible extender or satellite unit for pairing. Typically, this involves pressing a button on both devices or configuring through the web interface.
- Once paired, your devices will automatically connect to the strongest Wi-Fi signal as you move around your home (Smart Roaming).
5.3 Parental Controls
Manage internet access for specific devices or users through the parental control features in the router's web interface.
- Access Schedules: Set specific times when internet access is allowed or blocked for certain devices.
- Website Filtering: Block access to inappropriate websites or categories.
- Device Management: Monitor connected devices and their internet usage.
5.4 Guest Network
Create a separate Wi-Fi network for guests to provide internet access without sharing your main network password or allowing access to your internal network resources.
- Log in to the router's web interface.
- Navigate to the Guest Network settings (usually under Wireless or Network settings).
- Enable the Guest Network for the 2.4GHz band.
- Set a unique SSID and password for the guest network.
- Configure any desired access restrictions or time limits.
6. Maintenance
6.1 Firmware Updates
Regularly updating your router's firmware ensures optimal performance, security, and access to new features.
- Visit the OLAX official website (if available) and navigate to the support section for the Scorpio X60 model.
- Download the latest firmware file to your computer.
- Log in to the router's web interface.
- Go to the Firmware Upgrade or System Tools section.
- Upload the downloaded firmware file and follow the on-screen instructions. Do not power off the router during the update process.
6.2 Resetting the Router
If you encounter persistent issues or forget your login credentials, you can reset the router to its factory default settings.
- With the router powered on, use a paperclip or a thin object to press and hold the Reset button on the rear panel for approximately 10 seconds.
- Release the button when the LEDs flash or the router reboots.
- The router will restart with factory default settings. You will need to reconfigure it as per the initial setup guide.
6.3 Physical Care
- Keep the router in a well-ventilated area to prevent overheating.
- Avoid exposing the router to direct sunlight, moisture, or extreme temperatures.
- Clean the exterior with a soft, dry cloth. Do not use liquid cleaners.
7. Troubleshooting
This section addresses common issues you might encounter with your OLAX Scorpio X60 router.
| Problem | Possible Solution |
|---|---|
| No Internet Access |
|
| Cannot Access Router's Web Interface |
|
| Slow Wi-Fi Speed |
|
| Wi-Fi Signal Drops Frequently |
|
8. Specifications
| Feature | Description |
|---|---|
| Model Name | OLAX Scorpio X60 |
| Wireless Standards | 802.11a/b/g/n/ac (Wi-Fi 5) |
| Frequency Band | Dual-Band (2.4GHz & 5GHz) |
| Wireless Speed | Up to 1200Mbps (867Mbps on 5GHz, 400Mbps on 2.4GHz) |
| Antennas | 4x 6dBi High Gain External Antennas |
| Ethernet Ports | 1x Gigabit WAN, 4x Gigabit LAN |
| Security Protocols | WPA3, WPA2, WPA |
| Special Features | EasyMesh, MU-MIMO, Parental Control, Smart Roaming, Guest Network, WPS |
| Coverage | Up to 2500 Square Feet |
| Control Method | App, Push Button (WPS) |
| Operating System Compatibility | Android, iOS, Linux, macOS, Windows |
| Dimensions (L x W x H) | 9.5" x 1.5" x 2.5" |
9. Warranty Information
The OLAX Scorpio X60 AC1200 Dual Band WiFi Router comes with a 1-year manufacturer's warranty from the date of purchase. This warranty covers defects in materials and workmanship under normal use. Please retain your proof of purchase for warranty claims. The warranty does not cover damage caused by misuse, accidents, unauthorized modifications, or external factors.
10. Support
For further assistance, technical support, or to download the latest drivers and firmware, please refer to the official OLAX support website or contact their customer service. Contact information is typically provided in the Quick Start Guide or on the product packaging.