1. Introduction
Thank you for choosing the POOLEX JETPOWER 120 Full Inverter Pool Heat Pump. This manual provides essential information for the safe and efficient installation, operation, and maintenance of your heat pump. Please read this manual thoroughly before installation and use, and keep it for future reference.
The JETPOWER 120 utilizes advanced Full Inverter technology to provide efficient and quiet heating and cooling for your pool, ensuring optimal water temperature from spring to autumn. Its integrated Wi-Fi connectivity allows for convenient control via a smartphone application.

Image 1.1: Front view of the POOLEX JETPOWER 120 Full Inverter Pool Heat Pump, showcasing its design and branding.
2. Safety Information
Important Safety Instructions:
- Read all instructions before using this appliance.
- Installation must be performed by a qualified professional in accordance with local and national electrical and plumbing codes.
- Ensure the power supply matches the specifications of the heat pump.
- Do not operate the heat pump if any part is damaged or malfunctioning.
- Keep children and pets away from the unit during operation.
- Do not block the air intake or exhaust vents.
- Always disconnect power before performing any maintenance or repairs.
3. Package Contents
Verify that all items are present in the package:
- POOLEX JETPOWER 120 Heat Pump Unit
- Anti-vibration support kit
- PVC connectors Ø 50mm 1'' ½
- Condensate drain hose
- Maintenance kit
- Multi-language user manual (this document)
- Wired control extension (10m)

Image 3.1: Included accessories. From left to right: Heat pump on wooden pallet (for delivery), anti-vibration supports, PVC connectors, winter cover, condensate drain hose, and maintenance kit with manual.
4. Setup and Installation
Proper installation is crucial for the performance and longevity of your heat pump. Consult a qualified professional for installation.
4.1. Site Selection
- Choose a well-ventilated outdoor location, away from direct sunlight and heat sources.
- Ensure sufficient clearance around the unit for proper airflow (refer to the diagram in the full manual for specific distances).
- Place the unit on a stable, level surface, using the provided anti-vibration supports.
4.2. Plumbing Connections
The heat pump should be installed in the pool's filtration circuit, after the filter and before any chemical treatment systems.
- Connect the pool water inlet to the "IN" port and the outlet to the "OUT" port using the supplied PVC connectors (Ø 50mm 1'' ½).
- Ensure all connections are watertight.
- Install the condensate drain hose to direct condensed water away from the unit's base.
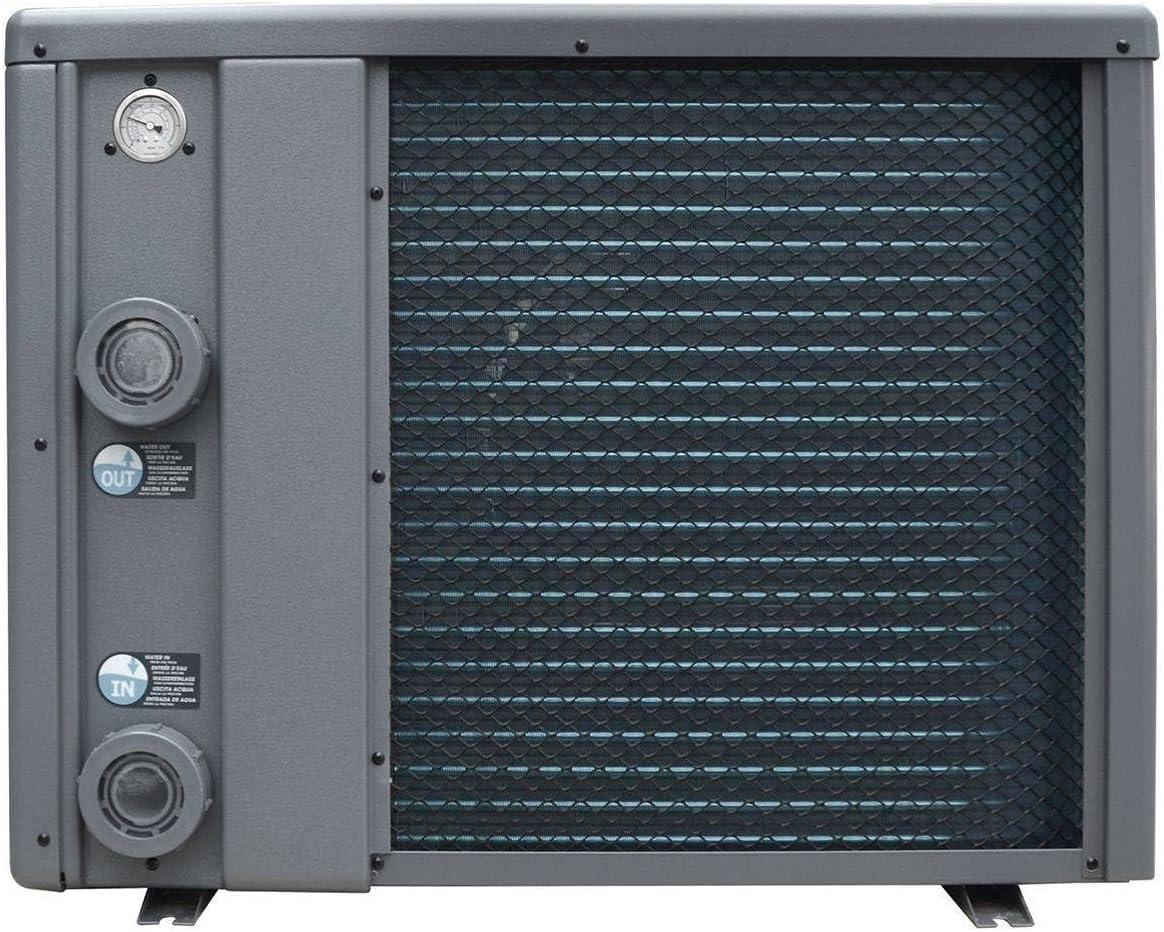
Image 4.1: Side view of the heat pump, illustrating the "IN" (inlet) and "OUT" (outlet) water connections. A pressure gauge is visible at the top left.
4.3. Electrical Connections
- Connect the heat pump to a dedicated electrical circuit with appropriate protection (circuit breaker).
- Refer to the specifications section for power requirements.
- Use the wired control extension (10m) to position the LED control panel conveniently.
5. Operating Instructions
The POOLEX JETPOWER 120 is designed for user-friendly operation with its LED control panel and Wi-Fi connectivity.
5.1. Initial Start-up
- Ensure the pool's filtration system is running and water is circulating through the heat pump.
- Turn on the electrical power to the heat pump.
- The LED control panel will illuminate. Follow the on-screen prompts to set the desired water temperature.
5.2. Full Inverter Technology
The Full Inverter technology allows the heat pump to continuously vary the speed of its compressor and fan. This results in:
- Energy Efficiency: Up to 35% energy savings compared to ON/OFF heat pumps by avoiding consumption peaks.
- Quiet Operation: Reduced noise levels, especially when maintaining the set temperature.
- Rapid Heating: The system can boost capacity for faster temperature increases when needed.
5.3. Reversible Heating/Cooling
The JETPOWER 120 can both heat and cool your pool water. This feature is particularly useful for smaller above-ground pools prone to overheating, which can encourage algae growth.
- Select the desired mode (heating or cooling) via the control panel or smartphone app.
5.4. Wi-Fi Connectivity
Control your heat pump remotely using the dedicated smartphone application. Refer to the separate Wi-Fi setup guide for detailed instructions on connecting your device.
- Download the POOLEX app from your device's app store.
- Follow the in-app instructions to pair your heat pump.
- Monitor and adjust settings from anywhere.
6. Maintenance
Regular maintenance ensures optimal performance and extends the lifespan of your heat pump.
6.1. Routine Checks
- Clean the Unit: Periodically clean the exterior of the unit to remove dust and debris. Ensure air intake and exhaust vents are clear.
- Check Water Flow: Ensure adequate water flow through the heat pump. A reduced flow can impact efficiency.
- Condensate Drain: Verify that the condensate drain hose is clear and draining properly.
6.2. Winterization
Before winter or when temperatures drop below freezing, it is essential to properly winterize your heat pump:
- Disconnect the power supply to the unit.
- Drain all water from the heat pump's plumbing.
- Disconnect the water inlet and outlet pipes.
- Cover the unit with the provided winter cover (or a suitable protective cover) to protect it from harsh weather.
7. Troubleshooting
This section addresses common issues you might encounter. For more complex problems, contact customer support.
| Problem | Possible Cause | Solution |
|---|---|---|
| Heat pump does not start | No power supply; Circuit breaker tripped; Control panel error | Check power connection; Reset circuit breaker; Consult control panel manual for error codes. |
| Insufficient heating/cooling | Low water flow; Dirty evaporator coils; Incorrect temperature setting; Ambient temperature too low/high | Check pool pump and filter; Clean coils; Verify settings; Operate within recommended temperature range. |
| Unusual noise | Loose components; Fan obstruction; Compressor issue | Inspect for loose parts; Clear any obstructions from fan; If compressor issue, contact support. |
| Water leakage | Condensation (normal); Loose plumbing connections; Internal leak | Verify if it's condensation (normal during operation); Tighten connections; For internal leaks, contact support. |
8. Specifications
Technical specifications for the POOLEX JETPOWER 120 heat pump:
| Feature | Specification |
|---|---|
| Model Number | PC-SLP120N/BO |
| Power Source | AC |
| Dimensions (L x W x H) | 86.5 x 37.5 x 65.6 cm |
| Weight | 26 kg |
| Recommended Pool Volume | 45 to 65 m³ |
| COP (26°C Air / 26°C Water) | Up to 16 |
| Refrigerant | R32 |
| Functionality | Heating / Cooling / Auto |
9. Warranty and Support
POOLEX is committed to customer satisfaction. For warranty information, please refer to the warranty card included with your product or visit the official POOLEX website.
- Customer Support: If you have any questions, require technical assistance, or need to report an issue, please visit the POOLEX website or contact your local dealer.
- Spare Parts: Information regarding spare parts availability is currently unavailable. Please contact customer support for specific part inquiries.
- Returns: This product is eligible for 30-day returns.
Note: The seller "eRobot Piscine" provides 30-day returns and legal guarantees.


