1. Product Overview
This PawHut Outdoor Dog Kennel provides a spacious and secure enclosure for large breeds, chickens, or ducks. Constructed from galvanized steel with a waterproof and UV-resistant roof, it offers durability and protection against various weather conditions. The design emphasizes quick assembly and enhanced security features to ensure your pet's safety and comfort.
Key Features:
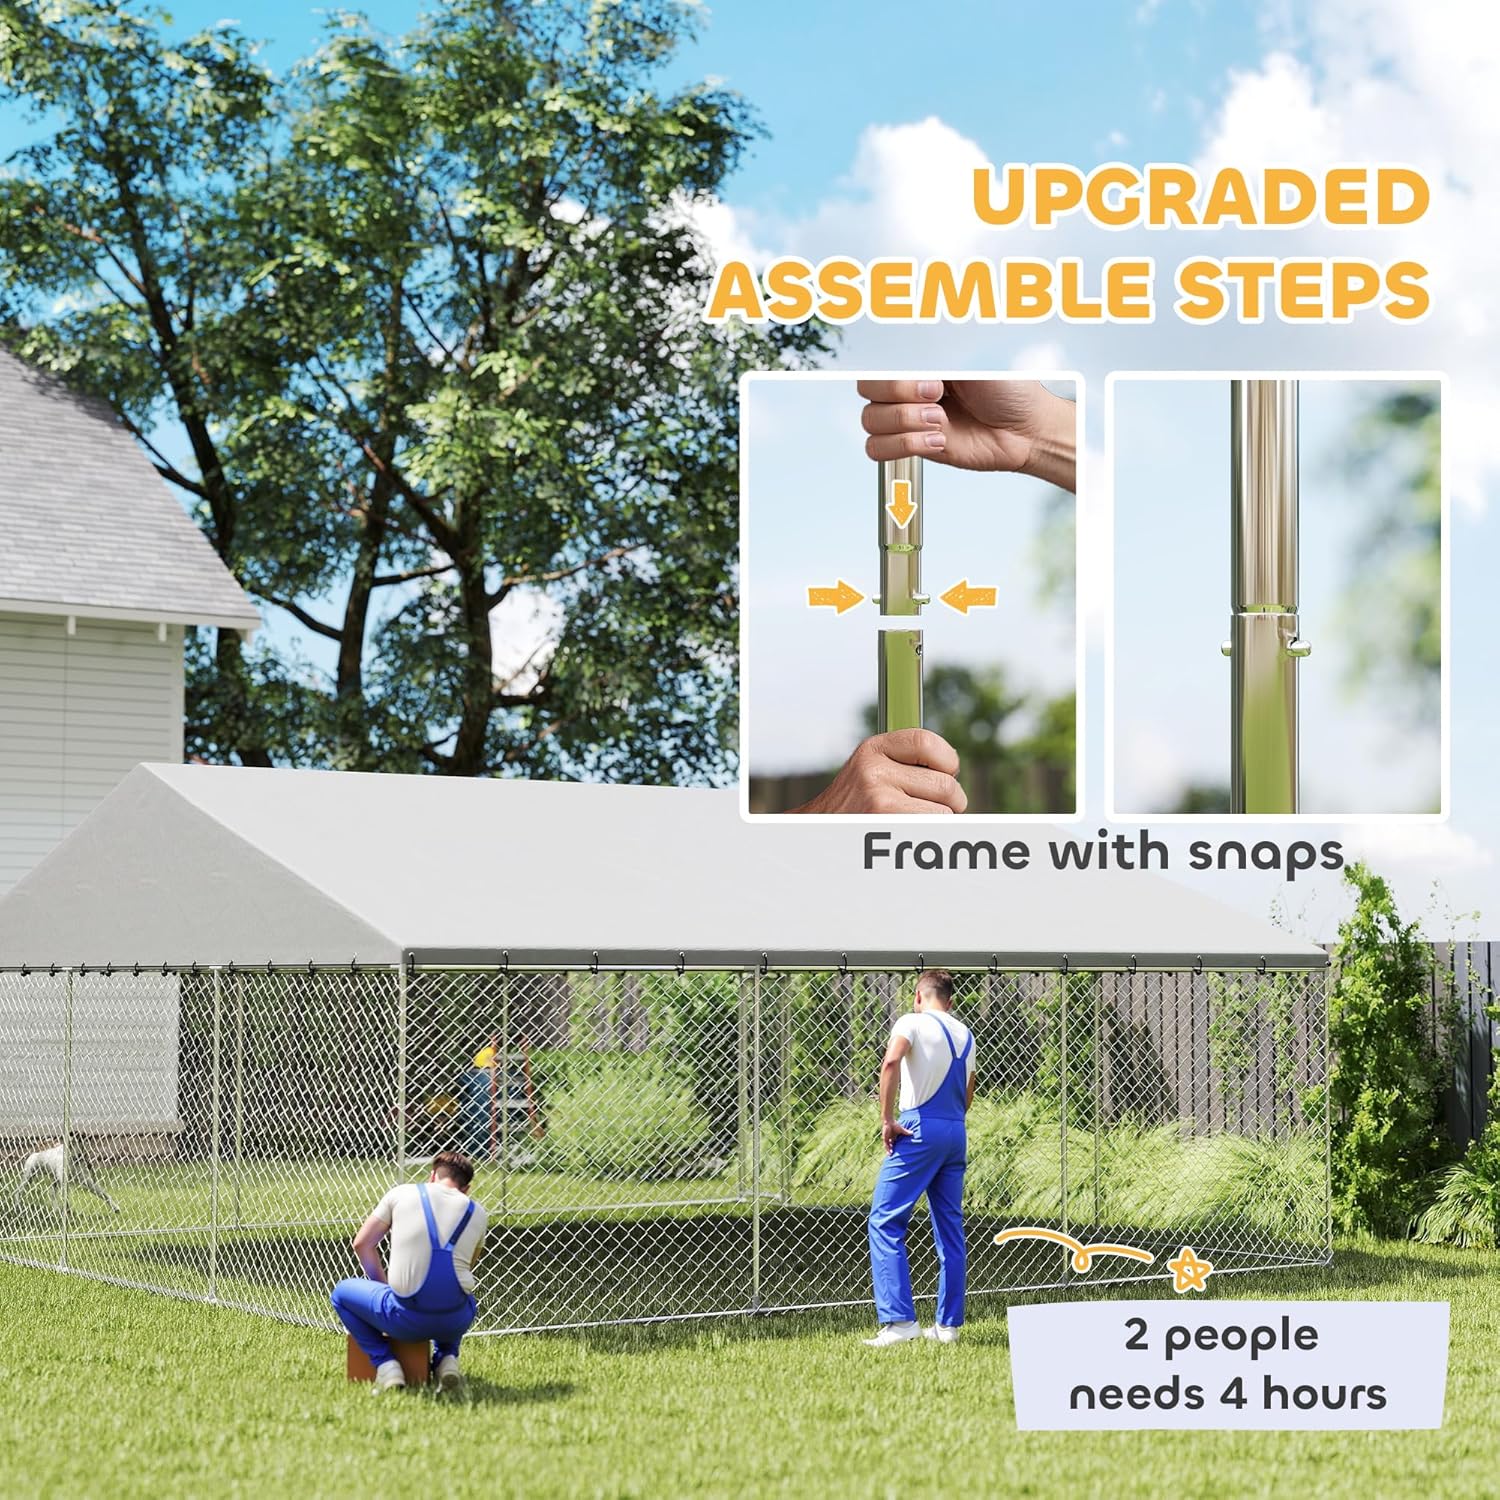
- Quick Assembly: Features an upgraded tube frame for fast setup.
- Spacious Design: Offers a generous 387.5 sq. ft. play area.
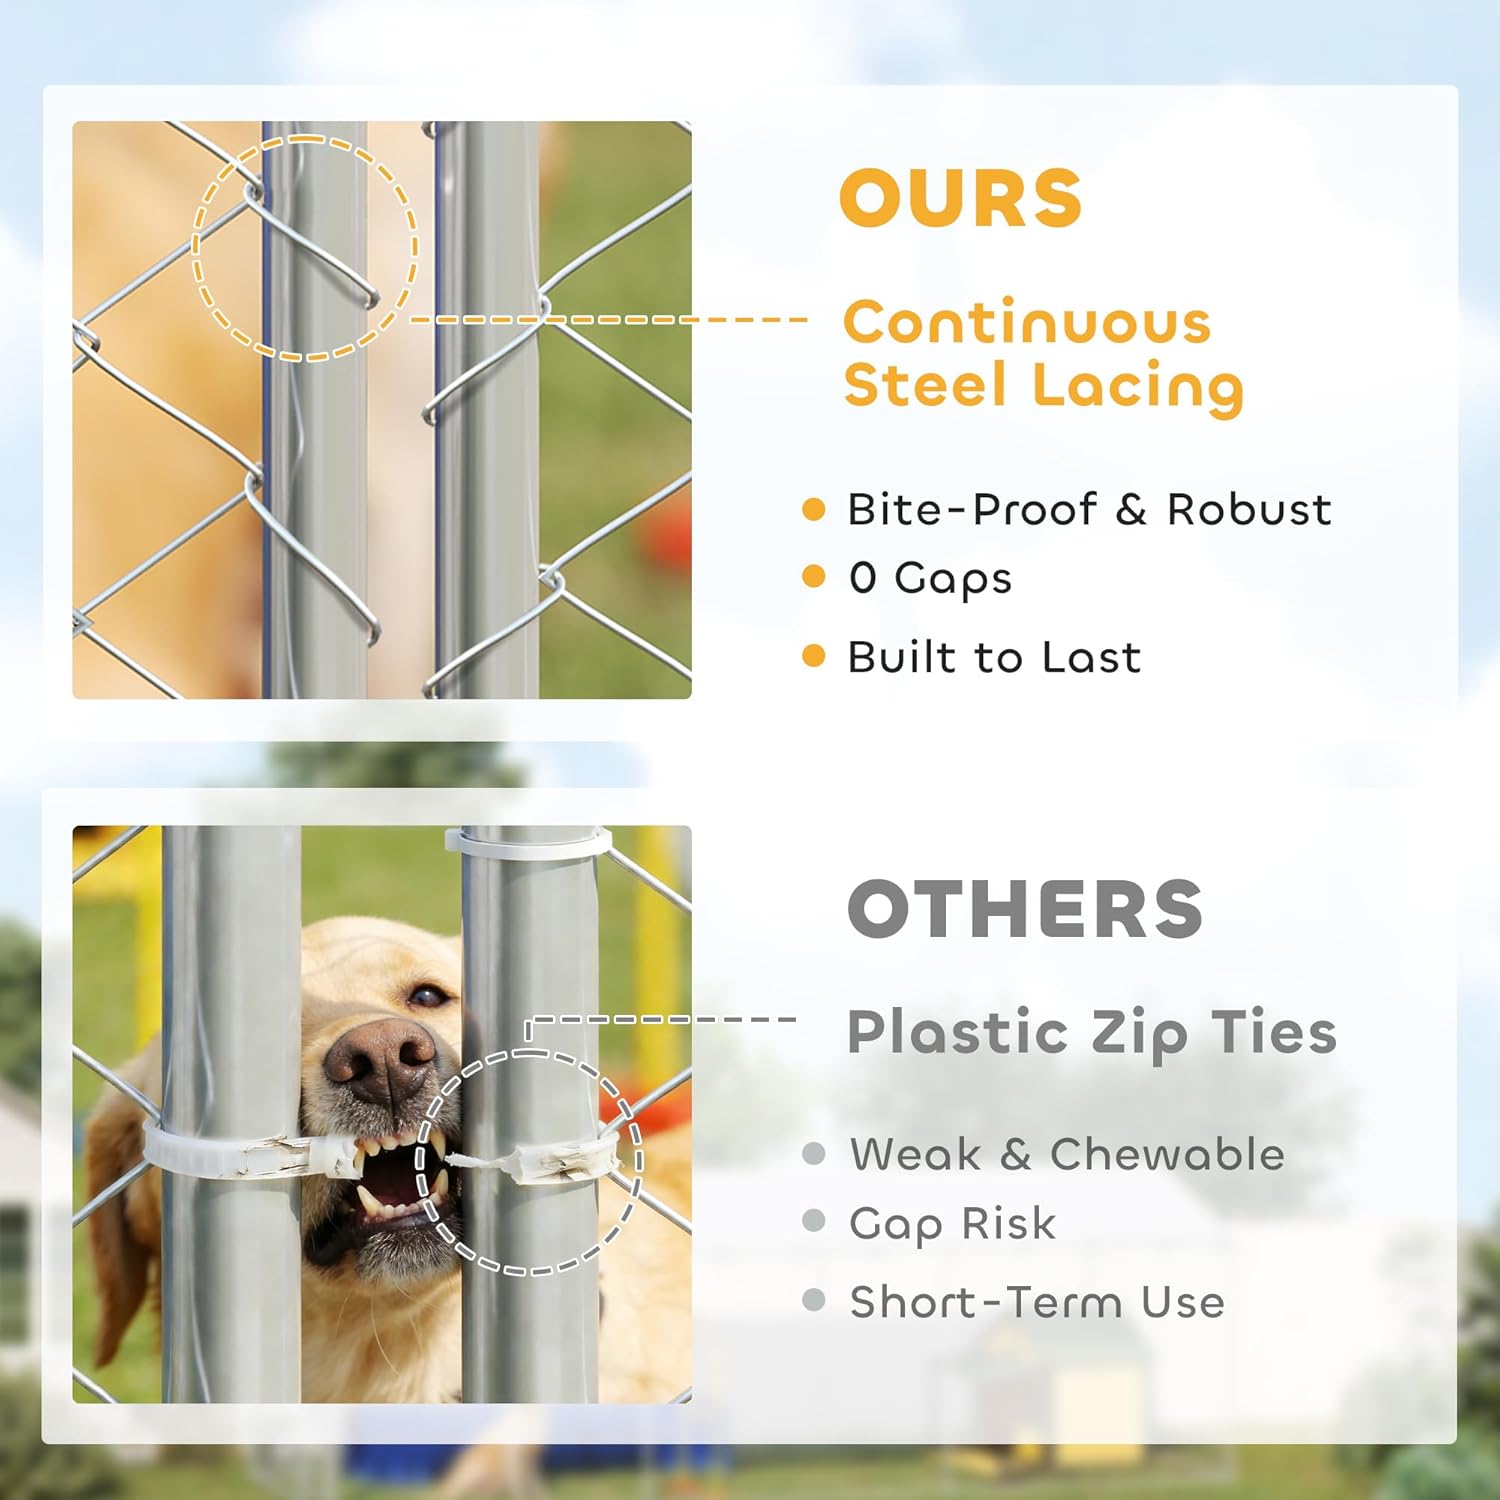
- Double Security: Equipped with galvanized steel construction and an escape-proof secure latch.
- All-Weather Protection: Includes a waterproof and UV-resistant PE fabric cover.
- Durable Materials: Made from galvanized steel and PE fabric for long-lasting use.

2. Safety Information
- Read all instructions carefully before assembly and use.
- Ensure all parts are securely fastened before allowing pets into the kennel.
- Regularly inspect the kennel for any loose parts, damage, or wear that could compromise safety.
- Do not climb on the kennel structure.
- Keep children away from the assembly area to prevent injury.
- This kennel is designed for pets up to 66 lbs. Do not exceed this weight limit.
3. Assembly Instructions
The following steps detail the assembly process for your PawHut Outdoor Dog Kennel. It is recommended to have at least two people for assembly. Refer to the video for visual guidance on each step.
Step-by-Step Guide:
- Lay Out the Base Frame: Begin by connecting the base frame pipes (labeled 50) using the L and W connectors to form the rectangular base of the kennel. Ensure all connections are secure.
- Install Vertical Posts: Insert the vertical posts (labeled 53) into the designated connectors on the base frame. These posts will support the roof structure.
- Assemble Roof Frame Sections: Connect the curved roof pipes (P, Q, R, X, Y) with the straight pipes (54, II, III) as shown in the diagram to create the roof frame sections.
- Attach Mesh to Door Frame: Use the iron wire (H1) to securely attach the mesh (O) to the door frame. Ensure the mesh is taut and evenly distributed.
- Install Door Frame: Integrate the assembled door frame into the main structure by connecting it to the vertical posts.
- Continue Roof Frame Assembly: Assemble the remaining roof frame sections, ensuring all connections are firm.
- Connect Roof Frame to Vertical Posts: Carefully lift and attach the assembled roof frame sections to the top of the vertical posts. This step may require multiple people.
- Install Horizontal Roof Supports: Add the horizontal support pipes (60) to complete the roof structure, providing stability.
- Secure Roof Frame with Clamps: Use the provided clamps (A, B) to firmly secure the roof frame connections. Do not fully tighten until all adjustments are made.
- Install Door Hinges and Latches: Attach the door hinges (D, E) and latches (K) to the door frame and corresponding vertical posts.
- Adjust Door and Tighten Nuts: After ensuring the door opens and closes properly, adjust the distance between the door and the lock, then fully tighten all nuts on the hinges and latches.
- Unfold Mesh: Carefully unroll and unfold the mesh (N) completely. Check for any unhooking or misalignment and correct as needed.
- Temporarily Secure Mesh: Use cable ties (I) to temporarily secure the top edge of the mesh to the frame.
- Wrap Mesh with Iron Wire (Top): Starting from one end, wrap the iron wire (H1) along the top edge of the mesh, securing it to the frame.
- Wrap Mesh with Iron Wire (Bottom): Repeat the process for the bottom edge of the mesh, ensuring it is securely fastened to the base frame.
- Wrap Mesh with Iron Wire (Sides): Secure the mesh along the vertical sides of the frame using the iron wire.
- Install the Waterproof Roof Cover: Carefully drape the waterproof and UV-resistant PE fabric cover (U) over the assembled roof frame.
- Secure Roof Cover with Bungee Cords: Use the provided bungee cords (G) to secure the roof cover to the frame through the grommets, ensuring it is taut and protected from wind.

4. Maintenance
Regular maintenance will extend the life and ensure the safety of your PawHut Outdoor Dog Kennel.
- Cleaning: Clean the galvanized steel frame and PE fabric roof with mild soap and water. Rinse thoroughly and allow to air dry. Avoid harsh chemicals that may damage the materials.
- Inspection: Periodically check all connections, bolts, and wires for tightness. Tighten any loose fasteners. Inspect the mesh for any damage or sharp edges.
- Roof Cover: Ensure the waterproof roof cover remains securely attached, especially during windy conditions. Check for tears or punctures and repair as necessary to maintain weather protection.
- Rust Prevention: While the frame is galvanized steel, inspect for any signs of rust, especially at connection points. Address any rust promptly to prevent spread.
5. Troubleshooting
- Kennel Instability: Ensure all frame connections are fully engaged and tightened. Verify that the kennel is placed on level ground.
- Door Not Latching Properly: Check the alignment of the door frame and the latch mechanism. Adjust the nuts on the hinges and latches as needed to ensure smooth operation and secure closure.
- Mesh Sagging or Loose: Re-tension the iron wire securing the mesh to the frame. Ensure all cable ties are tight. If any mesh sections are unhooked, reset them as shown in the assembly steps.
- Roof Leaks: Inspect the PE fabric cover for any tears or holes. Ensure the cover is properly positioned and all bungee cords are securely fastened to prevent water pooling.
6. Specifications
| Feature | Detail |
|---|---|
| Overall Dimensions | 19.7' W x 19.7' D x 8.9' H (6m W x 6m D x 2.7m H) |
| Play Area | 387.5 sq. ft. (approx. 36 sq. m) |
| Suitable for Pets Up To | 66 lbs (30 kg) |
| Materials | Galvanized Steel, PE Fabric |
| Special Features | Rust Resistant, Waterproof, UV-resistant Roof |
| Color | Silver |
| Item Weight | 288 Pounds |
| Model Number | D02-226V04SR |
| UPC | 673986553268 |

7. Warranty and Support
This product is manufactured by Aosom LLC. For any issues or support, please contact the seller directly. The product typically includes a 30-day return policy for refunds or replacements. Please retain your original packaging for any potential returns.