
1. Introduction
Thank you for choosing the KOUENOM P11 10-inch 2.5K Mirror Dash Cam. This device is designed to enhance your driving safety and convenience with advanced features such as 2.5K front and 1080P rear recording, CarPlay and Android Auto compatibility, voice control, and a responsive touch screen. This manual provides essential information for proper installation, operation, and maintenance of your dash cam. Please read it thoroughly before use.

Figure 1.1: KOUENOM P11 Mirror Dash Cam overview, showcasing its 9.66-inch smart touch screen, CarPlay & Android Auto compatibility, 2.5K+1080P recording, WDR, voice control, loop record, reverse assist, and super capacitor.
2. Product Overview
2.1 Package Contents
- KOUENOM P11 Mirror Dash Cam (10-inch)
- Rear Camera with Cable
- Car Charger
- Mounting Straps
- 64GB Memory Card (pre-installed)
- Installation Tool
- User Manual
2.2 Device Features
- Display: 9.66-inch IPS Touch Screen
- Front Camera: 2.5K QHD, 170° Field of View
- Rear Camera: 1080P FHD, 140° Field of View
- Connectivity: Wireless CarPlay, Wireless Android Auto, Bluetooth
- Special Features: Voice Control, WDR Technology, Loop Recording, Parking Monitor, Reverse Assist, Split Screen Display, Super Capacitor
- Storage: Supports up to 256GB MicroSD card (64GB included)
3. Setup and Installation
3.1 Mounting the Dash Cam
- Attach the mirror dash cam to your vehicle's existing rearview mirror using the provided rubber straps. Ensure the straps are securely fastened to prevent movement.
- Adjust the front camera lens to capture the desired view of the road ahead. The lens is rotatable for optimal positioning.
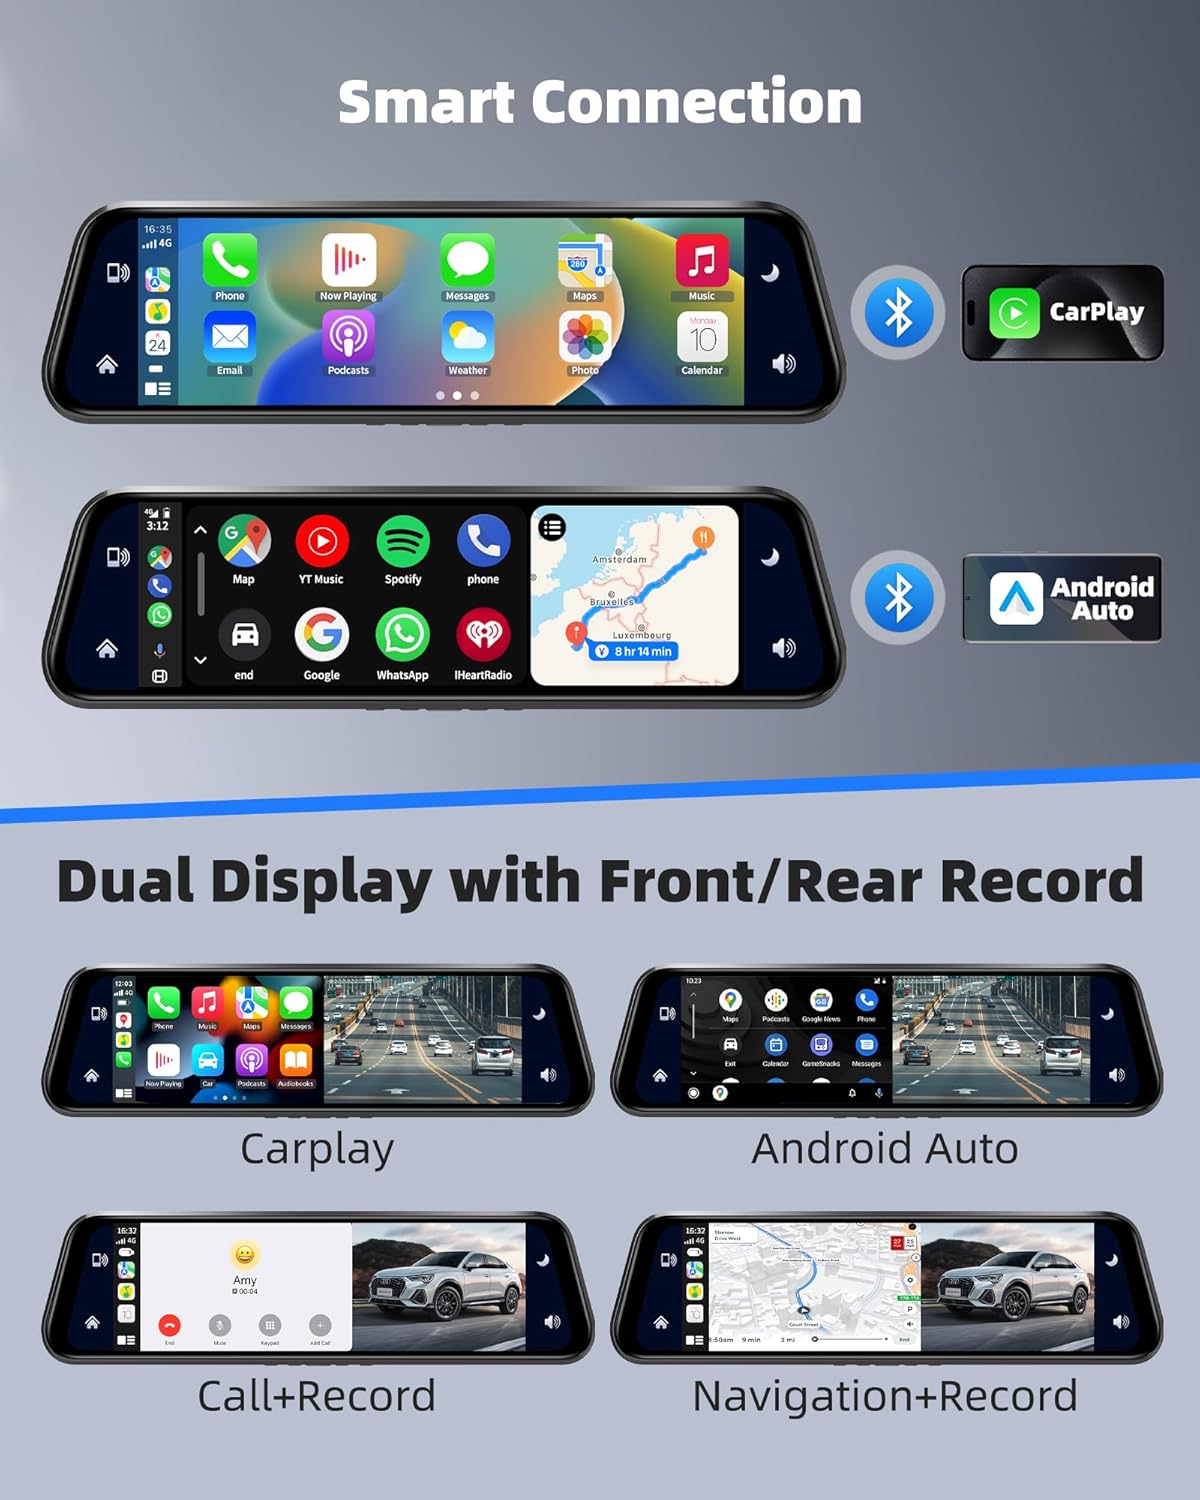
Figure 3.1: Securely attach the dash cam to your existing rearview mirror using the provided straps.
3.2 Connecting the Rear Camera
- Route the rear camera cable from the main unit to the rear of your vehicle.
- Mount the rear camera in a suitable location, typically above the license plate or on the rear window, ensuring a clear view.
- Connect the rear camera cable to the designated port on the main dash cam unit.
3.3 Power Connection
- Plug the car charger into your vehicle's 12V power outlet (cigarette lighter socket).
- Connect the other end of the car charger cable to the Type-C power input port on the top of the dash cam.
- The dash cam will automatically power on when the vehicle starts and power off when the vehicle is turned off.

Figure 3.2: Overview of the dash cam unit, showing the front camera, mounting points, and various ports including Type-C power, AV-in, TF card slot, and AUX output.
4. Operating Instructions
4.1 Basic Operation
- Power On/Off: The device powers on automatically with vehicle ignition. To manually power off, press and hold the power button.
- Touch Screen: Navigate through menus and settings by tapping and swiping on the 9.66-inch IPS touch screen.
- DVR Interface: Access the DVR interface to view live camera feeds, start/stop recording, and access recorded files.
4.2 CarPlay and Android Auto Connection
The dash cam supports wireless CarPlay and Android Auto for seamless smartphone integration.
- On the dash cam, tap the CarPlay or Android Auto icon to activate the respective mode.
- On your smartphone, enable Bluetooth and search for the device named "T86B" (or similar, refer to screen for exact name).
- Connect to the device via Bluetooth.
- Confirm the connection on your phone to use CarPlay or Android Auto.
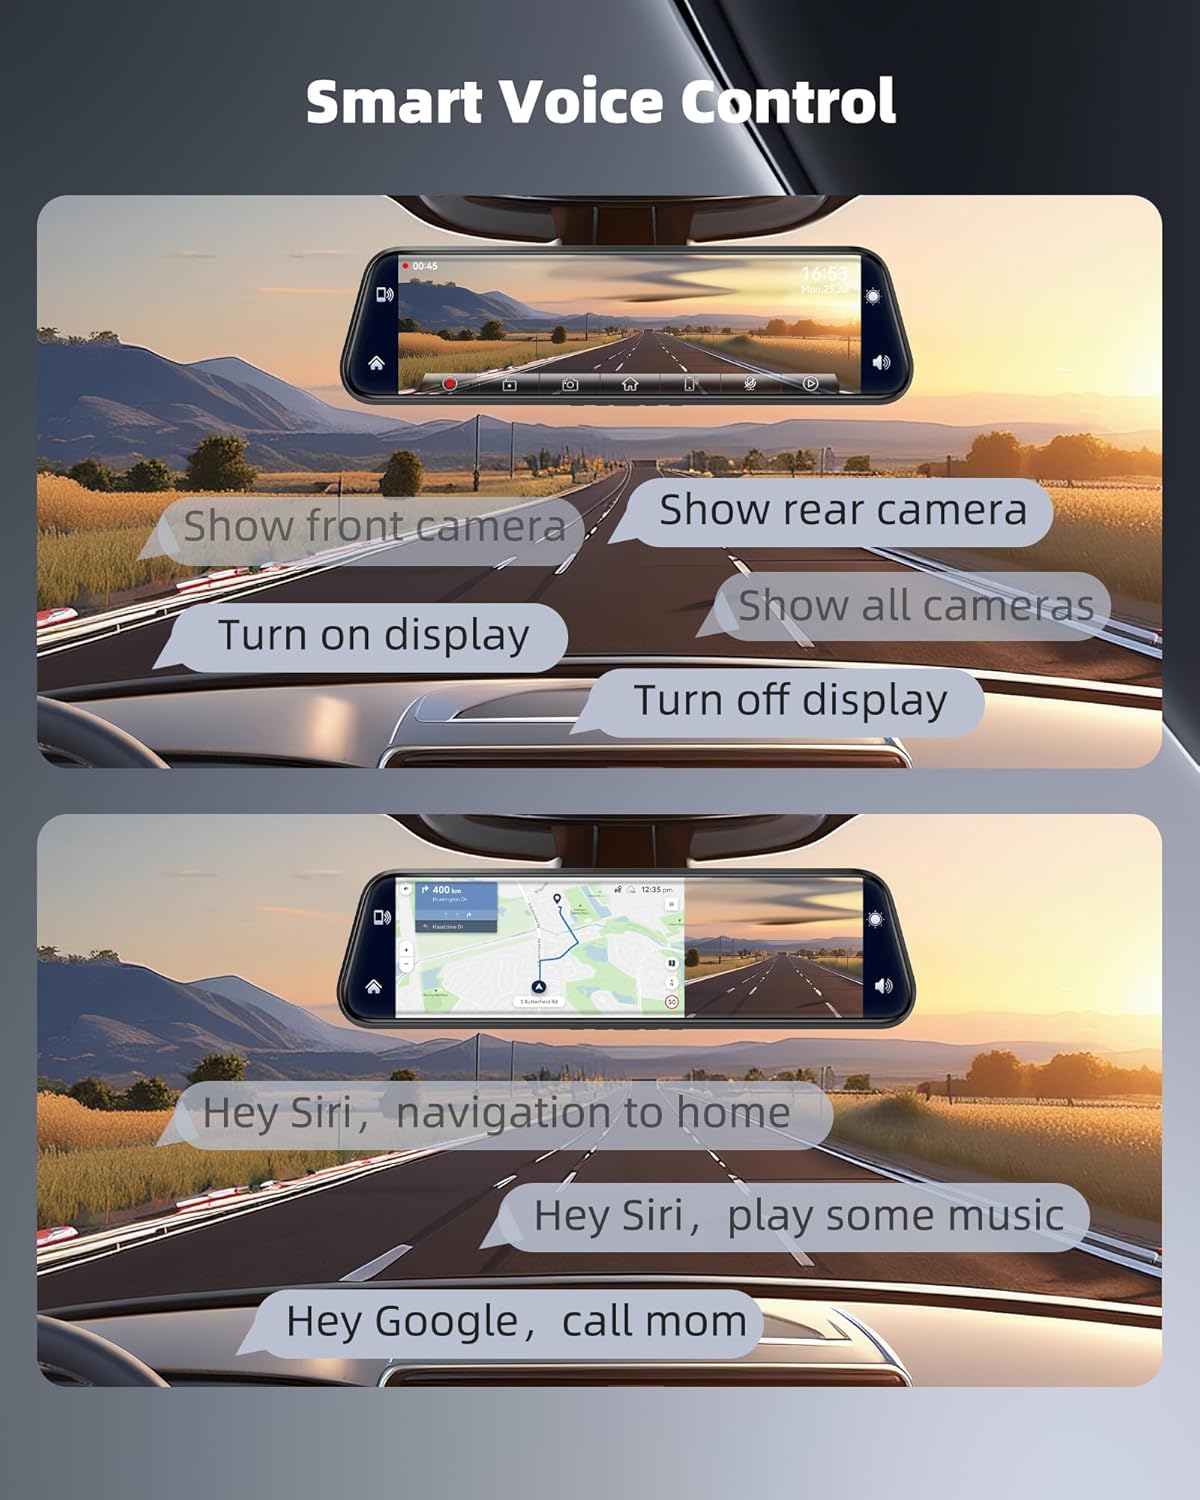
Figure 4.1: The dash cam display showing the CarPlay and Android Auto interfaces, allowing access to navigation, music, and calls.

Figure 4.2: Visual instructions for connecting your iPhone to CarPlay and Android phone to Android Auto via Bluetooth.
4.3 Voice Control
The dash cam supports voice commands for hands-free operation, enhancing driving safety.
- In CarPlay/Android Auto: Use Siri or Google Assistant for navigation, calls, and music. (Voice commands are processed by your phone.)
- In DVR Interface: Use specific commands for camera control:
- "Show front camera"
- "Show rear camera"
- "Show all cameras"
- "Turn on display"
- "Turn off display"

Figure 4.3: Examples of voice commands for navigation, calls, and camera display control.
4.4 Recording Features
- Dual Recording: Records simultaneously with the front 2.5K camera (170° FOV) and rear 1080P camera (140° FOV).
- WDR Technology: Wide Dynamic Range (WDR) optimizes image quality in varying light conditions, ensuring clear recordings in both bright and dark environments.
- Loop Recording: The dash cam continuously records, automatically overwriting the oldest unlocked files when the memory card is full. Recording duration can be set to 1, 3, or 5 minutes per segment.
- G-Sensor: Automatically locks video files upon detecting sudden impacts or collisions, preventing them from being overwritten.

Figure 4.4: WDR Technology enhances image quality by balancing exposure in challenging lighting conditions.

Figure 4.5: Loop recording ensures continuous recording by overwriting older files. A 64GB card is included, supporting up to 5 hours of recording.
4.5 Display Modes
- Field of View Adjustment: Swipe up or down on the screen to adjust the vertical field of view for both front and rear cameras.
- Split Screen: Swipe left or right to switch between front camera full screen, rear camera full screen, or a split-screen view showing both cameras simultaneously.
- Multiple Display with CarPlay/Android Auto: In settings, you can choose full-screen display (CarPlay only) or split-screen display (CarPlay/Android Auto with DVR).

Figure 4.6: Adjust the vertical viewing angle of the front and rear cameras by sliding your finger up or down on the screen.

Figure 4.7: Swipe left or right on the screen to toggle between different display modes, including full screen for front or rear, and split screen.
4.6 Parking Monitor and Reverse Assist
- Reverse Assist: When shifting into reverse gear, the dash cam automatically displays the rear camera feed with adjustable parking guidelines for safer backing up.
- Parking Monitor: (Requires hardwire kit, not included) When enabled, the dash cam will automatically record if an impact is detected while the vehicle is parked, providing surveillance.

Figure 4.8: The Reverse Assistant provides a wide-angle 1080P view from the rear camera with adjustable guidelines to aid in parking.
4.7 Audio Output
The dash cam offers multiple ways to transmit audio to your car's stereo system:
- Bluetooth Connection: Connect the dash cam to your car stereo via Bluetooth.
- AUX Cable: Use an AUX cable to connect the dash cam's AUX output to your car's AUX input.
- FM Transmitter: Set the dash cam's FM frequency to match your car's FM radio frequency to transmit audio wirelessly.
5. Maintenance
5.1 Cleaning the Device
- Use a soft, dry cloth to clean the screen and camera lenses.
- Avoid using abrasive cleaners or solvents that may damage the surfaces.
- Ensure the device is powered off before cleaning.
5.2 Memory Card Management
- Regularly format the memory card (every 1-2 months) to ensure optimal performance and prevent data corruption.
- Use a high-quality Class 10 or U3 MicroSD card for reliable recording.
- The dash cam supports up to 256GB memory cards.
6. Troubleshooting
6.1 Android Auto Disconnection Solution
If you experience disconnections with Android Auto, follow these steps:
- On your phone, search for "evelink" or "eWlink" in the Google Play Store and download the app.
- On your dash cam, tap the SuperLink icon and switch to SuperLink (Android mode).
- Open the downloaded app, tap "Add", select WiFi Direct mode, and connect to the dash cam using the on-screen identification code.
- Wait for the app prompt: "Android 16 Auto Connect issue Fixed".
- Switch back to Android Auto mode on the dash cam and reconnect your device.
- Verify that the connection is stable, then you may uninstall the "evelink" or "eWlink" app.
Figure 6.1: Detailed steps to troubleshoot and fix Android Auto connection stability issues using the SuperLink app.
6.2 General Issues
- Device not powering on: Check the power connection and ensure the car charger is properly inserted into the 12V outlet.
- Recording issues: Ensure the memory card is inserted correctly and has sufficient free space. Format the card if necessary.
- Screen freezing: If the screen freezes, try restarting the device by briefly disconnecting and reconnecting the power.
7. Specifications
| Feature | Specification |
|---|---|
| Brand | KOUENOM |
| Model Name | KOUENOM P11 2.5K front & rear mirror camera |
| Screen Size | 9.66 Inches |
| Front Video Resolution | 2.5K QHD |
| Rear Video Resolution | 1080p FHD |
| Front Field of View | 170 Degrees |
| Rear Field of View | 140 Degrees |
| Connectivity Technology | Bluetooth (for CarPlay/Android Auto) |
| Control Method | Voice, Touch Screen |
| Supported Memory Card | MicroSD, up to 256 GB (64GB included) |
| Mounting Type | Rearview Mirror Mount |
| Special Features | CarPlay, Android Auto, WDR, Loop Recording, Parking Monitor, Reverse Assist |
8. Warranty and Support
8.1 Warranty Information
The KOUENOM P11 Mirror Dash Cam comes with a 12-month manufacturer's warranty from the date of purchase, ensuring stable performance. This warranty covers manufacturing defects and malfunctions under normal use.
8.2 Customer Service
For any questions, technical support, or warranty claims, please contact KOUENOM customer service. Refer to the contact information provided with your product packaging or visit the official KOUENOM website for assistance.
