1. Safety Instructions
Please read all instructions carefully before operating the Tehanld Commercial Ice Maker Machine. Retain this manual for future reference.
- Electrical Safety: Ensure the machine is connected to a properly grounded 115V/60Hz electrical outlet. Do not use extension cords. Disconnect power before cleaning or maintenance.
- Water Supply: Connect only to a potable water supply. Ensure all water connections are secure to prevent leaks.
- Placement: Place the machine on a level, stable surface. Allow at least 6 inches of clearance around the unit for proper ventilation. Avoid direct sunlight, heat sources, or areas with high humidity.
- Children and Pets: Keep children and pets away from the appliance during operation.
- Cleaning: Do not immerse the appliance in water or other liquids. Use only mild, non-abrasive cleaners.
- Damage: Do not operate the machine if the power cord or plug is damaged, or if the machine malfunctions or has been dropped. Contact customer support for assistance.
2. Product Overview
The Tehanld Commercial Ice Maker Machine is designed for high-volume ice production, suitable for commercial establishments and large home use. It features efficient ice making, a large storage capacity, and convenient functions like self-cleaning.
Key Features:
- High Capacity: Produces up to 110 LBS of ice per 24 hours with a 33 LBS storage bin.
- Fast Ice Production: Generates 50 square ice cubes in approximately 7-15 minutes.
- Adjustable Ice Thickness: Offers 10 adjustable levels for ice thickness.
- Self-Cleaning Function: Simplifies maintenance and ensures hygiene.
- Integrated Water Filter: Provides cleaner ice.
- Durable Construction: Stainless steel exterior, thick PP plastic interior, and corrosion-resistant copper-nickel plated ice tray.
- User-Friendly: Features a clear guide rail door, ice-full, and water-shortage reminders.
Components:
Familiarize yourself with the main components of your ice maker:
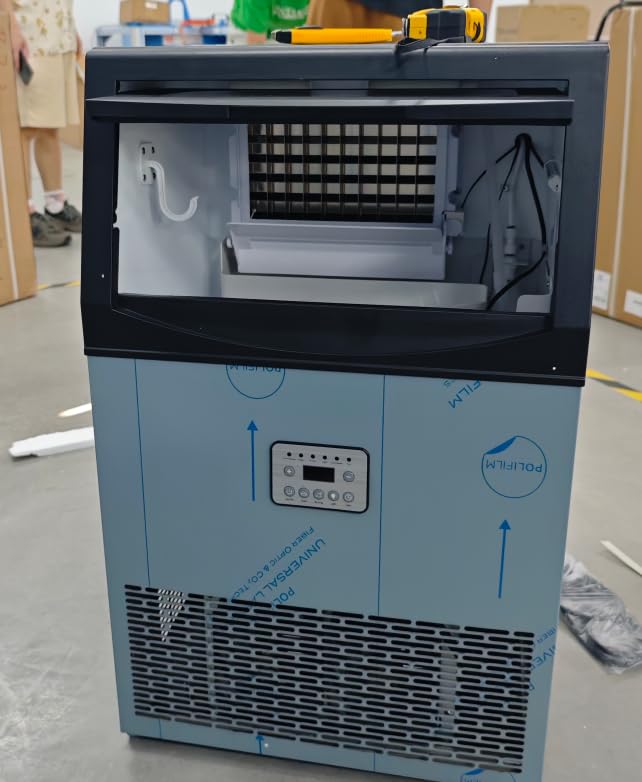
Image 2.1: Front view of the Tehanld Commercial Ice Maker Machine. This image displays the stainless steel exterior, control panel, and the clear guide rail door for accessing the ice bin.
- Control Panel: Located on the front, with buttons and indicator lights.
- Ice Bin: Storage area for produced ice.
- Water Inlet: Connection point for the water supply.
- Drain Outlet: For water drainage.
- Air Vents: Located on the sides or back for heat dissipation.
3. Setup Instructions
3.1 Unpacking
- Carefully remove the ice maker from its packaging.
- Remove all packing materials, tape, and protective film from the unit.
- Inspect the machine for any shipping damage. If damaged, do not operate and contact customer support.
3.2 Placement
- Place the ice maker on a firm, level surface capable of supporting its weight when full of ice and water.
- Ensure there is at least 6 inches (15 cm) of space around the back and sides for proper air circulation.
- Avoid placing the unit near heat sources (e.g., ovens, radiators) or in direct sunlight.
- The ambient temperature should be between 10°C (50°F) and 35°C (95°F) for optimal performance.
3.3 Water Connection
The ice maker requires a continuous water supply.
- Locate the water inlet connection at the back of the machine.
- Install the provided water filter according to its instructions.
- Connect the water supply line to the water inlet. Ensure all connections are tight to prevent leaks.
- Connect the drain hose to the drain outlet and route it to a suitable drain. Ensure the drain hose has a continuous downward slope.
- Open the water supply valve and check for any leaks.
3.4 Power Connection
- Plug the power cord into a dedicated, grounded 115V/60Hz electrical outlet.
- Do not share the outlet with other high-power appliances.
3.5 Initial Cleaning
Before first use, it is recommended to perform an initial cleaning cycle.
- Ensure the water supply is connected and the machine is powered on.
- Refer to the 'Self-Cleaning Function' section in Operating Instructions to initiate a cleaning cycle.
- After the cleaning cycle, discard the first batch of ice produced.
4. Operating Instructions
4.1 Control Panel
The control panel typically includes:
- POWER Button: Turns the machine on/off.
- ICE/CLEAN Button: Starts ice making or initiates the self-cleaning cycle.
- TIMER Button: Sets the timed operation.
- +/- Buttons: Adjust ice thickness or timer settings.
- Indicators: Lights for 'Ice Full', 'Water Shortage', 'Ice Making', 'Cleaning'.
4.2 Making Ice
- Ensure the water supply is open and the machine is plugged in.
- Press the POWER button to turn on the machine.
- The machine will automatically start the ice-making process. The 'Ice Making' indicator will illuminate.
- To adjust ice thickness, use the +/- buttons. There are 10 levels of adjustment. Thicker ice takes longer to produce.
- When the ice bin is full, the 'Ice Full' indicator will light up, and the machine will pause ice production. It will resume automatically once ice is removed.
- If the water supply is low, the 'Water Shortage' indicator will light up. The machine will pause until water supply is restored.
4.3 Self-Cleaning Function
Regular use of the self-cleaning function helps maintain hygiene and efficiency.
- Ensure the ice bin is empty.
- Press and hold the ICE/CLEAN button for a few seconds to activate the self-cleaning cycle. The 'Cleaning' indicator will light up.
- The machine will automatically flush and clean its internal components. This cycle typically takes several minutes.
- Once the cycle is complete, the machine will return to standby mode.
4.4 Timer Function
Use the timer function to schedule when the machine turns on or off.
- While the machine is on or in standby, press the TIMER button.
- Use the +/- buttons to set the desired delay time (e.g., hours until turn on/off).
- Press the TIMER button again to confirm the setting. The timer indicator will illuminate.
5. Maintenance
Regular maintenance ensures optimal performance and extends the lifespan of your ice maker.
5.1 Exterior Cleaning
- Wipe the exterior with a soft cloth dampened with mild detergent and water.
- Do not use abrasive cleaners or solvents.
5.2 Interior Cleaning and Descaling
Perform a thorough interior cleaning and descaling every 1-3 months, depending on water hardness and usage.
- Turn off the machine and disconnect it from the power supply.
- Empty the ice bin and drain any remaining water.
- Prepare a cleaning solution (e.g., a mixture of water and white vinegar or a commercial ice maker cleaner).
- Pour the cleaning solution into the water reservoir.
- Initiate the self-cleaning cycle (refer to section 4.3). For manual cleaning, use a soft brush to clean the ice tray and water tank.
- After the cleaning cycle, drain the solution and rinse thoroughly with clean water. Run several cycles with clean water to ensure all cleaning solution residue is removed.
5.3 Water Filter Replacement
The included water filter should be replaced every 3-6 months, or more frequently if water quality is poor or ice production decreases.
- Turn off the water supply to the ice maker.
- Disconnect the old filter and dispose of it properly.
- Install the new water filter according to its specific instructions.
- Turn on the water supply and check for leaks.
6. Troubleshooting
| Problem | Possible Cause | Solution |
|---|---|---|
| Machine does not turn on | No power; Power cord loose; Fuse blown/circuit breaker tripped | Check power outlet; Ensure cord is securely plugged in; Reset circuit breaker or replace fuse. |
| No ice production | Water supply off; Water shortage; 'Ice Full' sensor activated; Ambient temperature too high | Check water supply valve; Refill water reservoir (if applicable) or check water line; Empty ice bin; Ensure proper ventilation and lower room temperature. |
| Ice is too thin or soft | Water temperature too high; Ambient temperature too high; Ice thickness setting too low | Ensure cold water supply; Improve ventilation; Adjust ice thickness setting to a higher level. |
| Water leakage | Loose water connections; Clogged drain hose | Tighten all water inlet and drain connections; Clear any blockages in the drain hose. |
| Unusual noise | Machine not level; Internal component issue | Ensure machine is on a level surface; If noise persists, contact customer support. |
7. Specifications
- Brand: Tehanld
- Model: 110LBS
- Ice Production Capacity: Up to 110 LBS per 24 hours
- Ice Storage Capacity: 33 LBS
- Ice Cube Production Cycle: Approximately 7-15 minutes for 50 cubes
- Power Supply: AC 115V / 60Hz
- Operating Temperature Range: 10°C - 35°C (50°F - 95°F)
- Material: Stainless Steel (exterior), PP Plastic (interior), Copper-Nickel Plated (ice tray)
- Features: Self-cleaning, Water Filter, Adjustable Ice Thickness
8. Warranty and Support
Your Tehanld Commercial Ice Maker Machine comes with a manufacturer's warranty. Please refer to the warranty card included with your purchase for specific terms and conditions.
For technical support, troubleshooting assistance, or warranty claims, please contact Tehanld Customer Support:
- Website: Visit the Tehanld Store on Amazon
- Email: support@tehanld.com (Example email, actual email may vary)
- Phone: 1-800-XXX-XXXX (Example phone, actual number may vary)
When contacting support, please have your model number (110LBS) and purchase date available.


