1. Introduction
Thank you for choosing the West Biking Electric Bike Pump. This compact and portable pump is designed for efficient and accurate inflation of bicycle tires, motorcycle tires, and various inflatables. Featuring a digital display, auto shut-off, and dual valve compatibility, it provides a convenient solution for maintaining optimal tire pressure. Please read this manual carefully before use to ensure proper operation and safety.
2. What's in the Box
- West Biking Electric Bike Pump
- Charging Cable
- Travel Pouch
- Inflation Hose with Presta Valve Adapter
- Ball Needle Adapter
3. Specifications
| Feature | Specification |
|---|---|
| Brand | West Biking |
| Model | B0GLD9NTPC |
| Color | Black |
| Material | Plastic |
| Power Source | Battery Powered (Rechargeable) |
| Maximum Pressure | 130 PSI (Pound per Square Inch) |
| Battery Capacity | 900mAh (Built-in) |
| Weight | Approximately 169g |
| Dimensions | 7.9cm x 5.2cm x 3cm (approx.) |
| Valve Compatibility | Presta and Schrader |
4. Safety Information
- This device is for inflating air only. Do not use it for flammable gases or other liquids.
- Keep out of reach of children. This is not a toy.
- Do not expose the pump to extreme temperatures, direct sunlight, or moisture.
- Avoid over-inflating. Always check the recommended pressure for your item. The auto shut-off feature helps prevent over-inflation, but manual monitoring is advised.
- Do not operate the pump if it is damaged or malfunctioning.
- Ensure the inflation hose is securely connected to both the pump and the valve before starting inflation.
- The pump may become warm during prolonged use. Allow it to cool down if it feels excessively hot.
5. Setup
5.1 Charging the Pump
Before first use, fully charge the pump. Connect the provided charging cable to the pump's charging port and a suitable USB power source. The smart indicator light will show the charging status and extinguish when fully charged.
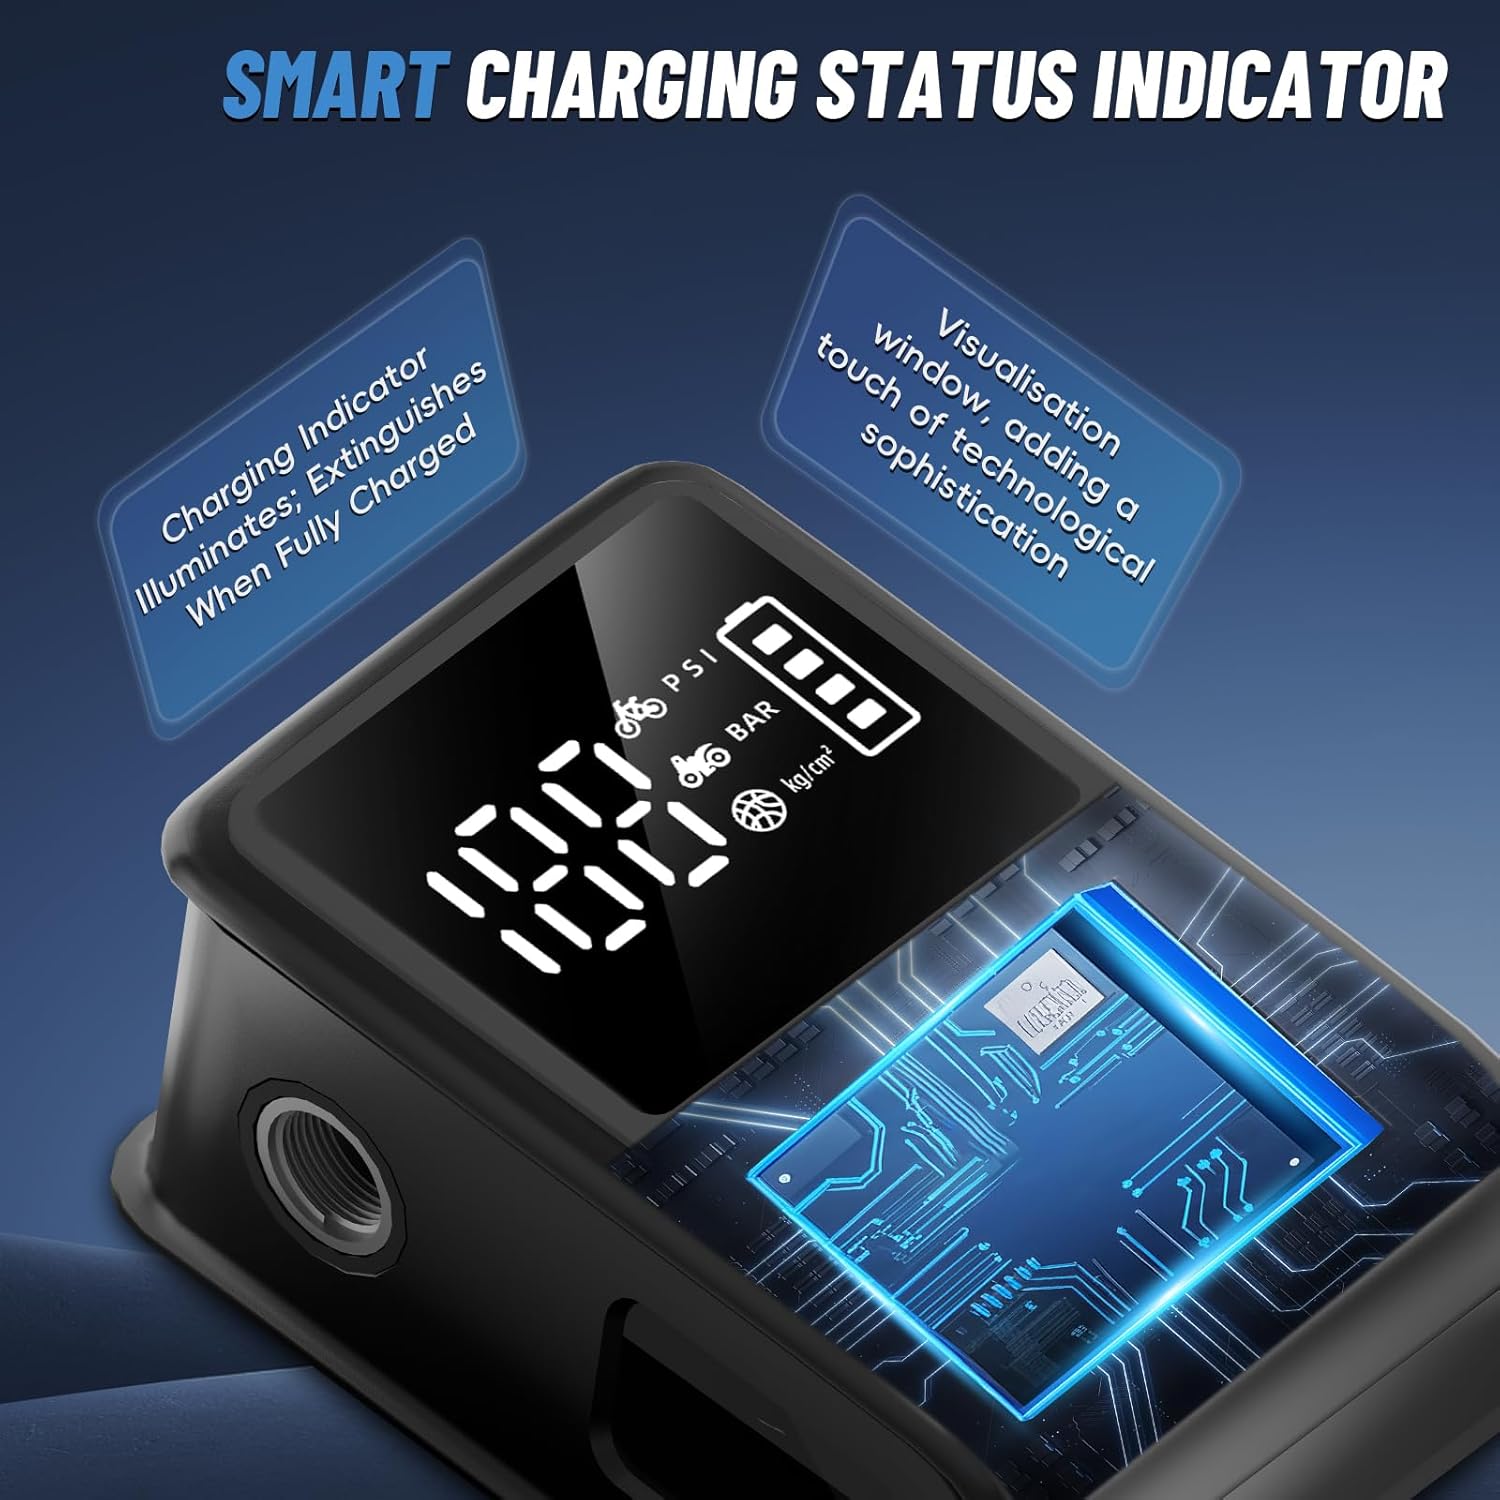
Image: The pump features a smart indicator light that shows charging status. The light extinguishes when fully charged.
5.2 Understanding the Display and Controls
The pump features a clear digital display and intuitive buttons for operation.
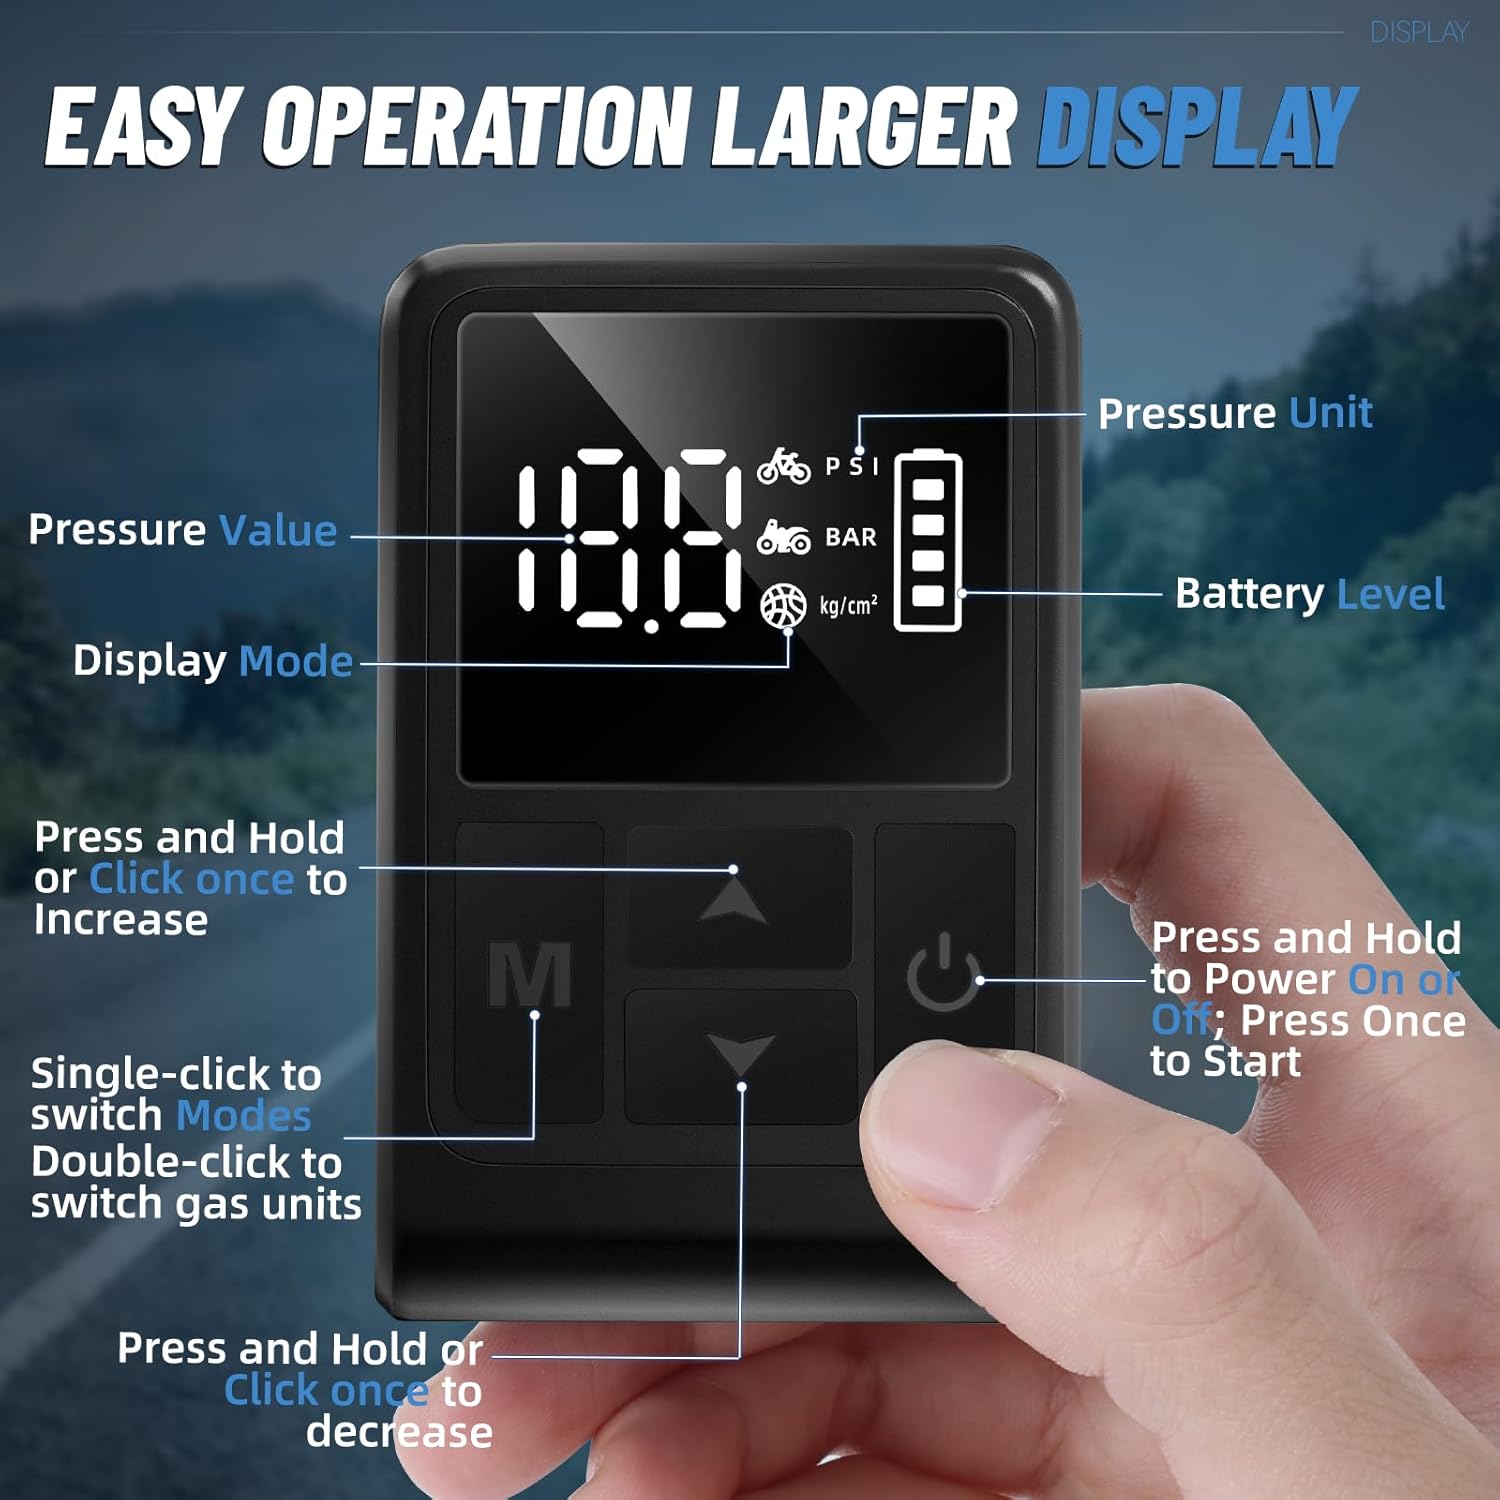
Image: Detailed view of the pump's digital display showing pressure value, pressure unit, battery level, and control buttons for mode selection, increase/decrease, and power/start.
- Power Button: Press and hold to power on/off. Press once to start/stop inflation.
- Mode Button (M): Single-click to switch between preset inflation modes (e.g., bicycle, motorcycle, ball). Double-click to switch gas units (PSI, BAR, kg/cm²).
- Up/Down Arrows: Press and hold or click once to increase/decrease the target pressure value.
6. Operating Instructions
6.1 Powering On and Setting Pressure
- Press and hold the Power button to turn on the pump. The digital display will illuminate.
- Single-click the Mode (M) button to cycle through preset inflation modes (e.g., bicycle, motorcycle, ball).
- Double-click the Mode (M) button to select your desired pressure unit (PSI, BAR, or kg/cm²).
- Use the Up/Down arrow buttons to set your target pressure.

Image: The digital display shows real-time pressure monitoring and allows for setting target pressure values.
6.2 Connecting to Valves
The pump supports both Presta and Schrader valves. Use the appropriate connection method:
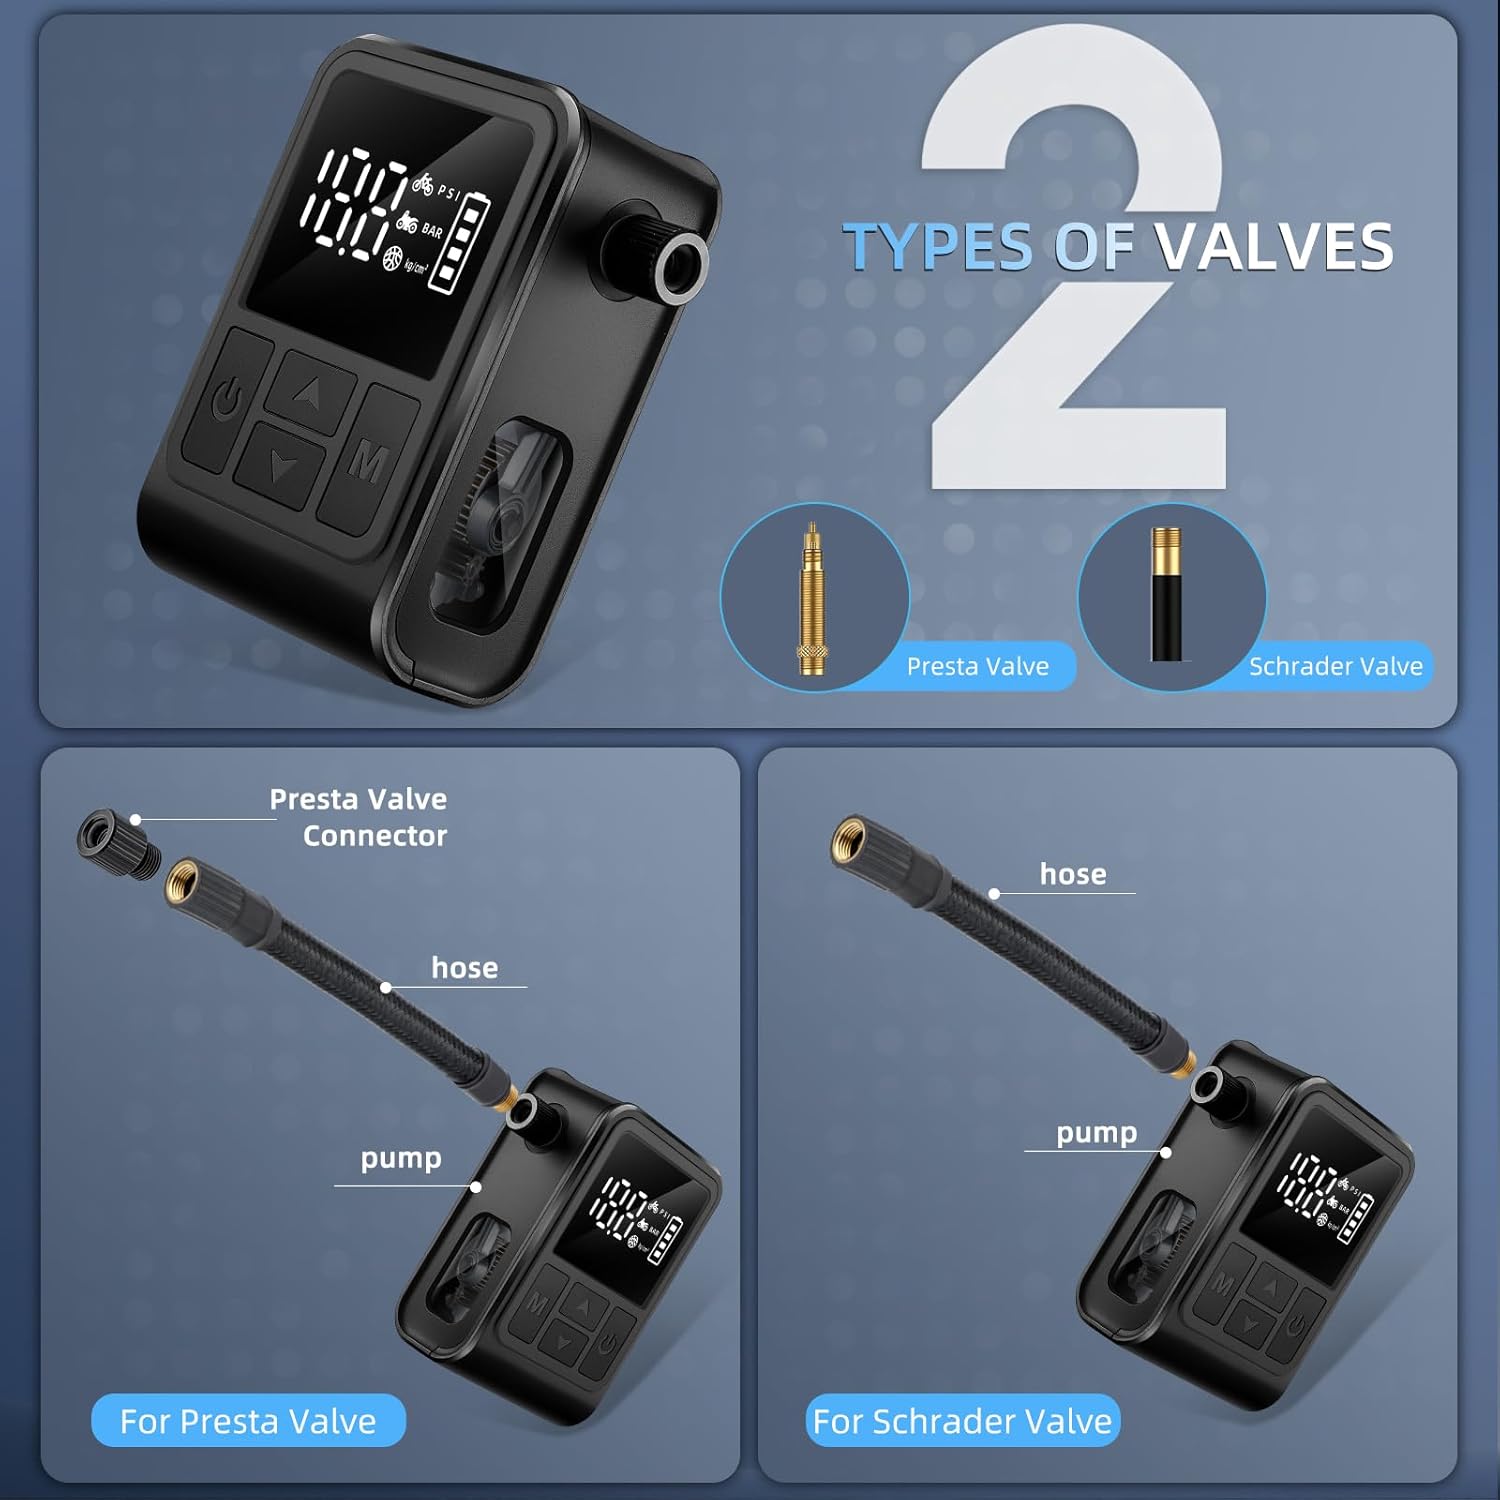
Image: Illustration showing how to connect the pump to both Presta and Schrader valves using the included adapter for Presta.
- For Schrader Valves: Directly screw the inflation hose onto the Schrader valve stem until secure.
- For Presta Valves: First, loosen the tip of the Presta valve. Then, screw the small Presta valve adapter onto the Presta valve stem. Finally, screw the inflation hose onto the adapter until secure.
6.3 Starting Inflation
- Once the target pressure is set and the hose is securely connected, press the Power button once to start inflation.
- The pump will begin inflating, and the digital display will show the real-time pressure.
- The pump features an auto shut-off function. It will automatically stop once the preset pressure is reached.
- To manually stop inflation at any time, press the Power button again.

Image: The pump automatically stops inflation once the preset pressure is achieved, preventing over-inflation.
Video: This video demonstrates the operation of the West Biking Electric Bike Pump, including setting pressure and inflating a tire. It highlights the compact size and ease of use.
6.4 After Inflation
- Carefully unscrew the inflation hose from the valve. For Presta valves, remove the adapter first, then tighten the valve tip.
- Press and hold the Power button to turn off the pump.
- Store the pump and accessories in the provided travel pouch.
7. Maintenance
- Cleaning: Wipe the pump with a soft, dry cloth. Do not use harsh chemicals or immerse the pump in water.
- Storage: Store the pump in a cool, dry place away from direct sunlight and extreme temperatures. Ensure it is fully charged before long-term storage to preserve battery life.
- Battery Care: Recharge the battery regularly, even if not in use, to maintain optimal performance. Avoid completely draining the battery frequently.
8. Troubleshooting
| Problem | Possible Cause | Solution |
|---|---|---|
| Pump does not turn on | Low battery; Power button not pressed correctly | Charge the pump fully; Press and hold the power button for 3 seconds |
| Pump does not inflate | Hose not securely connected; Target pressure not set; Valve issue | Ensure hose is tightly screwed onto valve; Set a target pressure; Check valve for damage or blockage |
| Inaccurate pressure reading | Loose connection; Sensor malfunction | Ensure hose is tightly connected; Contact customer support if issue persists |
| Pump stops unexpectedly | Target pressure reached (auto shut-off); Low battery; Overheating | Check if target pressure is met; Recharge the pump; Allow pump to cool down |
9. Warranty
This West Biking Electric Bike Pump comes with a 90-day warranty from the date of purchase. This warranty covers manufacturing defects under normal use. It does not cover damage caused by misuse, accidents, unauthorized modifications, or normal wear and tear. Please retain your proof of purchase for warranty claims.
10. Support
For further assistance, technical support, or warranty inquiries, please contact West Biking customer service through the retailer where you purchased the product or visit the official West Biking store on Amazon: