1. Introduction
This manual provides essential information for the safe operation and maintenance of your CHUBORY G9 Pluto GPS Drone. Please read this manual thoroughly before operating the drone to ensure proper usage and to prevent damage or injury. Keep this manual for future reference.
2. Product Overview
2.1 Key Features
- 4K EIS Camera: Equipped with Electronic Image Stabilization for smooth video recording.
- Integrated HD Screen Controller: Features a 4.5-inch HD display for direct FPV viewing without an external mobile device.
- GPS Positioning: Provides stable flight, precise hovering, and intelligent return-to-home functions.
- Extended Flight Time: Includes three batteries, offering up to 90 minutes of total flight time (30 minutes per battery).
- Long Control Range: Supports a control and transmission range of up to 3280 feet (1000 meters).
- Foldable Design: Compact and portable, weighing under 249g, requiring no FAA registration.
- Intelligent Flight Modes: Includes Circle Fly and Follow Me modes for dynamic aerial photography.
2.2 Components Included
The CHUBORY G9 Pluto package contains the following items:

Image: All components included in the CHUBORY G9 Pluto drone package.
- Drone (x1)
- Remote Controller with 4.5 inch HD Screen (x1)
- Flight Battery (x3)
- Propellers (4x4, total 8 propellers)
- USB Charging Cable (x3)
- MicroSD Card (32GB) & Card Reader (x1)
- Screwdriver (x1)
- Screws (x8)
- Instruction Manual (x1)
- Drone Carry Bag (x1)
3. Safety Guidelines
Adherence to safety guidelines is crucial for preventing accidents and ensuring a positive flight experience. Always operate the drone responsibly.
- Pre-Flight Check: Before each flight, ensure batteries are fully charged, propellers are securely attached, and the drone is free from damage.
- Environmental Conditions: Avoid flying in strong winds, rain, snow, or fog. Maintain visual line of sight with the drone at all times.
- Flight Zones: Do not fly near airports, restricted airspace, crowded areas, or over private property without permission.
- Battery Safety: Use only original CHUBORY batteries and chargers. Do not overcharge or puncture batteries.
- Propeller Safety: Keep hands and face clear of rotating propellers. Ensure propellers are correctly installed before flight.
- GPS Functionality: The drone features GPS for stable flight and return-to-home. Ensure sufficient GPS signal before takeoff.
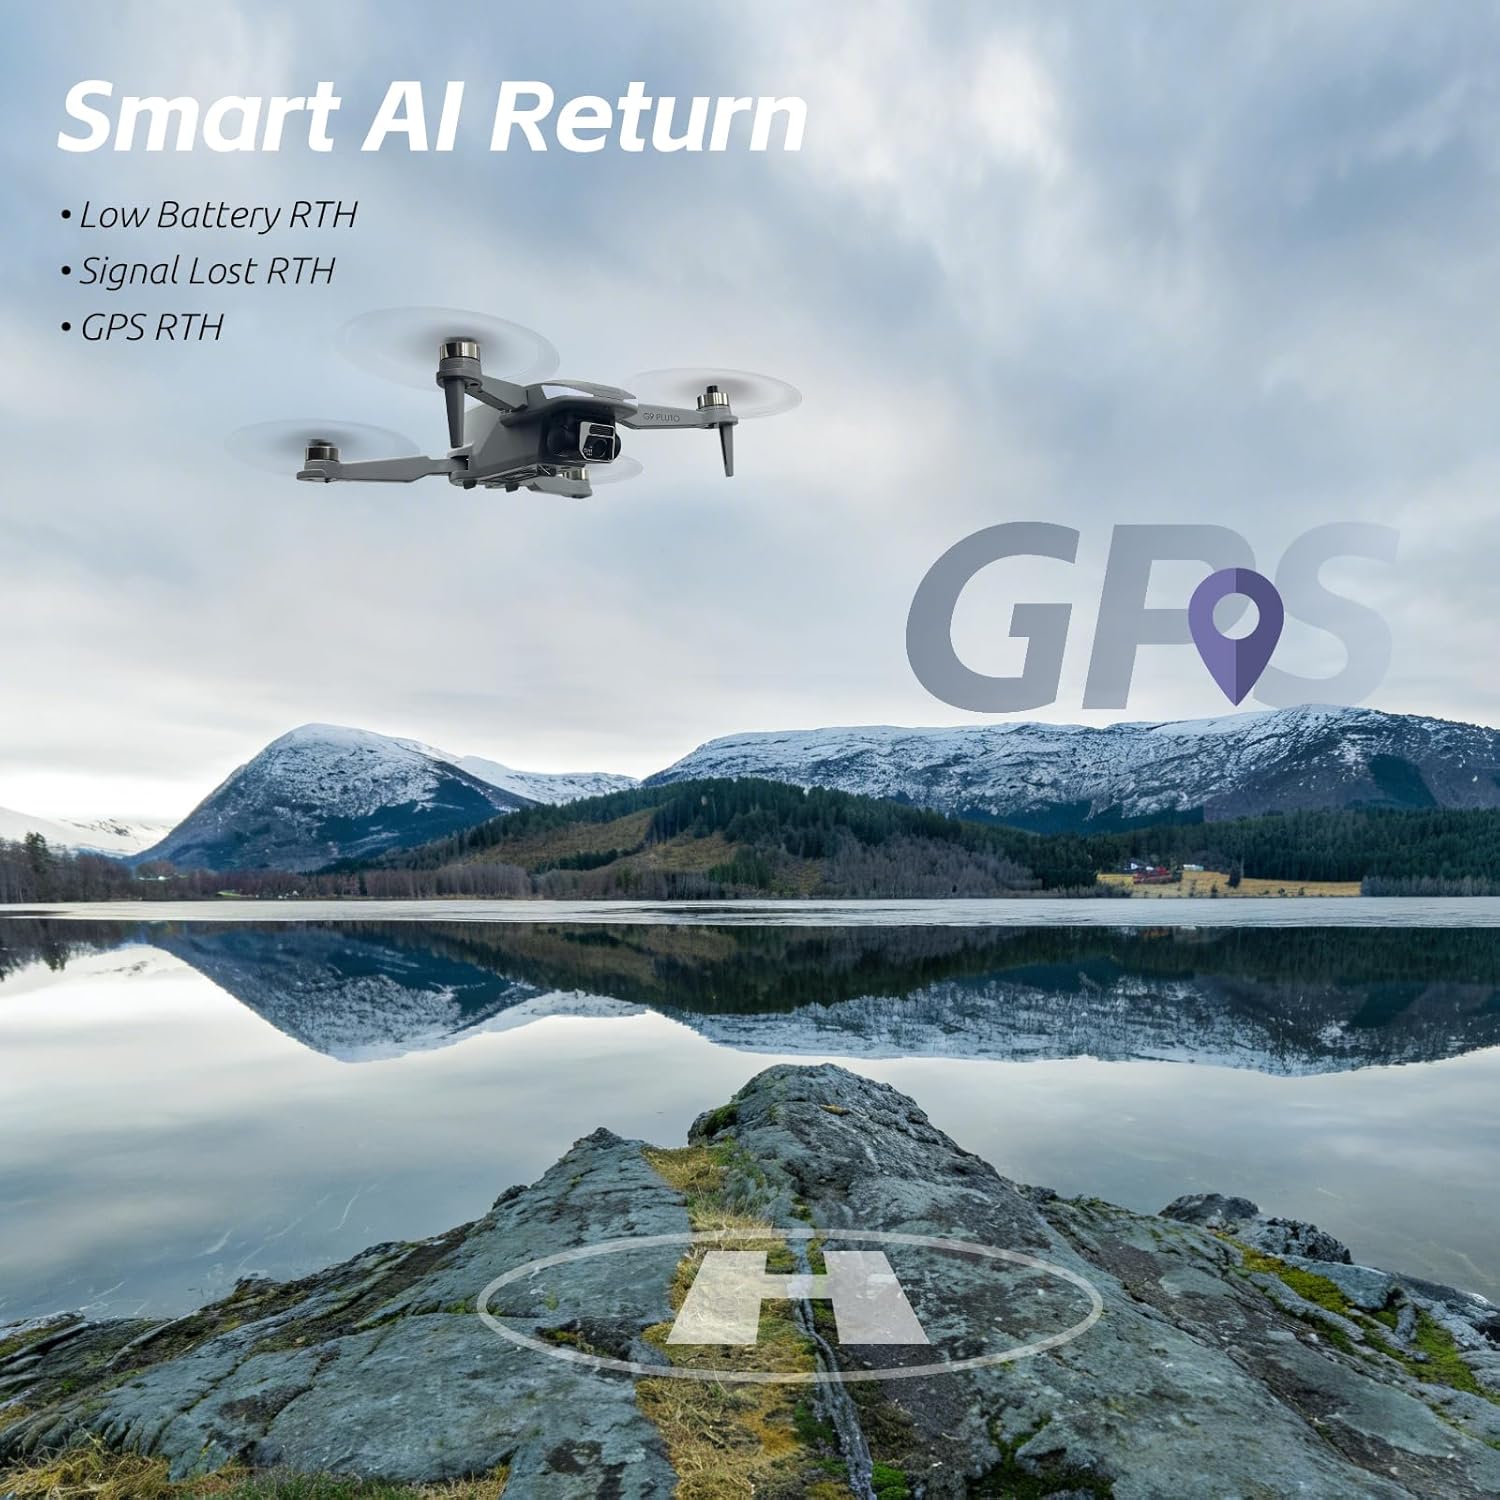
Image: The drone demonstrating its Smart AI Return capabilities, including Low Battery RTH, Signal Lost RTH, and GPS RTH.
4. Setup
4.1 Charging Batteries
- Connect the USB charging cable to the drone battery and a compatible USB power adapter (not included).
- The indicator light on the battery will show charging status. Refer to the battery's specific instructions for full details.
- Charge all three flight batteries and the remote controller battery fully before first use.

Image: The drone and its three batteries, emphasizing the extended flight duration.
4.2 Propeller Installation
- Identify propellers marked 'A' and 'B'.
- Match 'A' propellers to motor arms marked 'A' and 'B' propellers to motor arms marked 'B'.
- Securely attach each propeller using the provided screws and screwdriver. Ensure they are tight but do not overtighten.
4.3 Drone and Controller Pairing
- Power on the drone by pressing the power button.
- Power on the remote controller.
- Follow the on-screen instructions on the controller's HD display to initiate the pairing process.
- Once paired, the drone's indicator lights will change, and the controller will confirm connection.
5. Operating Instructions
5.1 Pre-Flight Checks
- Ensure all batteries are charged.
- Verify propellers are correctly installed and secure.
- Check for clear flight path and suitable weather conditions.
- Confirm GPS signal strength on the controller's display.
5.2 Takeoff and Landing
- Automatic Takeoff: Press the one-key takeoff button on the controller. The drone will ascend to a safe altitude and hover.
- Manual Takeoff: Push both control sticks down and outwards to start the motors. Slowly push the left stick up to ascend.
- Automatic Landing: Press the one-key landing button. The drone will descend and land automatically.
- Manual Landing: Slowly pull the left stick down to descend. Once landed, push both sticks down and inwards to stop the motors.
5.3 Flight Modes
- GPS Mode: Provides stable flight, precise hovering, and enables intelligent flight functions.
- Follow Me Mode: The drone will automatically follow the controller, recording your movements. Activate this mode via the controller's menu.
- Circle Fly Mode: The drone will fly in a circular path around a designated point. Select this mode and set parameters on the controller.

Image: The controller's screen showing the drone actively following a subject using AI Follow mode.
5.4 Camera Operation
- Photo Capture: Press the dedicated photo button on the controller to take a still image.
- Video Recording: Press the dedicated video button to start/stop recording.
- Gimbal Control: Use the gimbal dial on the controller to adjust the camera's tilt angle.
- Storage: Photos and videos are saved to the inserted 32GB MicroSD card.
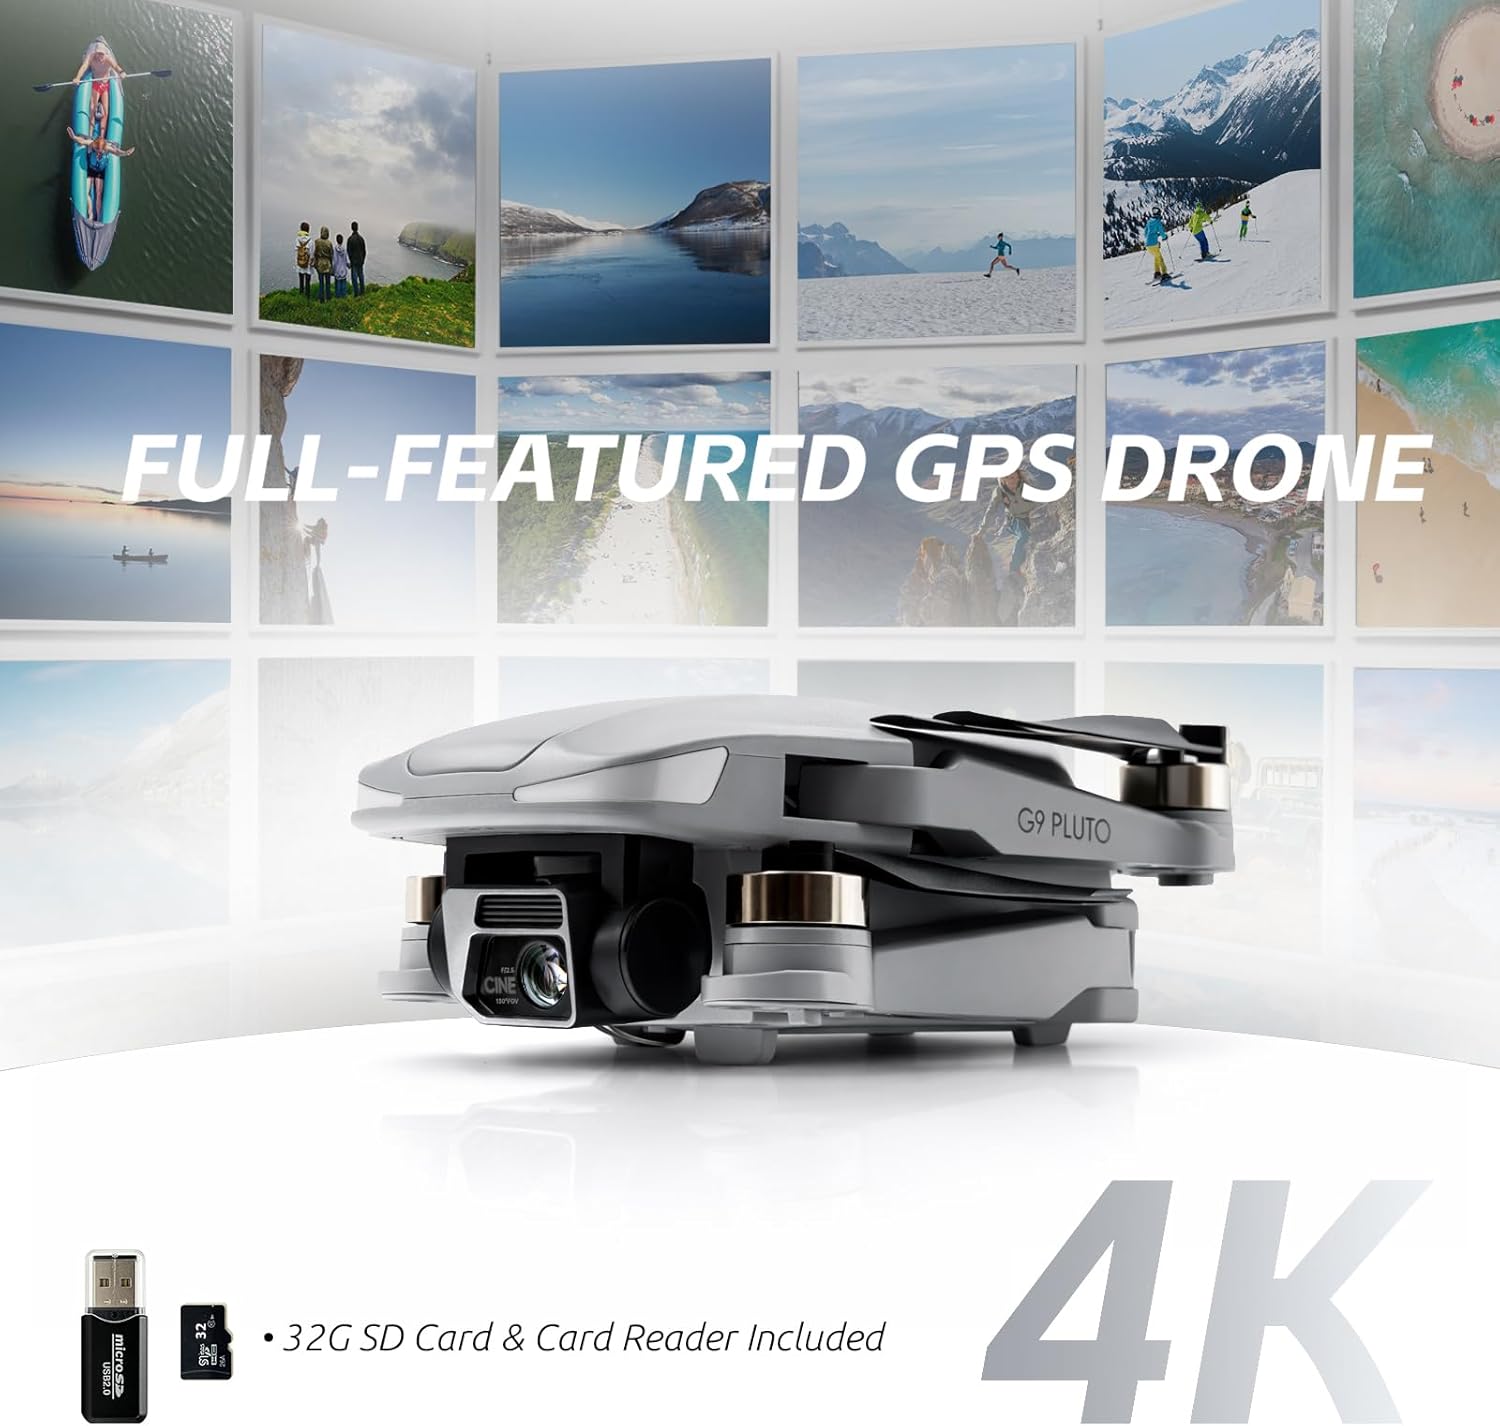
Image: Close-up of the G9 Pluto drone highlighting its 4K camera, along with the included 32GB SD card and card reader.
6. Maintenance
6.1 Cleaning
- Wipe the drone and controller with a soft, dry cloth after each use.
- Do not use harsh chemicals or solvents.
- Ensure no dust or debris accumulates in the motors or camera lens.
6.2 Storage
- Store the drone and its components in a cool, dry place, away from direct sunlight.
- For long-term storage, ensure batteries are charged to approximately 50-60% to prolong their lifespan.
- Use the provided carry bag for safe transport and storage.
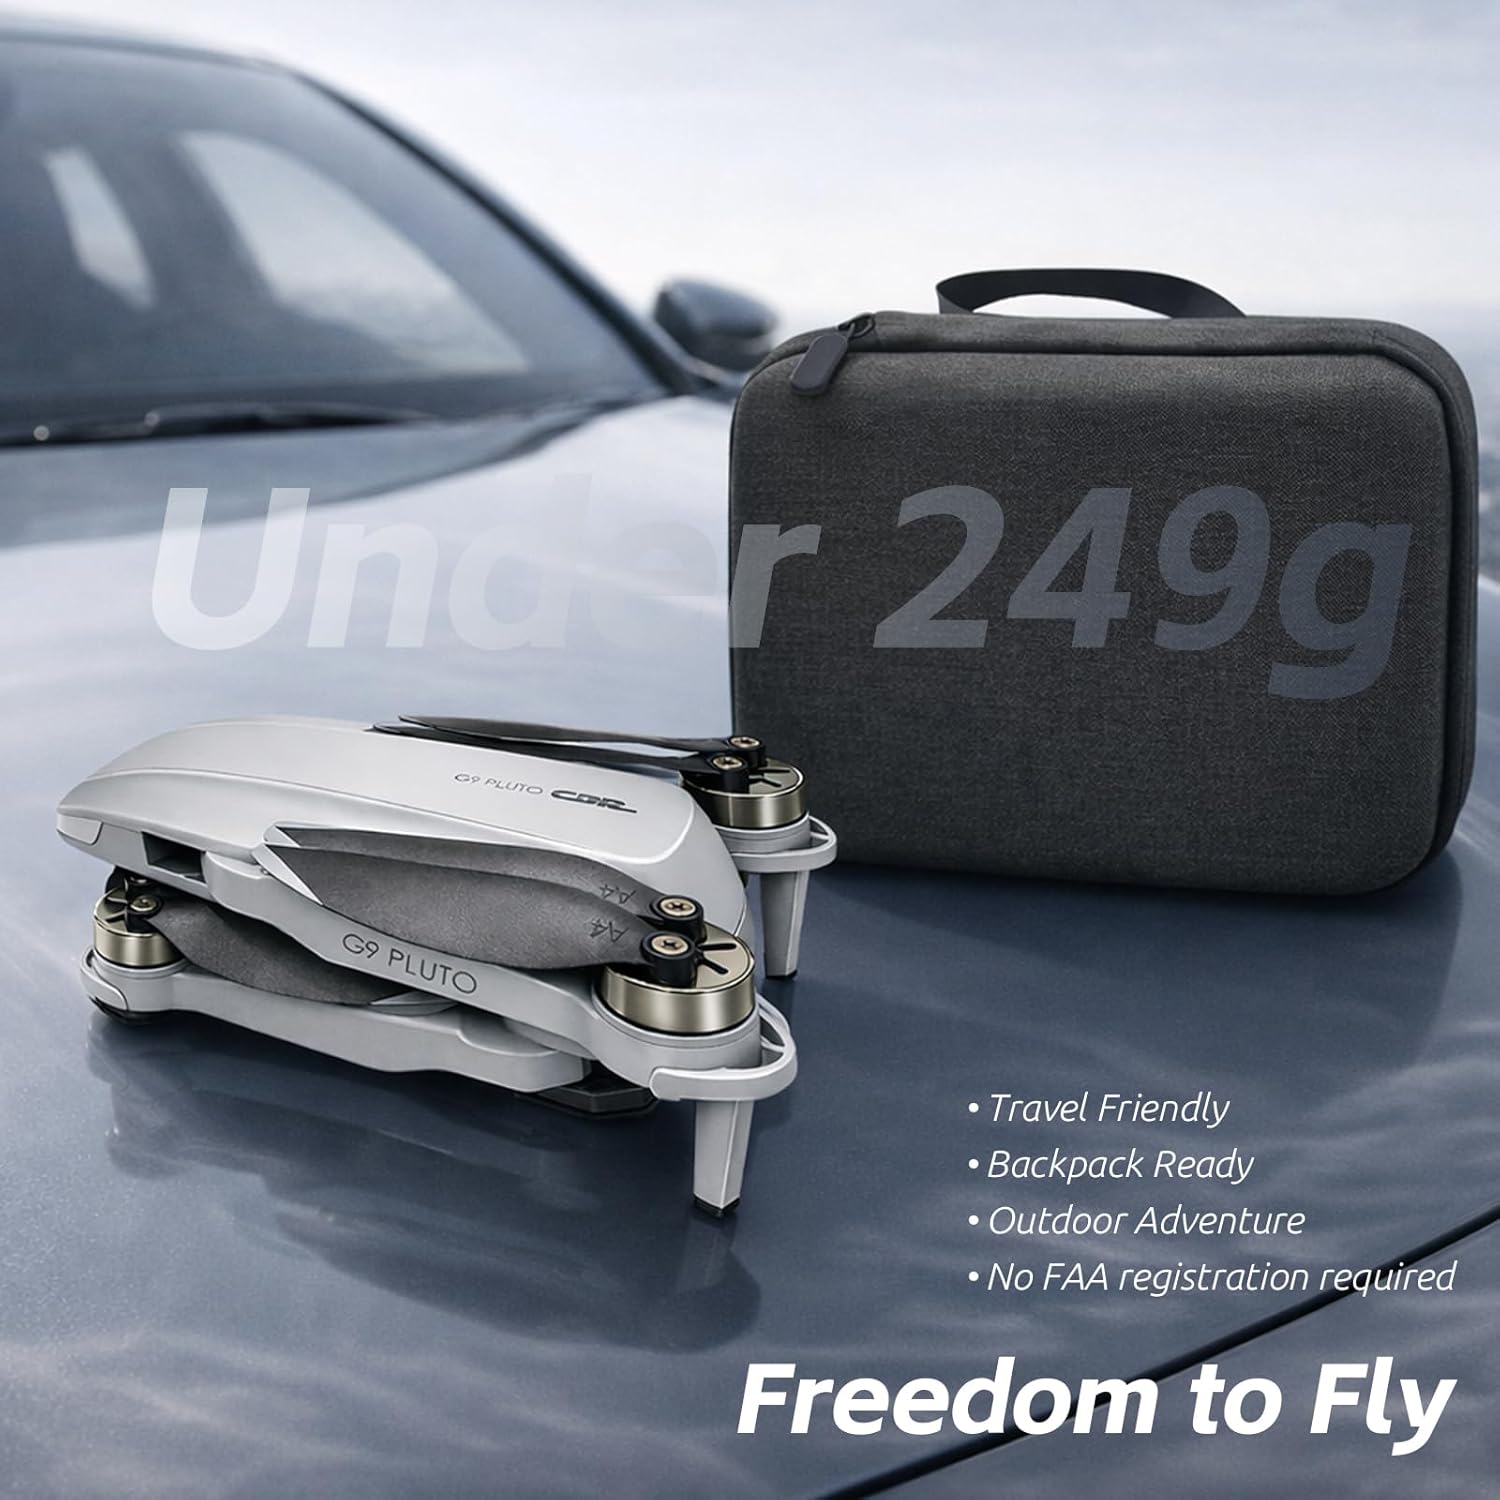
Image: The G9 Pluto drone in its folded state, positioned beside its protective carry case, illustrating its travel-friendly design.
6.3 Propeller Replacement
- If a propeller is damaged, replace it immediately with a new one from the spare set.
- Use the provided screwdriver to remove the old propeller and install the new one, ensuring correct 'A' and 'B' alignment.
7. Troubleshooting
This section addresses common issues you might encounter with your CHUBORY G9 Pluto drone.
| Problem | Possible Cause | Solution |
|---|---|---|
| Drone does not power on | Low or uncharged battery | Charge the flight battery fully. Ensure it is correctly inserted. |
| Controller does not power on | Low or uncharged controller battery | Charge the controller battery fully. |
| Drone fails to pair with controller | Incorrect pairing procedure; interference | Ensure both devices are powered on and follow the pairing steps in Section 4.3. Move to an area with less interference. |
| Unstable flight or drifting | Insufficient GPS signal; uncalibrated sensors; strong winds | Fly in an open area with strong GPS signal. Perform IMU and compass calibration. Avoid flying in windy conditions. |
| Poor image/video quality | Dirty camera lens; insufficient lighting; MicroSD card issues | Clean the camera lens. Ensure adequate lighting. Check MicroSD card for proper insertion and sufficient space. |
| Drone does not respond to commands | Out of range; signal interference; low battery | Fly within the specified control range. Avoid areas with strong signal interference. Check drone and controller battery levels. |
8. Specifications
| Feature | Detail |
|---|---|
| Model Name | G9 Pluto |
| Brand | CHUBORY |
| Product Dimensions | 13.5 x 7.5 x 4.5 cm |
| Item Weight | 150 Grams |
| Video Capture Resolution | 4K |
| Camera Features | EIS (Electronic Image Stabilization) |
| Controller Screen | 4.5 inch HD Screen |
| Maximum Control Range | 3280 Feet (1000 meters) |
| Flight Time | Up to 30 minutes per battery (90 minutes total with 3 batteries) |
| Battery Type | Lithium Ion |
| Connectivity Technology | Wi-Fi, RF |
| Special Features | GPS Auto Return, Foldable Design, Circle Fly, Follow Me Mode |
| Included Storage | 32GB MicroSD Card |
| UPC | 718027500068 |
| Country of Origin | China |
9. Warranty and Support
For warranty information and technical support, please refer to the official CHUBORY website or contact their customer service directly. Details can typically be found on the product packaging or the manufacturer's official online channels.
Online Resources: For additional support, FAQs, and firmware updates, visit the CHUBORY Store on Amazon.