1. Introduction
Thank you for choosing the CEVIK PRO CA-CS6 Silent Air Compressor. This manual provides essential information for the safe and efficient operation, maintenance, and troubleshooting of your new compressor. Please read this manual thoroughly before using the product and keep it for future reference.
The CEVIK PRO CA-CS6 is designed for domestic and light workshop tasks, offering a quiet, portable, and oil-free solution for various pneumatic applications such as blowing, painting, and nailing.
2. Important Safety Instructions
Always follow basic safety precautions to reduce the risk of fire, electric shock, and personal injury when using this product.
- Read All Instructions: Familiarize yourself with the controls and proper use of the compressor.
- Electrical Safety: Ensure the power supply matches the voltage specified on the compressor's rating plate. Do not operate in wet conditions or expose to rain. Always use a grounded outlet.
- Personal Protective Equipment: Wear safety glasses or goggles to protect your eyes from compressed air and debris. Hearing protection is recommended, even with a silent compressor, for prolonged use.
- Work Area: Operate the compressor in a well-ventilated area. Keep children and bystanders away. Do not operate near flammable liquids or gases.
- Pressure Safety: Never exceed the maximum operating pressure of the compressor or the attached tools. Do not tamper with the pressure relief valve.
- Maintenance: Disconnect the power supply before performing any maintenance or repairs. Regularly drain condensation from the tank.
- Handling: The compressor is heavy. Use proper lifting techniques or assistance when moving.
- Storage: Store the compressor in a dry, secure location, out of reach of children.
3. Product Features
The CEVIK PRO CA-CS6 compressor offers a range of features designed for convenience and efficiency:
- Quiet Operation: Operates at an extremely low noise level of 59 dB, making it suitable for indoor use and noise-sensitive environments.
- Compact and Portable Design: With a 6-liter tank and lightweight construction (10 kg), it is easy to transport and store, ideal for users requiring mobility.
- Oil-Free Technology: Ensures clean, contamination-free compressed air and significantly reduces maintenance requirements, saving time and costs.
- Efficient Performance: Equipped with a 0.75 HP electric motor, delivering 8 Bar maximum pressure and an airflow of 106 l/min, suitable for various light-duty pneumatic tasks.
- Stable Anti-Vibration Base: Designed to absorb vibrations, enhancing stability during operation, reducing indirect noise, and protecting internal components.
- Durable Construction: Features a low-revolution head for increased durability and energy efficiency.
4. Components and Parts Identification
Familiarize yourself with the main components of your CEVIK PRO CA-CS6 compressor:
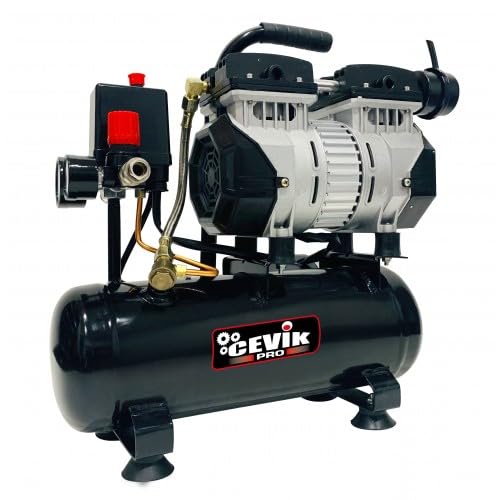
Figure 1: CEVIK PRO CA-CS6 Silent Air Compressor. This image shows the compact design of the compressor, highlighting its main body, pressure gauges, and air outlet. The anti-vibration feet are visible at the base, ensuring stability during operation. The overall appearance emphasizes its portability and user-friendly structure.
- Air Tank (Receiver): Stores compressed air. Capacity: 6 liters.
- Motor/Pump Assembly: Generates compressed air. Oil-free design.
- Pressure Gauges: One gauge displays tank pressure, the other displays regulated outlet pressure.
- Pressure Regulator: Adjusts the air pressure delivered to the pneumatic tools.
- Quick-Connect Air Outlet: For attaching air hoses and tools.
- ON/OFF Switch: Controls the power to the compressor.
- Pressure Relief Valve: A safety device that automatically releases air if the tank pressure exceeds a safe limit. Do not tamper with this valve.
- Drain Valve: Located at the bottom of the air tank, used to release condensed moisture.
- Anti-Vibration Feet: Provide stability and reduce noise during operation.
5. Setup Instructions
5.1 Unpacking
- Carefully remove the compressor from its packaging.
- Inspect the unit for any shipping damage. If damaged, do not operate and contact your supplier.
- Ensure all components listed in Section 4 are present.
5.2 Placement
- Place the compressor on a firm, level, and stable surface to prevent tipping.
- Ensure adequate ventilation around the unit to prevent overheating. Maintain at least 30 cm (12 inches) clearance from walls or other obstructions.
- Avoid operating in dusty, damp, or poorly ventilated areas.
5.3 Electrical Connection
- Ensure the ON/OFF switch is in the 'OFF' position before plugging in.
- Connect the power cord to a grounded electrical outlet that matches the voltage requirements of the compressor (refer to the product label).
- Do not use extension cords unless absolutely necessary. If an extension cord is required, ensure it is rated for the compressor's power requirements and is properly grounded.
5.4 Initial Checks
- Verify that the drain valve at the bottom of the tank is fully closed.
- Check that the pressure relief valve is securely in place and not obstructed.
6. Operating Instructions
6.1 Starting the Compressor
- Ensure the compressor is properly set up and connected to power.
- Turn the ON/OFF switch to the 'ON' position. The motor will start, and the tank pressure will begin to build.
- The compressor will automatically shut off once the maximum tank pressure (8 Bar) is reached. It will restart automatically when the tank pressure drops below a preset minimum.
6.2 Adjusting Outlet Pressure
- Attach your air hose to the quick-connect air outlet.
- Turn the pressure regulator knob clockwise to increase the outlet pressure or counter-clockwise to decrease it.
- Monitor the regulated outlet pressure gauge to set the desired pressure for your pneumatic tool.
6.3 Connecting Air Tools
- Ensure the air tool is rated for the pressure you are setting.
- Connect the air hose to the tool.
- Always disconnect air tools and release pressure from the hose before changing accessories or performing maintenance.
6.4 Shutting Down the Compressor
- Turn the ON/OFF switch to the 'OFF' position.
- Unplug the power cord from the electrical outlet.
- Release any remaining air pressure from the tank by opening the drain valve or by briefly activating an attached air tool.
- Drain any accumulated condensation from the tank (see Maintenance section).
7. Maintenance
Regular maintenance ensures the longevity and safe operation of your compressor. Always disconnect the power before performing any maintenance.
7.1 Draining Condensation (Daily/After Each Use)
- Compressed air generates moisture, which collects in the tank. This condensation must be drained regularly to prevent corrosion and tank damage.
- With the compressor off and the tank depressurized, slowly open the drain valve located at the bottom of the tank.
- Allow all moisture to drain completely.
- Close the drain valve tightly after draining.
7.2 Cleaning (As Needed)
- Wipe down the exterior of the compressor with a clean, damp cloth. Do not use harsh chemicals or abrasive cleaners.
- Keep the motor and ventilation openings free from dust and debris to ensure proper cooling.
7.3 Air Filter (Check Periodically)
- Although the compressor is oil-free, it may have an air intake filter. Check the filter for dust and debris.
- Clean or replace the filter as per manufacturer recommendations to ensure optimal airflow and prevent damage to the pump.
7.4 Storage
- Before storing, ensure the tank is completely drained of air and condensation.
- Store the compressor in a dry, clean, and secure location, protected from extreme temperatures.
8. Troubleshooting
This section addresses common issues you might encounter. For problems not listed here, contact customer support.
| Problem | Possible Cause | Solution |
|---|---|---|
| Compressor does not start | No power supply ON/OFF switch is off Thermal overload activated | Check power cord and outlet Turn ON/OFF switch to 'ON' Allow compressor to cool down, then restart |
| Low air pressure / Compressor runs continuously | Air leak in hose or connections Pressure regulator set too low Air filter clogged | Check all connections for leaks, tighten if necessary Adjust pressure regulator to desired setting Clean or replace air filter |
| Excessive noise or vibration | Loose components Compressor not on a level surface Damaged anti-vibration feet | Check and tighten all visible fasteners Place compressor on a firm, level surface Inspect and replace damaged feet if necessary |
| Moisture in air line | Condensation in tank not drained | Drain condensation from the tank regularly (see Section 7.1) |
9. Technical Specifications
| Feature | Specification |
|---|---|
| Model | CA-CS6 |
| Brand | Cevik |
| Power Source | Electric Cable |
| Motor Power | 0.75 HP (3/4 HP) |
| Tank Volume | 6 Liters |
| Maximum Pressure | 8 Bar |
| Airflow (L/min) | 106 l/min |
| Noise Level | 59 Decibels (dB) |
| Oil-Free Operation | Yes |
| Dimensions (L x W x H) | 49 x 48.5 x 24.05 cm |
| Weight | 10 kg |
| Components Included | Air compressor |
10. Warranty and Support
This product is covered by a manufacturer's warranty. Please refer to the warranty card included with your purchase or visit the official Cevik website for detailed warranty terms and conditions.
For technical assistance, spare parts, or warranty claims, please contact Cevik customer support through their official channels. Keep your purchase receipt as proof of purchase.
Cevik Official Website: Visit Cevik Store on Amazon