1. Introduction
Thank you for purchasing the LIKIMIO Queen Bed Frame. This bed frame is designed to provide comfort, convenience, and modern aesthetics to your bedroom. It features a soft Sherpa fabric upholstered headboard, integrated LED lighting, a built-in charging station, and ample under-bed storage. This manual provides detailed instructions for assembly, operation, maintenance, and troubleshooting to ensure safe and optimal use of your new bed frame.
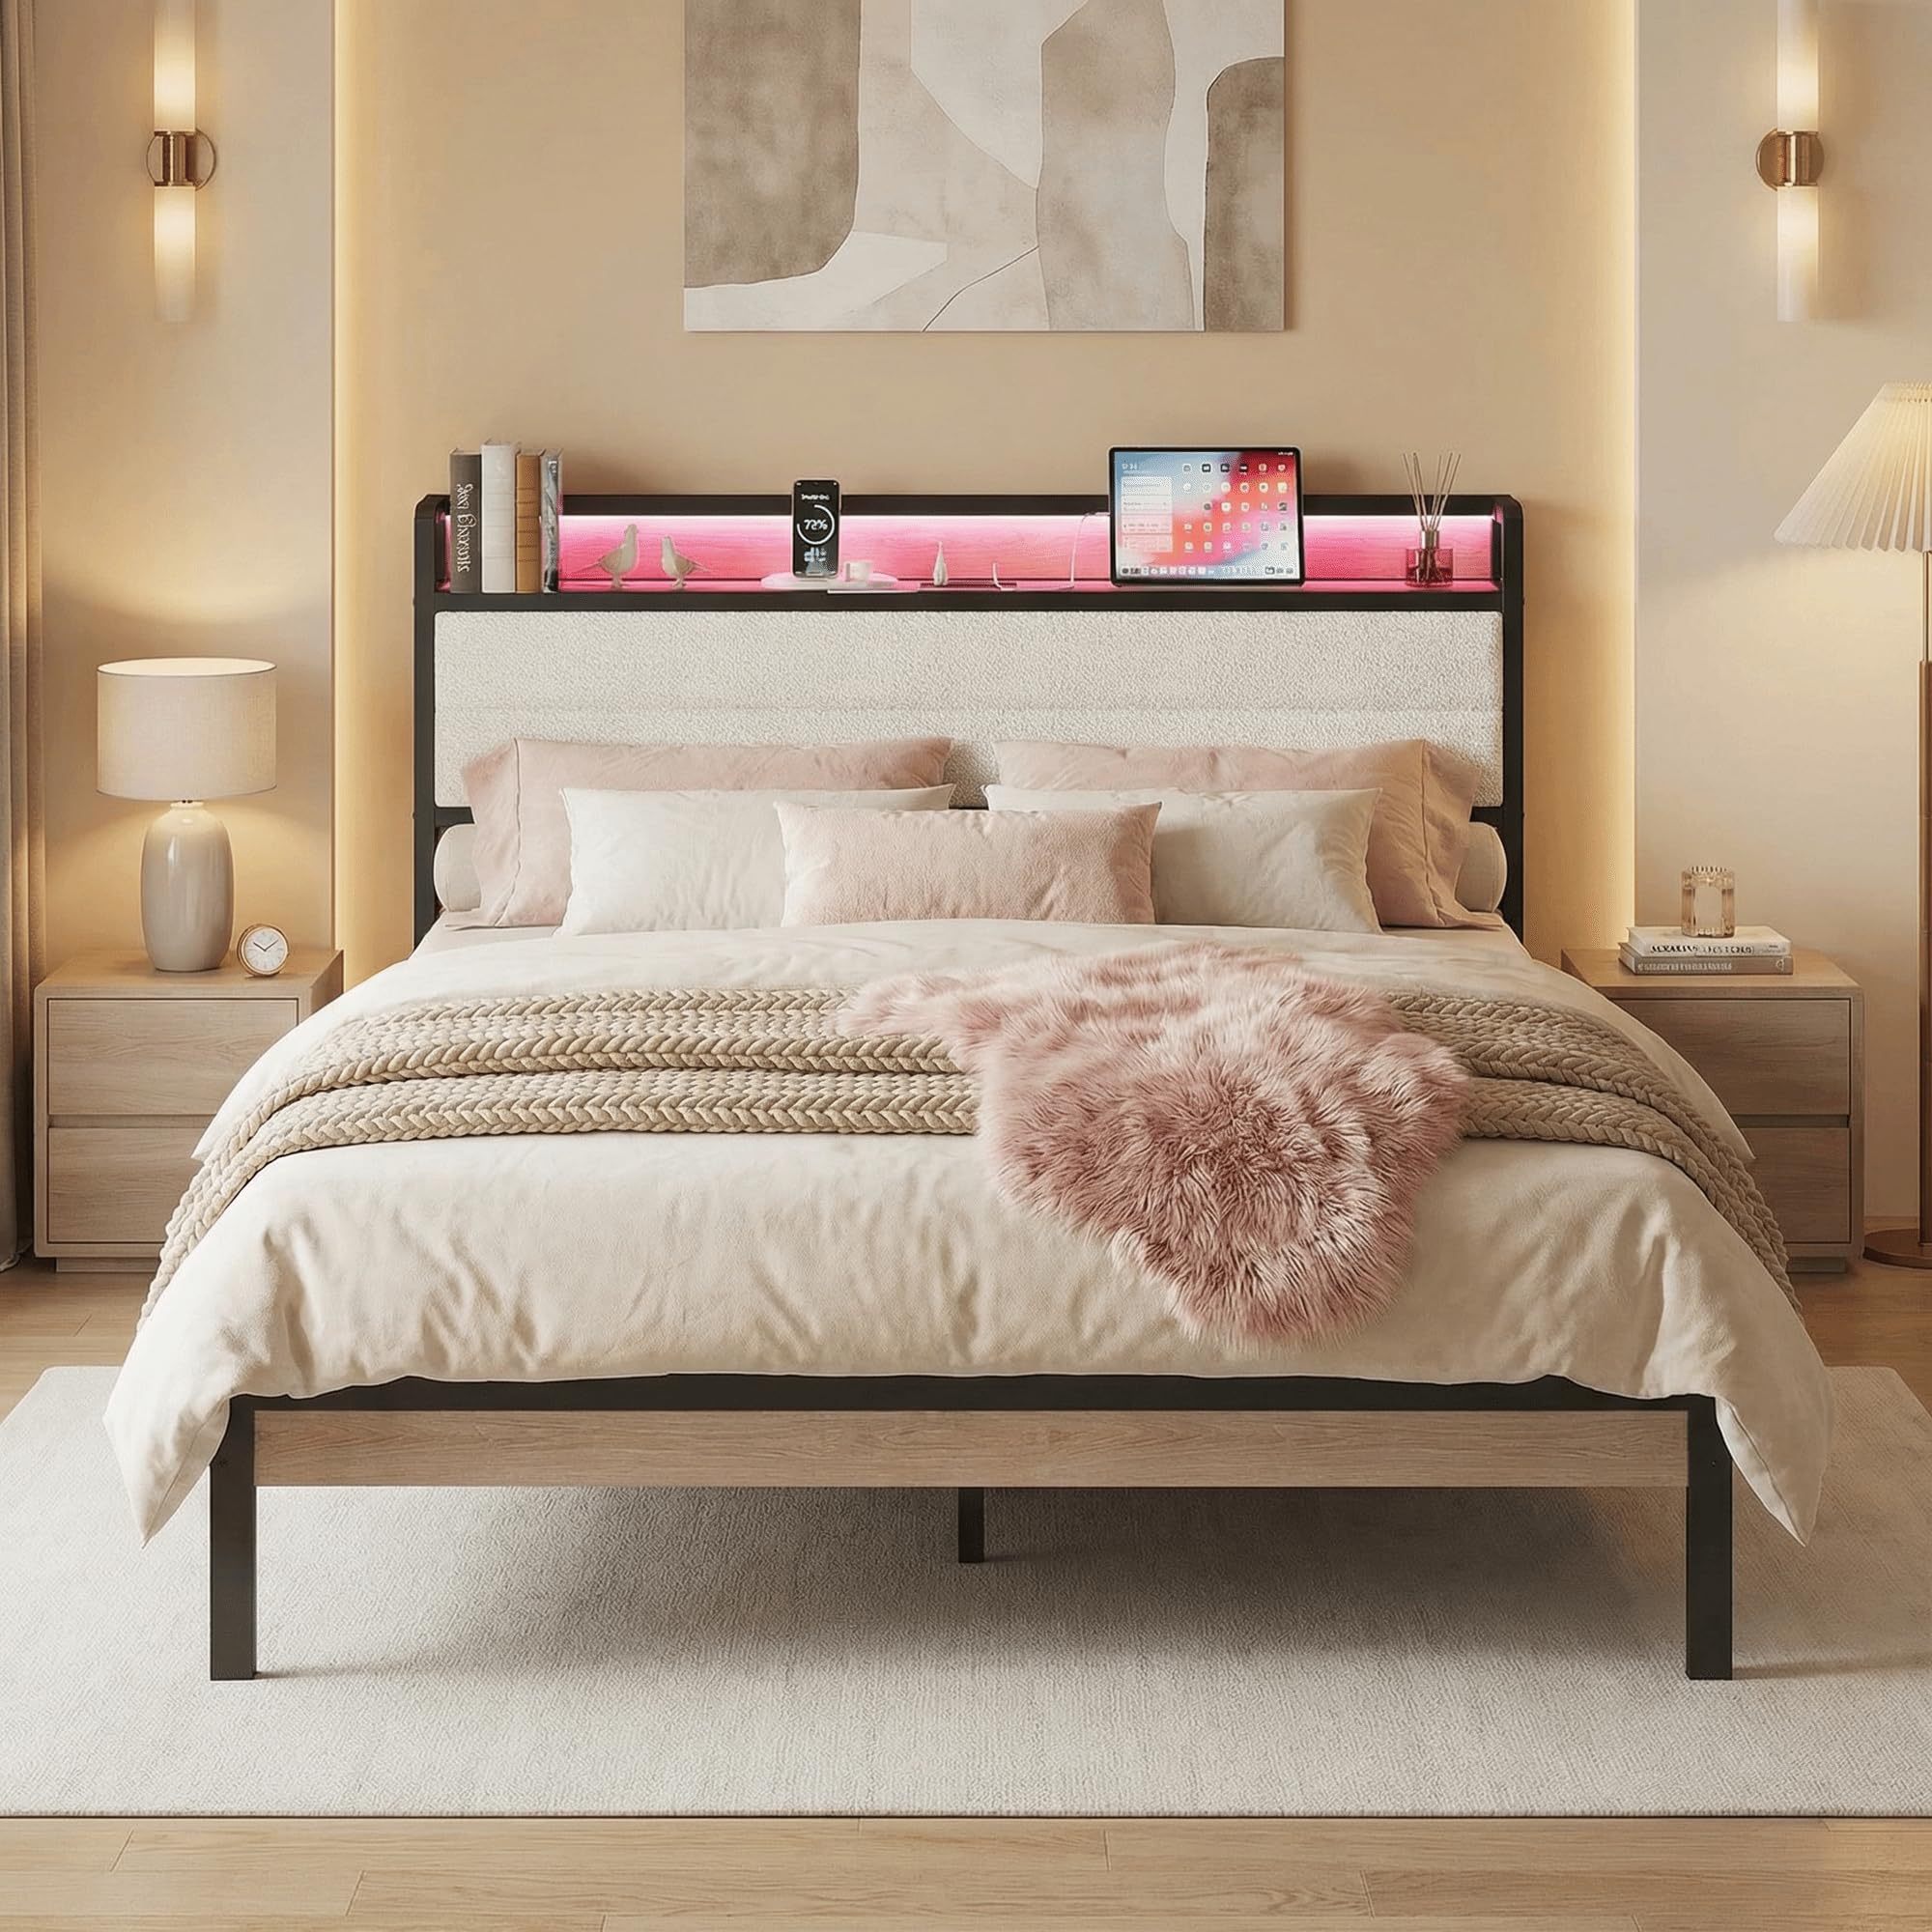
Image: Fully assembled LIKIMIO Queen Bed Frame in Natural and Cream color, showcasing the storage headboard with LED lights and charging station.
2. Safety Information
Please read all instructions carefully before assembly and use. Keep this manual for future reference.
- Assembly: Ensure all parts are present and undamaged before beginning assembly. Do not use power tools for assembly unless specifically instructed, as this may overtighten screws and damage components.
- Stability: Ensure all bolts and screws are securely tightened before using the bed frame. Periodically check and re-tighten fasteners to maintain stability.
- Weight Capacity: Do not exceed the recommended weight capacity for the bed frame. Refer to the specifications section for details.
- Electrical Safety: The integrated charging station contains electrical components. Do not expose it to liquids. Ensure the power cord is not pinched or damaged. Disconnect power before cleaning or if any electrical issue occurs.
- Children: Keep small parts and packaging materials away from children during assembly to prevent choking hazards.
- Sharp Edges: Exercise caution around sharp edges during assembly and handling.
3. Package Contents
Verify that all components are included in your package. If any parts are missing or damaged, please contact customer support.
- Headboard with integrated storage, LED lights, and charging station
- Footboard
- Side Rails (Left and Right)
- Center Support Beam
- Metal Slats
- Support Legs
- Hardware Pack (screws, bolts, washers, Allen wrench)
- LED Remote Control
- Power Adapter for Charging Station and LED Lights
- Instruction Manual
4. Assembly Instructions
Assembly is designed to be straightforward. It is recommended to assemble the bed frame with two people. Clear step-by-step guidance is provided in the included printed manual. Follow these general steps:
- Unpack and Identify Parts: Lay out all components on a clean, soft surface to prevent scratches. Refer to the parts list to ensure everything is present.
- Assemble Headboard: Attach any necessary support brackets or legs to the headboard as per the detailed instructions.
- Attach Side Rails: Connect the side rails to the headboard using the provided hardware. Do not fully tighten bolts until all major components are connected.
- Attach Footboard: Connect the footboard to the other end of the side rails.
- Install Center Support: Place and secure the center support beam and its legs.
- Install Slats: Lay the metal slats across the frame and secure them according to the instructions. Ensure the memory foam strip is correctly positioned to prevent noise.
- Final Tightening: Once all components are in place, go back and securely tighten all bolts and screws.
- Connect Power: Plug the power adapter for the charging station and LED lights into a wall outlet.

Image: Visual guide illustrating the bed frame's features including under-bed storage, stable construction, simplified assembly, and noise-free design.

Image: Diagram demonstrating that no box spring is required for this bed frame, accommodating various mattress depths from 8 to 12 inches.
5. Operating Instructions
5.1. LED Lights Operation
The integrated RGB LED lights offer customizable lighting options for your bedroom ambiance.
- Power On/Off: Use the remote control or mobile app to turn the LED lights on or off.
- Color Selection: Choose from over 60,000 colors via the remote or app.
- Brightness Adjustment: Adjust the light intensity to your preference.
- Modes: Select from various dynamic modes, including music sync, microphone mode, and customizable modes.
- Timer Function: Set a timer for the lights to automatically turn off.

Image: The bed frame's LED lights feature, demonstrating synchronization with music beats and control via remote or mobile application.
5.2. Charging Station Usage
The headboard includes a convenient charging station to power your devices.
- AC Outlets: Two 110V/12A AC outlets are available for standard electrical devices.
- USB Ports: One 5V/2A USB port for charging compatible devices.
- Type-C Port: One 5V/2A Type-C port for modern devices.
- Ensure the bed frame's power adapter is plugged into a live wall outlet for the charging station to function.

Image: Detailed view of the headboard's integrated charging station, featuring two AC outlets, one USB port, and one Type-C port.
6. Maintenance
Proper care will extend the life and appearance of your bed frame.
- Cleaning the Frame: Wipe metal and engineered wood surfaces with a soft, damp cloth. Avoid harsh chemicals or abrasive cleaners.
- Cleaning Sherpa Fabric: For the upholstered headboard, gently spot clean with a mild detergent and a damp cloth. Blot dry. Do not saturate the fabric. Regular vacuuming with an upholstery attachment can help maintain its appearance.
- Fastener Check: Periodically (every 3-6 months) check all bolts and screws and re-tighten them if necessary to ensure the bed frame remains stable and noise-free.
- Electrical Components: Keep the charging station and LED light components dry and free from dust. Do not attempt to disassemble or repair electrical parts yourself.
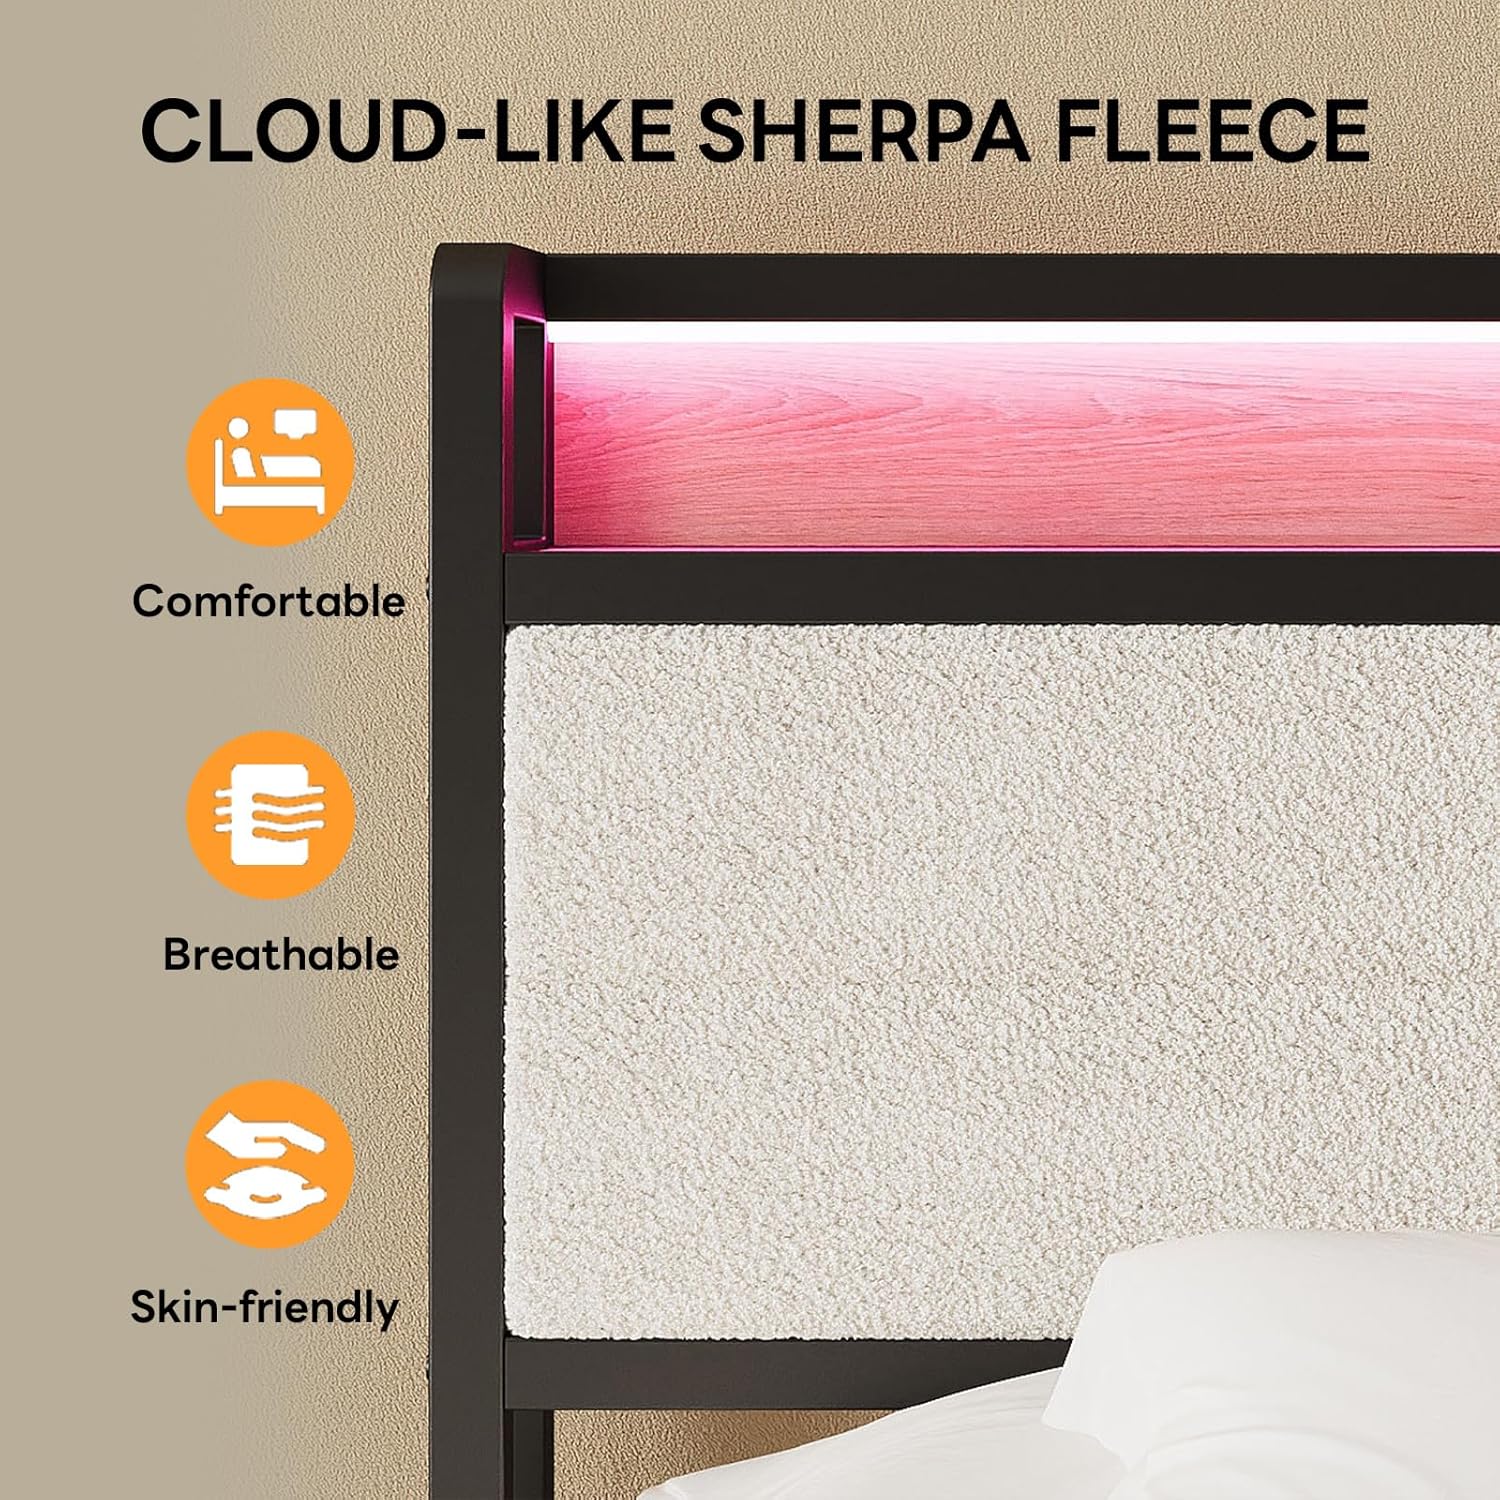
Image: Close-up view of the Sherpa fleece material used on the headboard, emphasizing its soft texture.
7. Troubleshooting
Refer to this section for solutions to common issues.
| Problem | Possible Cause | Solution |
|---|---|---|
| Bed frame is squeaking or noisy. | Loose fasteners; improper slat placement; missing memory foam strip. | Check and re-tighten all bolts and screws. Ensure slats are correctly seated and the noise-free memory foam strip is in place. |
| LED lights are not turning on. | Power adapter not plugged in; remote control battery dead; loose connection. | Verify the power adapter is securely plugged into a working outlet. Check remote battery. Ensure all LED connections are firm. |
| Charging station is not working. | Power adapter not plugged in; device not compatible; faulty cable. | Confirm the bed frame's power adapter is plugged in. Test with a different device and charging cable. |
| Bed frame feels unstable. | Loose connections; uneven floor. | Re-tighten all assembly hardware. Ensure the bed is on a level surface. |
8. Specifications
| Feature | Detail |
|---|---|
| Model Number | HK-QBF-55 |
| Size | Queen |
| Product Dimensions (L x W x H) | 86.5" x 60.4" x 40.5" |
| Material | Engineered Wood, Metal |
| Headboard Material | Sherpa Fabric |
| Color | Natural and Cream |
| Special Features | Fade Resistant, Squeak Resistant, RGB LED Lights, Charging Station (2 AC, 1 USB, 1 Type-C), Under-bed Storage |
| Under-bed Clearance | 9.8 inches |
| Assembly Required | Yes |
| Item Weight | 64 Pounds |
| UPC | 722385213201 |
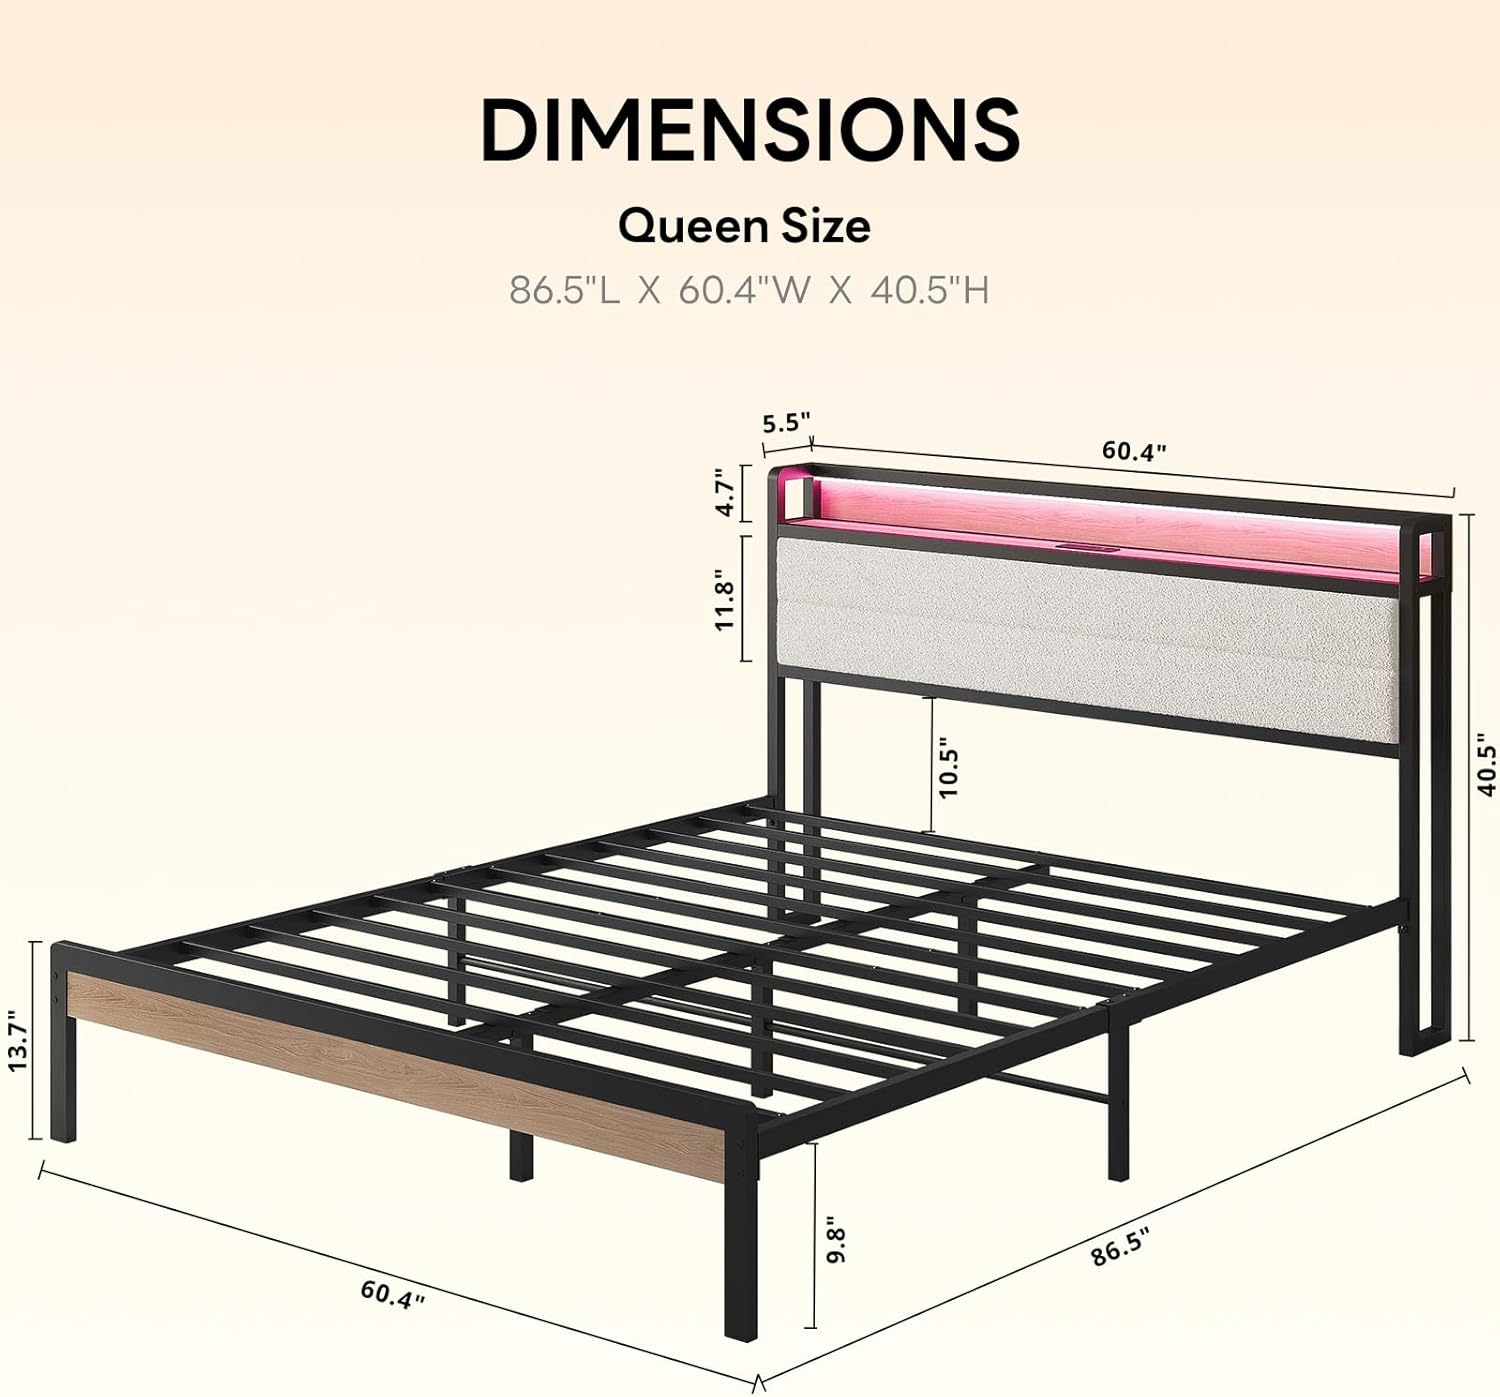
Image: Dimensional drawing of the LIKIMIO Queen Bed Frame, indicating overall length, width, and height, as well as specific measurements for the headboard and under-bed clearance.
9. Warranty and Customer Support
LIKIMIO products are manufactured with quality and care. For any questions, missing parts, or issues with your bed frame, please contact LIKIMIO customer support. Refer to your purchase documentation for specific warranty details and contact information.
You can often find support information on the brand's official website or through the retailer where the product was purchased.


