Cazeboo FAZZIO 4x3m
Cazeboo FAZZIO Electric Semi-Cassette Awning User Manual
Model: FAZZIO 4x3m | Brand: Cazeboo
1. Introduction
Thank you for choosing the Cazeboo FAZZIO Electric Semi-Cassette Awning. This manual provides essential information for the safe installation, operation, and maintenance of your awning. Please read these instructions carefully before assembly and use, and retain them for future reference.
The FAZZIO electric semi-cassette awning is designed to transform your terrace into a comfortable, modern, and protected outdoor space. It features a powerful motor, integrated LED lighting, and smart wind and sun sensors for optimal convenience and safety.
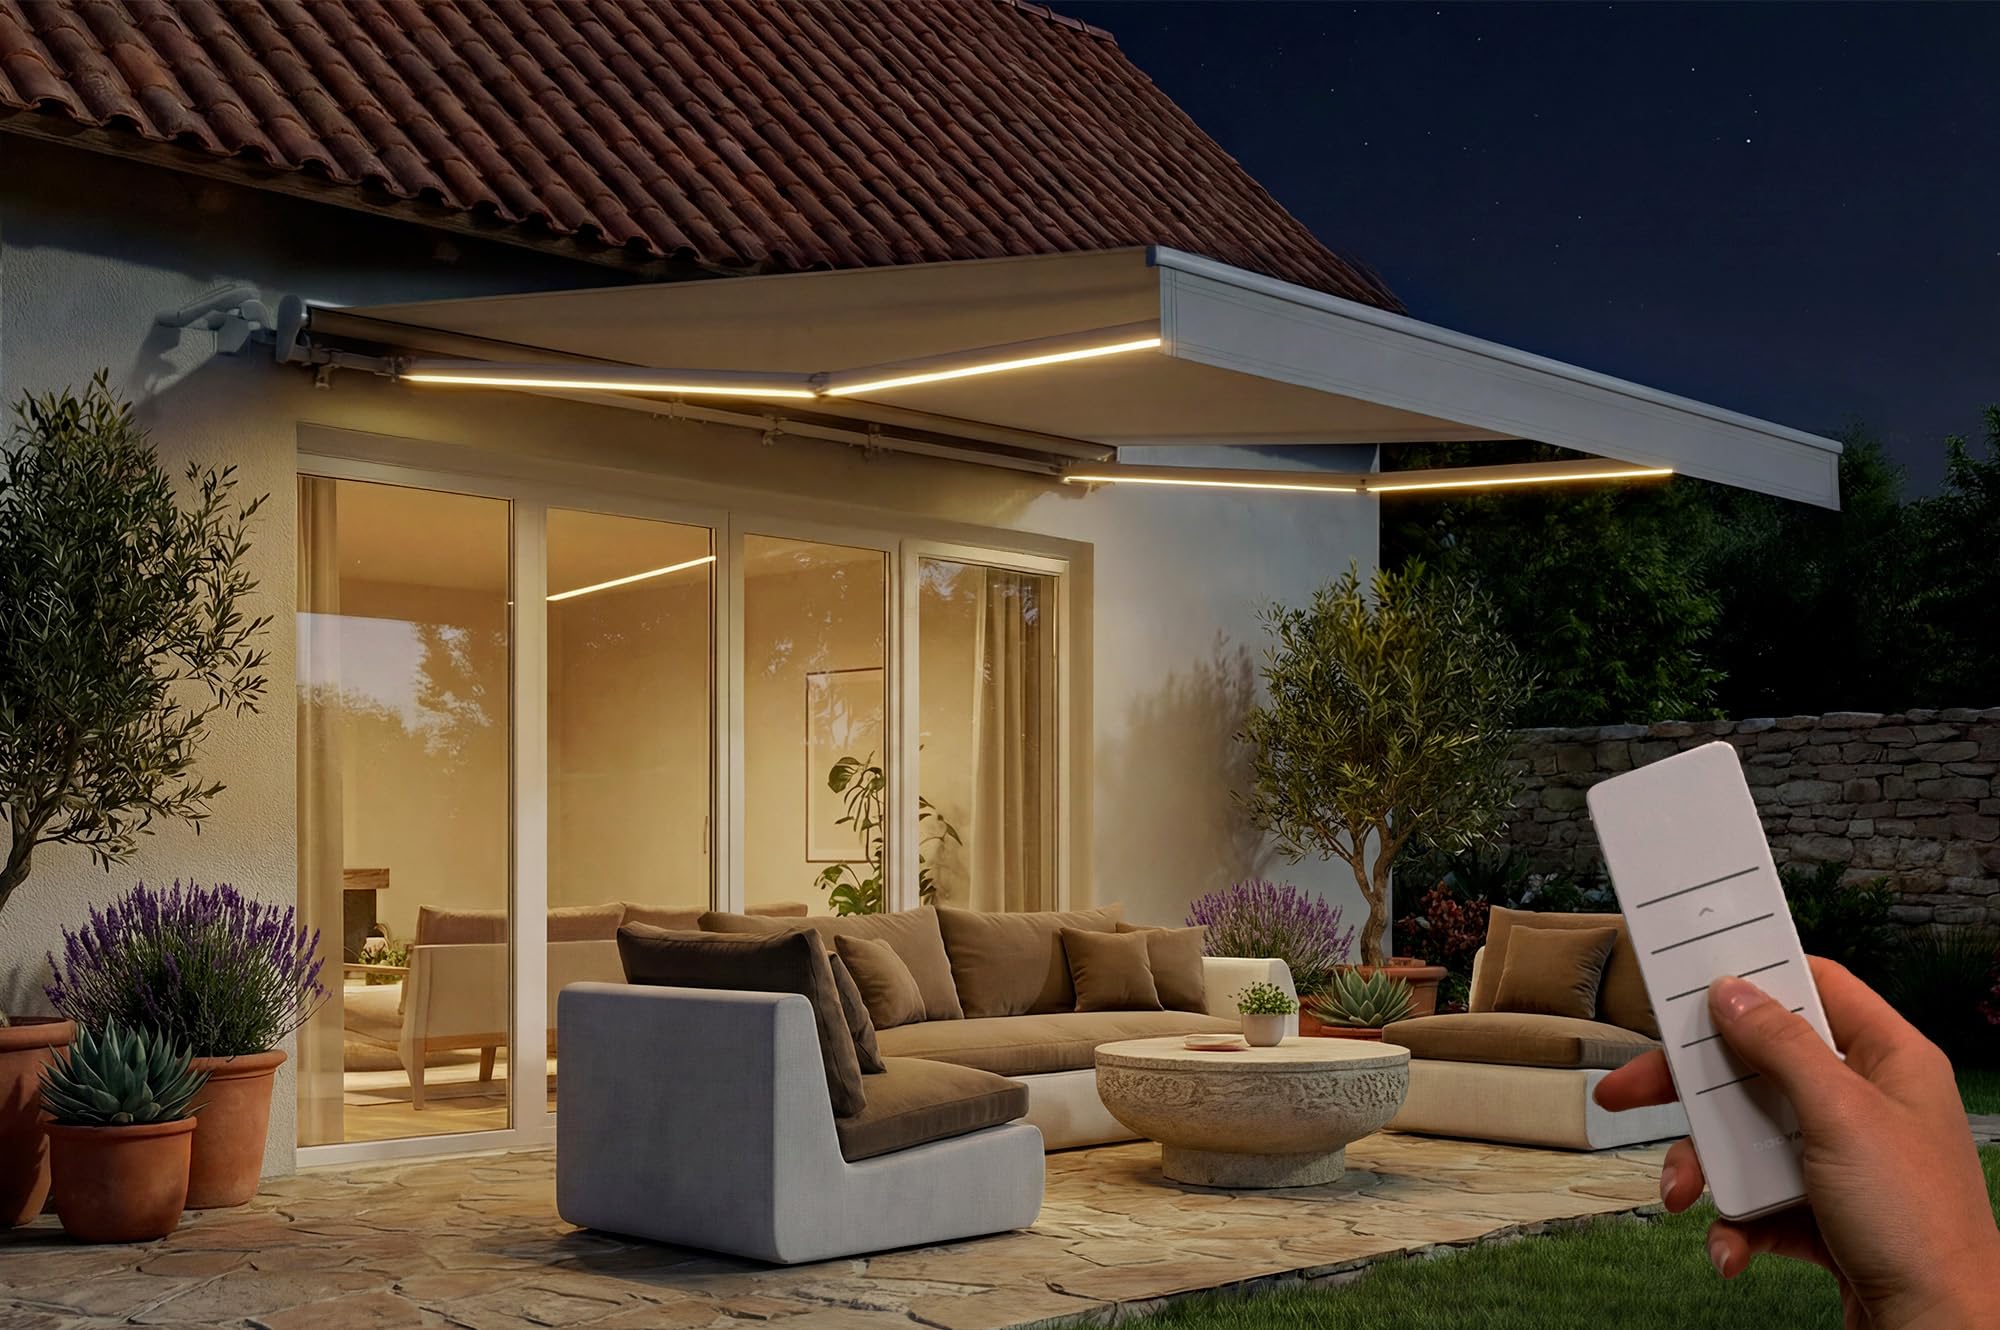
Image: The Cazeboo FAZZIO awning extended over a modern patio, providing shade.
2. Safety Instructions
WARNING: Failure to follow these safety instructions may result in injury or damage to the product.
- Ensure the awning is installed by qualified personnel following all local building codes and regulations.
- Do not operate the awning during strong winds, heavy rain, or snow. The wind sensor will automatically retract the awning in high winds.
- Keep children and pets away from the awning during operation.
- Regularly inspect the awning for any signs of wear, damage, or loose components. Do not use if damaged.
- Disconnect power before performing any maintenance or cleaning.
- Do not hang objects from the awning structure.
- Use only original replacement parts.
3. Package Contents
Verify that all components are present before beginning installation:
- Awning assembly (fabric, frame, motor)
- Remote control
- Wind sensor
- Sun sensor
- Manual override crank
- Wall mounting brackets and hardware
- Instruction manual
4. Setup and Installation
Installation requires two people. Ensure you have appropriate tools (drill, level, measuring tape, etc.) and safety equipment.
4.1 Mounting Location
Choose a sturdy wall capable of supporting the awning's weight. The recommended mounting height allows for an inclination angle between 30° and 100°.

Image: Diagram illustrating the awning's dimensions (395 cm width, 300 cm projection) and the recommended mounting height, indicating a minimum of 15 cm clearance above the window/door frame and an adjustable inclination range of 30° to 100°.
4.2 Attaching Mounting Brackets
Mark the drilling points for the wall mounting brackets. Ensure they are level and spaced correctly according to the awning's width. Drill holes and secure the brackets firmly to the wall using appropriate fasteners for your wall type.

Image: Detailed diagram showing the installation of the mounting brackets onto the wall, with an inset showing the bracket components. Four brackets are typically used for this model.
4.3 Mounting the Awning
Carefully lift the awning assembly and hook it onto the installed wall brackets. Secure the awning to the brackets using the provided hardware. Ensure all connections are tight and secure.
4.4 Adjusting the Inclination Angle
The awning's inclination can be adjusted between 30° and 100° to optimize shade throughout the day. Refer to the adjustment mechanism on the awning arms.

Image: Diagram illustrating the adjustable inclination angle of the awning, ranging from a minimum of 30° to a maximum of 100°.
4.5 Electrical Connection
Connect the awning's power cable to a suitable outdoor power outlet. It is recommended to have this step performed by a qualified electrician to ensure safety and compliance with electrical standards.
5. Operating Instructions
5.1 Remote Control Operation
Use the provided remote control to extend or retract the awning. The awning deploys or retracts in less than one minute. Ensure the remote control has fresh batteries.

Image: A hand holding the remote control, indicating a range of 30 meters for operation.
5.2 Integrated LED Lighting
The LED strips integrated into the articulated arms provide soft, uniform lighting. Activate them via the remote control to create a warm ambiance for evening use.
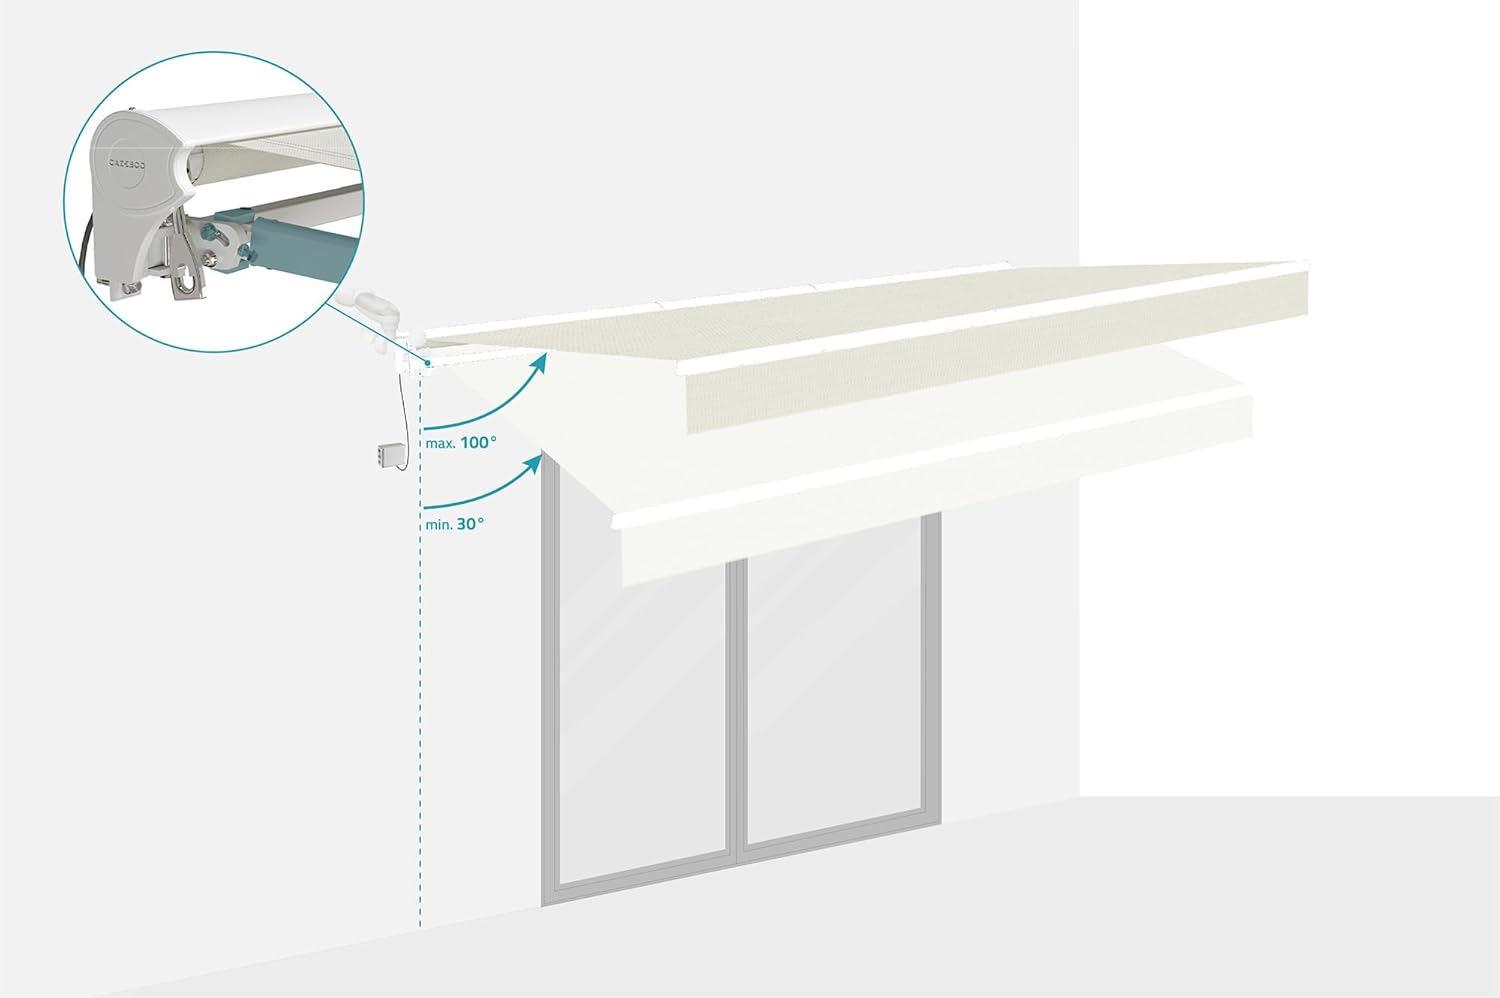
Image: Close-up view of the integrated LED lighting within the awning arm, showing the light source and its effect.
5.3 Wind and Sun Sensors
- Wind Sensor: The integrated wind sensor (anemometer) automatically retracts the awning in case of strong gusts, protecting it from damage.
- Sun Sensor: The sun sensor allows for intelligent management of the awning's extension based on sunlight intensity, providing shade when needed.
- Refer to the sensor's specific instructions for calibration and sensitivity settings.
5.4 Manual Override
In case of power failure or remote control malfunction, use the provided manual override crank to retract or extend the awning. Insert the crank into the designated opening and turn it clockwise to retract or counter-clockwise to extend.
6. Maintenance
- Fabric Cleaning: Clean the polyester fabric with mild soap and water. Do not use harsh chemicals or abrasive brushes. Allow the fabric to dry completely before retracting the awning to prevent mildew.
- Frame Cleaning: Wipe the aluminum frame with a damp cloth.
- Seasonal Inspection: Before and after periods of heavy use, inspect all bolts, screws, and moving parts for tightness and proper function. Lubricate moving parts as necessary.
- Winter Storage: In areas with heavy snow or ice, it is recommended to keep the awning retracted during winter months to prevent damage.
7. Troubleshooting
| Problem | Possible Cause | Solution |
|---|---|---|
| Awning does not extend/retract | No power, remote control batteries low, motor malfunction, wind sensor activated. | Check power supply. Replace remote batteries. Use manual crank. Check wind sensor settings. Contact customer support if motor issue persists. |
| LED lights not working | Loose connection, LED strip damage. | Check electrical connections. Contact customer support for replacement. |
| Awning retracts unexpectedly | Wind sensor activated by strong winds. | This is normal operation. Do not attempt to extend the awning during high winds. |
8. Specifications
| Feature | Detail |
|---|---|
| Model | FAZZIO |
| Dimensions (P x L x H) | 3P x 3.94L x 2.18H meters (approx. 4x3m coverage) |
| Fabric Material | 100% Polyester, 320 g/m², UV50+ protection, water-repellent |
| Frame Material | Thermolaquered Aluminum |
| Motorization | Electric, with remote control |
| Sensors | Integrated Wind Sensor (anemometer), Sun Sensor |
| Lighting | Integrated LED strips in arms |
| Inclination Angle | Adjustable from 30° to 100° |
| Color | Beige (for this variant) |
| Assembly Required | Yes |
| Manufacturer Part Number | KIT-000669 |
| Country of Origin | China |
9. Warranty and Support
For warranty information, technical support, or replacement parts, please contact Cazeboo customer service. Keep your purchase receipt as proof of purchase.
Contact information can typically be found on the Cazeboo website or your purchase documentation.
Ask a question about this manual
Ask about setup, troubleshooting, compatibility, parts, safety, or missing instructions. Manuals+ will review the question and use this page’s manual context to help answer it.