
Introduction
Thank you for choosing the NEWBULIG 6.34QT Air Fryer. This appliance is designed to provide a convenient and efficient way to cook a variety of foods with less oil, delivering crispy and delicious results. Please read this manual thoroughly before use to ensure safe and optimal operation.
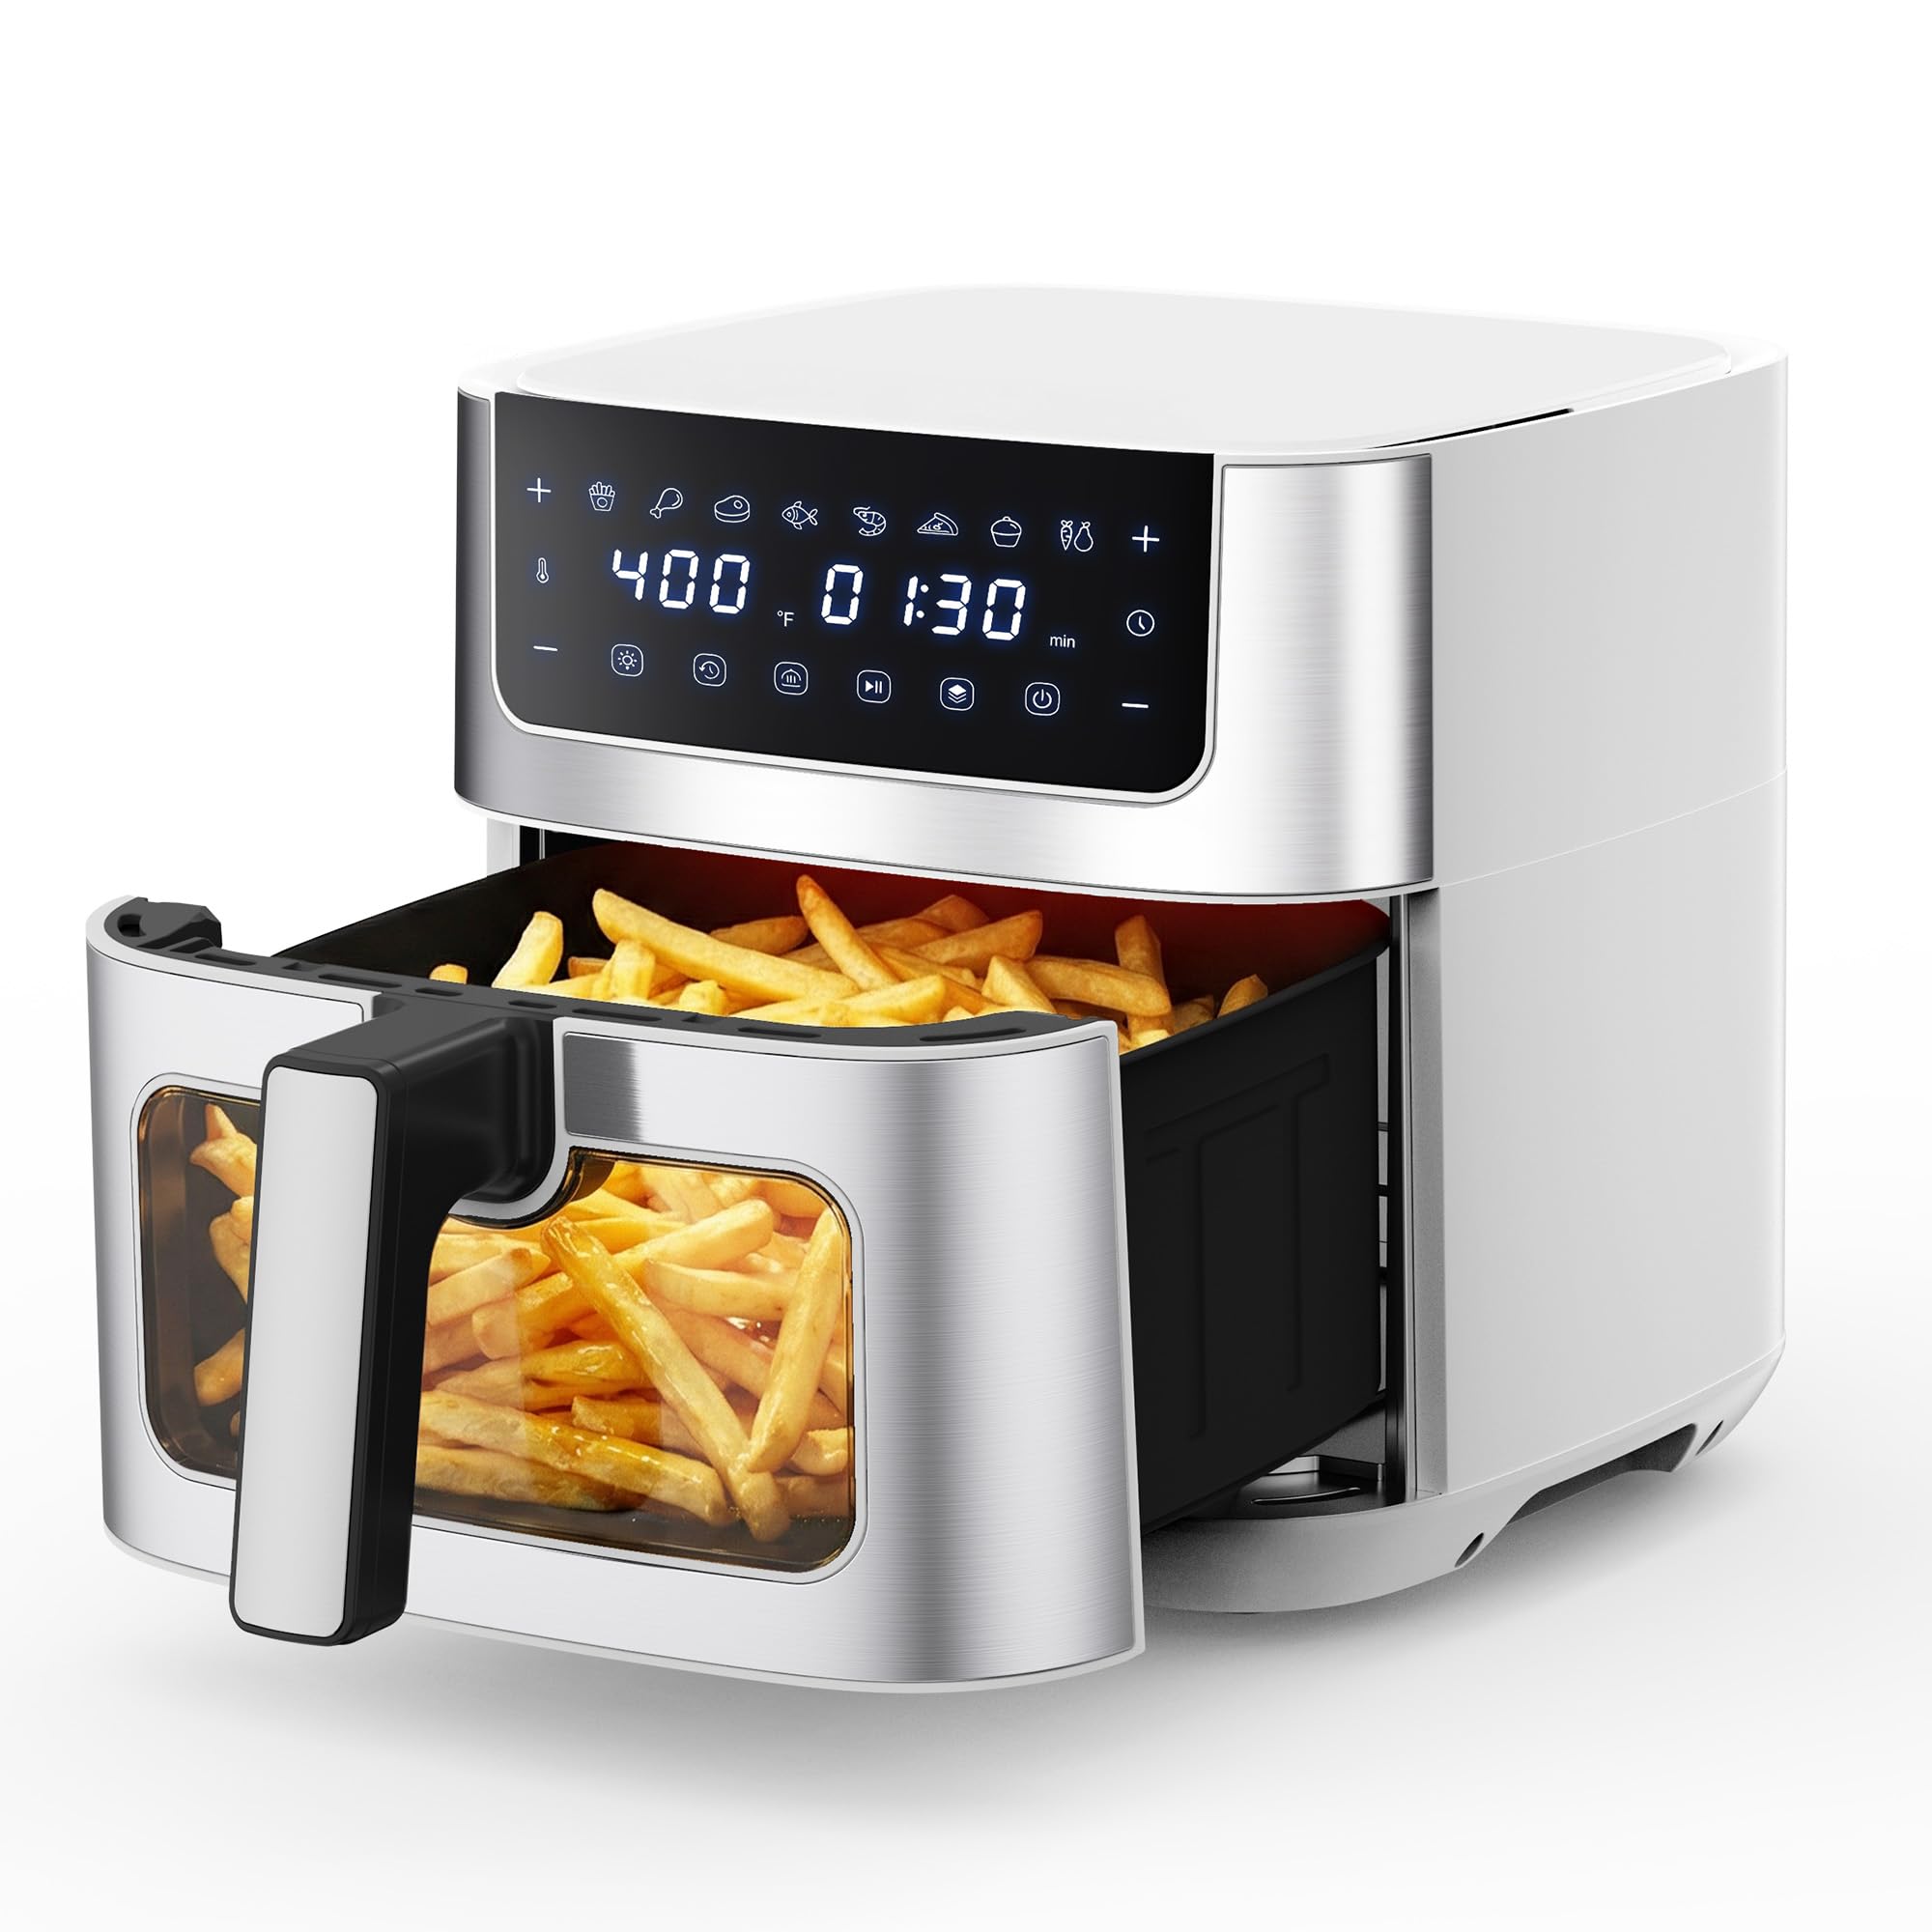
Image: The NEWBULIG 6.34QT Air Fryer, featuring a visible window, displayed on a kitchen counter alongside various cooked dishes, demonstrating its use in a home setting.
Important Safety Instructions
Always follow basic safety precautions when using electrical appliances to reduce the risk of fire, electric shock, and injury.
- Read all instructions before operating the air fryer.
- Do not touch hot surfaces. Use handles or knobs.
- To protect against electrical shock, do not immerse the cord, plugs, or main unit in water or other liquid.
- Close supervision is necessary when any appliance is used by or near children.
- Unplug from outlet when not in use and before cleaning. Allow to cool before putting on or taking off parts.
- Do not operate any appliance with a damaged cord or plug, or after the appliance malfunctions or has been damaged in any manner.
- The use of accessory attachments not recommended by the appliance manufacturer may cause injuries.
- Do not use outdoors.
- Do not let cord hang over edge of table or counter, or touch hot surfaces.
- Do not place on or near a hot gas or electric burner, or in a heated oven.
- Extreme caution must be used when moving an appliance containing hot oil or other hot liquids.
- Always attach plug to appliance first, then plug cord into the wall outlet. To disconnect, turn any control to "off", then remove plug from wall outlet.
- Do not use appliance for other than intended use.
- Built-in overheat protection and automatic shut-off features are included for safety.
Product Components
The NEWBULIG 6.34QT Air Fryer includes the following main components:
- Air Fryer Main Unit
- Removable Basket
- Crisper Plate

Image: The NEWBULIG Air Fryer with its basket partially removed, revealing the crisper plate designed for optimal air circulation during cooking.
Setup and First Use
- Unpacking: Carefully remove all packaging materials and promotional labels from the air fryer.
- Initial Cleaning: Before first use, wash the removable basket and crisper plate with warm, soapy water. Rinse thoroughly and dry completely. Wipe the exterior of the main unit with a damp cloth. Do not immerse the main unit in water.
- Placement: Place the air fryer on a stable, heat-resistant surface. Ensure there is adequate space (at least 6 inches) around the back and sides for proper air circulation. Do not place it directly against a wall or under cabinets.
- Power Connection: Plug the power cord into a grounded electrical outlet.
- Pre-heating (Optional): For best results, it is recommended to pre-heat the air fryer for 3-5 minutes before adding food.
Operating Instructions
The NEWBULIG Air Fryer features a digital touchscreen for easy control of cooking settings.
Basic Operation:
- Power On: Plug in the air fryer. The display will illuminate.
- Place Food: Insert the crisper plate into the basket, then place your food into the basket. Slide the basket firmly into the main unit.
- Set Temperature: Use the temperature controls (180°F–400°F) to select your desired cooking temperature.
- Set Timer: Use the timer controls (up to 90 minutes) to set the cooking duration.
- Start Cooking: Press the Start/Pause button to begin the cooking cycle.
- Monitor Progress: Utilize the visible window and interior light to check on your food without opening the basket, preserving heat and ensuring consistent results.
- Shake/Flip (Optional): For even cooking, some recipes may require shaking or flipping food halfway through the cooking cycle. The air fryer will pause when the basket is removed and resume when reinserted.
- Auto Shut-Off: The air fryer will automatically shut off when the timer reaches zero or if the basket is removed for an extended period.
Using Smart Presets:
The air fryer includes 8 smart presets for common dishes, allowing for one-touch cooking.
- Select the desired preset icon on the digital touchscreen (e.g., fries, chicken, fish, steak, pizza, cake, vegetables, shrimp).
- The air fryer will automatically set the optimal temperature and time for that food type.
- You can adjust the temperature and time manually after selecting a preset if needed.

Image: A close-up of the NEWBULIG Air Fryer's digital control panel, highlighting the 8 smart preset icons for various food items like chicken, steak, shrimp, fish, pizza, cake, fries, and vegetables.
Delay Start Function:
Program meals up to 24 hours in advance using the delay start function.
- Set your desired cooking temperature and time.
- Activate the delay start function and set the desired delay time.
- The air fryer will begin cooking automatically after the set delay.
Care and Maintenance
Cleaning:
- Unplug and Cool: Always unplug the air fryer and allow it to cool completely before cleaning.
- Basket and Crisper Plate: The nonstick basket and crisper plate are top-rack dishwasher safe. For manual cleaning, wash with warm, soapy water and a non-abrasive sponge. Rinse and dry thoroughly.
- Exterior: Wipe the exterior of the air fryer with a damp cloth. Do not use abrasive cleaners or scouring pads, as they may damage the finish.
- Interior: If the interior is dirty, wipe it with a damp cloth and mild detergent. Ensure it is completely dry before next use.

Image: The nonstick basket and crisper plate of the NEWBULIG Air Fryer placed in the top rack of a dishwasher, illustrating their dishwasher-safe design for easy cleaning.
Storage:
Store the cleaned and dried air fryer in a cool, dry place. Ensure the power cord is neatly wrapped and not kinked.
Troubleshooting Guide
| Problem | Possible Cause | Solution |
|---|---|---|
| Air fryer does not turn on. | Not plugged in; power outlet malfunction; unit malfunction. | Ensure the power cord is securely plugged into a working outlet. Try a different outlet. If the issue persists, contact customer support. |
| Food is not cooked evenly. | Basket overloaded; food not shaken/flipped; incorrect temperature/time. | Do not overload the basket. Shake or flip food halfway through cooking. Adjust temperature and time as needed for specific recipes. |
| White smoke coming from the appliance. | Grease residue from previous use; excessive oil on food. | Clean the basket and crisper plate thoroughly after each use. Remove excess oil from food before air frying. |
| Basket does not slide in easily. | Basket not aligned correctly; food obstructing closure. | Ensure the basket is properly aligned with the main unit's guides. Check for any food items or debris blocking the basket's path. |
Product Specifications
- Model Number: AH-KZG15SS
- Capacity: 6.34 Quarts
- Max Temperature: 400°F (200°C)
- Timer Range: Up to 90 minutes
- Wattage: 1500 Watts
- Voltage: 120 Volts
- Control Method: Touchscreen
- Product Dimensions (D x W x H): 10.83" x 11.42" x 12.99"
- Materials: Acrylonitrile Butadiene Styrene (ABS), Polypropylene (PP), Stainless Steel
- Special Features: Automatic Shut-Off, Stain Resistant, Temperature Control, Timer, Visible Window, Nonstick Coating, Dishwasher Safe (basket and crisper plate)
- UPC: 715569266995
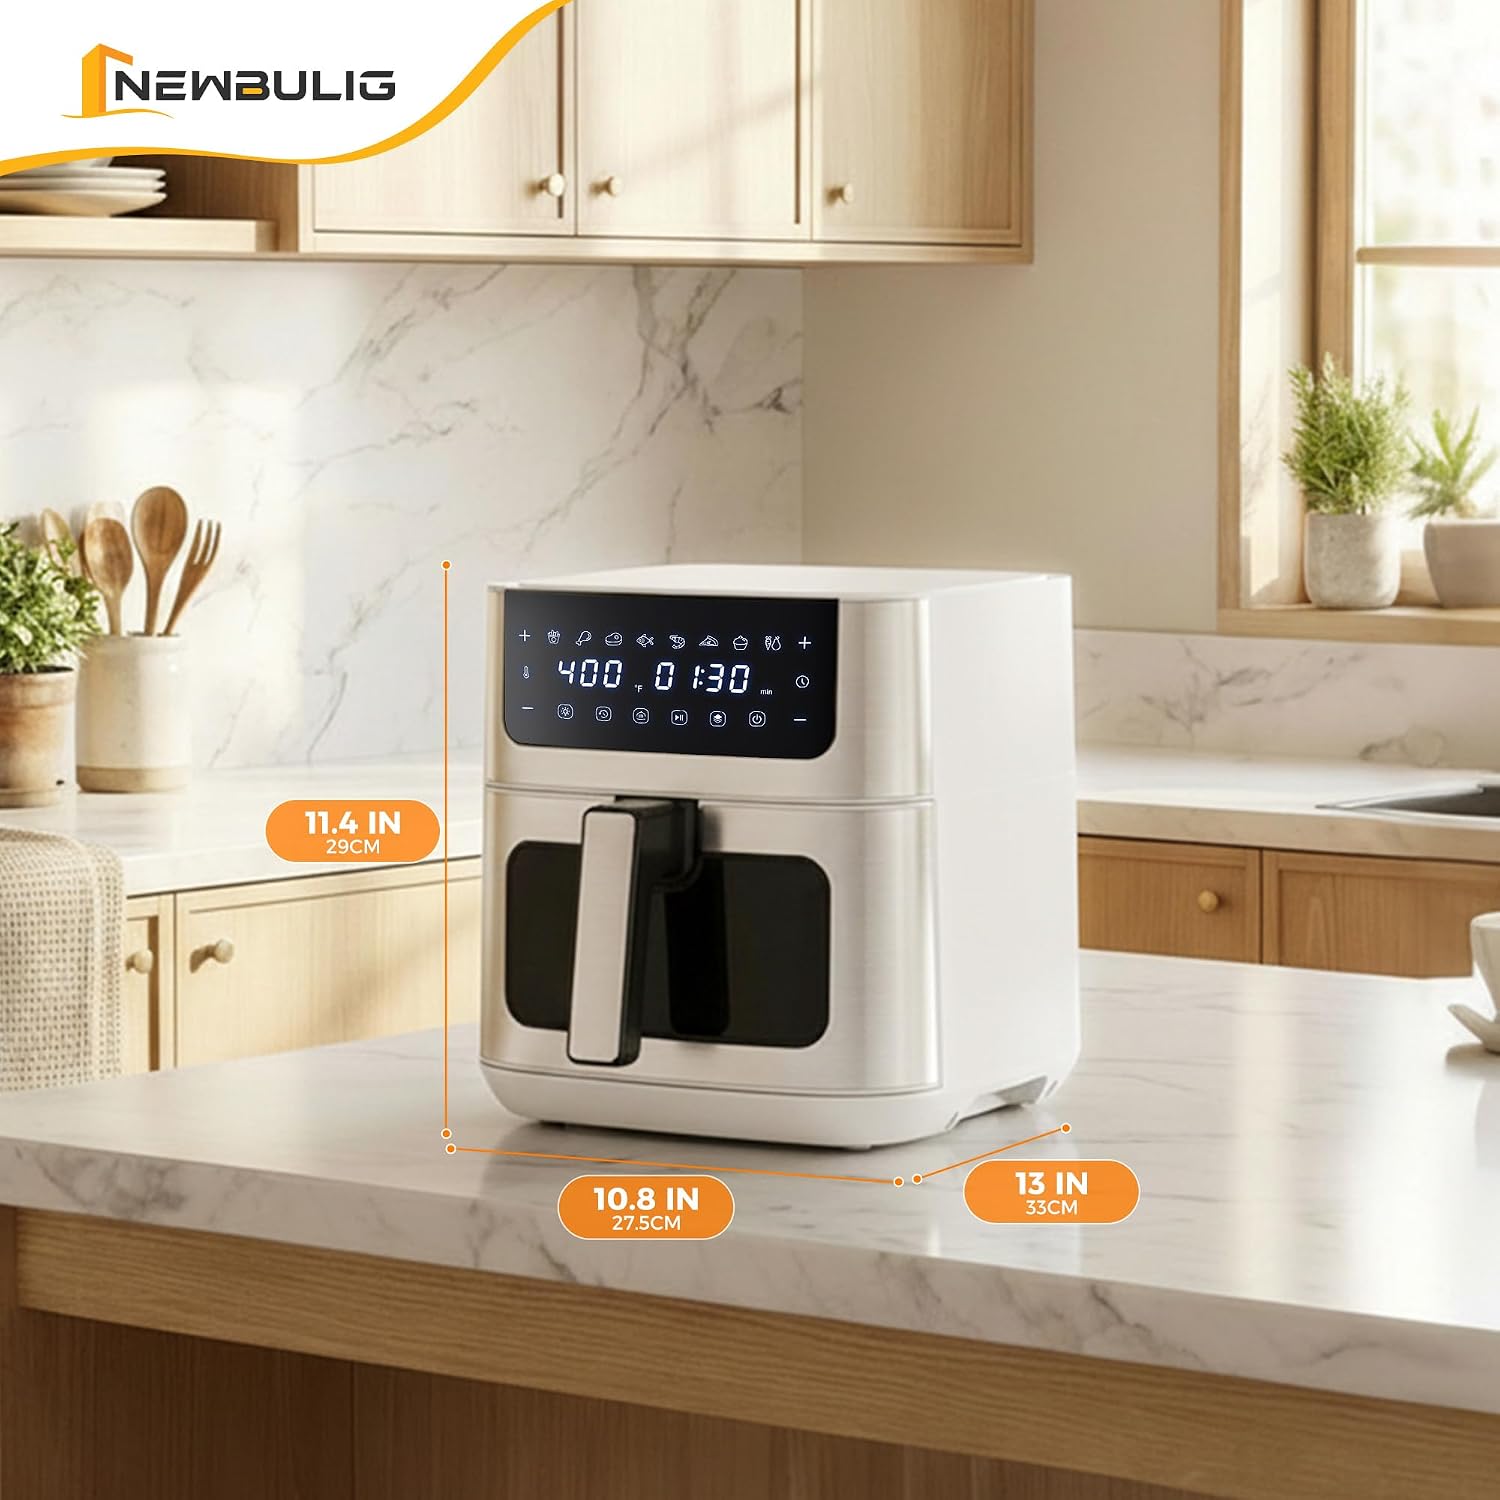
Image: The NEWBULIG Air Fryer shown with its key dimensions (depth, width, height) clearly labeled in both inches and centimeters.
Warranty and Customer Support
For warranty information or technical support, please refer to the warranty card included with your product or visit the official NEWBULIG brand store.
NEWBULIG Brand Store: Visit Store