
1. Introduction
This manual provides detailed instructions for the installation, operation, and maintenance of your TOP VACUUM PARTS replacement brush block assembly and dirty water tank filters. These parts are designed to restore the cleaning performance and filtration efficiency of your compatible Hoover carpet cleaner.
2. Product Overview
The replacement kit includes one (1) SpinScrub Brush Block Assembly and two (2) Dirty Water Tank Filters. The brush block features a 5-brush configuration designed for effective carpet cleaning, while the foam filters protect your vacuum's motor from debris.

Image 2.1: Contents of the replacement kit, including one brush block assembly and two water tank filters.

Image 2.2: Front and back views of the replacement brush block assembly, highlighting its design.
3. Compatibility
This replacement part kit is compatible with the following Hoover Power Scrub, Power Scrub Deluxe, and Turbo Scrub carpet cleaner models:
- FH50134
- FH50135
- FH50150NC
- FH50150
- FH50141
Important: Before installation, verify your vacuum model number is listed above. Do not rely solely on visual appearance as many parts may look similar but differ in fit or compatibility.

Image 3.1: Visual representation of compatible Hoover carpet cleaner models.
4. Installation
4.1. Installing the Dirty Water Tank Filters
- Ensure your carpet cleaner is unplugged and turned off.
- Locate and remove the dirty water tank from your carpet cleaner.
- Open the lid of the dirty water tank.
- Remove the old foam filter.
- Insert a new foam filter into the designated slot within the dirty water tank. Ensure it sits securely.
- Close the tank lid and reattach the dirty water tank to the carpet cleaner.
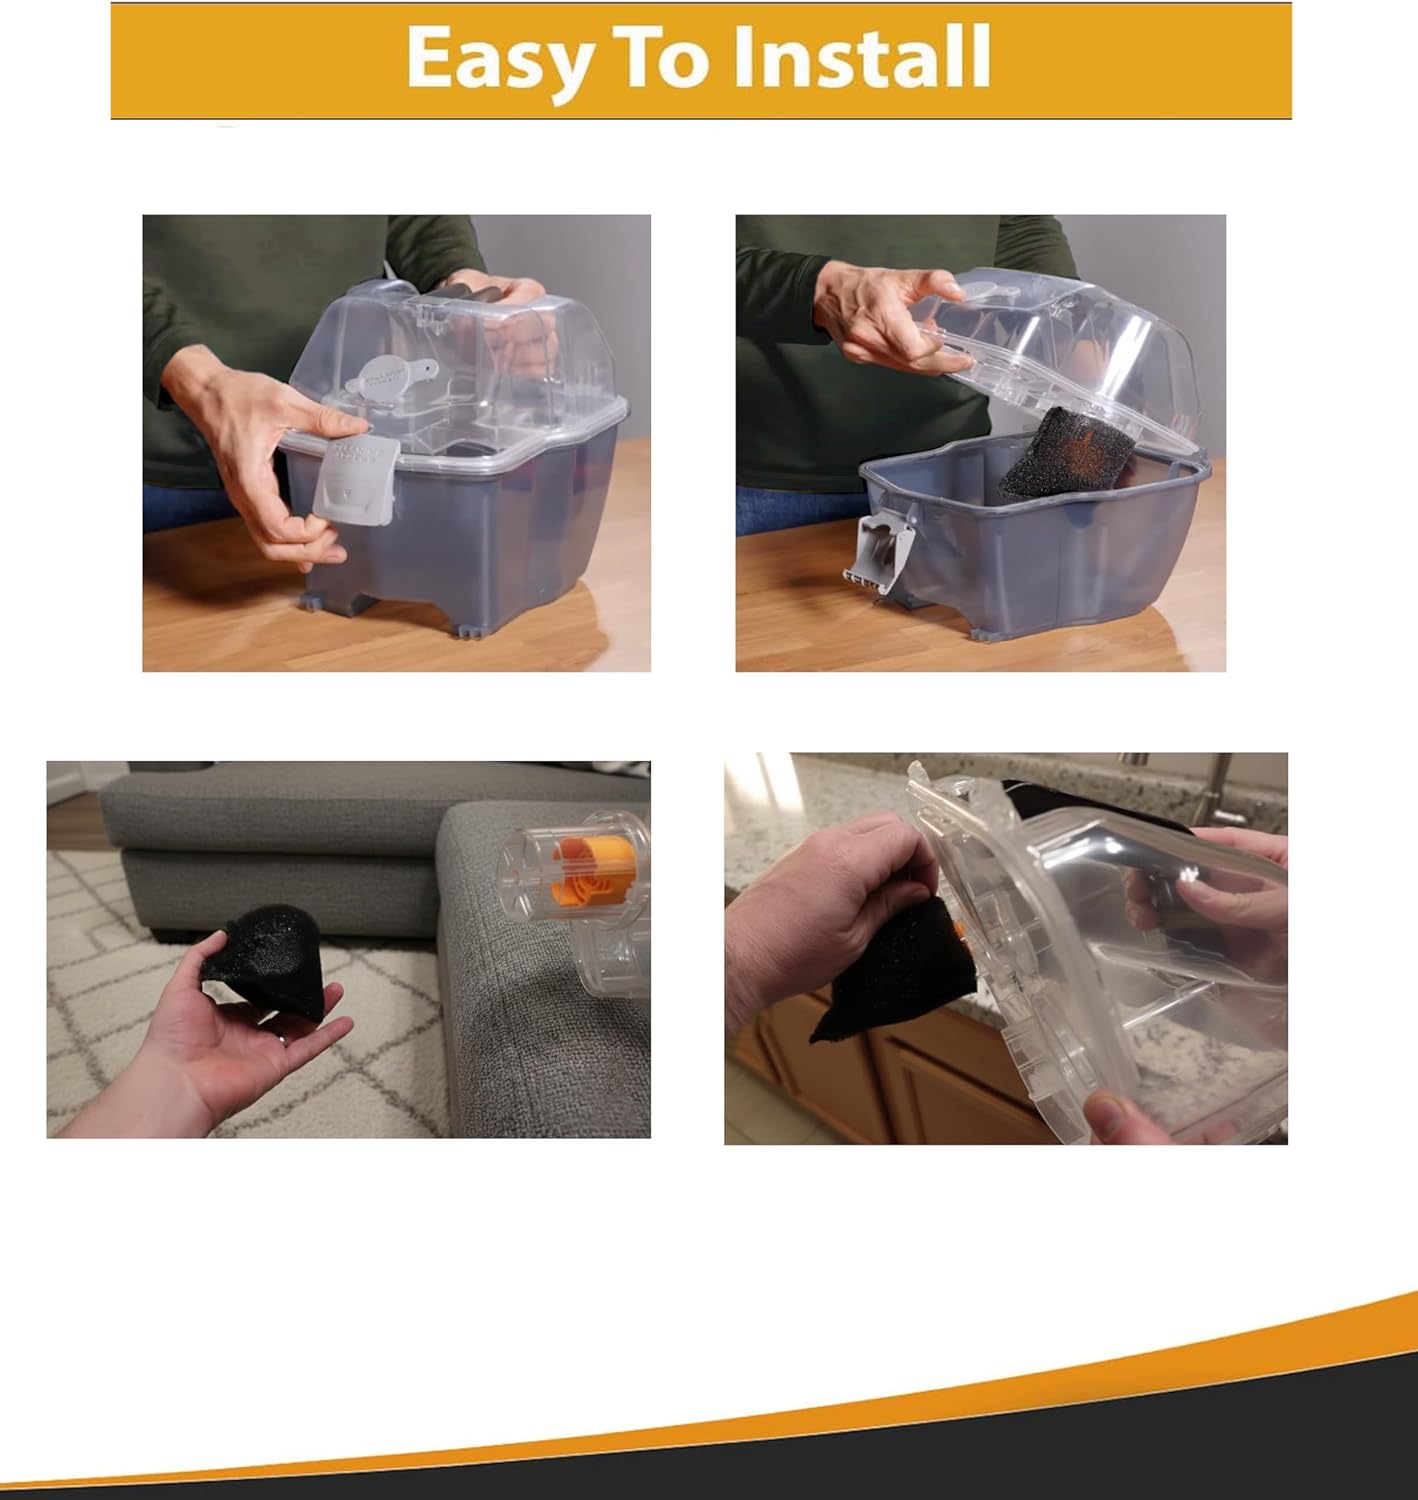
Image 4.1: Visual guide for replacing the dirty water tank filter.
4.2. Installing the Brush Block Assembly
The brush block assembly is designed for "snap-in" installation, allowing for tool-free replacement.
- Ensure your carpet cleaner is unplugged and turned off.
- Access the brush block compartment on the underside of your carpet cleaner. Refer to your carpet cleaner's original manual for specific instructions on opening this compartment.
- Carefully remove the old brush block assembly.
- Align the new brush block assembly with the mounting points in the compartment.
- Press down firmly until the assembly snaps into place. Ensure it is securely seated.
- Pro Tip: Gently turn the hexagonal drive post by hand to ensure the brushes spin freely after installation.
- Close the brush block compartment cover.

Image 4.2: Step-by-step visual guide for replacing the brush block assembly.
5. Operating
Once the replacement brush block and filters are installed, your Hoover carpet cleaner is ready for use. The 5-brush configuration of the SpinScrub brush block is designed to effectively scrub carpet fibers from multiple angles, aiding in deep cleaning.
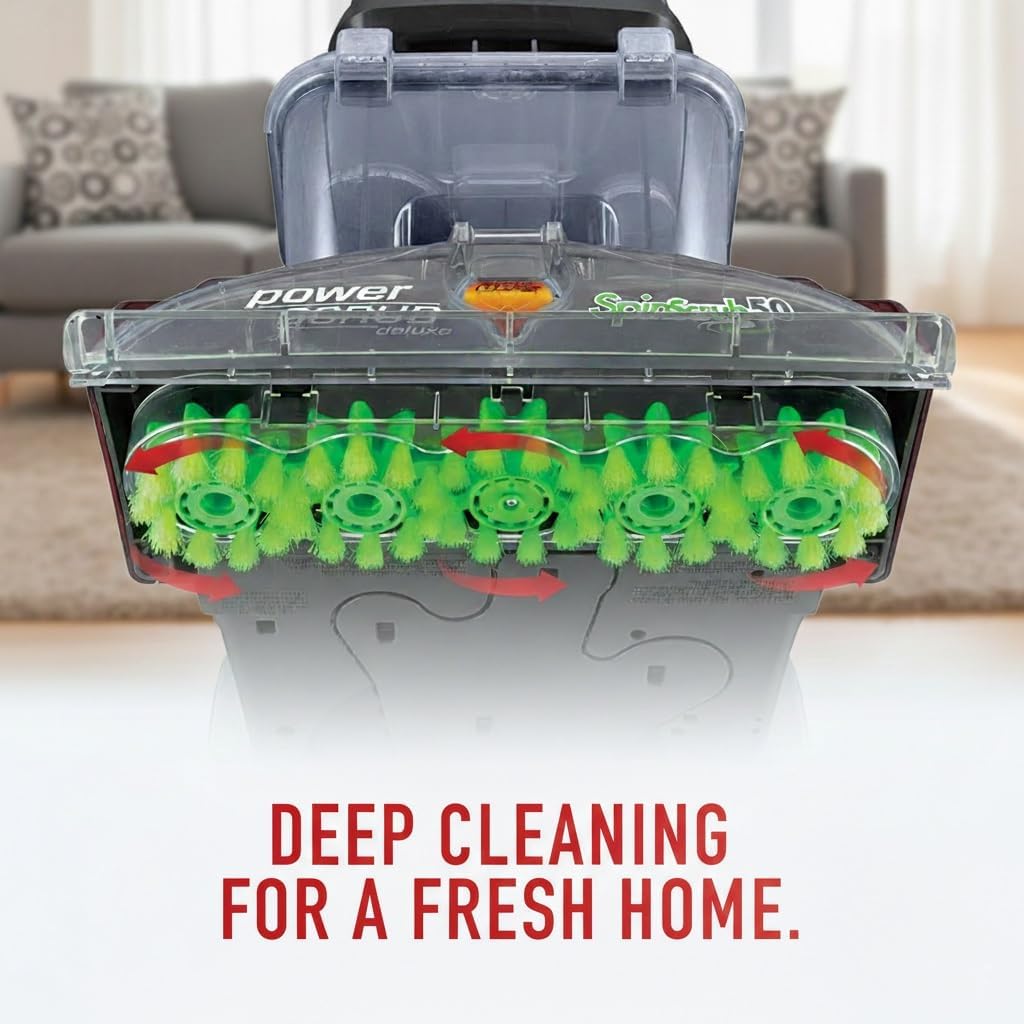
Image 5.1: The brush block assembly actively scrubbing carpet fibers during operation.
The dirty water tank filters work to capture debris and protect the motor from fine particles during the extraction process, ensuring consistent performance.

Image 5.2: A Hoover carpet cleaner in operation, demonstrating its cleaning capability and the role of the filter.
6. Maintenance
Regular maintenance of your brush block and filters is crucial for optimal performance and longevity.
6.1. Cleaning the Brush Block Assembly
The "snap-in" design allows for easy removal of the entire brush block for cleaning. After each use or as needed:
- Remove the brush block assembly as described in Section 4.2.
- Remove any hair, lint, or debris that has accumulated on the brushes or within the assembly.
- Rinse the brush block under running water.
- Allow the brush block to air dry completely before reinstallation.
6.2. Cleaning the Dirty Water Tank Filters
The foam filters are washable and reusable. After each use or as needed:
- Remove the dirty water tank and the foam filter as described in Section 4.1.
- Rinse the foam filter thoroughly under running water until clean.
- Gently squeeze out excess water.
- Allow the filter to air dry completely before reinstallation. Do not use a dryer or heat source.
7. Troubleshooting
If you experience issues after installing the replacement parts, consider the following:
- Brushes not spinning: Ensure the brush block assembly is fully snapped into place and the hexagonal drive post is properly engaged. Check for any obstructions (hair, debris) preventing rotation.
- Reduced suction/filtration: Verify that the dirty water tank filters are correctly seated and not clogged. Ensure the tank lid is securely closed.
- Water leakage: Confirm all components, including the dirty water tank and brush block compartment cover, are properly installed and sealed.
For further assistance, refer to your original Hoover carpet cleaner manual or contact the manufacturer of your carpet cleaner.
8. Specifications
| Feature | Description |
|---|---|
| Brand | TOP VACUUM PARTS |
| Material | Foam, Plastic |
| Compatible Devices | Hoover Power Scrub, Power Scrub Deluxe, and Turbo Scrub models FH50134, FH50135, FH50150NC, FH50150, FH50141 |
| Product Dimensions | 13.3"L x 6.8"W x 4.3"H (Brush Block Assembly) |
| Reusability | Filters are Reusable (Washable) |
| Included Components | 1x SpinScrub Brush Block & 2x Dirty Water Tank Filters |
| Number of Pieces | 3 |
9. Warranty and Support
For information regarding warranty coverage or product support for this TOP VACUUM PARTS replacement kit, please refer to the seller's information on the original purchase platform or contact TOP VACUUM PARTS directly. Keep your purchase receipt for warranty claims.

