1. Important Safety Information
Read all instructions carefully before using the device. Failure to follow these safety guidelines may result in property damage, injury, or death.
- Keep out of reach of children.
- Do not operate the inflator in wet conditions or near flammable liquids or gases.
- Ensure the correct pressure setting for the item being inflated to prevent over-inflation and potential bursting. Refer to the item's manufacturer recommendations.
- Do not leave the inflator unattended while in operation.
- Avoid prolonged continuous operation to prevent overheating. Allow the device to cool down if it becomes hot.
- Use only the provided or recommended charging cables and accessories.
- Do not disassemble or modify the device. Contact customer support for service.
- Store the device in a cool, dry place when not in use.
2. Product Overview
The Generic Portable Digital Tire Inflator ST-221 is a cordless air compressor designed for fast and efficient inflation of various items, including car tires, motorcycle tires, bicycle tires, and sports balls. It features a digital display, preset inflation modes, auto-shutoff, and an integrated LED work light.
Key Features:
- Fast Inflation: 70W high-efficiency motor with a maximum pressure of 150 PSI.
- Low-Heat Design: Unique heat-dissipating structure for continuous use.
- 4 Preset Modes: Optimized settings for Car, Motorcycle, Bicycle, and Ball inflation.
- Intelligent Dual-Screen & Auto-Shutoff: Displays real-time and target pressure, automatically stops at the set PSI.
- Cordless & Rechargeable: USB rechargeable, compact, and portable.
- LED Emergency Light: Built-in light for use in dark environments.
- Durable Metal Core: Wear-resistant internal components for extended lifespan.
Package Contents:
- Portable Digital Tire Inflator ST-221
- Air Hose
- USB Charging Cable
- Car Charger (USB-C to Car Cigarette Lighter Adapter)
- Nozzle Set (3 types: Presta valve adapter, ball needle, general nozzle)
- Storage Pouch

Figure 2.1: Package Contents. The image shows the inflator unit, air hose, USB cable, car charger adapter, various inflation nozzles, and a black storage bag.

Figure 2.2: Included Inflation Nozzles. This image displays four different types of nozzles for various inflation needs.

Figure 2.3: Spiral Connector Design. A detailed view of the air hose's spiral connector, designed for secure attachment.
3. Setup and Charging
Initial Charge:
Before first use, fully charge the inflator. The device is powered by a built-in lithium-ion battery.
- Connect the USB charging cable to the inflator's Type-C charging port.
- Connect the other end of the USB cable to a compatible USB power adapter (not included) or a car charger adapter.
- The digital display will indicate charging status. Charge until the battery indicator shows full.

Figure 3.1: Diverse Charging Methods. The image shows the inflator being charged using a USB wall adapter and a car charger adapter.

Figure 3.2: Power Bank Functionality. The inflator can also serve as a power bank to charge other devices via its USB port.
4. Operating Instructions
Controls and Display:
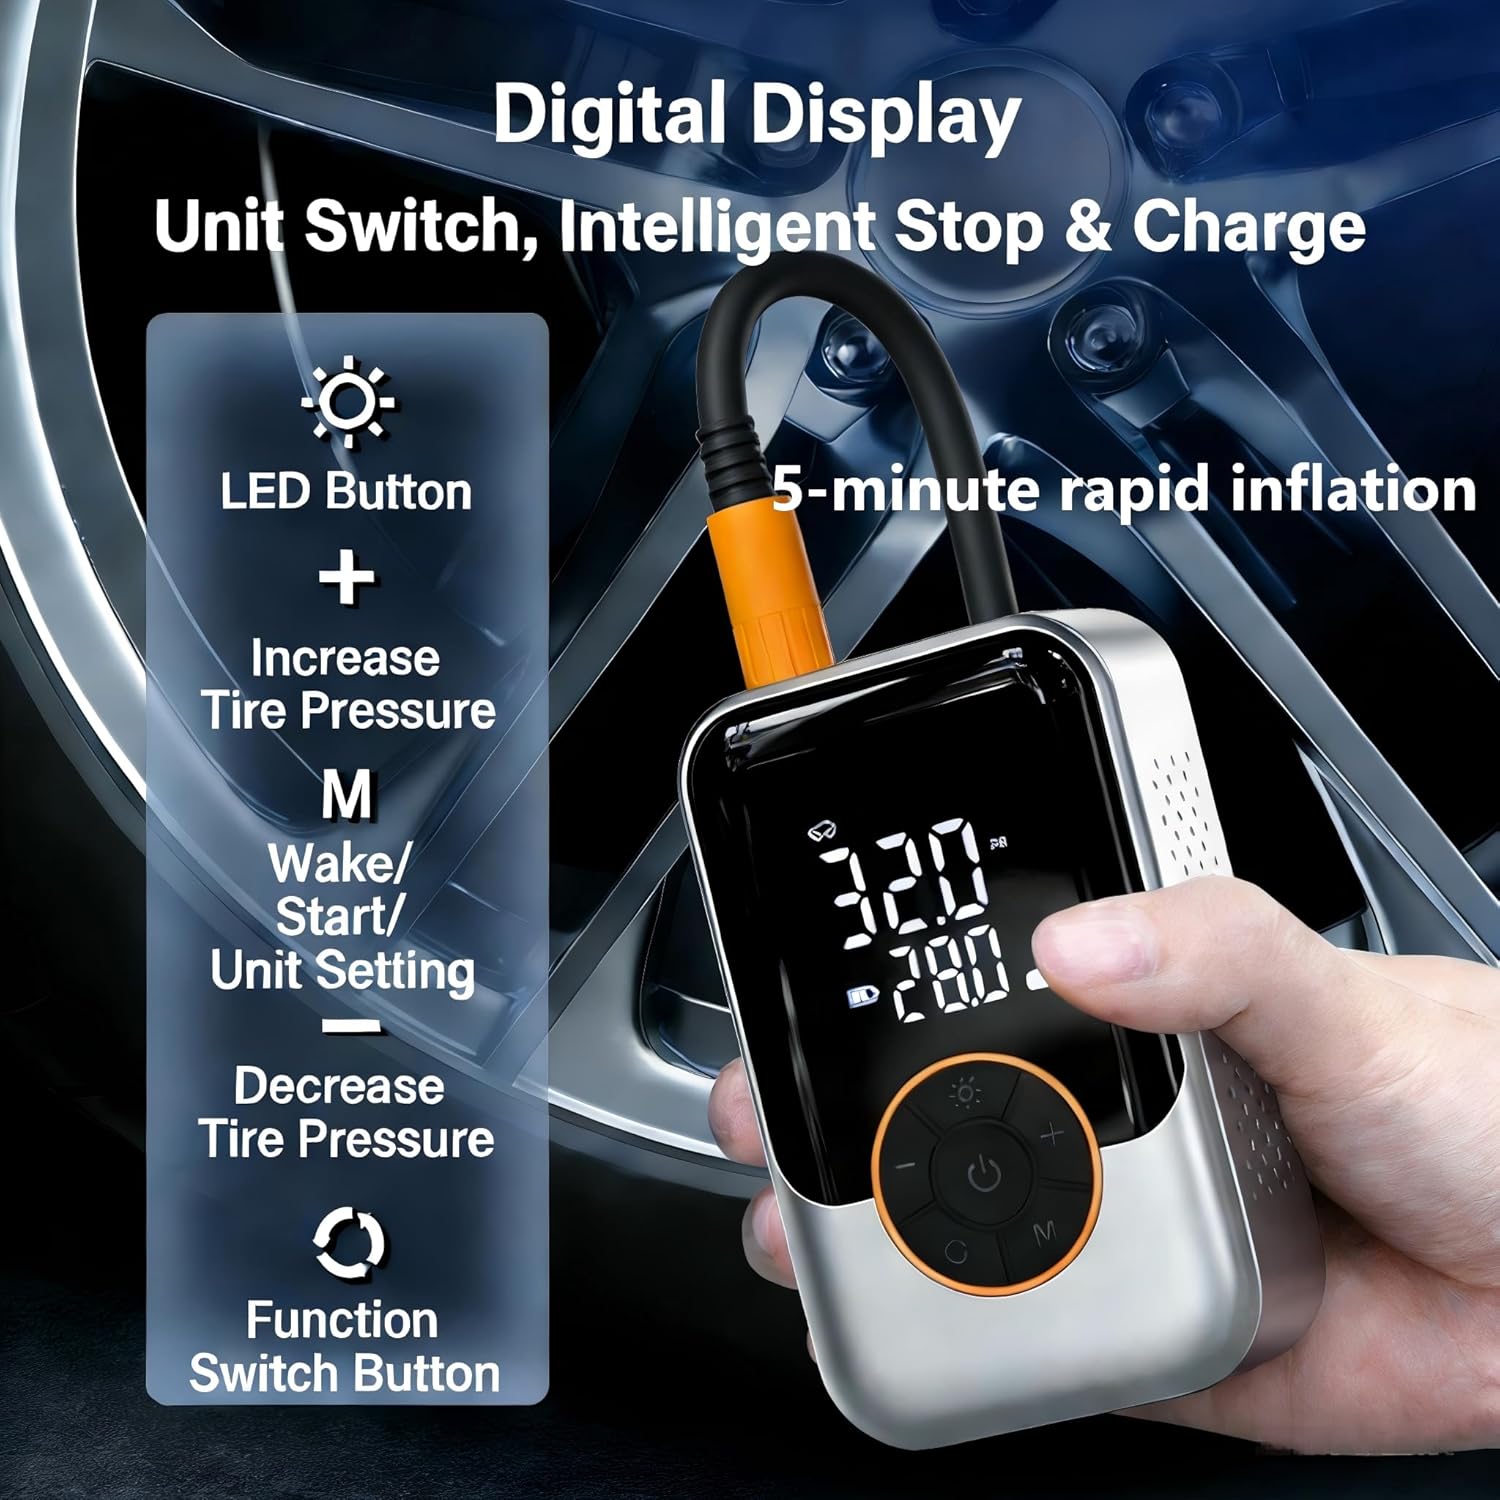
Figure 4.1: Digital Display and Controls. This image highlights the various buttons and their functions on the inflator's digital display.
- Power Button: Press and hold to turn on/off. Short press to start/stop inflation.
- "M" Button (Mode/Wake/Unit Setting): Short press to cycle through preset modes (Car, Motorcycle, Bicycle, Ball). Long press to switch pressure units (PSI, Bar, KPA).
- "+" Button: Increase target pressure.
- "-" Button: Decrease target pressure.
- LED Button: Turn the LED work light on/off.
Inflation Process:
- Connect Hose: Screw the air hose securely onto the inflator's air outlet.
- Attach Nozzle: Select the appropriate nozzle for your item and attach it to the other end of the air hose.
- Power On: Press and hold the Power button to turn on the inflator. The display will show the current pressure.
- Select Mode: Press the "M" button to cycle through the preset modes (Car, Motorcycle, Bicycle, Ball) or manually set the desired pressure using the "+" and "-" buttons. The target pressure will flash.
- Start Inflation: Press the Power button once to start inflation. The inflator will automatically stop when the target pressure is reached.
- Disconnect: Once inflation is complete, disconnect the nozzle from the item and then remove the hose from the inflator.

Figure 4.2: Preset Inflation Modes. The display shows default pressure settings for different vehicle types and sports balls.

Figure 4.3: Connecting to a Tire. This image demonstrates how to connect the air hose to a tire valve for inflation or pressure measurement.
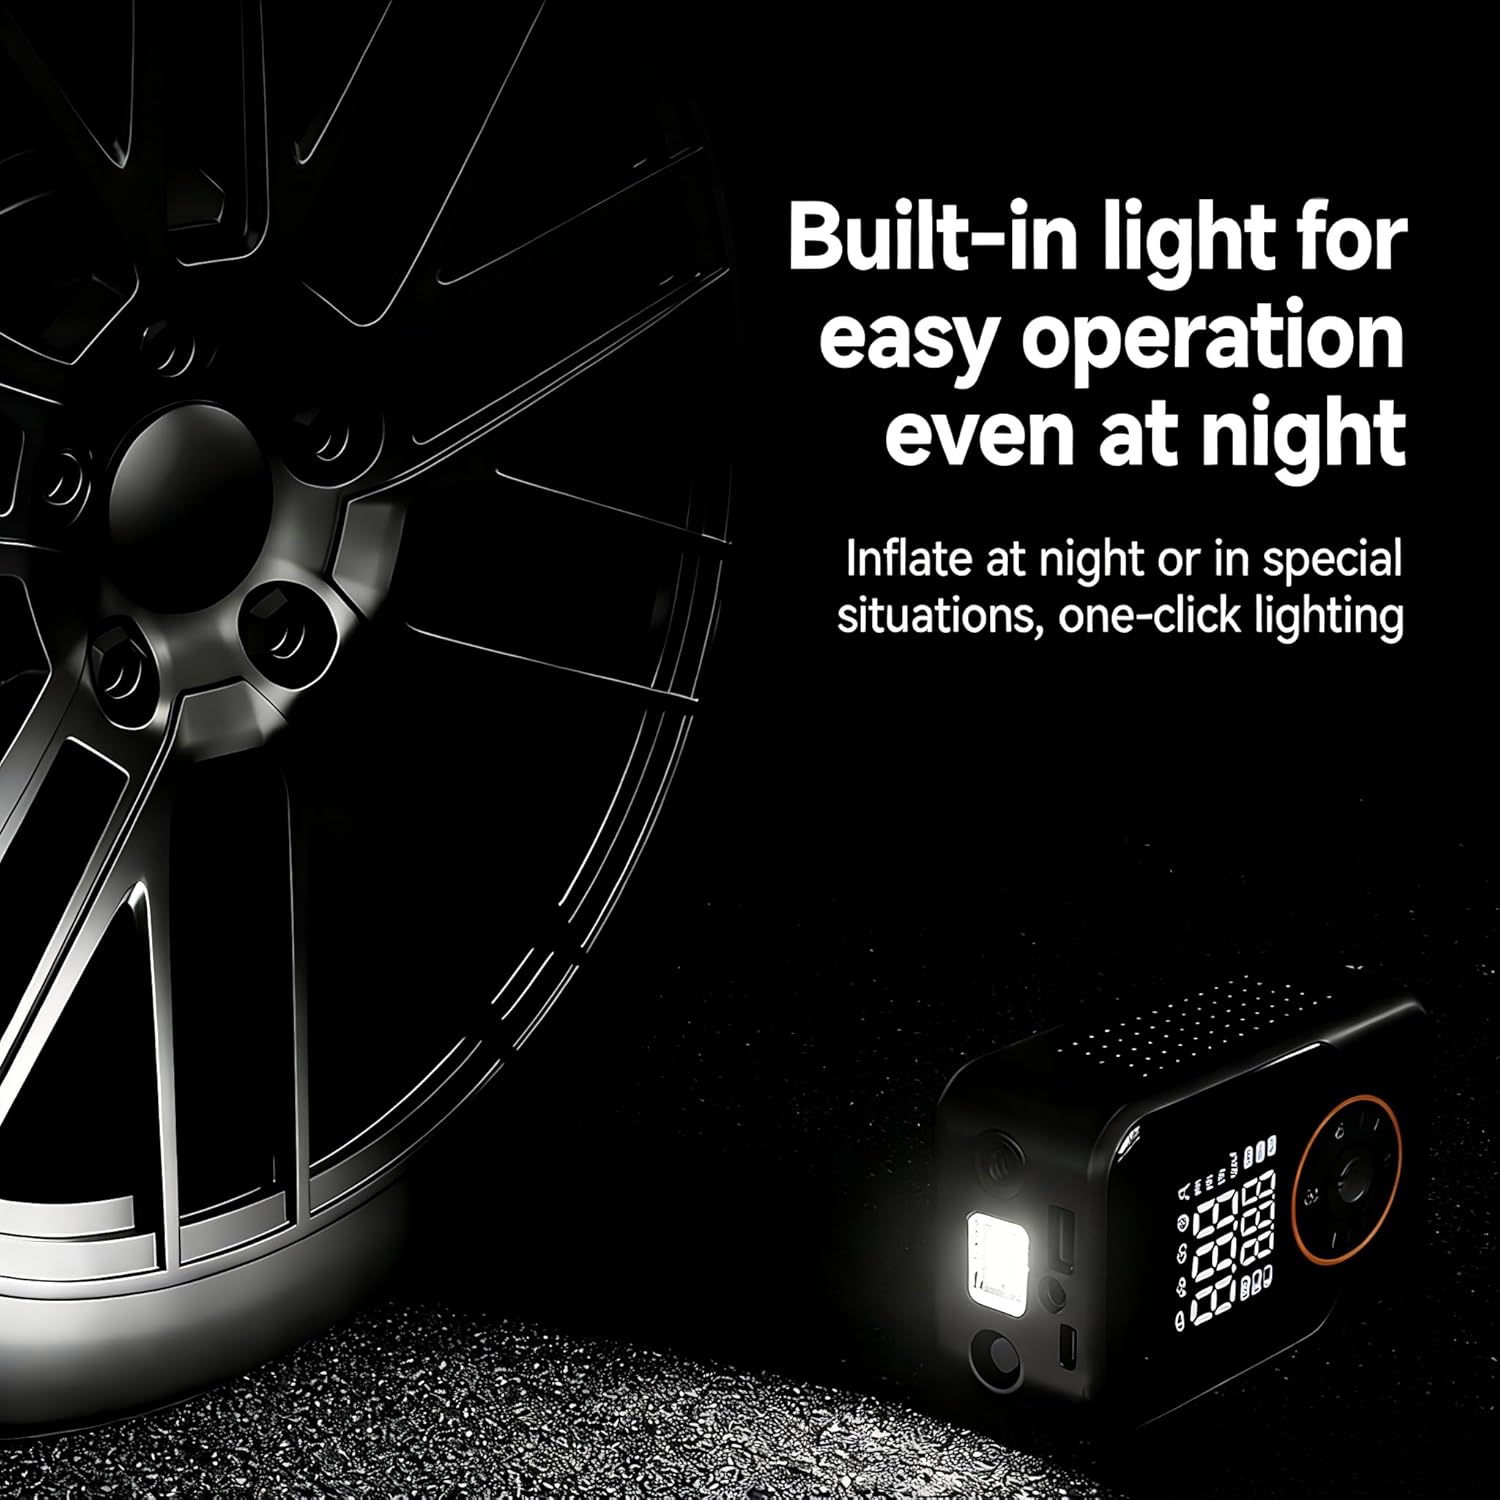
Figure 4.4: LED Work Light in Use. The built-in LED light provides illumination for operation in low-light conditions.
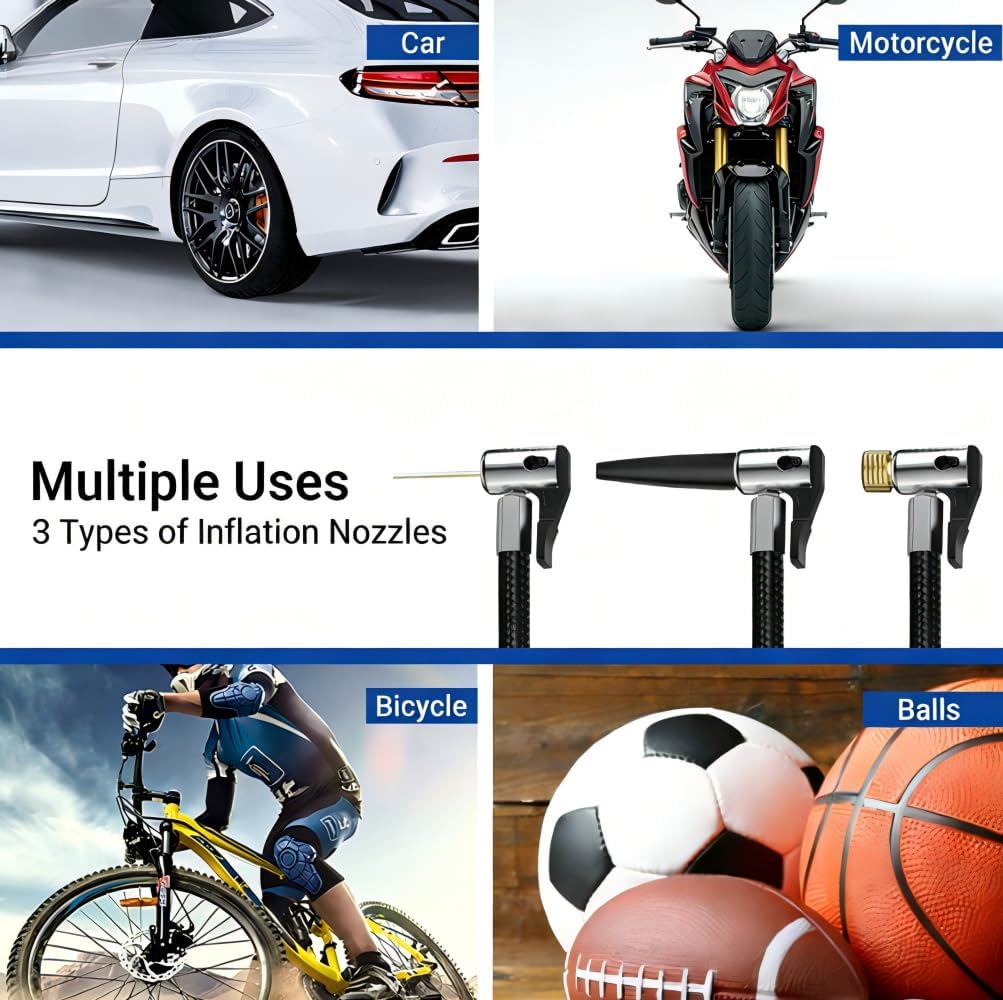
Figure 4.5: Multiple Uses and Nozzles. This image illustrates the versatility of the inflator for different items and shows the included nozzle types.
5. Maintenance
- Cleaning: Wipe the exterior of the inflator with a soft, dry cloth. Do not use harsh chemicals or abrasive cleaners.
- Storage: Store the device and its accessories in the provided storage pouch in a cool, dry place, away from direct sunlight and extreme temperatures.
- Battery Care: To prolong battery life, charge the device at least once every three months if not used regularly.
- Hose Inspection: Periodically check the air hose and nozzles for any signs of wear, cracks, or damage. Replace if necessary.
6. Troubleshooting
| Problem | Possible Cause | Solution |
|---|---|---|
| Inflator does not turn on. | Battery is depleted. | Charge the inflator fully. |
| Inflator does not inflate. | Air hose not securely connected. Target pressure not set. Nozzle blocked. | Ensure hose is tightly screwed. Set a target pressure. Check and clear any blockages in the nozzle or hose. |
| Inflation is slow. | Low battery. Air leak from connection. | Charge the inflator. Tighten connections. |
| Device overheats. | Prolonged continuous use. | Turn off the inflator and allow it to cool down for at least 15-20 minutes before resuming use. |
| Inaccurate pressure reading. | Loose connection. | Ensure the air hose and nozzle are securely attached to the valve stem. |
7. Specifications
| Feature | Detail |
|---|---|
| Model Name | ST-221 |
| Brand | Generic |
| Maximum Operating Pressure | 150 PSI |
| Maximum Power | 70 Watts |
| Voltage | 7.4 Volts (DC) |
| Air Flow Capacity | 19 Liters Per Minute |
| Noise Level | 60 Decibels |
| Power Source | Battery Powered (Lithium Ion) |
| Item Weight | 465 Grams (1.03 pounds) |
| Product Dimensions | 1.8"L x 4.7"W x 2.9"H |
| Hose Length | 150 Millimeters |
| Special Features | Cordless, LED Light, Portable, Pressure Detection, Quick Inflation |

Figure 7.1: Product Dimensions. The image provides a visual representation of the inflator's size with measurements.
8. Warranty and Support
This product comes with a standard manufacturer's warranty. Please refer to the product packaging or retailer's website for specific warranty terms and conditions.
For technical support, troubleshooting assistance, or warranty claims, please contact the seller or manufacturer directly through the platform where the product was purchased.
Manufacturer: HUKETEK