Introduction
Welcome to your new Relaxdays Raised Bed with Greenhouse. This manual provides detailed instructions for the assembly, operation, and maintenance of your garden plant bed. Please read all instructions carefully before use to ensure safe and correct setup and operation.
Safety Instructions
- Keep all small parts and packaging materials away from children to prevent choking hazards.
- Ensure all screws and fasteners are securely tightened during assembly. Periodically check for tightness.
- Do not climb on or lean heavily on the raised bed or greenhouse structure.
- Place the raised bed on a level and stable surface to prevent tipping.
- Exercise caution when handling metal edges during assembly to avoid cuts. Wearing gloves is recommended.
- The greenhouse cover is designed for plant protection; it is not intended for human or animal shelter.
Package Contents
Before beginning assembly, please verify that all components listed below are present and undamaged. If any parts are missing or damaged, contact customer support.
- Raised bed panels and corner pieces
- Greenhouse frame components
- Greenhouse plastic cover
- Mounting hardware (screws, nuts, washers)
- Assembly instructions (this manual)

Image: Individual components of the raised bed frame before assembly.
Assembly Instructions
Follow these steps carefully for proper assembly. It is recommended to have two people for certain steps.
Step 1: Assemble the Raised Bed Frame
- Unpack all metal panels and corner pieces.
- Connect the side panels to the corner pieces using the provided screws and nuts. Ensure all connections are firm.
- Continue connecting panels until the rectangular raised bed frame is complete. Do not overtighten screws initially, allow for minor adjustments.
- Once all panels are connected, tighten all screws securely.
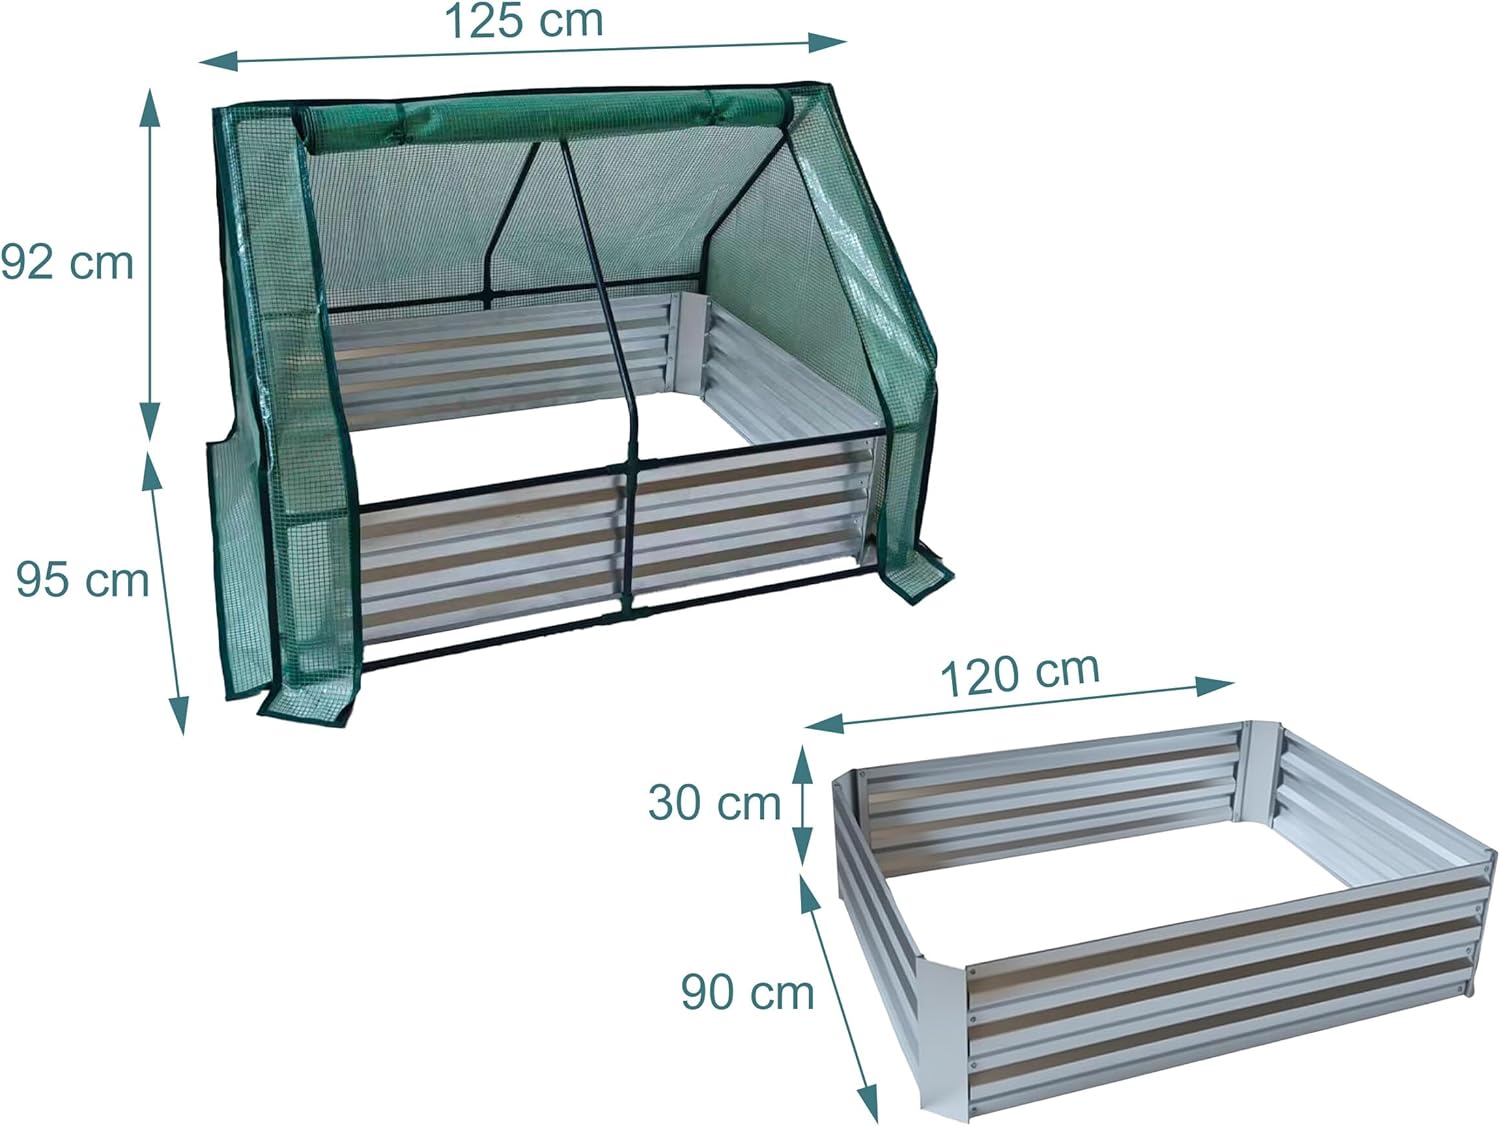
Image: Detail of how the metal panels connect at the corner of the raised bed.
Step 2: Attach the Greenhouse Structure
- Assemble the metal frame for the greenhouse cover according to the diagram in your package.
- Position the assembled greenhouse frame over the raised bed.
- Secure the greenhouse frame to the raised bed using the designated attachment points and hardware.
Step 3: Install the Greenhouse Cover
- Carefully drape the plastic greenhouse cover over the assembled greenhouse frame.
- Ensure the cover fits snugly and is properly aligned.
- Secure the cover to the frame using any integrated ties, clips, or fasteners to prevent it from being dislodged by wind.

Image: The fully assembled raised bed with greenhouse, ready for planting.
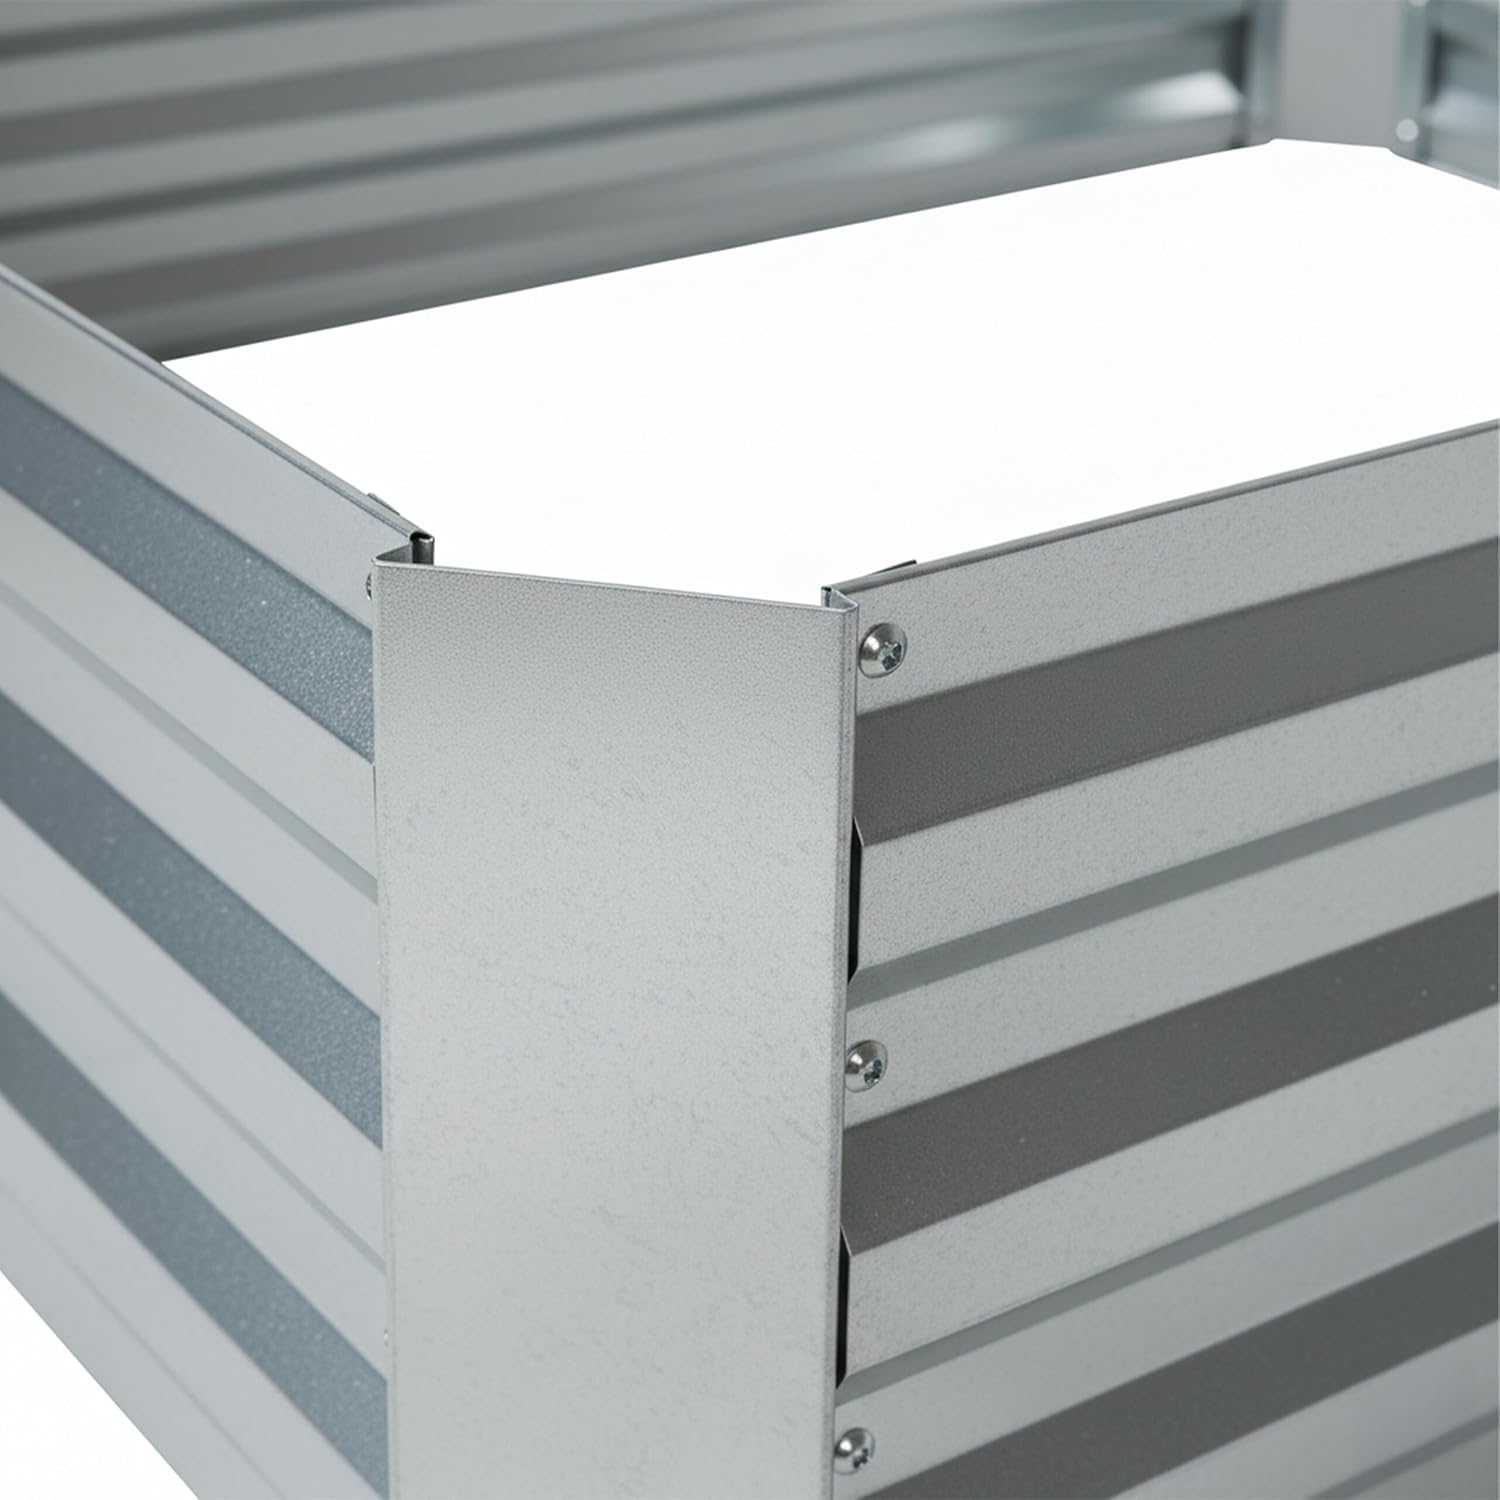
Image: A close-up view of the durable mesh material used for the greenhouse cover.
Operating Instructions
Planting
Fill the raised bed with appropriate soil mix for your chosen plants. The design without a base facilitates water drainage and allows direct contact with the ground, which can be beneficial for certain root systems. Plant your desired flowers, herbs, or vegetables, ensuring adequate spacing.
Ventilation and Temperature Control
The greenhouse cover creates optimal growing conditions by retaining heat and humidity. On warm days, partially or fully open the greenhouse cover to provide ventilation and prevent overheating. Close the cover during cooler temperatures or at night to protect plants from cold and pests.
Watering
Water plants as needed, considering the increased humidity within the greenhouse. The cover can be easily lifted or rolled up to facilitate watering.

Image: A user watering plants inside the raised bed, demonstrating easy access with the greenhouse cover.
Maintenance
- Cleaning: Periodically clean the greenhouse cover with mild soap and water to ensure maximum light penetration. Rinse thoroughly.
- Inspection: Regularly inspect the metal frame for any signs of rust or damage. Check all screws for tightness and re-tighten if necessary.
- Winter Storage: In areas with harsh winters, consider disassembling the greenhouse cover and storing it indoors to prolong its lifespan. The raised bed frame can typically remain outdoors.
- Pest Control: While the greenhouse offers some protection, regularly check plants for pests and address any infestations promptly.
Troubleshooting
| Problem | Possible Cause | Solution |
|---|---|---|
| Greenhouse cover not fitting properly | Incorrect assembly of the frame; cover not aligned. | Review assembly instructions for the greenhouse frame. Adjust cover alignment. |
| Water pooling in the raised bed | Soil compaction; poor drainage. | Ensure the soil mix allows for good drainage. The raised bed is designed without a base to prevent waterlogging. |
| Plants wilting or showing signs of stress | Lack of ventilation; too much heat; insufficient water. | Open the greenhouse cover for ventilation on warm days. Check soil moisture and water as needed. |
| Raised bed feels unstable | Screws are loose; uneven ground. | Tighten all assembly screws. Ensure the raised bed is placed on a firm, level surface. |
Specifications
| Feature | Detail |
|---|---|
| Model Number | 10051787_55 |
| Total Dimensions (H x W x D) | Approx. 92 x 125 x 95 cm (36.22"H x 49.21"W x 37.4"D) |
| Raised Bed Dimensions (H x W x D) | Approx. 30 x 120 x 90 cm |
| Material | 70% Galvanized Iron, 30% Plastic |
| Color | Silver |
| Mounting Type | Standing |
| Item Weight | 8.24 Kilograms |
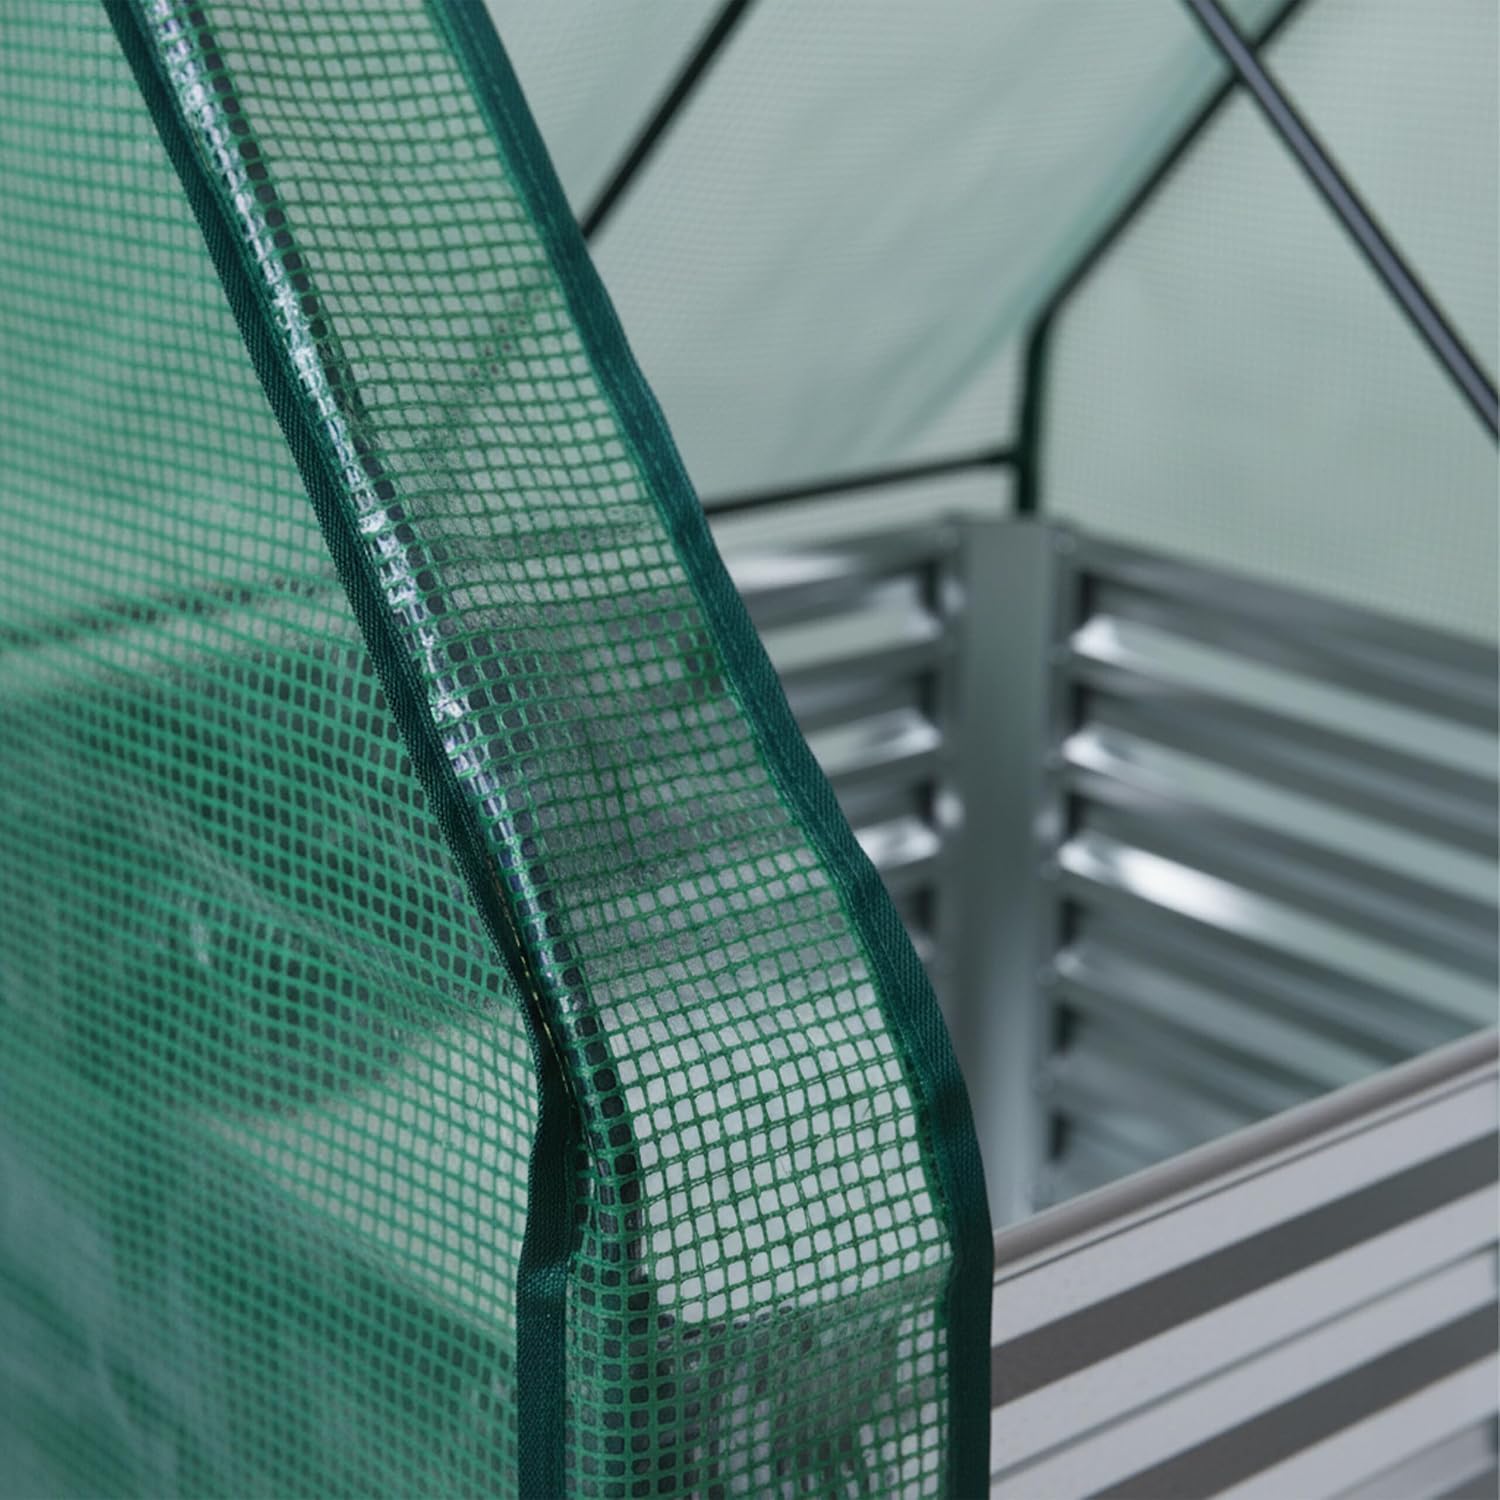
Image: Dimensional diagram illustrating the height, width, and depth of the raised bed and greenhouse.
Warranty and Support
This product is manufactured to high-quality standards. For any questions regarding assembly, operation, or if you encounter any issues, please refer to the retailer's return policy or contact the manufacturer's customer support channels. Please retain your proof of purchase for warranty claims, if applicable.


