
1. Product Overview
The Rolife Tipsy Cat Bar DIY Miniature Kit is a detailed miniature dollhouse designed for assembly. This kit allows you to construct a charming bar-themed scene, perfect for display as a bookshelf insert or tabletop decoration. It features intricate elements and high-quality components for an engaging building experience.
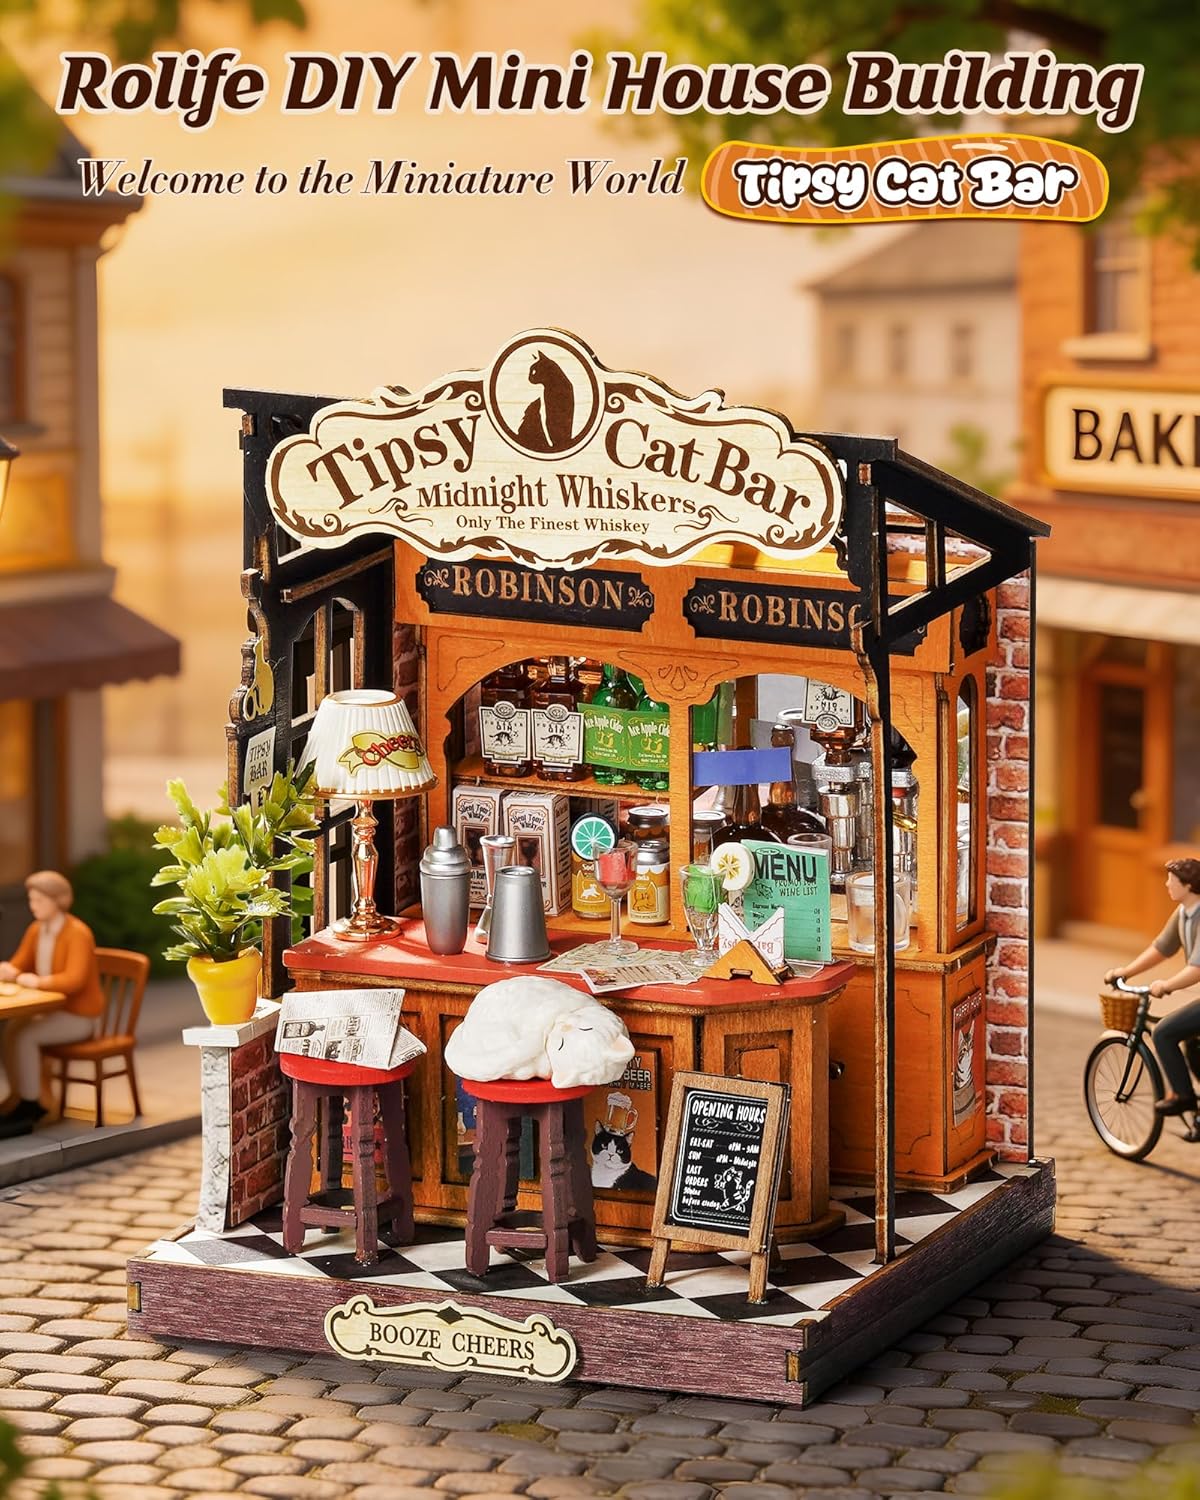
Image 1.1: The completed Tipsy Cat Bar miniature kit.
Key Features:
- Tipsy Cat Bar Theme: Features a layered bar-style miniature layout with detailed décor and themed accessories.
- High-Quality DIY Mini Kit: Precision-crafted mini building pieces provide smooth assembly and durable structure.
- Miniverse Lifestyle Decoration: Designed as a compact mini bookshelf insert or tabletop décor item.
- Compact Yet Detailed Build: Small footprint packed with intricate miniature elements, ideal for collectors.
2. Safety Information
Please read and adhere to the following safety guidelines to ensure a safe and enjoyable building experience:
- Keep all kit components away from naked flames or direct heat sources.
- This kit contains small parts and is not suitable for children under 14 years of age. Adult supervision is recommended for younger builders.
- Exercise caution when handling sharp tools such as scissors or craft knives, if used for assembly.
- Avoid ingesting any parts or materials from the kit.
3. Package Contents
Before beginning assembly, verify that all components are present in your kit. The package typically includes:
- Pre-cut wooden boards (for structural elements)
- MDF pieces
- Various plastic parts (for decorative items)
- Paper sheets (for printed details, stickers, and instructions)
- Assembly tools: Tweezers, sandpaper, and double-sided adhesive tape.
Image 3.1: Typical contents of the Rolife DIY Miniature Kit.
4. Setup and Assembly
Assembly of the Tipsy Cat Bar kit requires patience and attention to detail. Follow the numbered instructions provided in your kit for the best results.
Recommended Tools (Not always included):
- Scissors: For cutting paper elements or excess material.
- Craft Knife: For precise cuts (use with caution).
- Quick-drying Glue: While double-sided tape is provided, a strong, quick-drying craft glue (e.g., superglue or wood glue) can enhance the sturdiness of the model, especially for smaller or load-bearing parts.
Assembly Steps:
- Unpack and Organize: Carefully remove all components from the packaging. Identify the different sheets of parts and organize them according to the instruction manual.
- Review Instructions: Read through the entire instruction manual before starting to familiarize yourself with the steps and overall process.
- Prepare Parts: Gently detach parts from their wooden or paper sheets. Use sandpaper for any rough edges if necessary.
- Assemble Structure: Begin by assembling the main structural elements of the bar, following the numbered steps and diagrams in the manual.
- Add Details: Attach smaller decorative elements, furniture, and accessories. Pay close attention to the placement of stickers and paper cutouts.
- Secure Connections: Ensure all connections are firm. If using additional glue, allow adequate drying time before proceeding to the next step.

Image 4.1: Example of assembly in progress.
5. Operating Instructions
The Rolife Tipsy Cat Bar miniature kit is a static display model and does not feature any operational components such as integrated lighting or moving parts. Once assembled, it is ready for display.
6. Maintenance
To preserve the appearance and longevity of your miniature kit, follow these simple maintenance tips:
- Dusting: Regularly dust the model with a soft brush or a can of compressed air to remove accumulated dust from intricate areas.
- Cleaning: For stubborn dirt, gently wipe surfaces with a slightly damp cloth. Avoid excessive moisture, which can damage wooden or paper components.
- Storage: Store the model in a dry environment, away from direct sunlight or extreme temperature fluctuations, to prevent warping or fading of materials.
- Handling: Handle the assembled model with care, especially when moving it, to avoid dislodging small parts.
7. Troubleshooting
If you encounter any issues during assembly or with the finished product, consider the following common solutions:
- Parts Not Fitting: Some wooden pieces may require light sanding with the included sandpaper to fit perfectly. Do not force parts together, as this can cause breakage.
- Stickers Not Adhering: If stickers do not stick well, apply a small amount of craft glue to the back for better adhesion.
- Fragile Pieces Breaking: Small or thin pieces can be delicate. If a piece breaks, it can often be repaired using a strong, quick-drying glue. Allow sufficient drying time.
- Missing Parts: Double-check all packaging materials. If a part is genuinely missing, contact Rolife customer support with your model number and a description of the missing part.
8. Specifications
| Specification | Detail |
|---|---|
| Brand Name | Rolife |
| Model Number | DS-0-54 |
| Age Range Description | Adult (Manufacturer Minimum Age: 168 months / 14 years) |
| Assembly Required | Yes |
| Included Components | Wooden board, MDF, plastic parts and paper. |
| Item Dimensions (L x W x H) | 3.8" x 3.8" x 5.3" (9.65 cm x 9.65 cm x 13.46 cm) |
| Item Weight | 0.7 Pounds (0.32 kg) |
| Material Type | Wood |
9. Warranty and Support
For specific warranty information or further assistance with your Rolife DIY Miniature Kit, please refer to the documentation included in your product packaging or contact Rolife customer support directly. You can often find contact details on the official Rolife website or through the retailer where the product was purchased.


