1. Introduction
The WAVLINK AX3000 WiFi 6 Mesh System provides a high-performance, whole-home wireless network solution. This system utilizes WiFi 6 (802.11ax) technology to deliver fast speeds, extensive coverage, and support for numerous devices. This manual will guide you through the setup, operation, and features of your mesh system to ensure optimal performance.
2. Package Contents
Verify that all items are present in your package:
- 3 x WAVLINK AX3000 Mesh Routers
- 3 x Power Adapters
- 1 x Ethernet Cable (3ft)
- 1 x User Manual (this document)
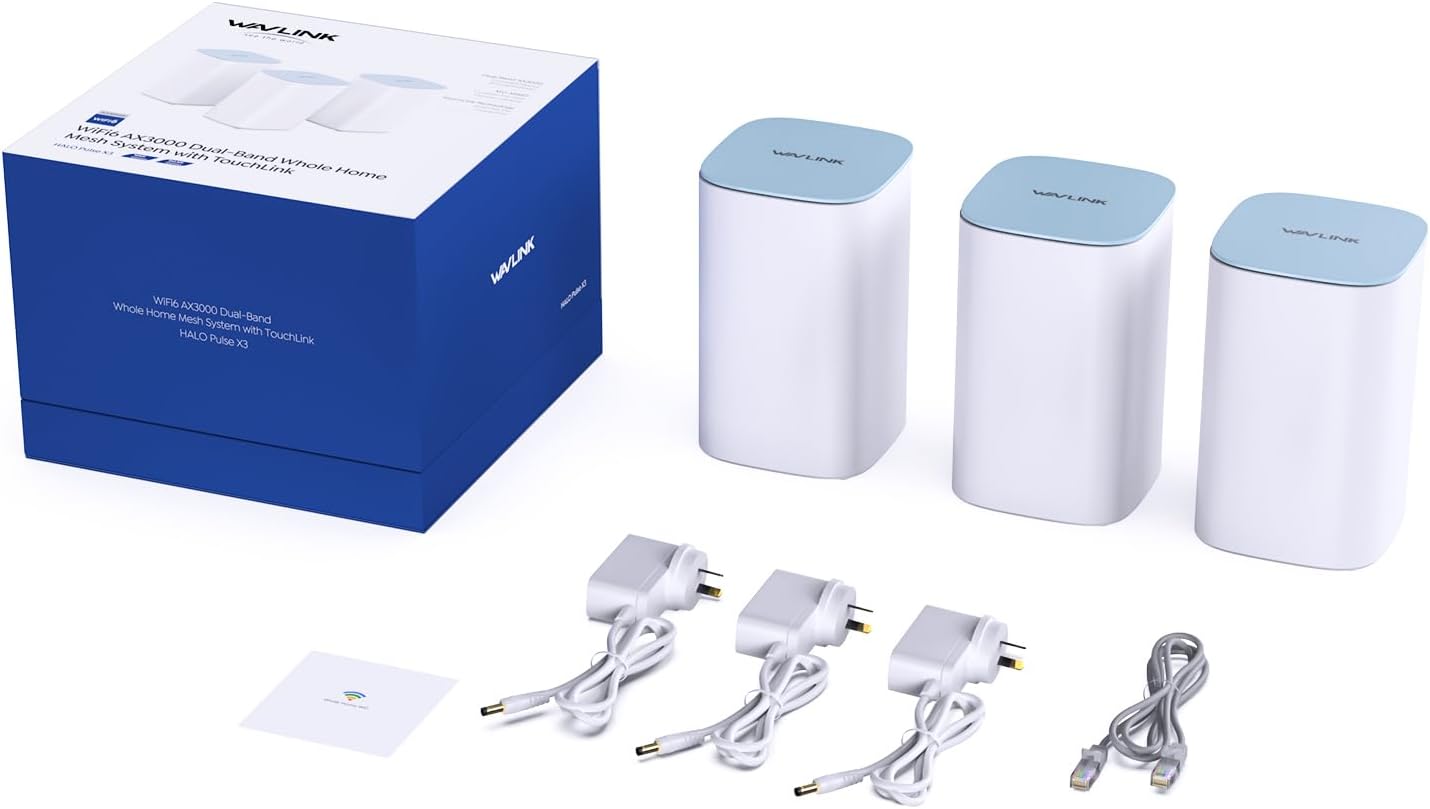
Image: Package contents of the WAVLINK AX3000 Mesh System, showing three mesh units, three power adapters, an Ethernet cable, and the user manual.
3. Product Overview
3.1. Mesh Unit Diagram
Video: An overview of the WAVLINK AX3000 Mesh WiFi System, showcasing its design and key features like ports and indicators.
3.2. Ports and Buttons
Each WAVLINK AX3000 mesh unit features the following ports and buttons:
- DC IN: Power input port.
- ON/OFF Switch: Power button for the unit.
- LAN1/LAN2: Gigabit Ethernet LAN ports for connecting wired devices.
- Internet/LAN Backhaul: A versatile Gigabit Ethernet port that can function as a WAN port for the main router or a LAN port for backhaul connections.
- Pair Button: Used for pairing mesh units.
- Reset Button (RESET 6S): Press and hold for 6 seconds to restore factory default settings.
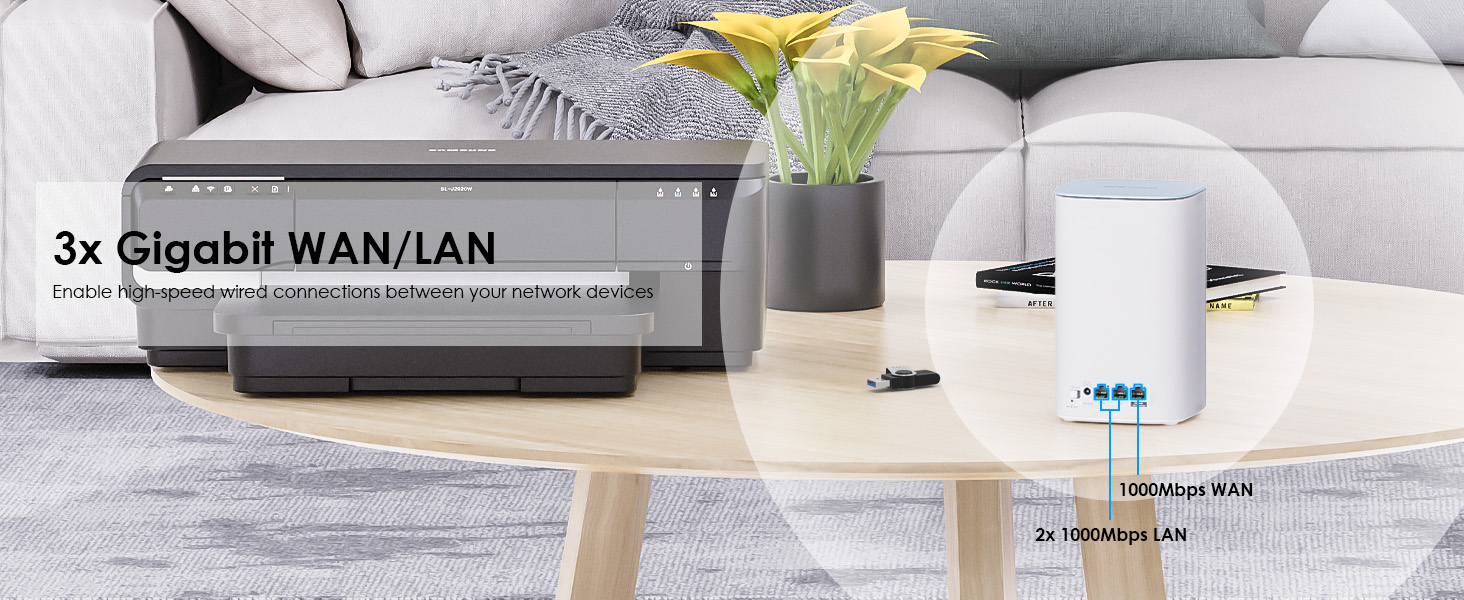
Image: Rear view of a WAVLINK mesh unit, highlighting the three Gigabit WAN/LAN ports for wired connections.
3.3. LED Indicators
The LED indicator on top of each unit provides status information:
- Solid Blue: Connected to the internet and operating normally.
- Solid Red: No internet connection or connection issue.
- Blinking Red: Signal strength is below -70dBm, indicating a weak connection between mesh nodes.
- Blinking Blue: Pairing mode or firmware update in progress.
4. Setup Guide
This section outlines the steps to set up your WAVLINK AX3000 Mesh System.
4.1. Initial Setup (Router Mode)
- Connect the Main Unit: Connect one mesh unit to your modem or ONT using the provided Ethernet cable. Plug the power adapter into the DC IN port and turn on the unit.
- Connect to WiFi: On your smartphone or computer, connect to the default WiFi network broadcast by the mesh unit (SSID and password are usually found on a label on the unit).
- Access Setup: Open a web browser and enter the default IP address (e.g., 192.168.20.1) or the domain name (e.g., wavlogin.link) to access the setup wizard.
- Follow On-Screen Instructions: Complete the initial setup, including setting up your new WiFi name (SSID) and password.
4.2. Adding Mesh Nodes
After setting up the main unit, you can add additional mesh nodes to expand coverage.
- Power On: Place the additional mesh unit(s) in desired locations and power them on.
- Automatic Pairing: The additional units will automatically detect and pair with the main mesh unit. This process may take a few minutes. The LED indicator will turn solid blue once successfully paired.
- Manual Pairing (if needed): If automatic pairing fails, press the 'Pair' button on both the main unit and the new mesh unit within 30 seconds.
4.3. AP Mode Setup (for existing routers)
If you already have a router and wish to use the mesh system as Access Points (AP mode), follow these steps:
- Initial Setup as Router: First, set up one mesh unit in router mode as described in Section 4.1.
- Switch to AP Mode: Access the web management interface or the WavRouter App. Navigate to the operating mode settings and switch the mode from 'Router' to 'AP Mode' (LAN Bridge).
- Connect to Existing Router: Connect the main mesh unit (now in AP mode) to a LAN port on your existing router using an Ethernet cable.
- Add Additional Nodes: Power on additional mesh units. They will automatically join the mesh network in AP mode.

Image: Network installation diagrams illustrating how to set up the mesh system as a primary router or as access points with an existing router.
4.4. App Control
Manage your mesh network conveniently using the WavRouter App. Download the app from your device's app store. The app allows for easy setup, network monitoring, and management of various settings.

Image: Simplified setup and network management via the WavRouter App on a smartphone and the web-based Graphical User Interface (GUI) on a laptop.
4.5. Node Placement Tips
Proper placement of your mesh units is crucial for optimal coverage and performance:
- Distance: Keep main router to node distance within 8-12 meters (26-40 feet) in open areas, less if obstacles are present.
- Signal Check: Connect your phone to the main WiFi first, then test proposed spot for satellite nodes. Aim for 2-3+ bars of signal strength.
- Wall Impact: Concrete walls weaken signals. Place nodes near doorways when crossing rooms.
- Avoid These Spots:
- Metal objects (e.g., utility boxes, fridges, large TVs, metal dividers) cause significant interference.
- Microwaves, high-wattage adapters, and cheap Bluetooth devices can interfere with WiFi signals.
- Red Light Alert: A blinking red LED indicates signal below -70dBm, which can cause frequent connection drops. Adjust placement if this occurs.

Image: Mesh WiFi system node placement tips, showing recommended distances and environmental factors to consider for optimal signal.
5. Operating Modes
The WAVLINK AX3000 Mesh System supports two primary operating modes:
5.1. Mesh Router Mode
In Mesh Router Mode, one unit acts as the main router, connecting directly to your modem/ONT and providing internet access to all connected devices. The other units function as satellite nodes, extending the WiFi coverage throughout your home, creating a single, unified network.
5.2. Access Point (AP) Mode
In Access Point Mode, the mesh system extends an existing wired network wirelessly. This is ideal if you already have a router and want to improve WiFi coverage without replacing your current network setup. The mesh units will broadcast WiFi under the same network name, providing seamless roaming.
6. Key Features and Technologies
6.1. WiFi 6 (802.11ax) Technology
The AX3000 Mesh System leverages WiFi 6 technology for enhanced performance:
- Dual-Band AX3000 Speeds: Offers speeds up to 3.0 Gbps (573 Mbps on 2.4GHz and 2402 Mbps on 5GHz) for smooth 8K streaming and VR gaming.
- 160MHz Bandwidth: Doubles the bandwidth compared to WiFi 5, allowing for faster data transfer and reduced latency.
- MU-MIMO & OFDMA: Multi-User, Multiple-Input, Multiple-Output (MU-MIMO) and Orthogonal Frequency-Division Multiple Access (OFDMA) technologies improve network efficiency and capacity, allowing more devices to connect simultaneously without slowdowns.
- BSS Coloring: Reduces interference from neighboring WiFi networks, improving network performance in dense environments.
- Beamforming: Focuses WiFi signals directly towards connected devices, enhancing signal strength and range.
- Target Wake Time (TWT): Optimizes device power consumption by scheduling when devices wake up to send or receive data, extending battery life for mobile devices.

Image: Illustration of MU-MIMO and OFDMA, showing how these technologies enable more efficient data transmission to multiple devices simultaneously, preventing network congestion.

Image: Diagram illustrating Beamforming, where the mesh unit directs WiFi signals to specific devices, enhancing connection quality and range.
6.2. Extensive Coverage & Device Capacity
A 3-pack system provides coverage up to 7,300 sq. ft. and can connect over 256 devices simultaneously, eliminating dead zones and buffering.

Image: A multi-story house diagram illustrating the extensive WiFi coverage provided by a 3-pack mesh system, reaching up to 7,300 sq. ft.

Image: A WAVLINK mesh unit connected to numerous devices, illustrating its capacity to support up to 256 simultaneous connections.
6.3. Seamless Whole-Home Roaming
The mesh system creates a single, unified WiFi network. Devices automatically switch between the strongest mesh nodes as you move around your home, ensuring uninterrupted connectivity without manual intervention or drops.

Image: A comparison illustrating seamless roaming with a mesh WiFi system (one network name) versus traditional routers (multiple network names), highlighting uninterrupted connectivity.
6.4. Flexible Backhaul Options
The system supports both wireless and wired backhaul for connecting mesh nodes:
- Wireless Backhaul: Nodes communicate wirelessly, offering a cable-free setup.
- Wired Backhaul: Connect nodes via Ethernet cables for enhanced speed, reduced latency, and maximum performance, especially beneficial for 4K streaming and NAS access.

Image: Three mesh units connected by Ethernet cables, demonstrating a wired backhaul setup for robust and high-speed network synchronization.

Image: Three mesh units operating with wireless backhaul, providing a flexible, cable-free solution for linking nodes.
6.5. Network Security & Control
- WPA3/WPA2-Mix Encryption: Provides enterprise-grade security to protect your network and connected devices from unauthorized access.
- Parental Control: Allows you to manage and monitor internet activities, ensuring a safe online environment for children.
- VPN Support: Built-in VPN functionality offers enhanced online privacy and secure access to geo-restricted content.
- Guest Mode: Create a separate WiFi network for guests, keeping your main network secure.
- QoS Management: Quality of Service (QoS) allows you to prioritize network traffic for specific applications or devices, ensuring smooth performance for critical tasks like gaming or video conferencing.

Image: A mesh unit encased in a shield, symbolizing the enterprise-class security features, including WPA3/WPA2-Mix encryption, that protect your network.
6.6. Patented Touchlink Connection
Effortlessly set up a password-free guest WiFi network with a single touch, ideal for social gatherings.

Image: A hand interacting with the mesh unit to activate the patented Touchlink feature, enabling quick and hassle-free guest WiFi setup.
7. Specifications
| Feature | Description |
|---|---|
| Brand | WAVLINK |
| Model Number | WN551X3-C |
| Wireless Standard | 802.11ax (WiFi 6) |
| Frequency Band Class | Dual-Band (2.4GHz & 5GHz) |
| Data Transfer Rate | Up to 3.0 Gbps (573Mbps on 2.4GHz, 2402Mbps on 5GHz) |
| LAN Port Bandwidth | 10/100/1000 Mbps (Gigabit Ethernet) |
| Number of Ports | 3 (1x WAN/LAN, 2x LAN) |
| Antenna Type | Internal (5 high-gain antennas) |
| Connectivity Range | Up to 7300 Square Feet (3-pack) |
| Security Protocol | WPA2-PSK, WPA3 |
| Control Method | App, Push Button, Web GUI |
| Operating System | RouterOS |
| Compatible Devices | Personal Computer, Printer, Smart Television, Smartphone, Tablet |
| Item Dimensions (L x W x H) | 4.7"L x 4.7"W x 7.8"H |
8. Troubleshooting
This section addresses common issues and their solutions.
8.1. Connecting to IoT Devices
Some older IoT devices (e.g., smart AC, security cameras, printers, garage door controllers) may have connectivity issues:
- Enable Both Bands: Ensure both 2.4GHz and 5GHz bands are enabled. Disable band steering (combined SSID) if your device struggles to connect.
- 2.4GHz Only: Older devices may only support 2.4GHz. Connect them specifically to the 2.4GHz network (5GHz may not work).
- Security Mode: Some older devices only support WPA2. Set the security mode to WPA2/WPA3 mixed if necessary.
8.2. Mesh Node Flashing Red
A flashing red light on a mesh node indicates a weak signal connection to the main router (signal below -70dBm), which can lead to frequent drops.
- Reposition Node: Move the mesh node closer to the main router or another strong mesh node. Refer to Section 4.5 for placement tips.
- Re-pair Nodes: Try re-pairing the main router and the affected mesh node.
- Update Firmware: Ensure all mesh units are updated to the latest firmware version.
8.3. General Connectivity Issues
- Check Cables: Ensure all Ethernet cables are securely connected.
- Power Cycle: Turn off and unplug your modem, main mesh unit, and satellite units. Wait 30 seconds, then plug in and power on the modem. Once the modem is fully online, power on the main mesh unit, then the satellite units.
- Factory Reset: If issues persist, perform a factory reset on the problematic unit(s) by holding the Reset button for 6 seconds, then reconfigure.
9. Warranty & Support
9.1. Warranty Information
The WAVLINK AX3000 WiFi 6 Mesh System comes with a 1-year manufacturer's warranty from the date of purchase. This warranty covers defects in materials and workmanship under normal use. Please retain your proof of purchase for warranty claims.
9.2. Technical Support
For technical assistance, troubleshooting, or warranty inquiries, please contact WAVLINK customer support. Contact information can typically be found on the official WAVLINK website or on the product packaging.