1. Introduction and Overview
Thank you for choosing the Benass 20x20 Heavy Duty Metal Carport with Sidewalls. This manual provides essential information for the safe and efficient assembly, operation, and maintenance of your carport. This all-weather carport is designed to provide robust protection for vehicles and equipment, featuring a durable metal roof and sturdy steel frame construction.
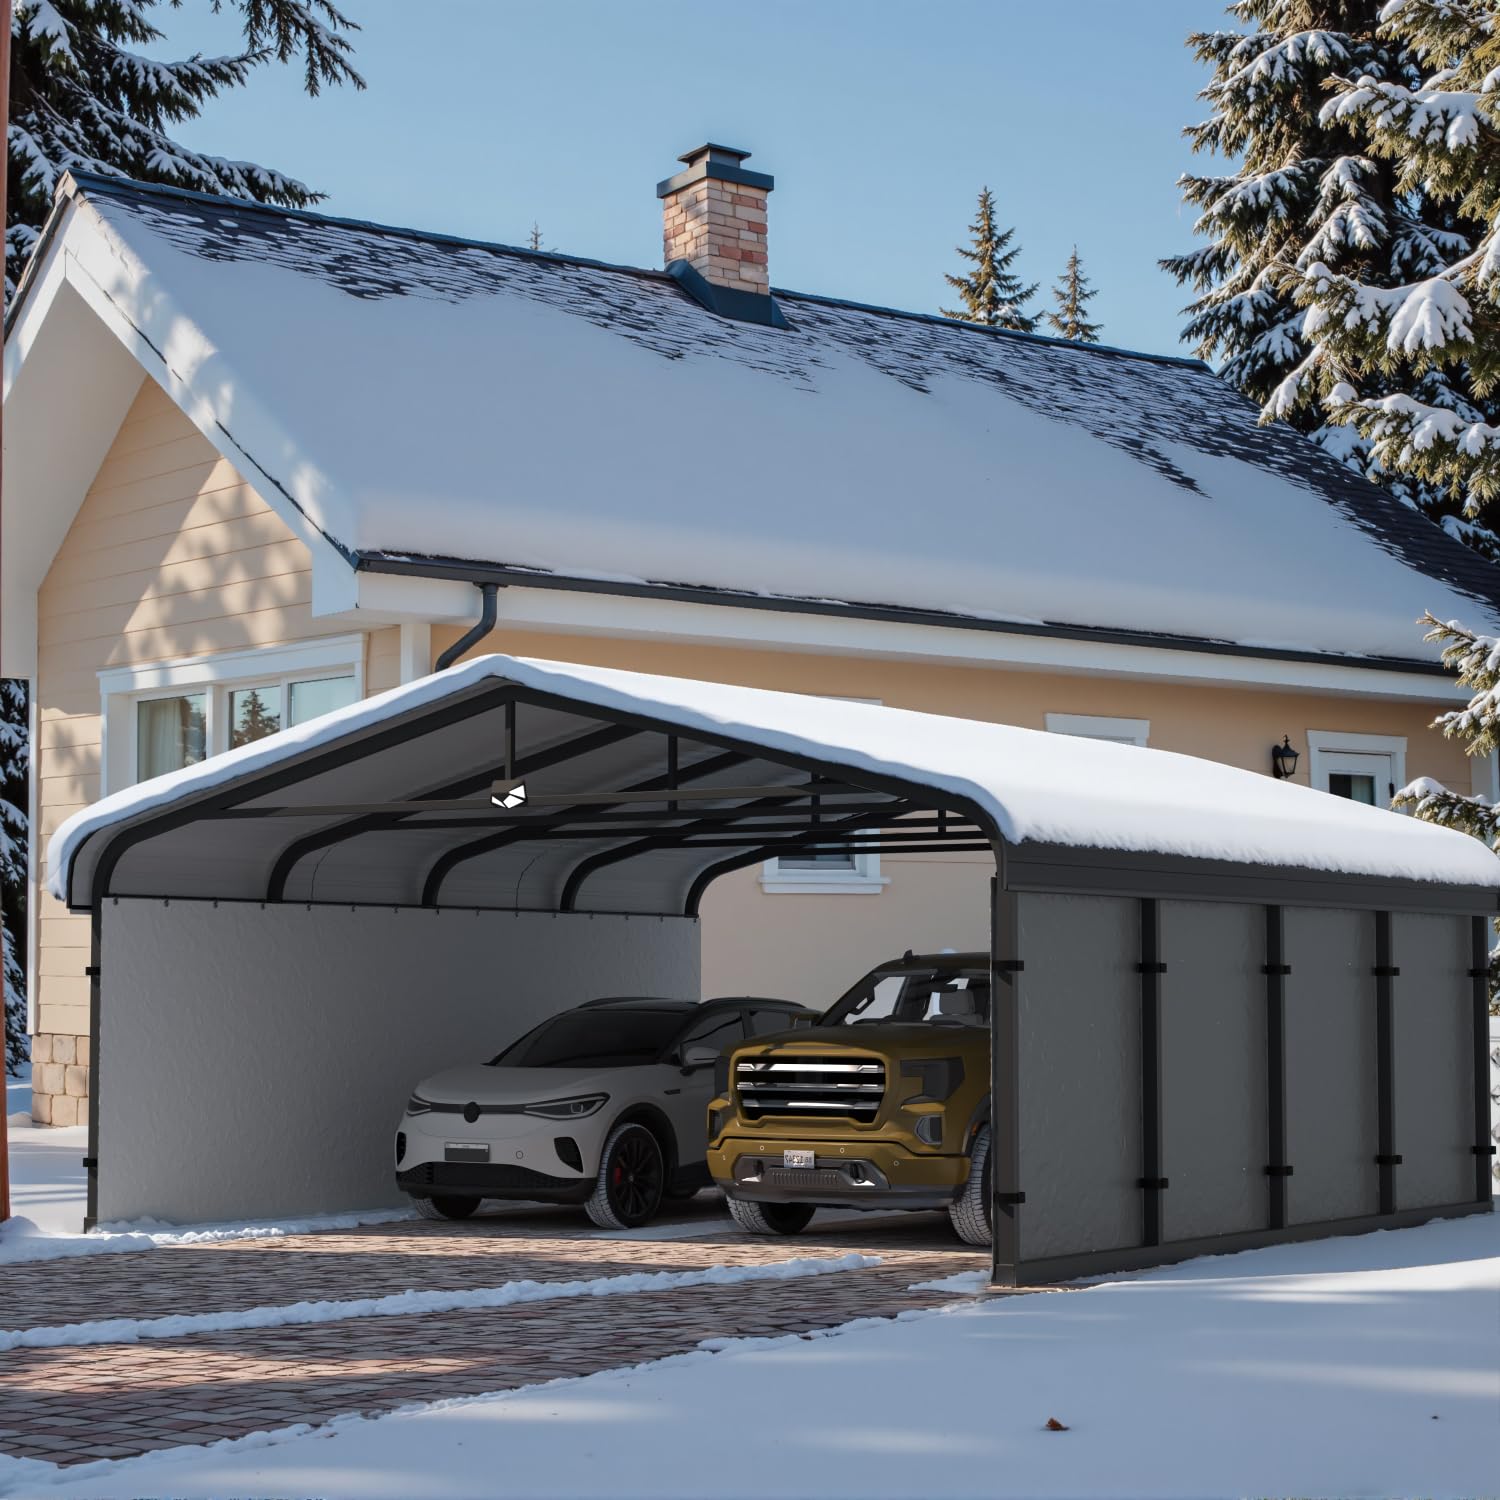
Image 1: Benass 20x20 Heavy Duty Metal Carport with Sidewalls, showcasing its overall structure and size.
2. Safety Information
- Assembly Safety: Always assemble with at least two people. Wear appropriate safety gear, including gloves and eye protection. Ensure all components are securely fastened according to instructions.
- Anchoring: The carport must be properly anchored to the ground using the provided anchor stakes to prevent movement or collapse due to wind. Failure to do so can result in serious injury or property damage.
- Weather Conditions: While designed for all-weather, including winds up to 120 MPH and snow loads up to 10.3 PSF, extreme weather conditions may still pose a risk. Monitor local weather forecasts and take additional precautions if necessary. Clear heavy snow accumulation promptly from the roof.
- Site Selection: Choose a level, stable surface for installation, clear of overhead power lines, trees, or other obstructions.
- Children and Pets: Keep children and pets away from the assembly area.
3. Package Contents
Verify that all parts are present before beginning assembly. If any parts are missing or damaged, contact Benass customer service.
Key Components:
- Powder-coated steel tube frame (2"x2" tubing)
- Galvanized steel roof panels
- Sidewalls (2 PE sidewalls included)
- Anchor stakes (8 provided)
- Reinforced crossbeams (5 included)
- Ground tubes (2 included)
- Weather strip
- Sealant filler
- Leak-proof adhesive strip
- Fasteners and connectors (bolts, nuts, screws)
- Automatic sensing solar light

Image 2: Included accessories such as gap sealant, stack adhesive tape, waterproof tape, solar light, rubber edge banding, drill sleeve, and alloy screwed nails.
4. Setup and Assembly Instructions
Assembly typically requires two or more individuals. Follow the detailed instructions provided in the separate assembly guide for step-by-step procedures. The following provides a general overview and important considerations.
General Assembly Steps:
- Frame Assembly: Begin by assembling the main frame structure using the 2"x2" powder-coated steel tubes. Connect the 10 legs, 5 reinforced crossbeams, and 2 ground tubes as indicated in the assembly guide. Ensure all connections are tight and secure.
- Roof Installation: Install the galvanized steel roof panels. The roof structure is designed with overlapping panels, similar to roof tiles, to ensure water shedding. Apply the provided weather strip, sealant filler, and leak-proof adhesive strip during roof panel installation to ensure 100% waterproofing.
- Sidewall Attachment: Attach the two PE sidewalls to the designated areas of the carport frame. These provide additional protection from elements.
- Anchoring: Securely anchor the carport to the ground using the 8 anchor stakes. Proper anchoring is crucial for stability, especially in windy conditions.
- Solar Light Installation: Mount the automatic sensing solar light in the desired position on the carport frame.
Important Note: Some users have reported that certain M screws might be shorter than ideal for some connections. It is advisable to have additional 1-inch self-driving roof screws available if you encounter difficulty securing specific roof components.

Image 3: View of the reinforced construction, highlighting the 2"x2" square tube frame and reinforced crossbeams.

Image 4: Close-up view of the 2x2 alloy steel tube frame, indicating its robust construction.
5. Operating Instructions
- Vehicle Parking: Drive vehicles into the carport carefully, ensuring adequate clearance on all sides. The 20'L x 20'W x 9.85'H dimensions provide ample space for various vehicles.
- Sidewall Usage: The included sidewalls can be used to provide additional privacy and protection from wind, rain, and sun. They can be easily attached or removed as needed.
- Automatic Sensing Solar Light: The integrated solar light will automatically illuminate the interior of the carport during low light conditions, enhancing visibility and safety. Ensure the solar panel is clean and exposed to direct sunlight for optimal charging.
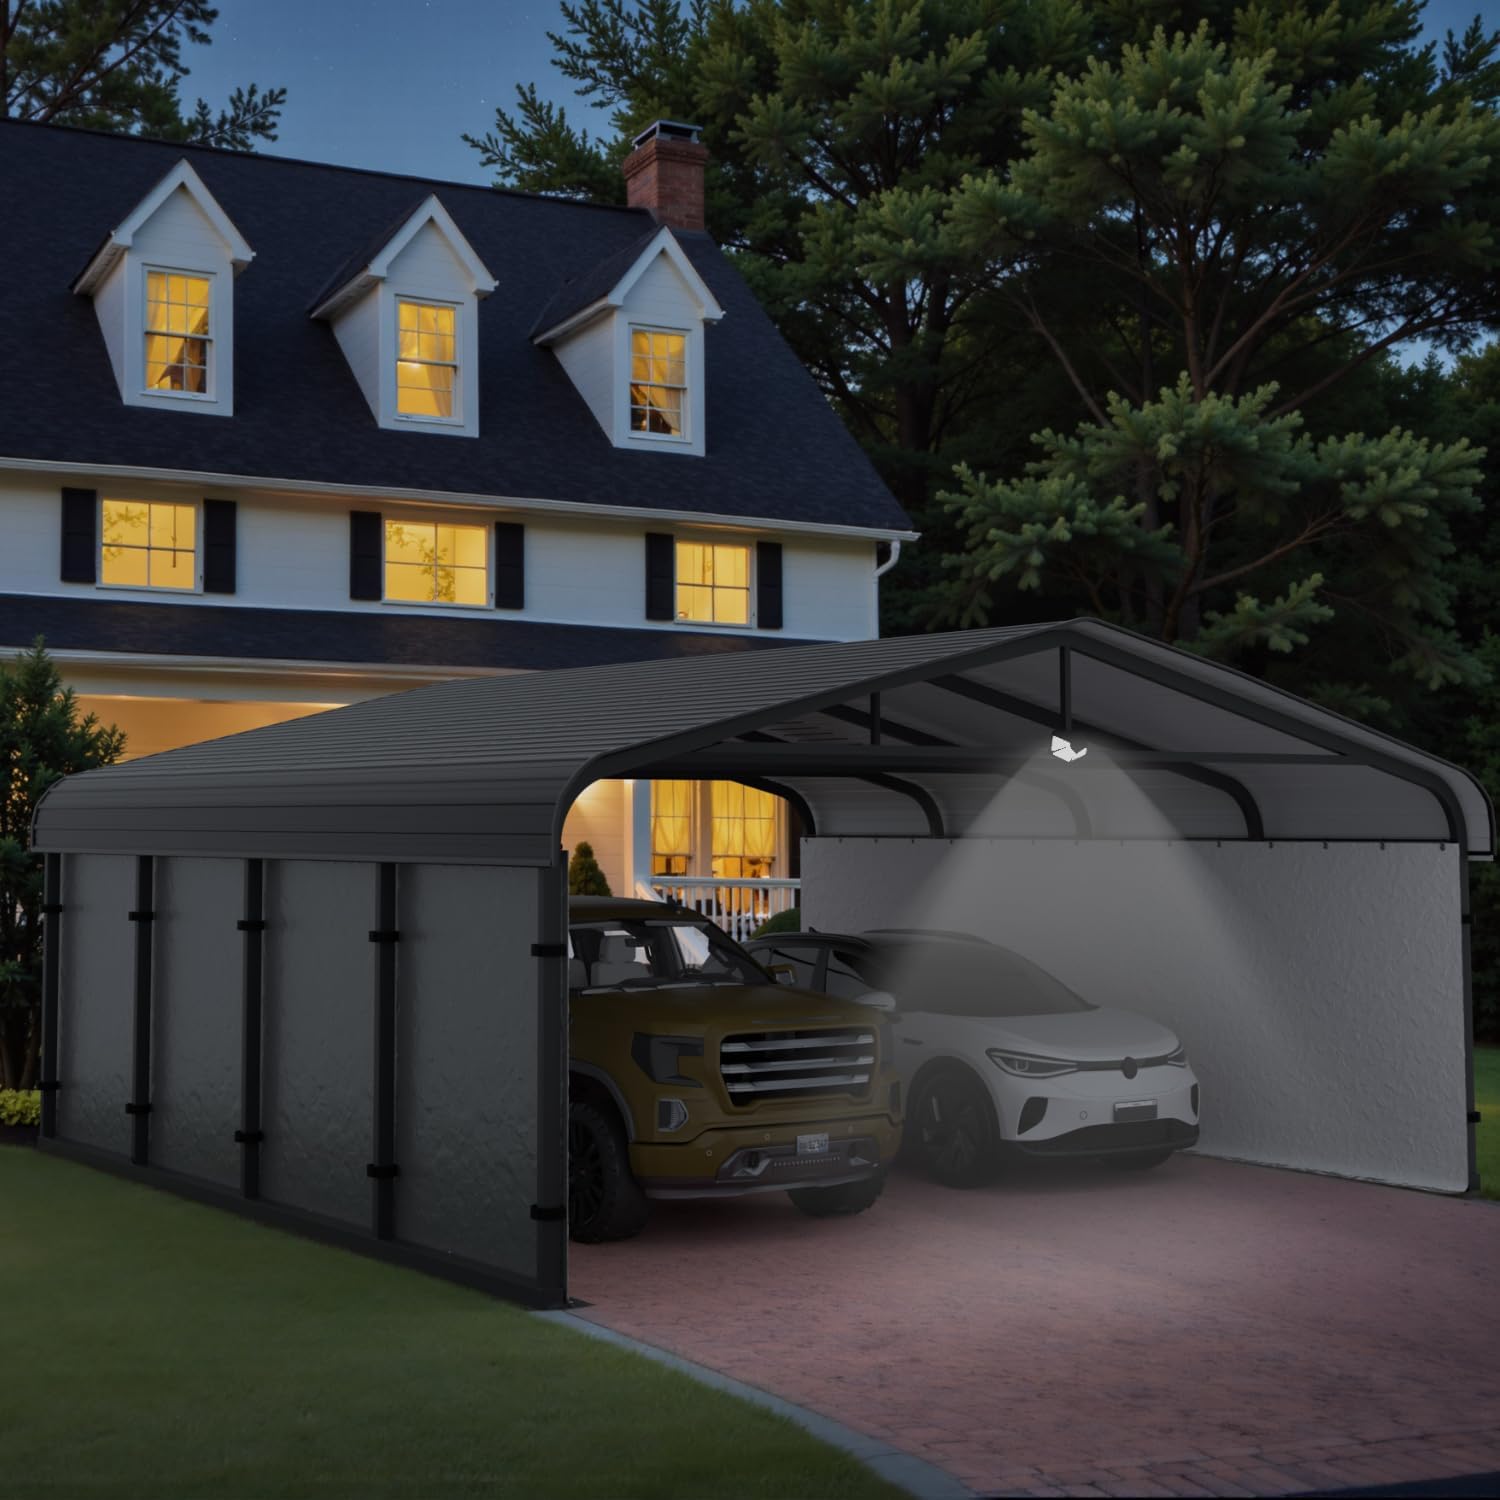
Image 5: The carport illuminated at night by its automatic sensing solar light.
6. Maintenance
- Regular Inspection: Periodically inspect the entire structure for any loose bolts, damaged frame components, or tears in the sidewalls. Tighten any loose fasteners immediately.
- Cleaning: Clean the roof and sidewalls with mild soap and water as needed to remove dirt, debris, and mildew. Avoid using harsh chemicals or abrasive cleaners.
- Snow Removal: In areas with heavy snowfall, regularly remove accumulated snow from the roof to prevent excessive load and potential damage. The carport is rated for 10.3 PSF snow load.
- Anchoring Check: Regularly check the anchor stakes to ensure they remain firmly secured in the ground, especially after strong winds or heavy rain.
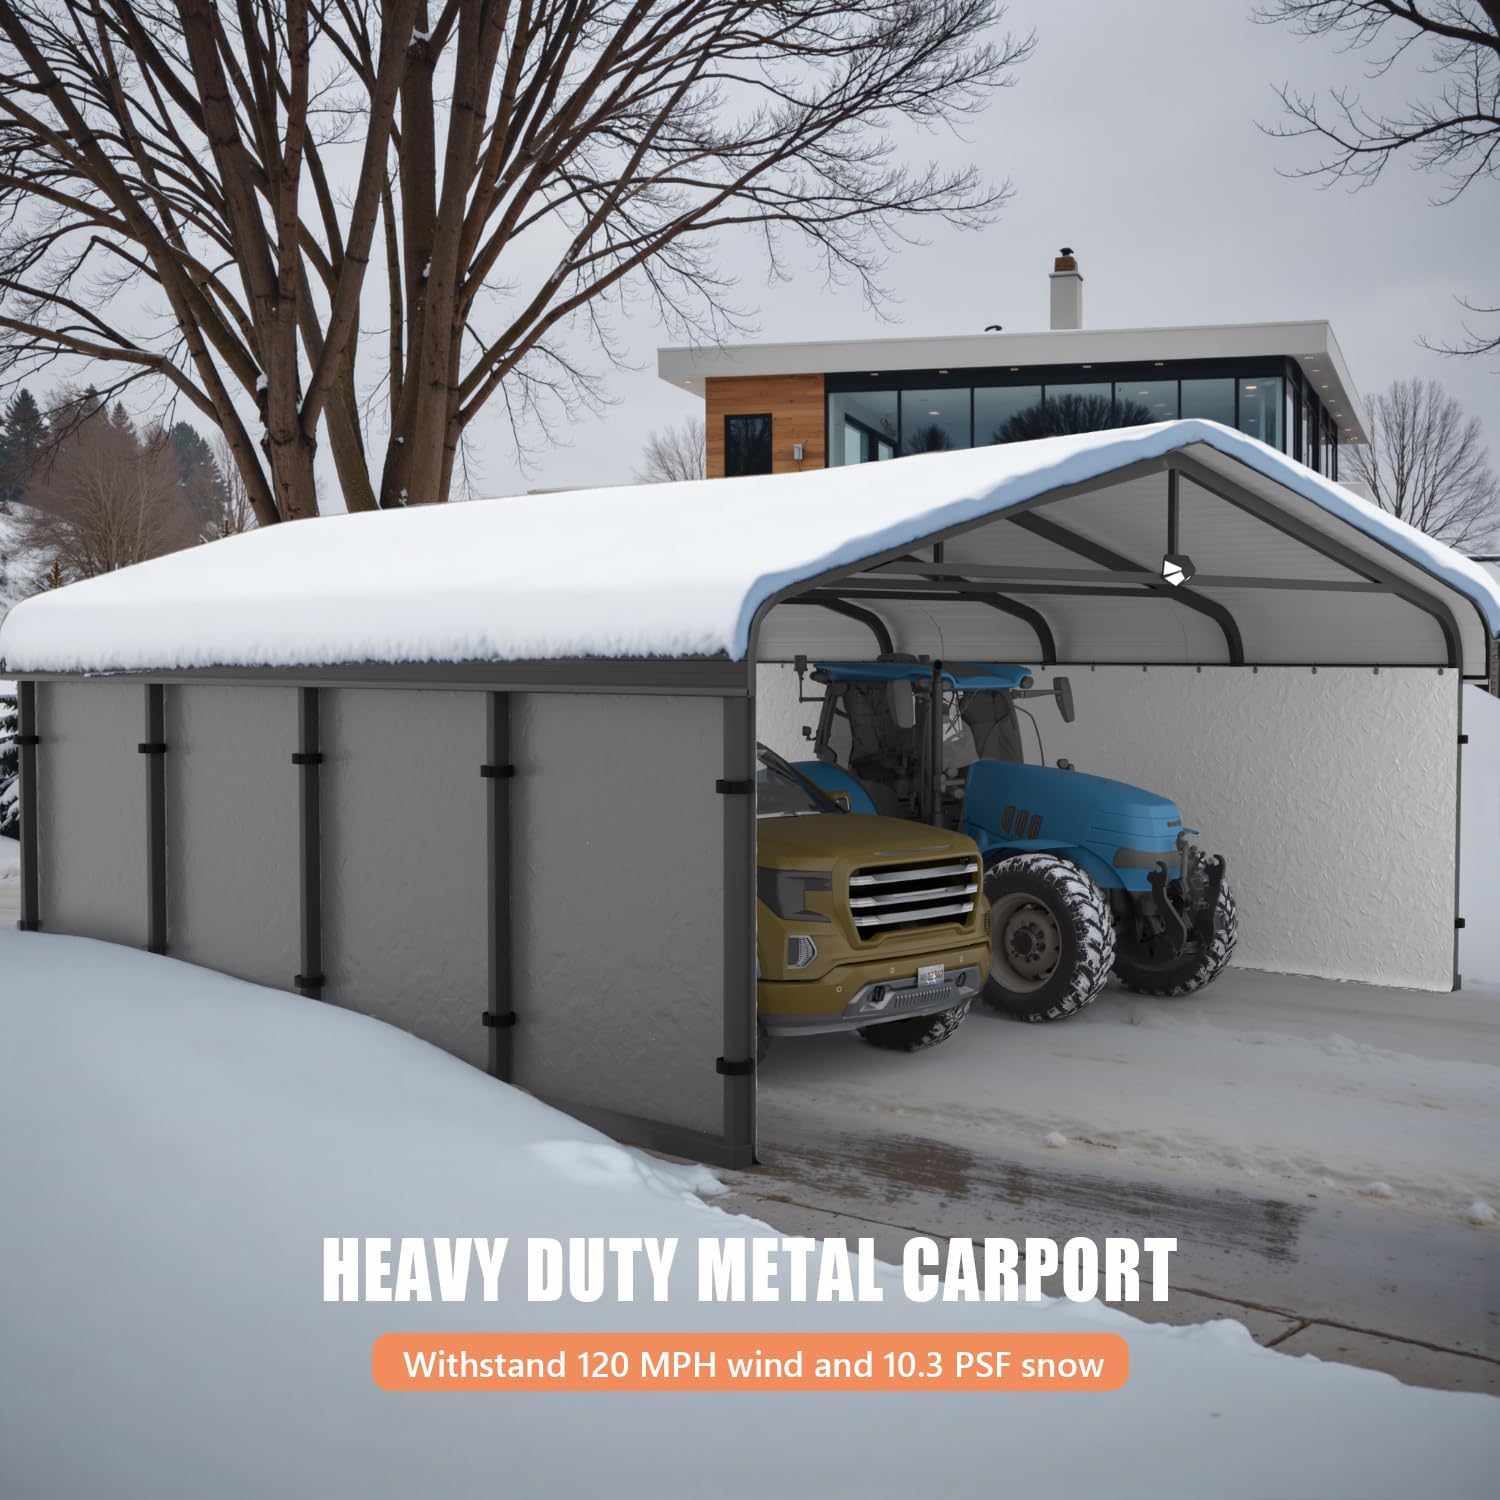
Image 6: The Benass carport demonstrating its ability to withstand snow, highlighting its heavy-duty metal construction.
7. Troubleshooting
Common Issues and Solutions:
- Carport Instability: Ensure all frame connections are tightened. Verify that all 8 anchor stakes are fully driven into the ground and are holding securely. Consider additional anchoring methods in very windy areas.
- Water Leaks: Check the roof panel overlaps and ensure the weather strip, sealant filler, and leak-proof adhesive strip were applied correctly during assembly. Reapply or reinforce these materials if necessary.
- Solar Light Not Working: Ensure the solar panel is clean and receiving direct sunlight for several hours daily. Check for any obstructions. If the issue persists, contact customer support.
- Missing or Damaged Parts: If you discover missing or damaged parts during assembly, immediately contact Benass customer service for replacements.

Image 7: The carport roof showcasing its 100% waterproof design with stacked galvanized steel panels, along with gap sealant and waterproof tape.
8. Specifications
| Brand | Benass |
| Model | 20x20 Grey-2 |
| Material | Alloy Steel (Frame), Galvanized Steel (Roof), PE (Sidewalls) |
| Product Dimensions (L x W x H) | 240"L x 240"W x 118"H (20'L x 20'W x 9.85'H) |
| Frame Material | 2"x2" Powder Coated Alloy Steel |
| Water Resistance Level | Waterproof |
| Ultraviolet Light Protection | Yes (100% UV Blocks) |
| Wind Resistance | Up to 120 MPH |
| Snow Load Capacity | 10.3 PSF |
| Total Weight | 850 LBs |
| Assembly Required | Yes |

Image 8: Detailed product size diagram, indicating the overall dimensions of the carport.
9. Warranty and Support
Benass offers a one-year warranty on this product, ensuring satisfactory after-sales service. If you encounter any problems when you receive the carport or during its use, please do not hesitate to contact Benass customer service. We are committed to assisting you promptly.
For support, please refer to the contact information provided with your purchase or visit the official Benass website.