
Introduction
Thank you for purchasing the Generic Full Size Daybed with Twin Trundle and USB Charging Ports. This manual provides essential information for the safe assembly, operation, and maintenance of your new daybed. Please read all instructions carefully before beginning assembly and retain this manual for future reference.
Safety Information
- Always follow assembly instructions precisely.
- Ensure all hardware is securely tightened before use. Periodically check and re-tighten as necessary.
- Do not exceed the recommended weight capacities: Main Bed - 550 lbs, Trundle - 250 lbs.
- Keep small parts away from children during assembly to prevent choking hazards.
- Use only the recommended mattress thickness of 6 inches for both the main bed and trundle.
- Place the daybed on a flat, level surface.
- Do not stand or jump on the bed.
- Ensure the USB power cable is properly connected to a suitable power outlet and routed safely to avoid tripping hazards.
Package Contents
Before assembly, verify that all components listed below are present and undamaged. If any parts are missing or damaged, contact customer support.
- Daybed Frame Components (Headboard, Footboard, Side Rails, Slats)
- Trundle Bed Frame Components (Trundle Frame, Slats, Drawers)
- Storage Shelf Components
- USB Charging Port Assembly
- Hardware Pack (Screws, bolts, nuts, Allen wrench)
- Instruction Manual
Setup and Assembly
Assembly typically requires two adults. Clear a spacious area for assembly. Do not fully tighten all bolts until instructed to do so.
Step 1: Unpack and Identify Parts
Carefully unpack all components and lay them out on a soft, clean surface to prevent scratches. Refer to the parts list in your hardware pack to identify each piece.
Step 2: Assemble the Main Daybed Frame
Attach the side rails to the headboard and footboard using the provided bolts and nuts. Ensure the connections are secure but do not fully tighten yet.

This image shows the daybed frame from the front with the trundle drawers neatly closed, demonstrating its compact appearance when the trundle is not in use.
Step 3: Install the Storage Shelves and USB Ports
Assemble the double-layer storage shelves according to the diagrams in your hardware pack. Integrate the USB charging port assembly into the designated slot on the side shelf. Ensure the USB cable is accessible for connection.

A detailed view focusing on the wooden slats that form the mattress support and the construction of the integrated storage shelves, emphasizing the quality of materials.

The back of the daybed is displayed, revealing the power cable connected to the USB charging ports, which should be plugged into a wall outlet for functionality.
Step 4: Attach the Main Bed Slats
Evenly space and secure the 10 wooden slats across the main bed frame. Use the provided screws to attach them to the side rails. This forms the mattress support.

This image provides a clear front view of the daybed frame, showing the wooden slats that support the mattress and the two pull-out trundle drawers in an open position.
Step 5: Assemble the Trundle Bed
Assemble the trundle frame, attaching its side rails and then securing the 7 wooden slats. Install the two trundle drawers into the trundle frame. Ensure the wheels are properly attached for smooth operation.

An angled perspective of the daybed frame, highlighting the sturdy wooden slat system for the main bed and the two accessible trundle drawers.
Step 6: Final Tightening and Placement
Once all components are assembled, go back and fully tighten all bolts and screws. Place the assembled daybed in its desired location. Plug the USB power cable into a wall outlet.
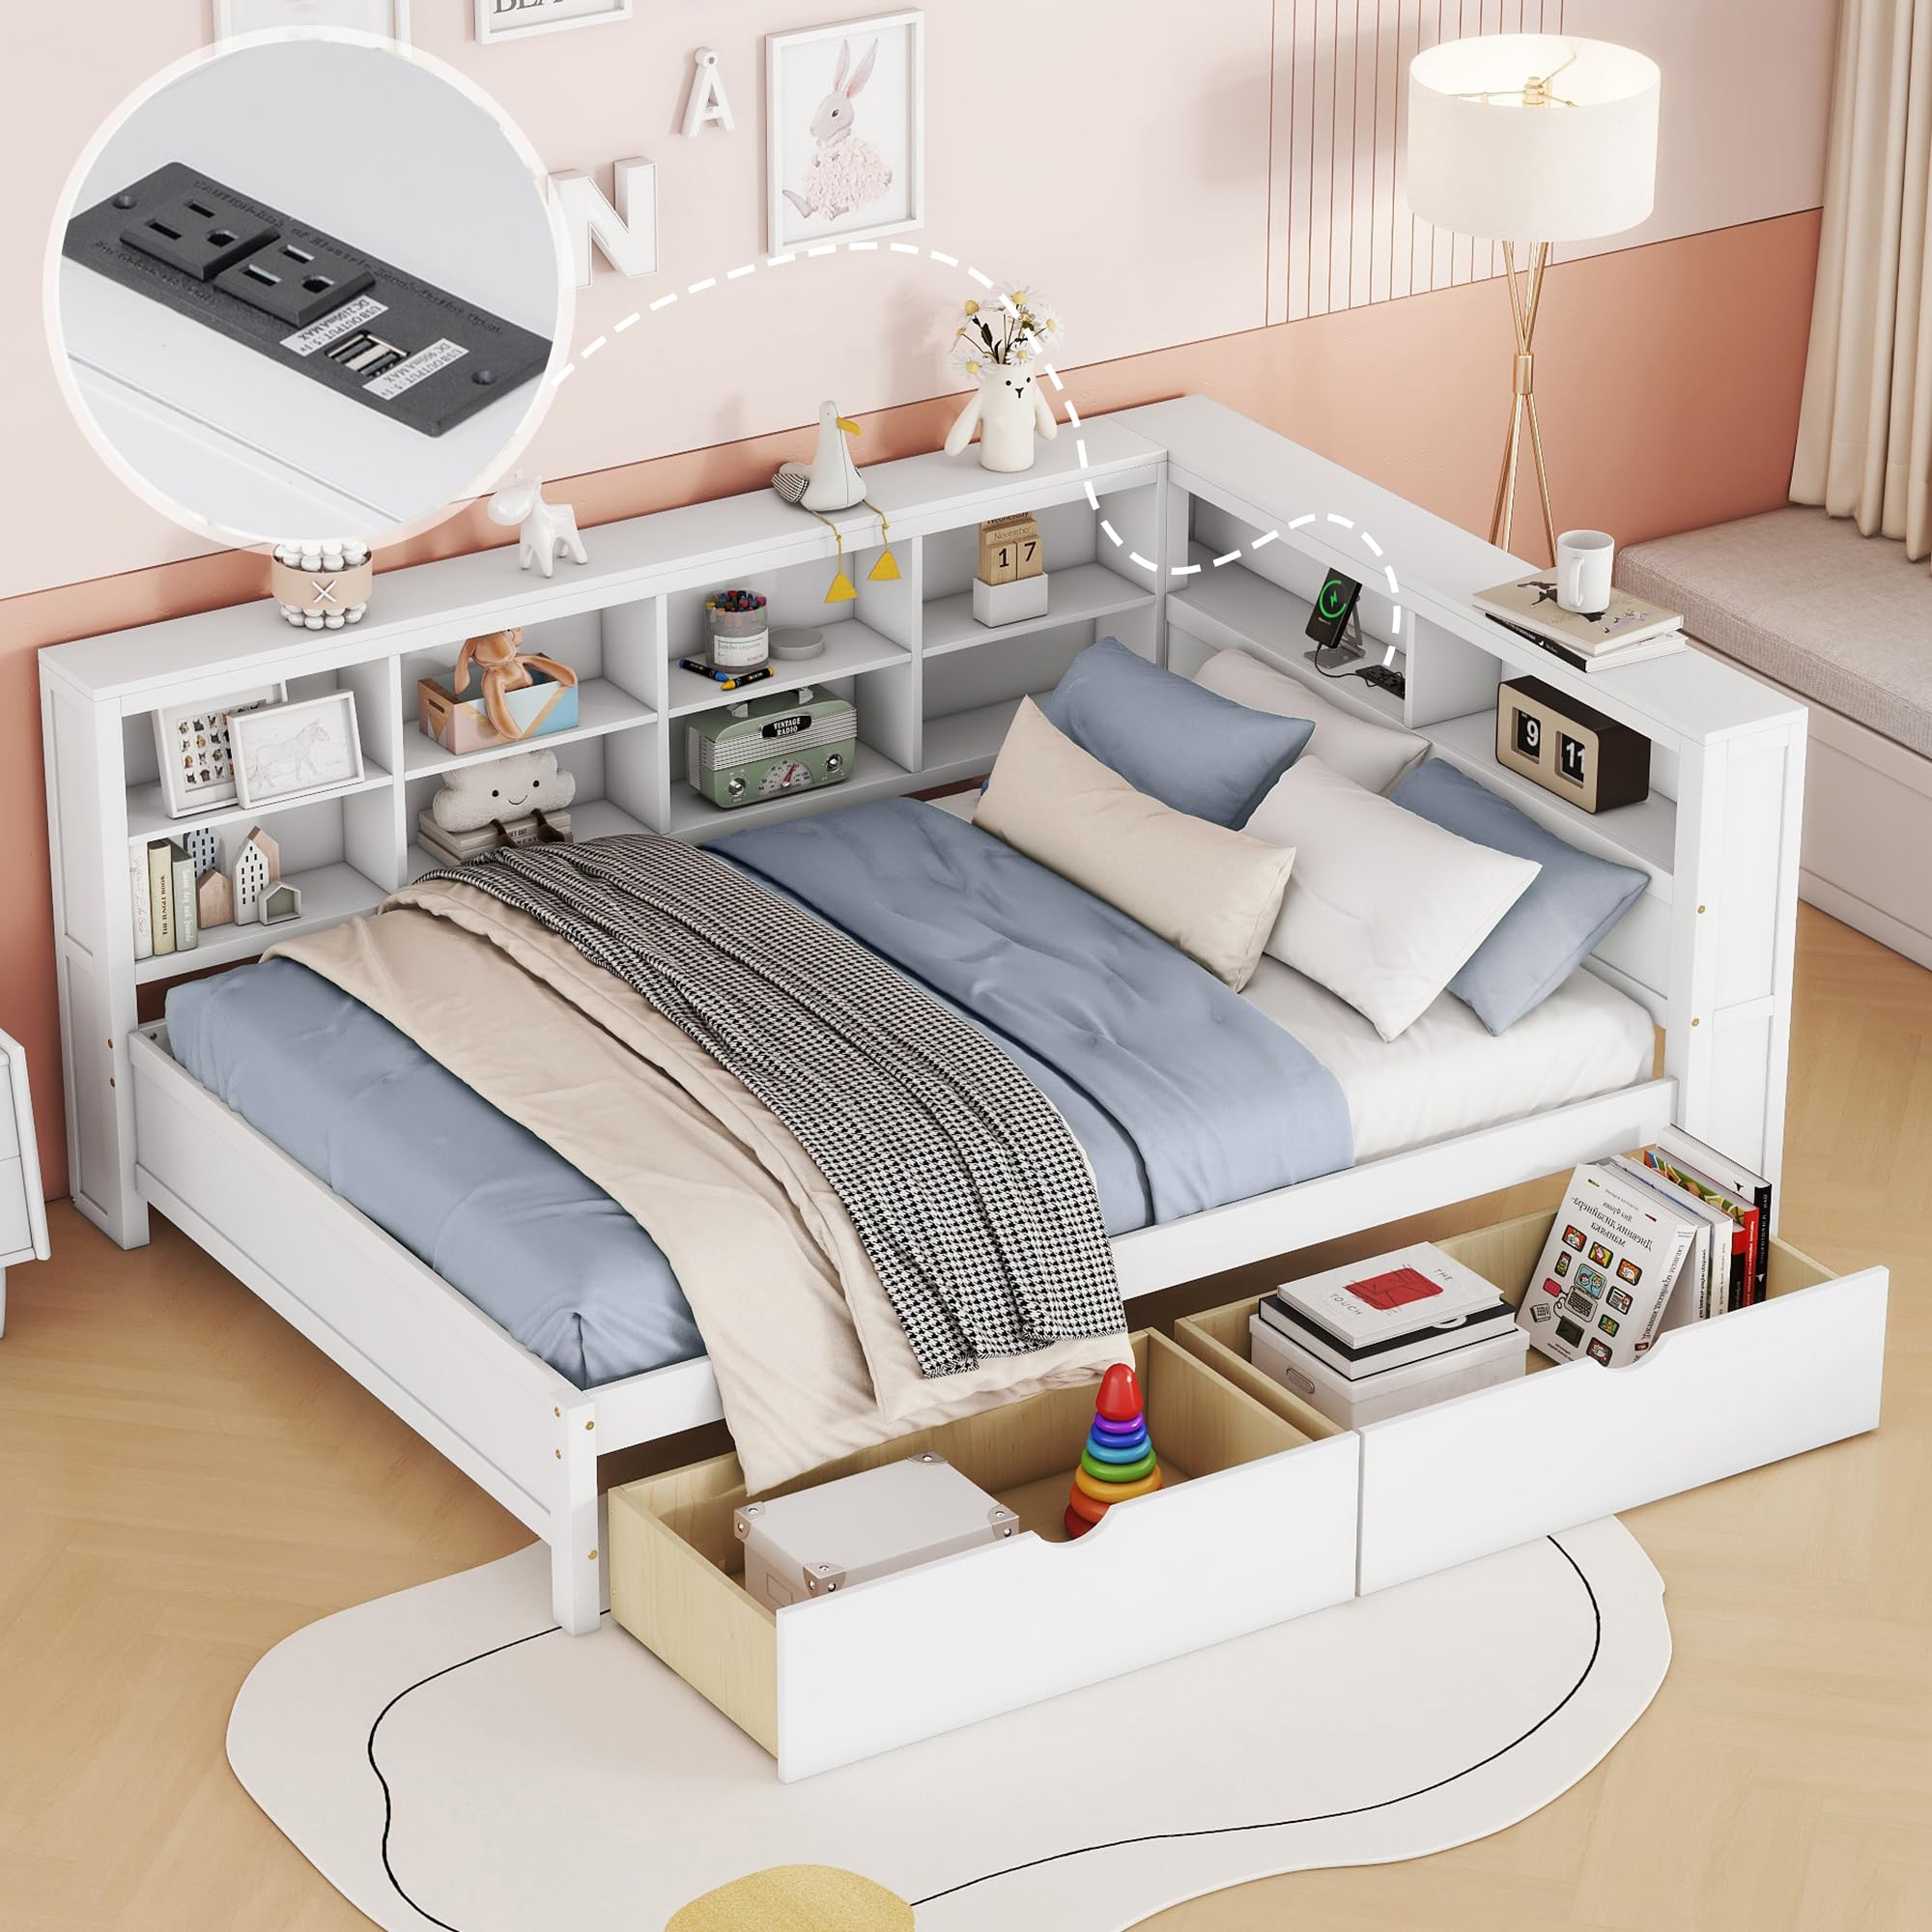
This image displays the fully assembled daybed in a room setting, highlighting its multi-functional design with a pull-out trundle and integrated storage shelves.

An overhead view of the assembled daybed, showcasing the integrated double-layer storage shelves filled with books and decorative items. The trundle is visible underneath the main bed.
Operating Instructions
Using the Trundle Bed
To use the trundle bed, gently pull the front panel of the trundle outwards from under the main daybed. The trundle is equipped with wheels for easy movement. To store, push the trundle back under the main daybed until it is fully recessed.

The daybed is shown with the trundle drawers fully extended, illustrating the ample storage capacity for bedding, toys, or other items. The integrated USB charging port is also visible on the side shelf.
Using the Storage Shelves
The integrated double-layer shelves provide convenient storage for books, decorative items, or personal belongings. Organize items to your preference.
Using the USB Charging Ports
Once the daybed is assembled and the USB power cable is plugged into a wall outlet, the USB ports located on the side shelf are ready for use. Connect your devices (e.g., smartphones, tablets) to charge them conveniently.
Maintenance
- Cleaning: Wipe the daybed frame with a soft, damp cloth. Avoid harsh chemicals or abrasive cleaners that may damage the finish.
- Hardware Check: Periodically inspect all bolts and screws to ensure they remain tight. Re-tighten as needed to maintain stability.
- Mattress Care: Rotate and flip mattresses regularly according to mattress manufacturer guidelines to ensure even wear and prolong their lifespan.
Troubleshooting
- Issue: Bed feels wobbly or unstable.
- Solution: Check all assembly hardware. Ensure all bolts and screws are fully tightened. Verify the bed is on a flat, level surface.
- Issue: Trundle does not slide smoothly.
- Solution: Inspect the trundle wheels for any obstructions or damage. Ensure the floor surface is clear. Check that the trundle frame is assembled correctly and not warped.
- Issue: USB charging ports are not working.
- Solution: Ensure the USB power cable is securely plugged into a functional wall outlet. Check the connection of the USB assembly within the daybed frame. Try a different device or USB cable to rule out device-specific issues.
Specifications
| Feature | Detail |
|---|---|
| Product Type | Daybed with Trundle |
| Main Bed Size | Full Size |
| Trundle Size | Twin Size |
| Primary Material | Pine Wood & MDF |
| Color | White |
| Overall Dimensions (L x W x H) | 83.9" x 63.3" x 36.6" |
| Main Bed Weight Capacity | 550 lbs |
| Trundle Weight Capacity | 250 lbs |
| Main Bed Slats | 10 |
| Trundle Slats | 7 |
| Recommended Mattress Thickness | 6 inches (both beds) |
| Special Features | USB Charging Ports, Double-Layer Storage Shelf |
| Assembly Required | Yes |
| Model Number | ERER760 |
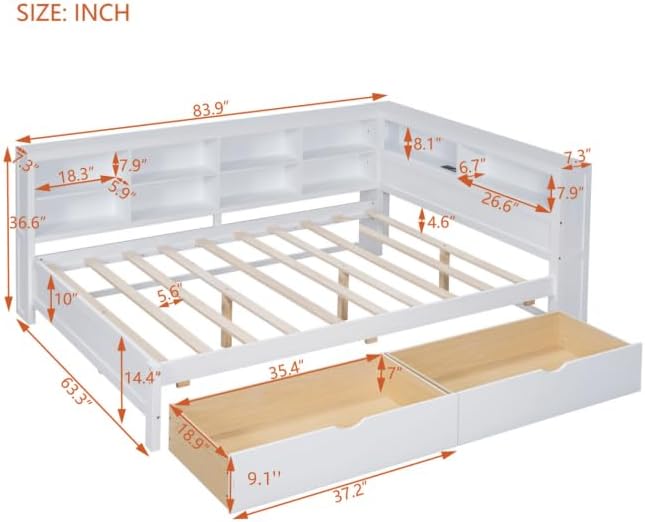
This diagram provides detailed measurements for the daybed, including overall length, width, height, and dimensions of the trundle and storage shelves. Refer to this for space planning and assembly.
Warranty and Support
This product is manufactured by Generic. For any questions regarding assembly, missing parts, or product functionality, please refer to your purchase documentation for seller contact information. Please retain your proof of purchase for any warranty claims.