1. Introduction
This manual provides essential information for the safe and efficient use of your Garvee Wireless Heated Floor Mat. Please read it thoroughly before installation and operation, and retain it for future reference.
The Garvee Wireless Heated Floor Mat is designed to provide gentle, radiant heat from the floor up, enhancing comfort in various indoor spaces. Its plush surface offers a soft feel underfoot, making it suitable for living rooms, bedrooms, offices, and game rooms.
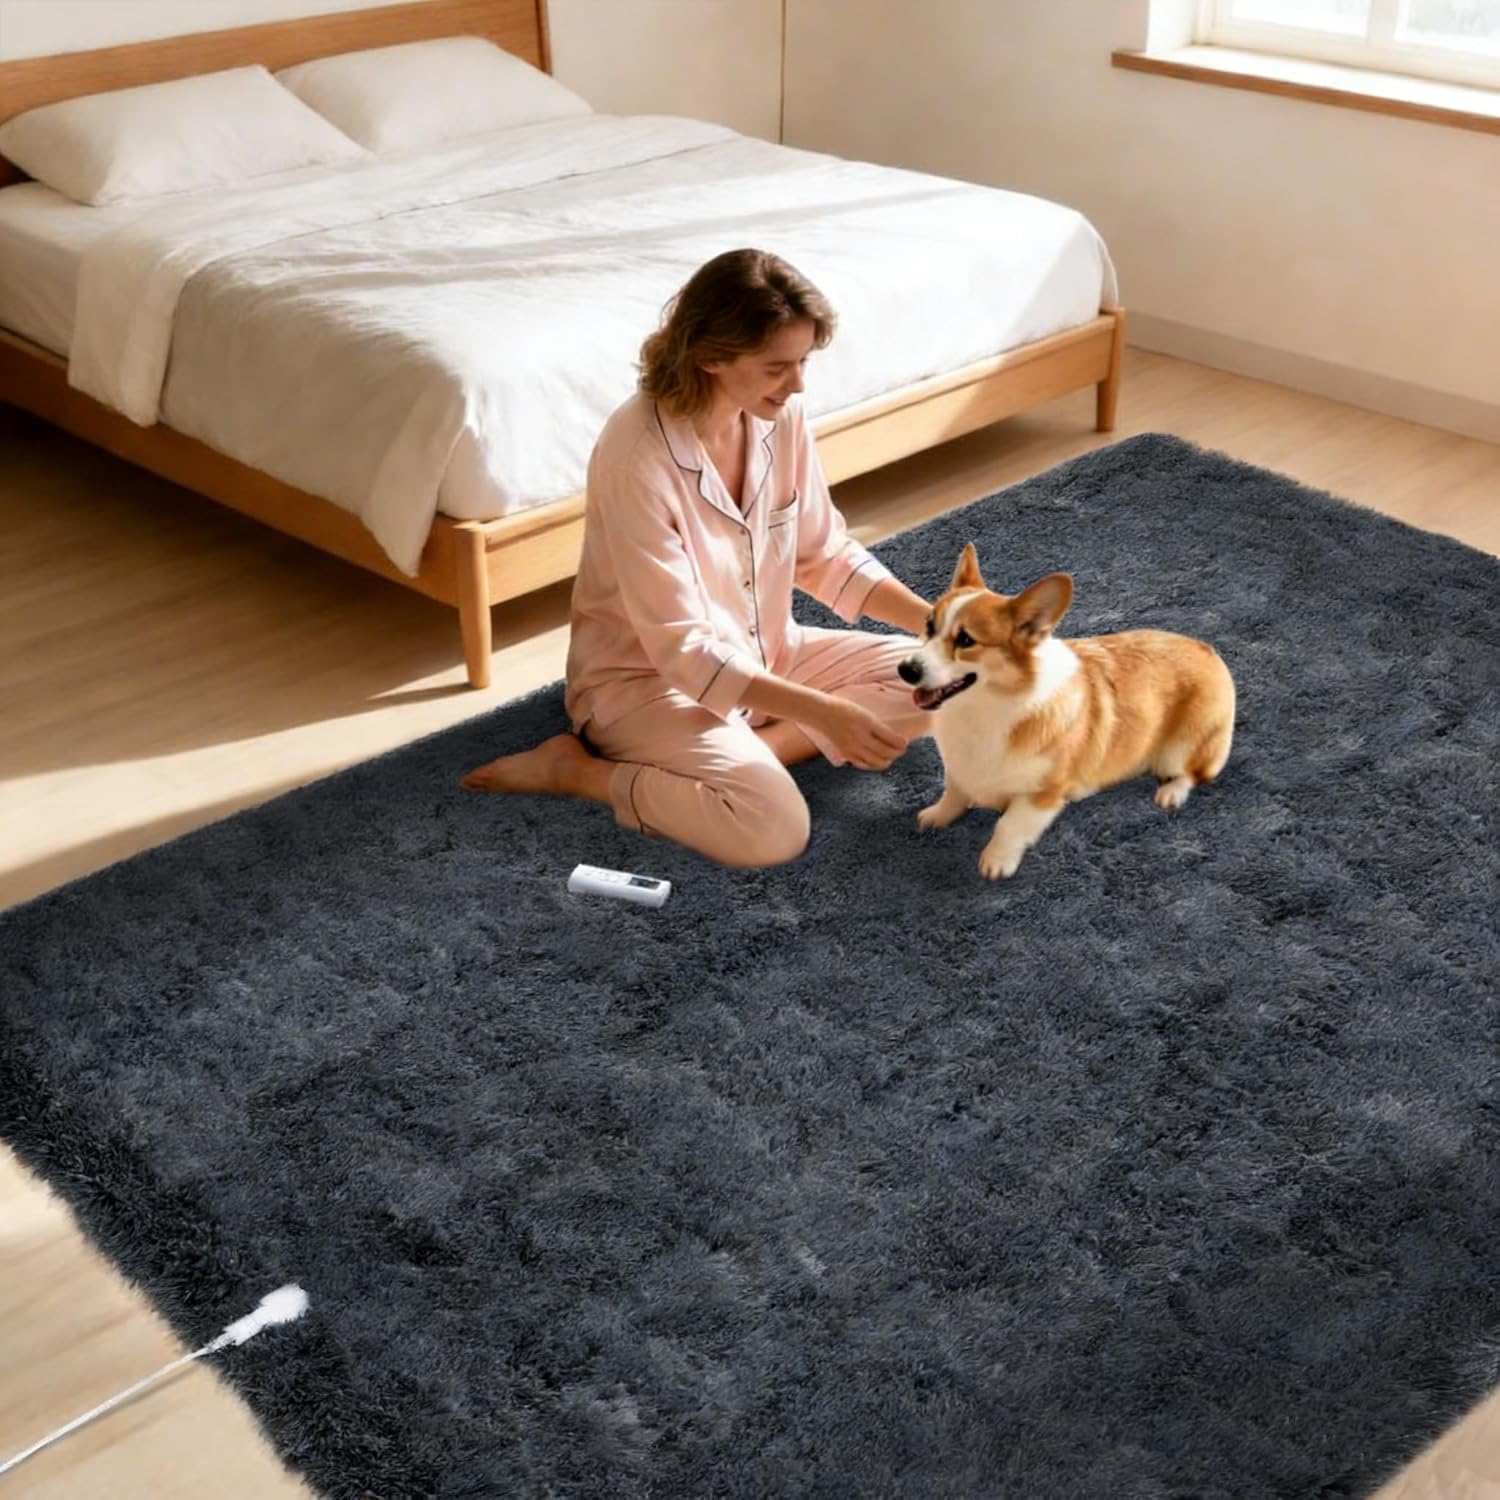
Image: A woman and a dog are comfortably seated on the dark grey Garvee heated floor mat, illustrating its use in a home environment.
2. Important Safety Information
To reduce the risk of fire, electric shock, or injury, always follow these basic precautions:
- Read all instructions before using this heated mat.
- Do not use the mat if it is wet.
- Ensure the mat is placed on a flat, stable surface.
- This product is equipped with built-in overheat and leakage protection for safe daily use.
- UL-certified components are used to ensure safety standards are met.
- Floor Compatibility: The reflective backing helps direct heat upwards, making it suitable for most hardwood and marble floors. Not recommended for vinyl, PVC, or other plastic flooring types.
- For optimal performance and floor protection, use a 4 mm rug pad or felt underlay.
- Keep children and pets away from the power cord and controller.
- Do not fold or crease the mat excessively during operation.
- Unplug the mat when not in use or before cleaning.

Image: Visual representation of the mat's safety features, including overheat protection, upward heat distribution, floor safety, and auto shut-off functionality.
3. Package Contents
Verify that all components are present and in good condition:
- Garvee Wireless Heated Floor Mat (8' x 10', Dark Grey)
- Wireless Remote Controller
- Power Adapter
- 2 x AAA Batteries (for remote controller)
- Instruction Manual
4. Setup Instructions
- Unroll the Mat: Carefully unroll the heated floor mat in your desired location. Ensure it lies flat without any significant creases.
- Floor Protection: If placing on hardwood or marble floors, consider using a 4 mm rug pad or felt underlay beneath the heated mat for added protection and efficiency. Avoid use on vinyl, PVC, or other plastic flooring.
- Furniture Placement: The 8' x 10' mat includes marked zones for heavy furniture, indicated by removable yellow ribbons. Place heavy furniture only within these non-heated zones. After positioning your furniture, gently remove the yellow ribbons.

Image: A yellow ribbon indicates the boundary between heated and non-heated zones on the mat, demonstrating where heavy furniture can be safely placed.
- Connect Power: Connect the power adapter to the mat and then plug it into a standard electrical outlet.
- Insert Batteries: Open the battery compartment on the wireless remote controller and insert the two AAA batteries provided, observing correct polarity.
5. Operating Instructions
The Garvee Wireless Heated Floor Mat features a user-friendly wireless remote for convenient control.
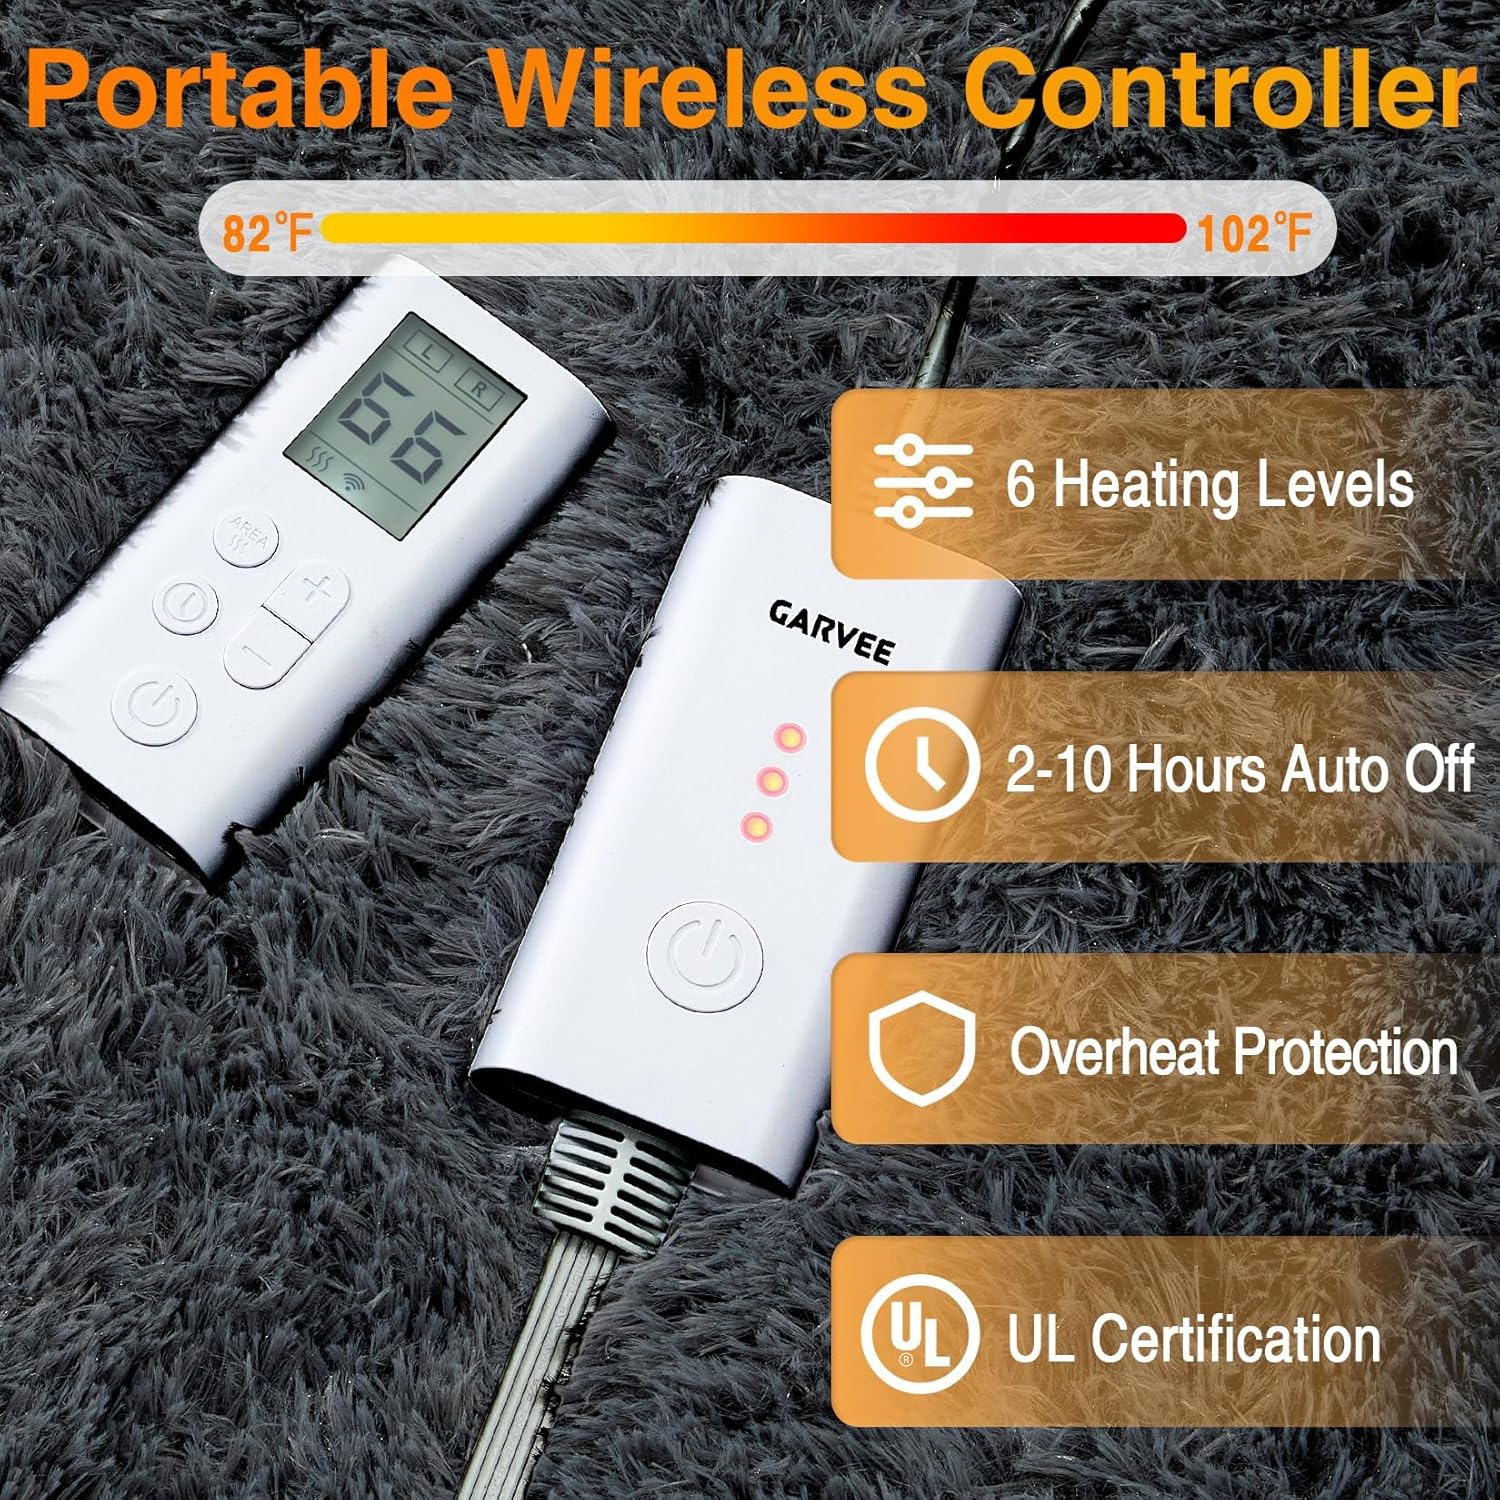
Image: The portable wireless controller and main power unit, highlighting controls for 6 heating levels, 2-10 hour auto-off timer, overheat protection, and UL certification.
5.1 Power On/Off
- Press the Power button on the wireless remote to turn the mat on or off.
5.2 Adjusting Heat Settings
- The mat offers 6 adjustable temperature levels.
- Use the "+" and "-" buttons on the remote to increase or decrease the heat intensity.
- The current heat level will be displayed on the remote's screen.
5.3 Setting the Timer
- The mat features an auto-off timer that can be set from 2 to 10 hours.
- Press the Timer button on the remote to cycle through the available timer settings.
- The mat will automatically shut off after the selected duration.
5.4 Dual-Zone Control
This heated mat features independent dual-zone control, allowing different temperature and timer settings for each side of the mat.
- Refer to the remote control's display for indicators of the left (L) and right (R) zones.
- Use the designated zone selection button (if available, or follow remote instructions) to switch between zones before adjusting heat or timer settings.
- This allows for personalized comfort in shared spaces.

Image: Two individuals are shown on different sides of the mat, demonstrating the independent zone temperature control feature, allowing customized warmth for each user.
6. Maintenance and Care
Proper care will extend the life of your heated floor mat.
- Cleaning: To clean the mat, simply vacuum the plush surface regularly.
- For spills or stains, spot clean with a mild detergent and a damp cloth. Do not immerse the mat or its electrical components in water.
- Ensure the mat is completely dry before reconnecting to power.
- Storage: When not in use, unplug the mat and roll it loosely. Store in a dry place away from direct sunlight.
- Do not place heavy objects on the mat during storage.
7. Troubleshooting
| Problem | Possible Cause | Solution |
|---|---|---|
| Mat does not heat up. |
|
|
| Uneven heating. |
|
|
| Remote control not responding. |
|
|
8. Specifications
- Model Name: YLYGArug-grey810_36JCY4MTber
- Brand: Garvee
- Size: 8' x 10' (120"L x 96"W)
- Color: Dark Grey
- Material: Polyester (Plush Surface), TPR (Non-slip Backing)
- Weave Type: Tufted
- Pile Height: Medium Pile
- Item Weight: 27.6 pounds
- Special Feature: Overheat Protection, Dual-Zone Control, Wireless Remote
- Heat Settings: 6 levels (82°F - 102°F range, as per image)
- Timer: 2-10 hours auto-off
- Power Source: Corded Electric
- Remote Batteries: 2 AAA batteries (included)
- UPC: 822200878391
- ASIN: B0GJDM8DHB

Image: Cross-section view detailing the 8-layer structure of the mat, highlighting components like the ultra-soft plush surface, heating elements, and non-slip backing.

Image: Detail showing the soft plush surface and the TPR non-slip backing, emphasizing comfort and stability.
9. Warranty and Support
For warranty information or technical support, please refer to the contact details provided with your purchase documentation or visit the official Garvee website. Keep your purchase receipt as proof of purchase.


