Introduction
This manual provides detailed instructions for the setup, operation, and maintenance of your Ken-Tech Model T-4682 Atomic Digital Wall Clock. Please read this manual thoroughly before using the device to ensure proper function and longevity.
Safety Information
- Do not expose the clock to extreme temperatures, direct sunlight, or high humidity.
- Avoid dropping the clock or subjecting it to strong impacts.
- Do not mix old and new batteries, or different types of batteries.
- Dispose of used batteries according to local regulations.
- This clock is designed for indoor use only.
Package Contents
Upon unpacking, please ensure all items are present:
- Ken-Tech Model T-4682 Atomic Digital Wall Clock
- Removable Stand (stored in battery compartment)
- User Manual (this document)
Product Features
The Ken-Tech Model T-4682 Atomic Digital Wall Clock offers a range of features for accurate and convenient timekeeping:
- Automatic Atomic Time Setting: Synchronizes with the National Time Observatory in Colorado for precise time.
- Large Easy-To-See Display: Oversized 2-inch LCD digits for time, visible from a distance.
- Comprehensive Information Display: Shows time, day of the week, date, indoor temperature, and indoor humidity.
- Daylight Saving Time (DST) Control: Manual on/off option for seasonal time changes.
- Alarm Function: Built-in alarm with a visible indicator.
- 12/24 Hour Format: Selectable time display format.
- Flexible Placement: Designed for wall mounting or desktop use with a removable stand.
- Battery Operated: Cordless design for versatile placement (requires 2 AAA batteries, not included).
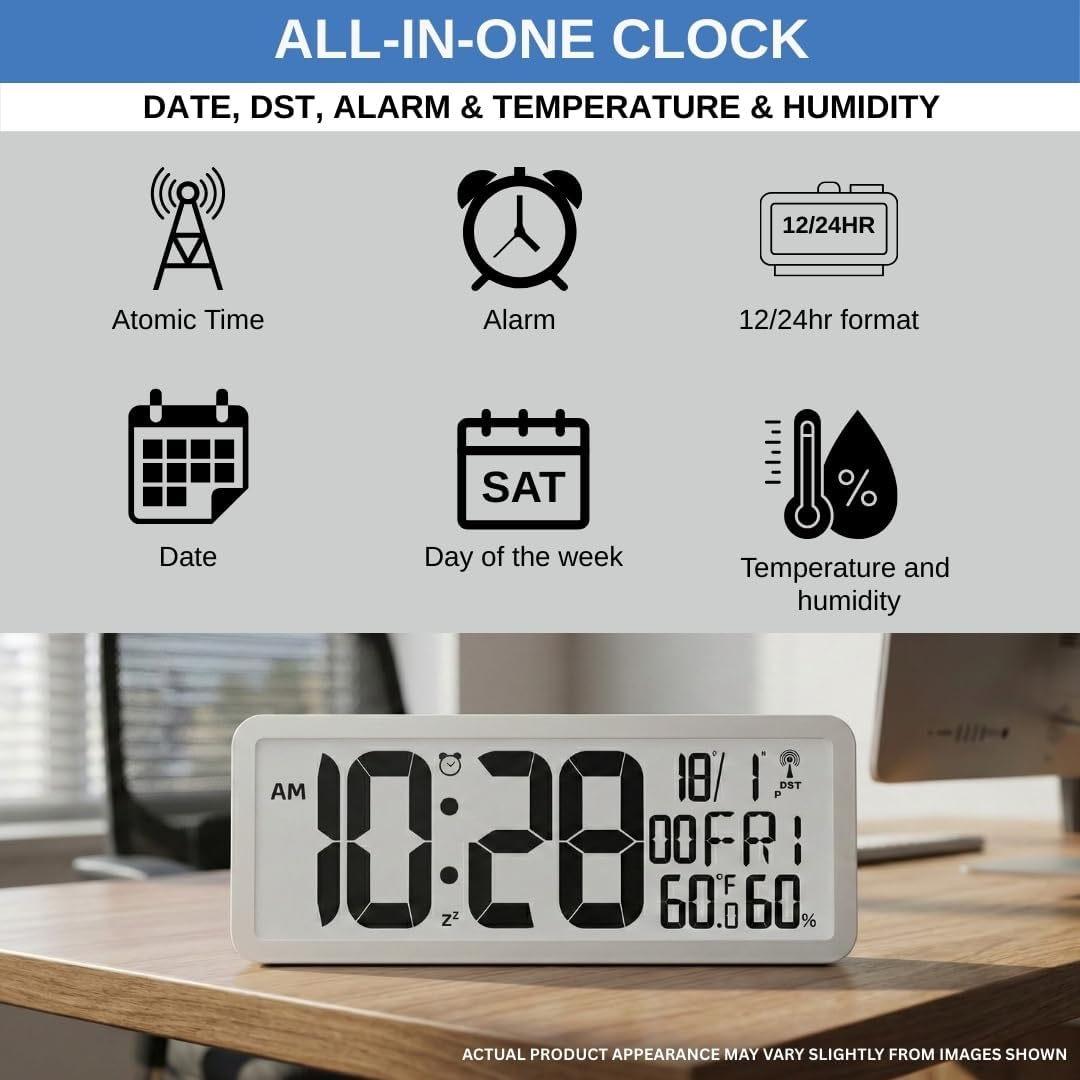
Image: This illustration highlights the various functions of the clock, including atomic time synchronization, alarm, 12/24-hour format, date, day of the week, temperature, and humidity display.
Setup
1. Battery Installation
- Locate the battery compartment on the back of the clock.
- Remove the battery compartment cover.
- Insert two (2) new AAA batteries (not included) according to the polarity indicators (+ and -) inside the compartment.
- Replace the battery compartment cover.

Image: The rear view of the clock displays the battery compartment and clearly labeled control buttons for easy setup and adjustments.
2. Initial Power On and Atomic Time Synchronization
Upon battery installation, the clock will automatically attempt to synchronize with the atomic time signal. This process may take several minutes to several hours, depending on your location and signal strength. The atomic signal icon (a radio tower with waves) will flash during synchronization and become solid once a successful signal is received.

Image: The clock is shown mounted on a wall, displaying the time and the atomic signal icon, indicating automatic time synchronization.
3. Setting Time Zone and DST
Even with atomic synchronization, you may need to manually set your time zone and Daylight Saving Time (DST) preference.
- Press the SET button (often represented by a gear icon) on the back of the clock to enter setup mode.
- Use the UP and DOWN buttons (arrow icons) to adjust the time zone.
- Press SET again to move to the DST setting. Use UP or DOWN to toggle DST On or Off.
- Continue pressing SET to cycle through other settings or exit setup mode.
4. Placement Options
The clock can be placed on a flat surface or mounted on a wall.
- Desktop Placement: The removable stand is stored in the battery compartment. Gently pull it out and attach it to the designated slot on the back of the clock to allow it to stand upright on a desk or shelf.
- Wall Mounting: Use the keyhole slots on the back of the clock to hang it securely on a wall using appropriate screws or hooks (not included).

Image: This image illustrates the clock's versatility, showing it both mounted on a wall and standing on a desk using its removable stand.
Operating Instructions
1. Understanding the Display
The large LCD display provides clear visibility of various information:

Image: A close-up view of the clock's large display, clearly showing the time in oversized digits, along with the day, date, indoor temperature, and humidity.
- Time: Displayed prominently in 2-inch digits. Includes AM/PM indicator if in 12-hour format.
- Day of the Week: Abbreviated (e.g., MON, TUE).
- Date: Month and day.
- Indoor Temperature: Displayed in Fahrenheit (°F) or Celsius (°C).
- Indoor Humidity: Displayed as a percentage (%).
- Atomic Signal Icon: Indicates successful atomic time synchronization.
- Alarm Icon: Appears when the alarm is set.
2. Changing 12/24 Hour Format
Press the 12/24HR button (or similar labeled button) on the back of the clock to toggle between 12-hour (with AM/PM) and 24-hour (military time) formats.
3. Setting and Activating the Alarm
- Press the ALARM button (often represented by a bell icon) to enter alarm setting mode.
- Use the UP and DOWN buttons to set the desired alarm hour.
- Press ALARM again to set the alarm minute.
- Press ALARM once more to exit alarm setting mode.
- To activate or deactivate the alarm, press the ALARM ON/OFF button (or the ALARM button briefly outside of setting mode). The alarm icon will appear on the display when activated.
- When the alarm sounds, press any button to snooze or turn off the alarm.
4. Manual Time Setting (If Atomic Signal is Unavailable)
In areas where the atomic signal is weak or unavailable, you can manually set the time.
- Press and hold the SET button for a few seconds until the display flashes.
- Use the UP and DOWN buttons to adjust the flashing value (e.g., year, month, day, hour, minute).
- Press SET to confirm each setting and move to the next.
- Once all settings are adjusted, press SET to exit manual setting mode.
Maintenance
1. Battery Replacement
When the display becomes dim or the clock stops functioning, it is time to replace the batteries. Follow the battery installation steps in the Setup section. Always replace both AAA batteries simultaneously with new ones.
2. Cleaning
To clean the clock, wipe it gently with a soft, dry cloth. Do not use abrasive cleaners, solvents, or chemical sprays, as these may damage the display or casing.
Troubleshooting
| Problem | Possible Cause | Solution |
|---|---|---|
| Clock not displaying / Display is dim | Dead or low batteries; Incorrect battery installation. | Replace with new AAA batteries, ensuring correct polarity. |
| Atomic signal icon is flashing or not appearing | Weak signal due to location (e.g., near electronics, metal structures, or far from transmitter); Interference. | Move the clock to a different location, preferably near a window and away from electronic devices. Allow several hours for synchronization. If signal remains weak, manually set the time. |
| Incorrect time displayed | Incorrect time zone setting; DST setting incorrect; Atomic signal not received or incorrect. | Verify time zone and DST settings. Ensure atomic signal is strong. If necessary, manually set the time. |
| Temperature/Humidity readings seem inaccurate | Clock placed near heat sources, vents, or in direct sunlight; Sensor obstruction. | Relocate the clock to an area with stable ambient temperature and humidity. Ensure sensors are not blocked. |
| Alarm not sounding | Alarm not activated; Alarm volume too low (if adjustable, though this model does not specify volume control). | Ensure the alarm icon is visible on the display, indicating it is active. Re-set the alarm time. |
Specifications
- Model: T-4682
- Brand: Ken-Tech
- Display Type: Digital LCD
- Time Format: 12/24 Hour Selectable
- Power Source: 2 x AAA Batteries (not included)
- Dimensions (W x H): 8 inches x 3.5 inches
- Depth (Wall Mounted): Approximately 0.75 inches
- Depth (with Stand): Approximately 2.38 inches
- Material: Plastic
- Color: Matte White (as shown in images and product description)
- Indoor/Outdoor Usage: Indoor only
- Special Features: Atomic Time, Day/Date Display, Indoor Temperature, Indoor Humidity, Alarm, DST On/Off.

Image: This diagram provides precise measurements of the clock, detailing its width (8.0 in), height (3.5 in), and depth when wall-mounted (0.75 in) and with the stand (2.38 in).
Warranty Information
Ken-Tech products are manufactured to high-quality standards. For specific warranty details, please refer to the warranty card included with your purchase or visit the official Ken-Tech website. Keep your purchase receipt as proof of purchase for any warranty claims.
Customer Support
If you encounter any issues or have questions not covered in this manual, please contact Ken-Tech customer support. Contact information can typically be found on the product packaging or the official Ken-Tech website.
For more information, visit the Ken-Tech Store on Amazon.