
1. Product Overview
The Trygoal Outdoor Privacy Screen Set provides a versatile and durable solution for enhancing privacy and aesthetics in various outdoor settings. This set includes two freestanding privacy panels, each measuring approximately 72 inches high by 47 inches wide, designed for easy arrangement and robust performance.

Image 1.1: Trygoal Outdoor Privacy Screen Set providing privacy on a patio.
Key Features:
- Customizable Layout: Each screen unit can be arranged using its interlocking panel design, allowing for flexible configurations to suit your space.
- Enhanced Privacy: Effectively conceals unsightly views such as trash bins, air conditioning units, or creates secluded areas on patios, decks, balconies, or around pools.
- Durable Construction: Crafted from high-density polyethylene (HDPE) panels, sturdy steel posts, and rust-proof plastic bases, ensuring resilience against various weather conditions.
- Easy Installation: Designed for straightforward assembly with a reinforced base for stability. Includes options for securing to both hard and grass surfaces.
- Modern Design: Features a sleek, slatted design that adds a contemporary aesthetic to any outdoor area while providing practical privacy.

Image 1.2: Material and durability features of the privacy screen.
2. Package Contents
Before beginning assembly, please verify that all components are present and undamaged. Refer to the following list and the provided video for a visual guide.
- HDPE Privacy Panels
- Steel Posts
- Plastic Bases
- Connecting Rods
- Ground Nails (for grass surfaces)
- Expansion Screws (for hard surfaces)
- Assembly Hardware (screws, bolts, Allen wrench)
Video 2.1: Official installation video for the Trygoal 6ft Freestanding Privacy Screen Panel. This video demonstrates the unboxing of installation components and key assembly steps.
3. Setup and Installation
Follow these steps to assemble your Trygoal Outdoor Privacy Screen. It is recommended to have a second person for easier assembly.
- Prepare the Base: Attach the plastic bases to the bottom of the steel posts using the provided screws. Ensure they are securely fastened.
- Install Connecting Rods: Insert the connecting rods into the designated slots on both sides of the steel posts. Secure them with the appropriate hardware.
- Attach Panels: Carefully slide the HDPE privacy panels into the grooves of the steel posts. Ensure they are aligned correctly. Fix the panels to the posts using the provided screws.
- Arrange Interlocking Panels: If using multiple panels, arrange them in your desired configuration. The panels are designed to interlock for a seamless appearance. Secure adjacent panels together using the provided connectors.
- Secure to Ground (Optional but Recommended):
- For Hard Surfaces (e.g., concrete, patio): Use the expansion screws to anchor the bases to the ground. Drill pilot holes if necessary.
- For Grass Surfaces (e.g., lawn, garden): Use the ground nails to secure the bases into the soil.
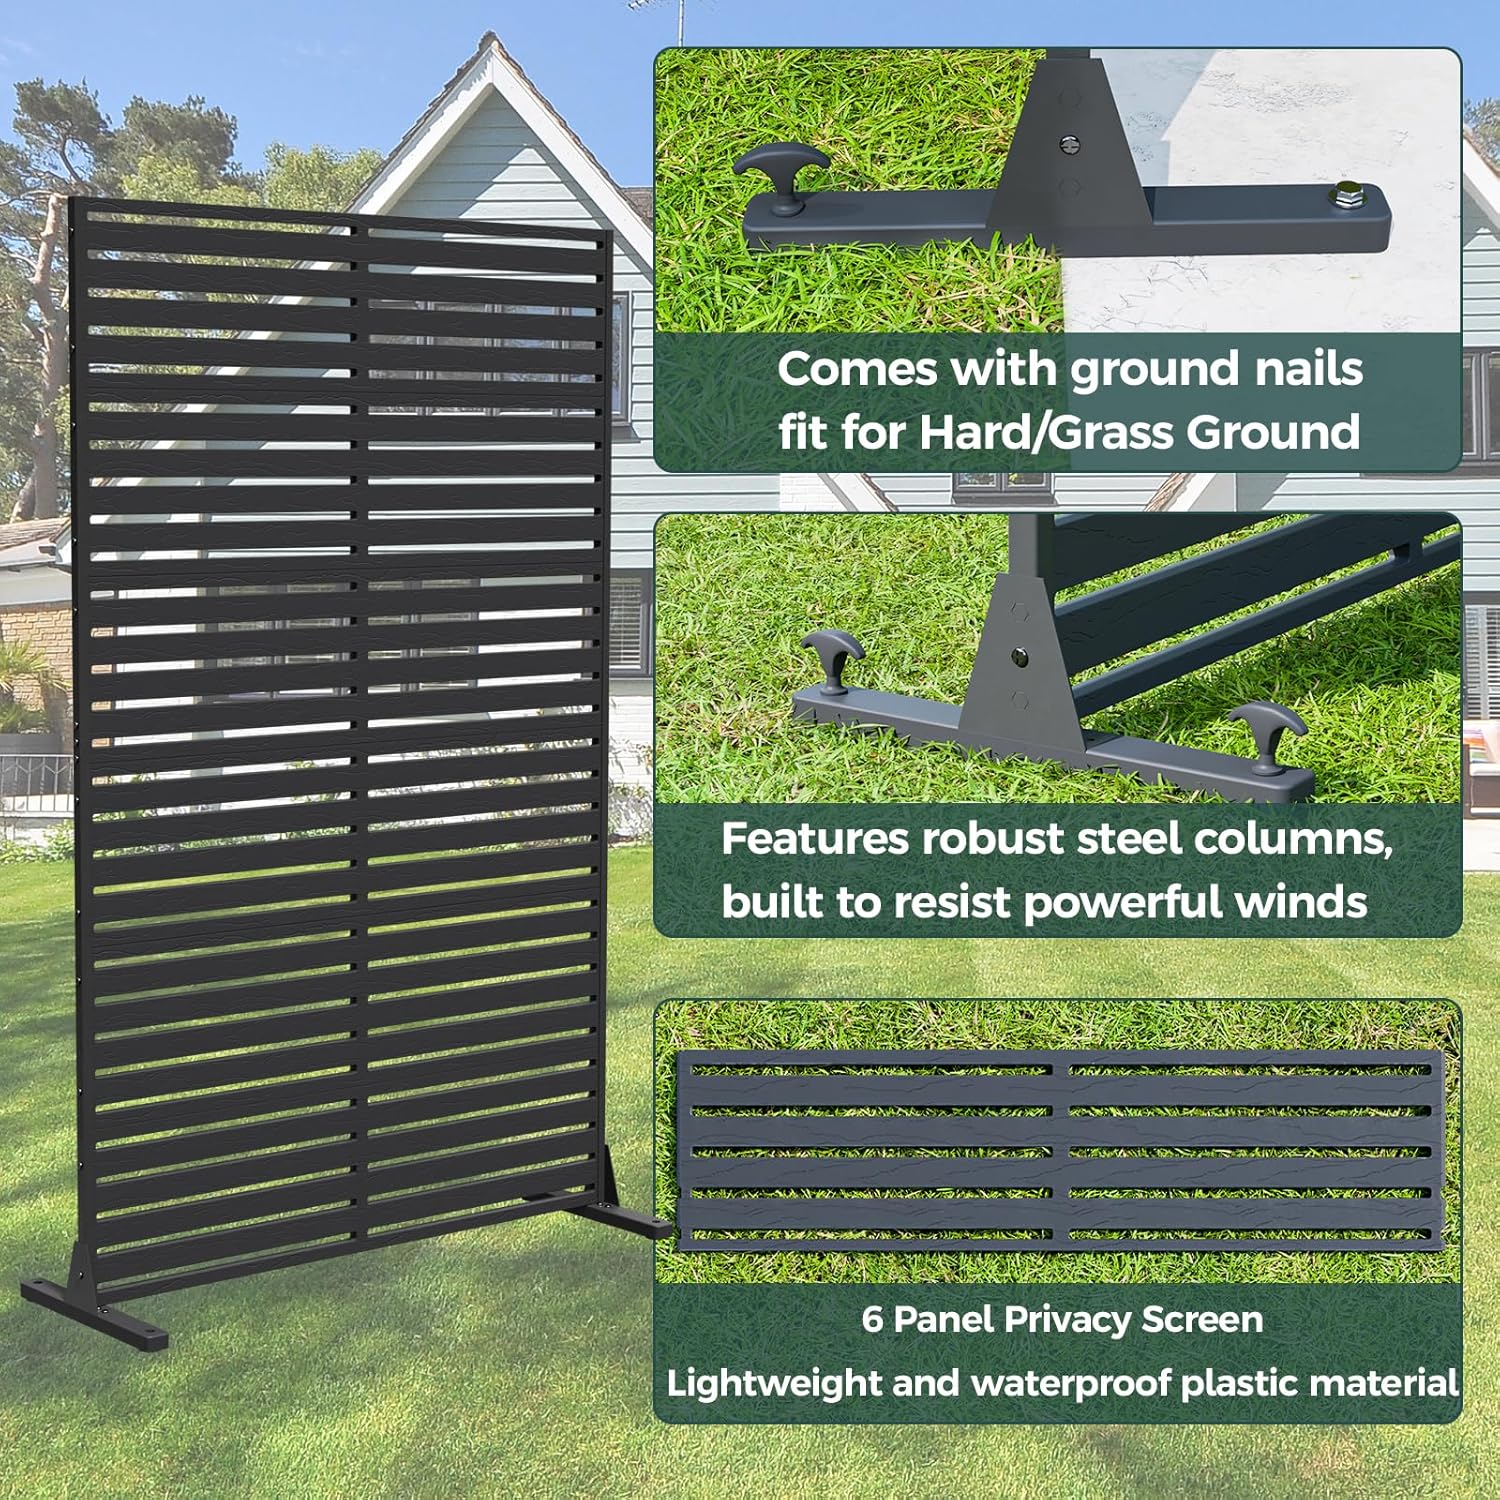
Image 3.1: Installation components and features for securing the privacy screen.
4. Operating Instructions
The Trygoal Outdoor Privacy Screen is designed for flexible use and requires minimal operation once installed.
- Positioning: Place the privacy screen in your desired outdoor location to block views, define spaces, or conceal items.
- Arrangement: The interlocking design allows for various configurations. You can arrange multiple panels in a straight line, an L-shape, or other custom layouts to fit your specific needs.
- Stability: For optimal stability, especially in windy conditions, ensure the bases are properly secured to the ground using the provided ground nails or expansion screws.

Image 4.1: Examples of privacy screen applications.

Image 4.2: Versatile placement options for the privacy screen.
5. Maintenance
The Trygoal Outdoor Privacy Screen is designed for low maintenance due to its durable HDPE and steel construction.
- Cleaning: Wipe down the panels and posts with a damp cloth and mild soap as needed to remove dirt or debris. Avoid abrasive cleaners or harsh chemicals that could damage the material.
- Inspection: Periodically check all screws and connections to ensure they remain tight. Re-tighten if necessary.
- Weather Protection: While designed for all-weather use, extreme weather conditions (e.g., hurricanes, blizzards) may require additional securing or temporary storage to prevent damage.
6. Troubleshooting
| Problem | Possible Cause | Solution |
|---|---|---|
| Screen is unstable or wobbles. | Loose connections; insufficient ground anchoring; uneven surface. | Ensure all screws are tightened. Use ground nails or expansion screws to secure the bases. Place on a level surface. |
| Panels do not align correctly. | Incorrect panel insertion; bent connecting rod. | Re-check panel orientation and ensure they are fully seated in the grooves. Inspect connecting rods for damage. |
| Missing parts. | Packaging error. | Contact Trygoal customer support immediately for replacement parts. |
7. Specifications
| Feature | Detail |
|---|---|
| Brand | Trygoal |
| Model Number | C-Trygoal-PF-04-2PCS |
| Material | High Density Polyethylene (HDPE) |
| Color | Black |
| Product Dimensions (assembled screen) | 72" H x 47" W (approximate) |
| Number of Pieces | 2 (Set of 2 privacy screens) |
| Unit Count | 72.0 Square Feet |
| Assembly Required | Yes |
| UPC | 684514829847 |
8. Warranty and Support
For warranty information, technical support, or to order replacement parts, please contact Trygoal customer service. Refer to your purchase documentation for specific contact details or visit the official Trygoal website.
Manufacturer: Trygoal
ASIN: B0GJ52YNJ7